8.6. SambaPOS GO Kiosk Setup
This product is no longer supported. You can click on here for the new version.
In this document, setup process of SambaPOS GO Kiosk which belongs to SambaPOS GO product family will be explained.
System Requirements;
1. You need to have SambaPOS GO Kiosk license in the same account that you have SambaPOS V5 Pro License.
2. SambaPOS GO Kiosk works on Windows Based computers.
3. It is necessary to purchase GO Kiosk license as much as kiosk device counts to be used.
You can purchase license of SambaPOS GO Kiosk Module from cp.sambapos.com account’s Store Section.
Important Note:
When you make any change on SambaPOS side, in order to apply this change to Kiosk Device, you need to follow below mentioned step.
Re-Sending the Menu to Kiosk Device;
IMPORTANT NOTE:
In order to save the changes, you need to restart SambaPOS before you click on the Send Menu to GO Office button.
You can do this by applying below step;
Main Menu > Manage > Settings > Program Settings > SambaPOS GO Section > Here, determine the menu that you want to send to Kiosk Device and click on Send Menu to GO Office button.
We Can Gather the Steps to Be Done Under 3 Main Headers;
1. Settings That Should Be Done on SambaPOS
2. Settings That Should Be Done on Kiosk Device
3. Settings That Should Be Done on https://koffice.sambapos.com/
1. Settings That Should Be Done on SambaPOS
1.1. Adding Application on SambaPOS
Main Menu > Manage > Users > Applications > here, click on Add Application.
General Settings Section;
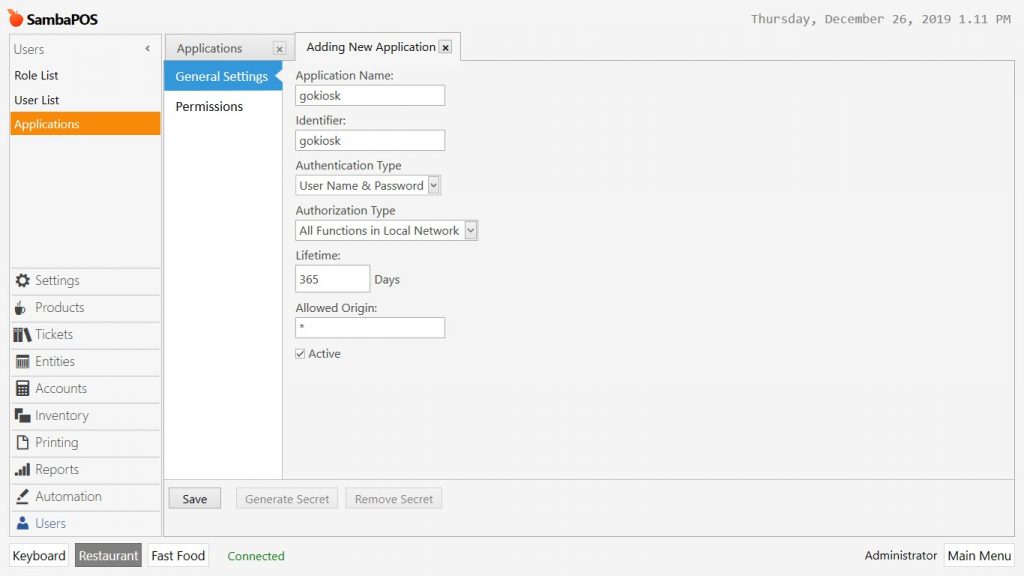
Application Name: gokiosk
Identifier: gokiosk
Authentication Type: User Name & Password
Authorization Type: All Functions in Local Network
Lifetime: 365
Allowed Origin: *
Active: Must be selected
Permissions Section;
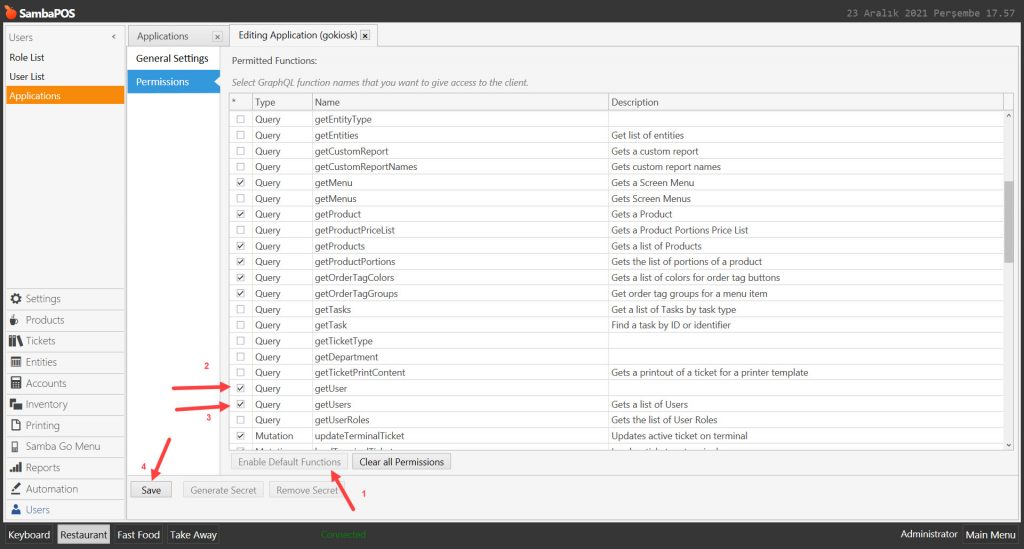
Enable Default Functions: Click on this button also click on related check boxes as shown in the above image.
After completing necessary editings, click on Save button.
1.2. Adding User on SambaPOS
Main Menu > Manage > User List > Users > here, click on Add User.
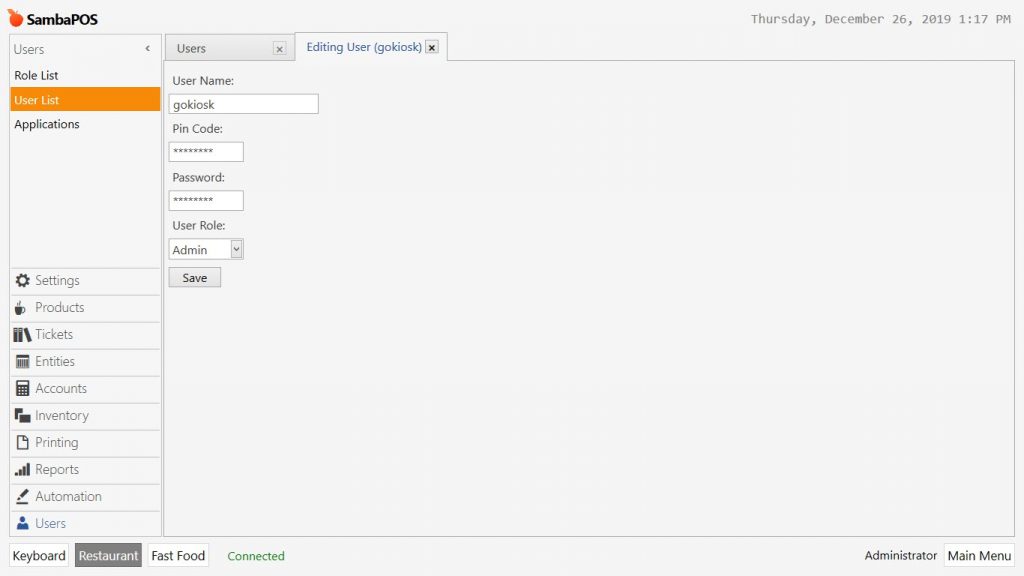
User Name: gokiosk
Pin Code: Type desired code here.
Password: Type the code that determined as Pin here as well.
User Role: Admin
After completing necessary editings, click on Save button.
1.3. Sending SambaPOS Menu to Device that GO Kiosk Device
Main Menu > Manage > Settings > Program Settings > SambaPOS GO Section > Here, determine the menu that you want to send to kiosk device and click on Send Menu to GO Office button.
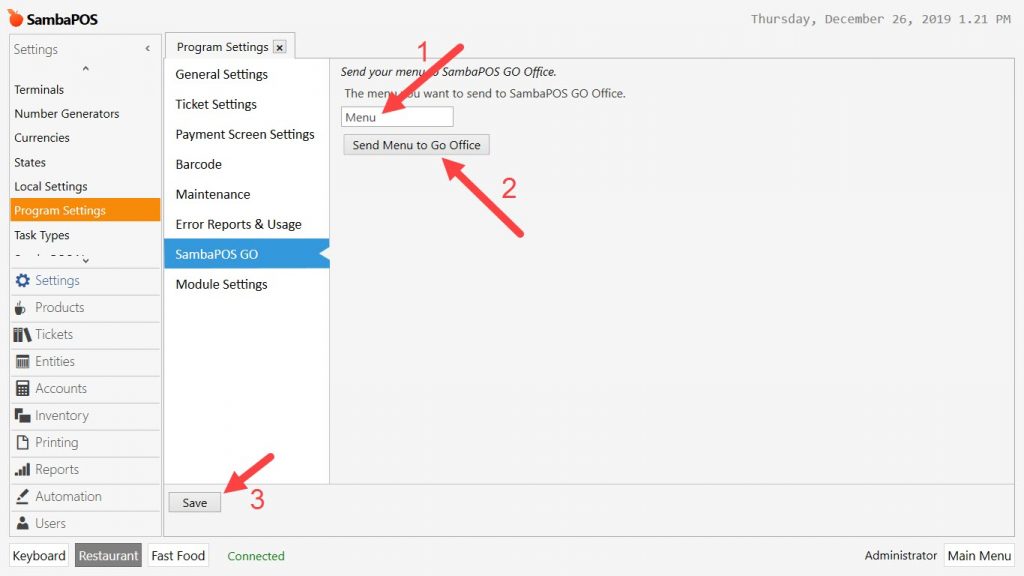
After completing necessary editings, click on Save button.
2. Settings That Should Be Done on Kiosk Device
You can download SambaPOS GO Kiosk Setup file from here.
Registering SambaPOS GO Kiosk Device to KOffice
Click on Settings button on GO Kiosk device and configure settings according to below images.
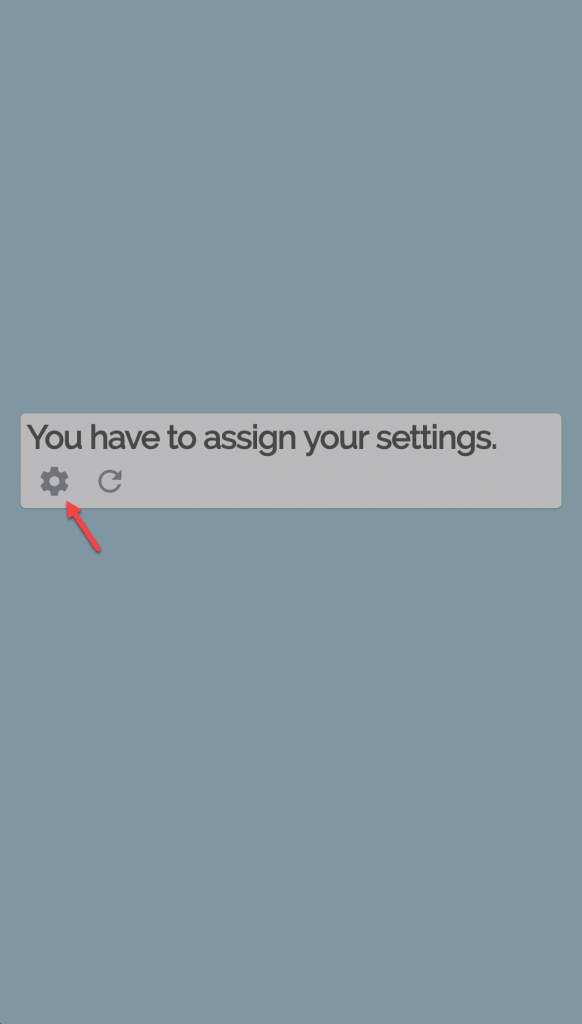
![]()
User Name: gokiosk
Password: Type the password that you determined while you creating the user on SambaPOS.
Application Name: gokiosk
Terminal Name: Select the Terminal you want to use.
Department Name: Select the Department you want to use.
Ticket Type Name: Select the Ticket Type you want to use.
Message Server Address: Type the IP Address of computer which SambaPOS V5 Pro installed on
Message Server Port: 9000
Master User: The system will be filling this field once you provided necessary information and click on Save Changes button.
After you finish this step go to https://koffice.sambapos.com address without doing any other settings on Kiosk Device.
Don’t turn this screen off because you will need to use it in the last step to apply all the changes to GO Kiosk Device by clicking on Get Settings From Web button.
3. Settings That Should Be Done on https://koffice.sambapos.com/login
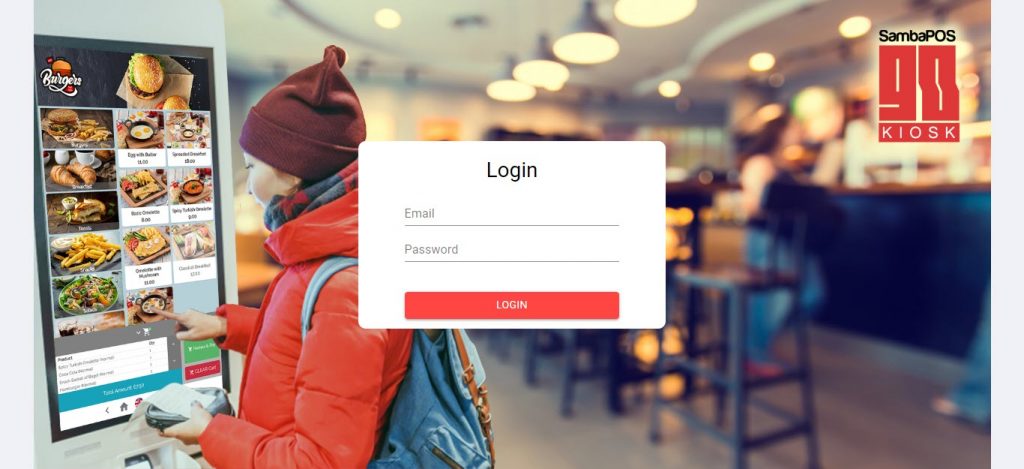
3.1. Logging in to KOffice
You need to Login to https://koffice.sambapos.com/login website by using your SambaPOS V5 Pro License email address and password.
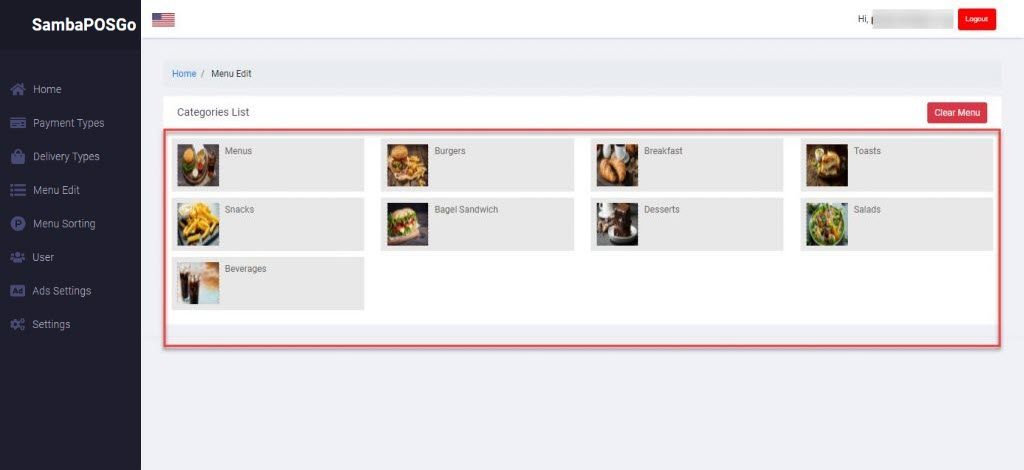
After you logged in, you will be seeing the below screen;

In this screen, after you click on Menu Edit button, you can start editing the product categories.
3.2. Adding Payment Type on KOffice
On the https://koffice.sambapos.com address, first click on Payment Types then New Payment Type button.
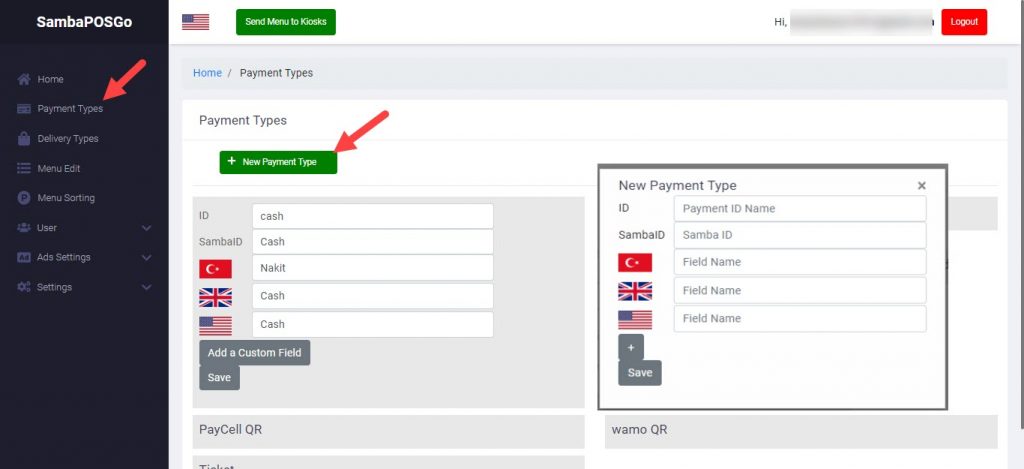
ID: Write the name of Payment Type that you wan to add.
SambaID: Exact equivalent of this payment type in the SambaPOS.
After completing necessary editings, click on Save button.
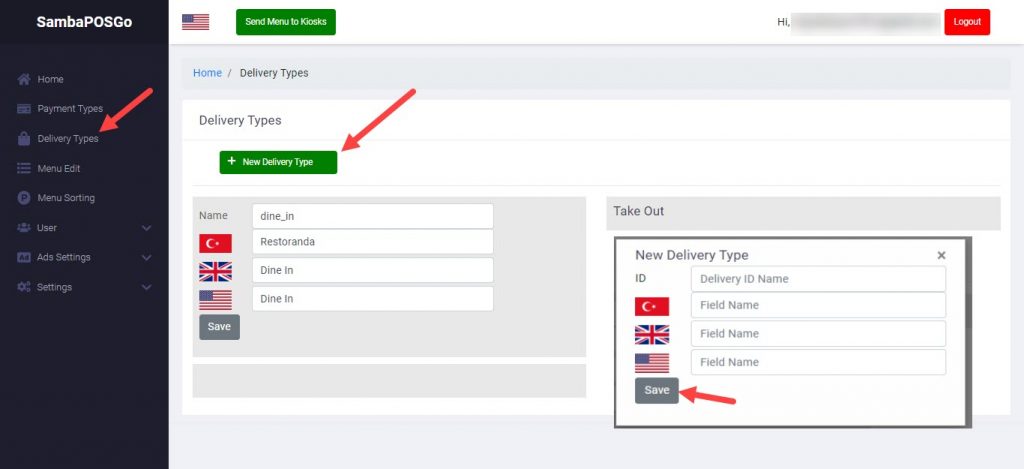
3.3. Adding Delivery Type (Order Type) on KOffice
In this step you can determine Order Types to be used.
On the https://koffice.sambapos.com address, first click on Delivery Types then New Delivery Type button.

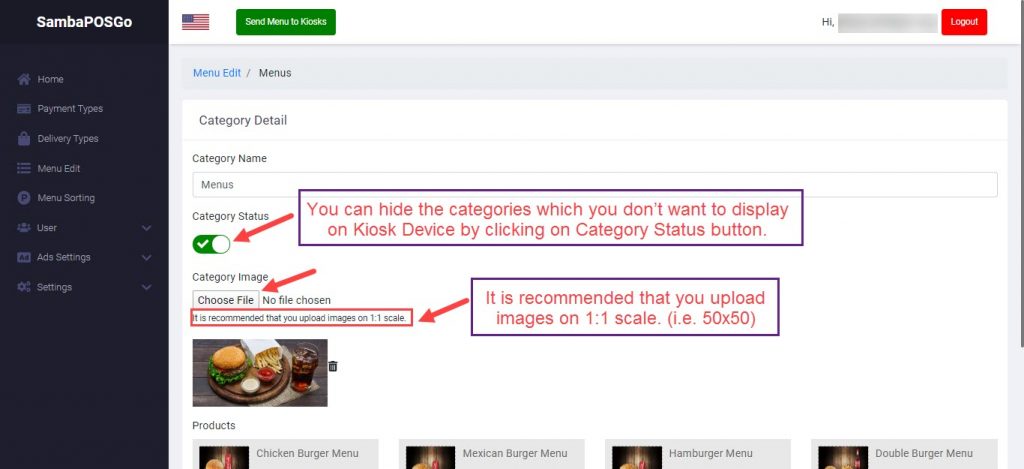
3.4. Product Category Editing on KOffice
Click on the category that you want to add image for, click on Choose File to add desired image and save the changes by clicking on Edit button.

You can hide the categories which you don’t want to display on Kiosk Device by clicking on Category Status button.
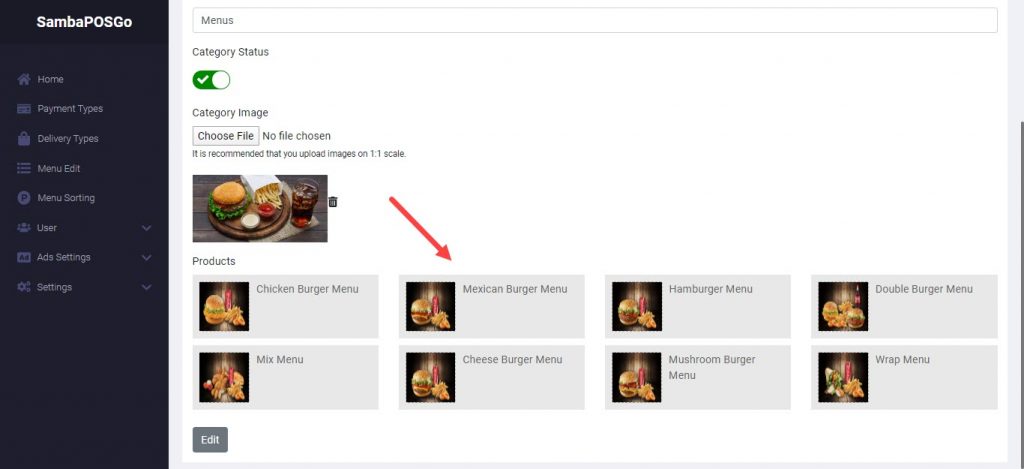
3.5. Product Editing on KOffice
Click on the category that includes the product which you want to add image and description for.
Insert the descriptions for related product.
You can hide the products which you don’t want to display on Kiosk Device by clicking on Product Status button.
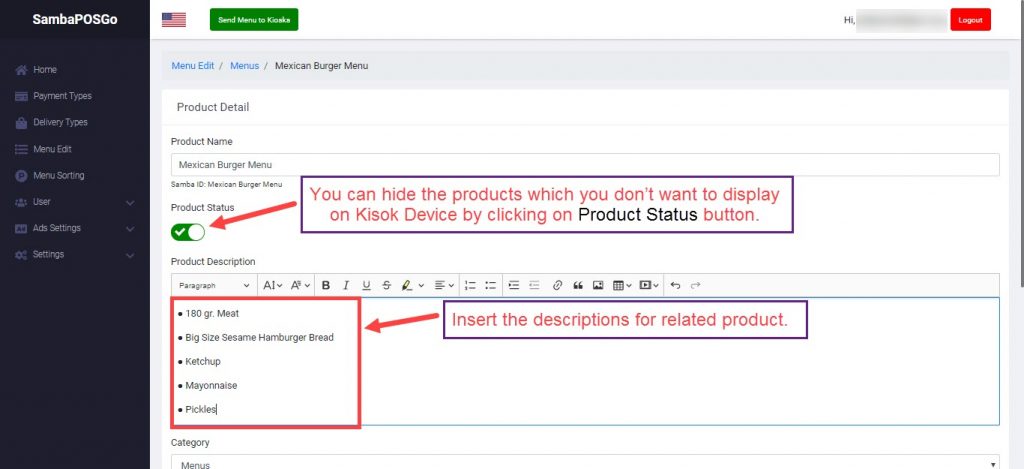
As last step, add the desired image for related product.

Once you completed necessary settings, save the changes by clicking on Edit Product button.
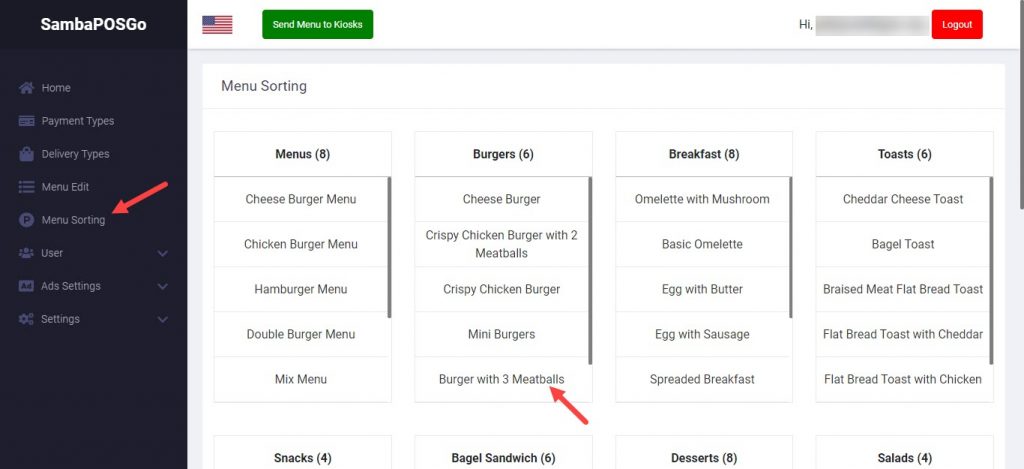
3.6. Product Sorting on KOffice
In order to set the sorting of the products that will be displayed on Kiosk Device, click on Menu Sorting button from https://koffice.sambapos.com/ and position the related product to desired place by drag and dropping.
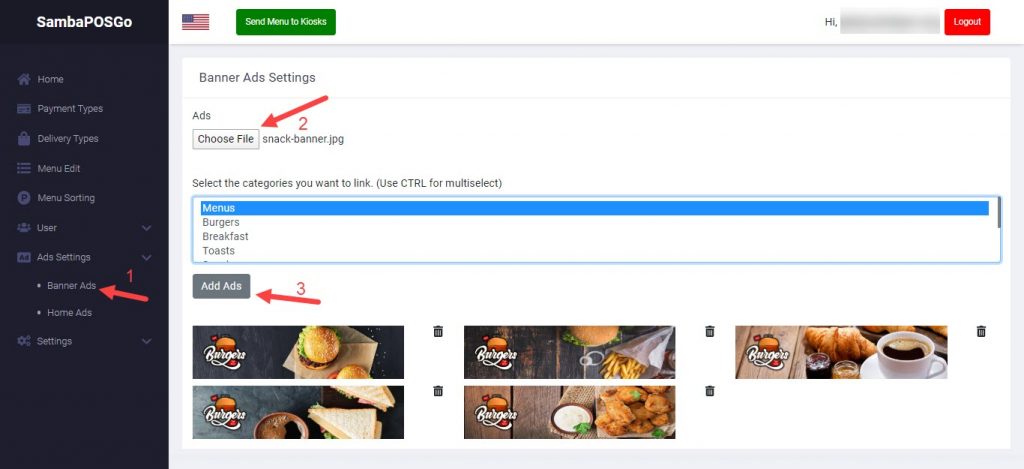
3.7. Adding Banner on KOffice
On the https://koffice.sambapos.com/ website, from left side of screen click on Ads Settings, Banner Ads button then click on Choose Files button to add desired images and then save the changes by clicking on Add Ads button.
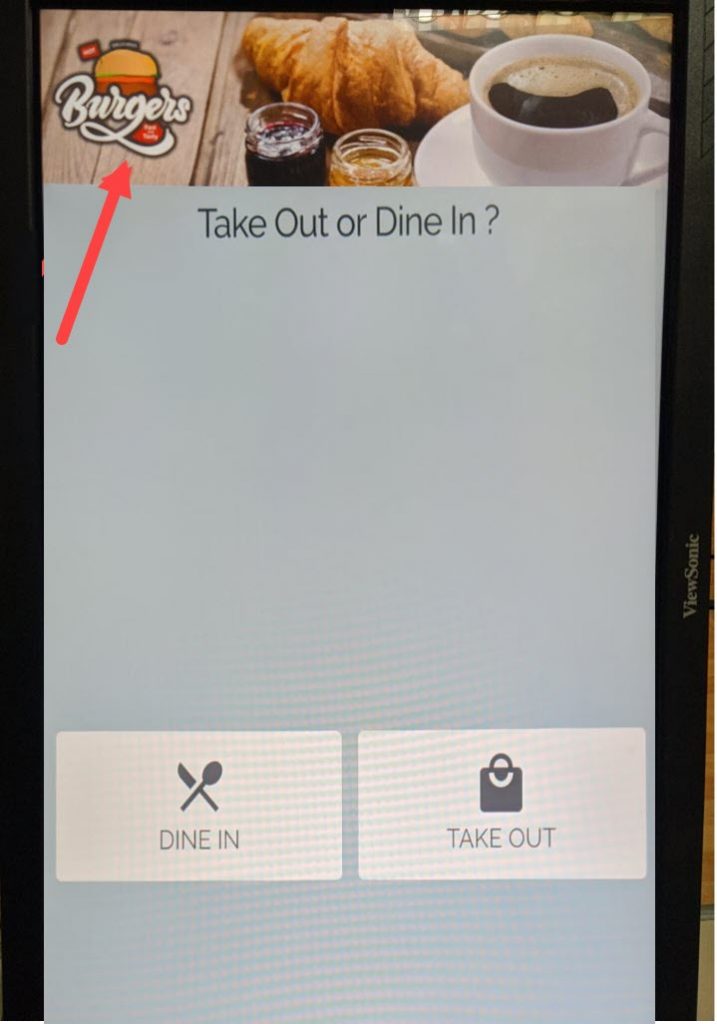
3.8. Adding Home Screen Images on KOffice
On the https://koffice.sambapos.com website, from left side of screen click on Ads Settings, Home Ads button then click on Choose Files button to add desired images and then save the changes by clicking on Add Ads button.


3.9. Configuring Detailed Settings on KOffice
3.9.1. General Settings Screen
On the https://koffice.sambapos.com/ website, configure your settings by first clicking on Settings and then General buttons.
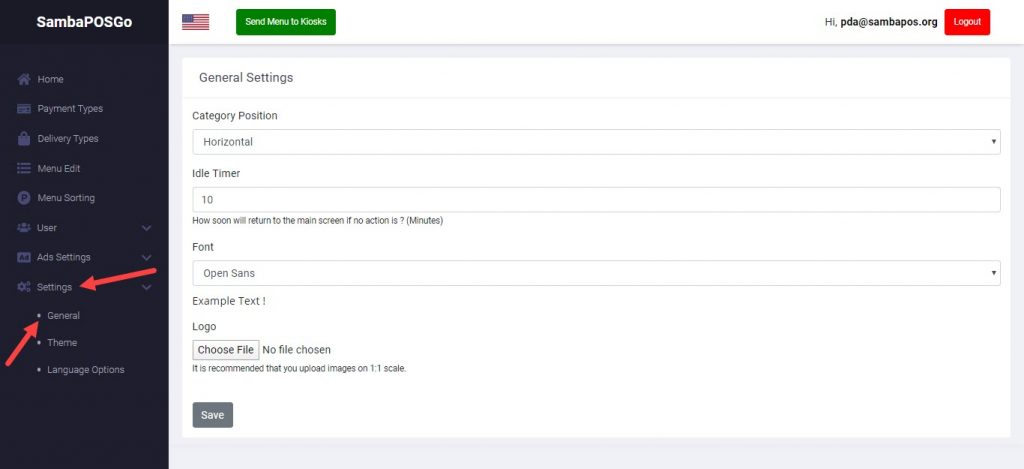
After completing necessary editings, click on Save button.
3.9.2. Theme Settings Screen
On the https://koffice.sambapos.com/ website, configure your settings by first clicking on Settings and then Theme buttons.
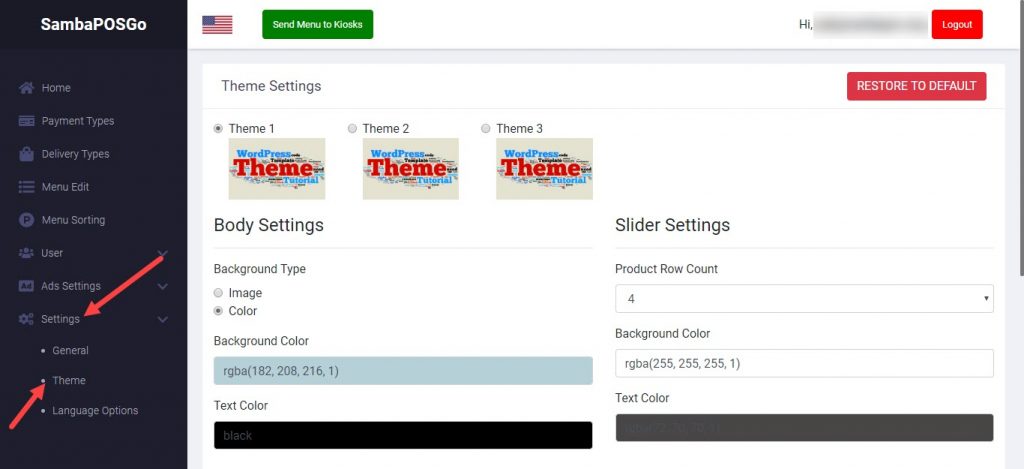
After completing necessary editings, click on Save button.
3.10. Sending Settings to GO Kiosk Device
In the last step, after you completed all the settings, send those settings to Kiosk Device by clicking on Get Settings From Web button.
![]()
You can find frequently asked questions about GO Kiosk in the link below;
https://kb.sambapos.com/en/8-6-1-sambapos-go-frequantly-asked-questions/