8.7. SambaPOS GO Tablet Setup
This product is no longer supported. You can click on here for the new version.
In this document, setup process of SambaPOS Go Tablet which belongs to SambaPOS GO product family will be explained.
System Requirements;
1. You need to have SambaPOS GO Tablet license in the same account that you have SambaPOS V5 Pro License.
2. SambaPOS GO Tablet application works on Tablet devices which have 7 inches and above screen size. (It won’t work on mobile phones)
3. It is necessary to purchase Go Tablet license as much as tablet counts to be used.
4. For Android tablets, Android Version must be minimum 5.0, for Apple tablets, iOS version must be 10 or above.
5. All of the Google Services must be installed on the tablet device.
Where to Download;
You can download SambaPOS GO Tablet application fromı Google Play Store and Appstore.


You can purchase license of SambaPOS GO Tablet application from cp.sambapos.com account’s Store Section.
Important Note:
When you make any change on SambaPOS side, in order to apply this change to tablet that SambaPOS GO Tablet installed on, you need to follow below mentioned 2 steps.
1. Re-Sending the Menu to tablet that SambaPOS GO Tablet installed on;
In order to save the changes, you need to restart SambaPOS before you click on the Send Menu to GO Office button.
You can do this by applying below step;
Main Menu > Manage > Settings > Program Settings > SambaPOS GO Section > Here, determine the menu that you want to send to tablet that SambaPOS GO Tablet installed on and click on Send Menu to GO Office button.
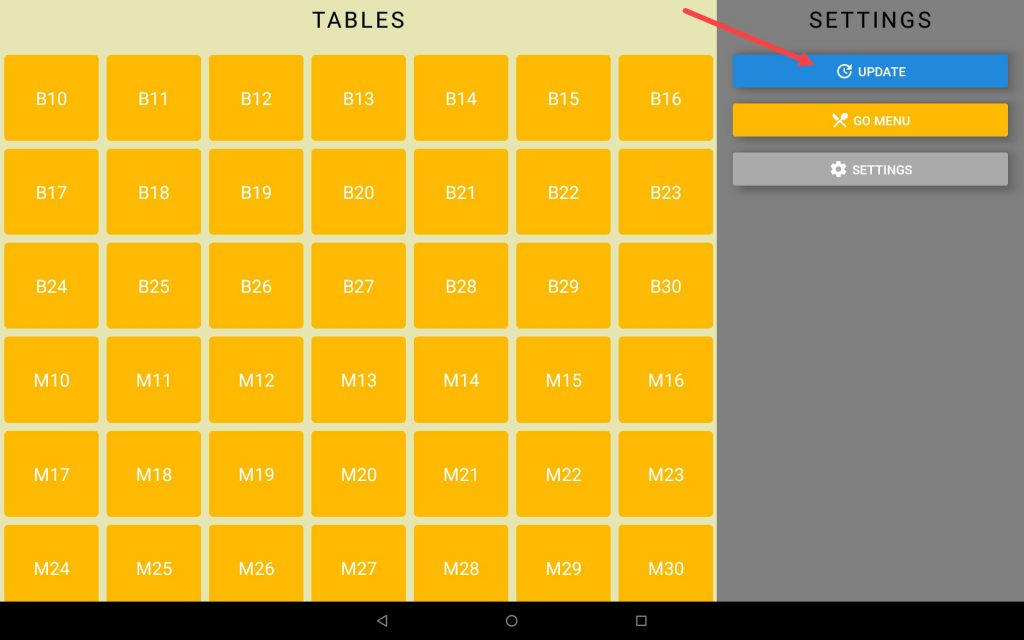
2. Clicking on Update button on the device that SambaPOS GO Tablet is installed on;
You can do this by applying below step;
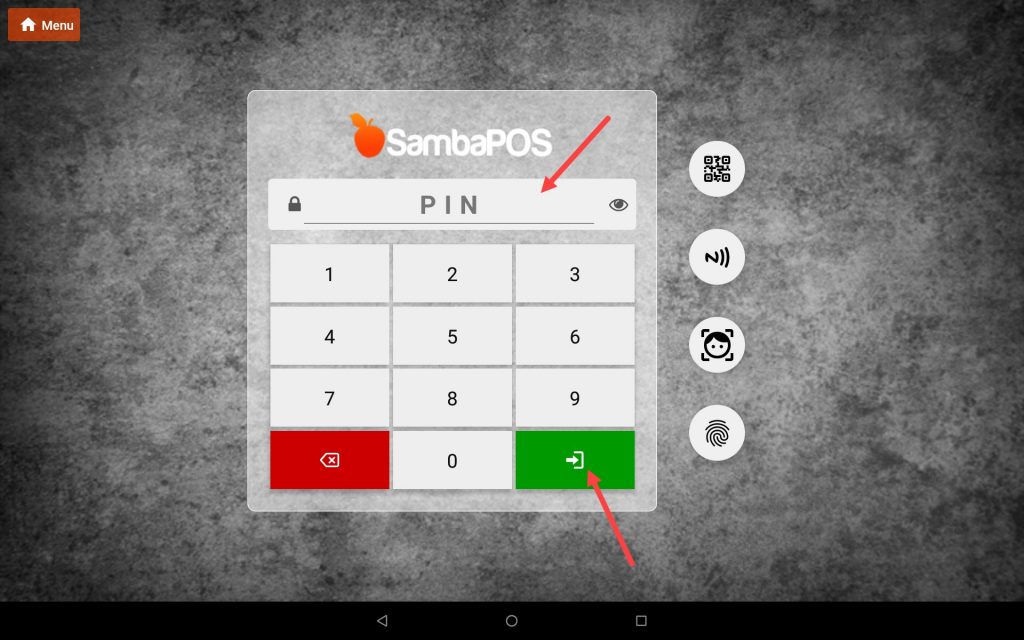
On the device that GO Tablet is installed on, enter the password by clicking 3 times on the SambaPOS Logo and reach the Settings Screen and then apply the changes by clicking on Update button.
We Can Gather the Steps to Be Done Under 4 Main Headers;
1. Windows Server Settings
2. Settings That Should Be Done on SambaPOS
3. Settings That Should Be Done on Tablet Device
4. Settings That Should Be Done on https://toffice.sambapos.com
1. Windows Server Settings
1.1. Server Features
1.2 Database Features
1.3. Network Settings
1.4. Windows Firewall Settings
1.5. MSSQL TCP/IP Ports
1.1. Server Features
Server Operating System: Windows 10 or above Operating system and the latest Microsoft SQL Server version.
Server Hardware: Minimum Intel Celeron J1900 CPU, 4 GB of Ram, 64 GB SSD Harddisk or higher
1.2. Database Features
Latest version of Microsoft SQL Express Server
Download Link
Setup Document Link
1.3. Network Settings
SambaPOS Server and Mobile Client must be in the same IP group.
Server: Go to Control Panel > Network and Sharing Center > Change Adapter Settings > Local Area Connection > Internet Protocol Version 4 (TCP/IPv4) > Properties > Write a static IP.
1.4. Windows Firewall Settings
Please deactivate all third party internet security and firewall services.
Note: If you don’t have MSSQL database, please visit the link to configure settings
https://kb.sambapos.com/2-1-3-sql-express-server-setup/?lang=en
Mobile Client doesn’t work without MSSQL database.
– Please deactivate all third party internet security services and Windows Firewall.
Control Panel > System and Security > Windows Firewall > Turn Windows Firewall on or off > Turn off Windows Firewall for Private Network Settings and Public Network Settings
Note: Do not have notification for reactivate of Windows Firewall, please follow the steps
Control Panel > System and Security > Action Center > Change Action Center Settings > Network Firewall (Unselected)
1.5. MSSQL TCP/IP Ports
Go to SQL Server Configuration Manager and “Enable” TCP/IP Sharing to connect MSSQL Database from clients.
– Right Click My Computer > Manage > Services and Applications > SQL Server Configuration Manager > SQL Server Network Configuration > Protocol For MSSQLSERVER > TCPIP > Enabled
2. Settings That Should Be Done on SambaPOS
2.1. Adding Application on SambaPOS
Main Menu > Manage > Users > Applications > here, click on Add Application.
General Settings Section;
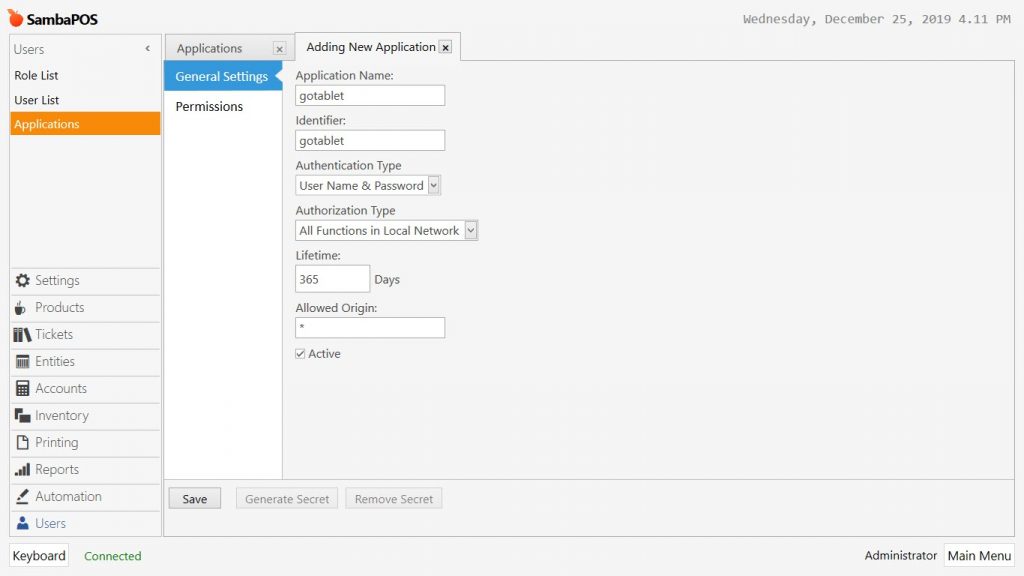
Application Name: gotablet
Identifier: gotablet
Authentication Type: User Name & Password
Authorization Type: All Functions in Local Network
Lifetime: 365
Allowed Origin: *
Active: Must be selected
Permissions Section;
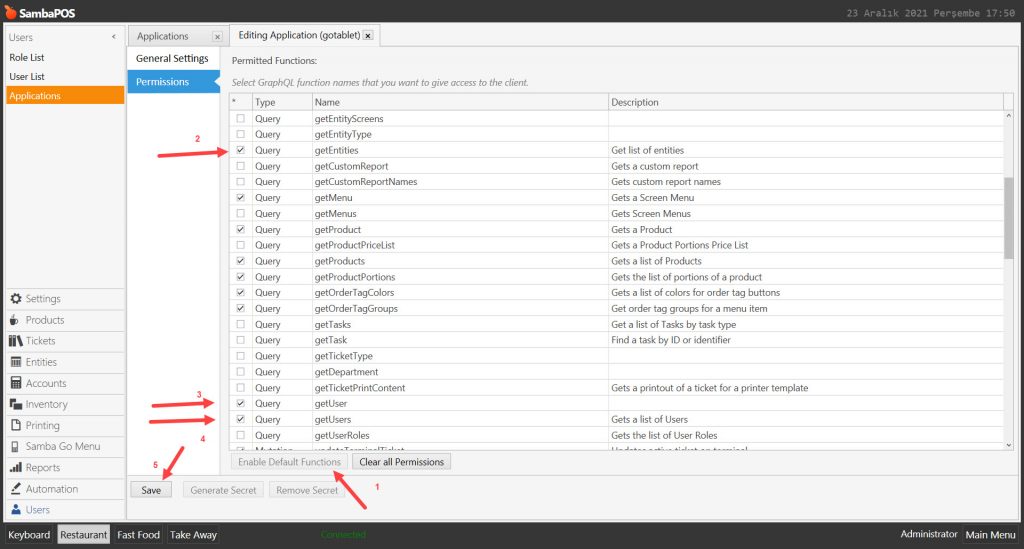
Enable Default Functions: Click on this button and then click on related check boxes as shown in the above image.
After completing necessary editings, click on Save button.
2.2. Adding User on SambaPOS
Main Menu > Manage > User List > Users > here, click on Add User.
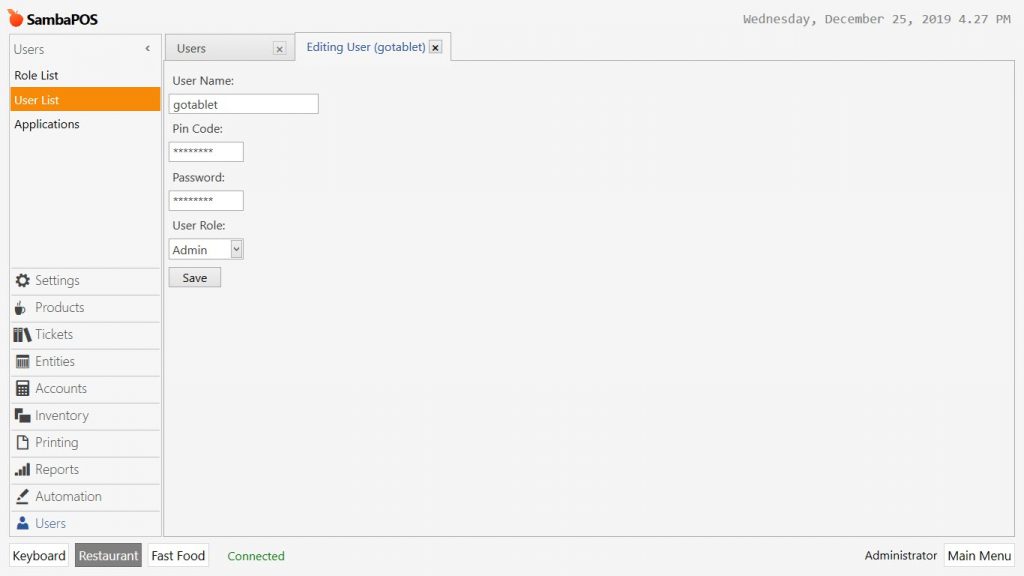
User Name: gotablet
Pin Code: Type desired code here.
Password: Type the code that determined as Pin here as well.
User Role: Admin
After completing necessary editings, click on Save button.
2.3. Sending SambaPOS Menu to Device that GO Tablet Installed
Main Menu > Manage > Settings > Program Settings > SambaPOS GO Section > Here, determine the menu that you want to send to the device which SambaPOS GO Tablet is installed on and click on Send Menu to GO Office button.
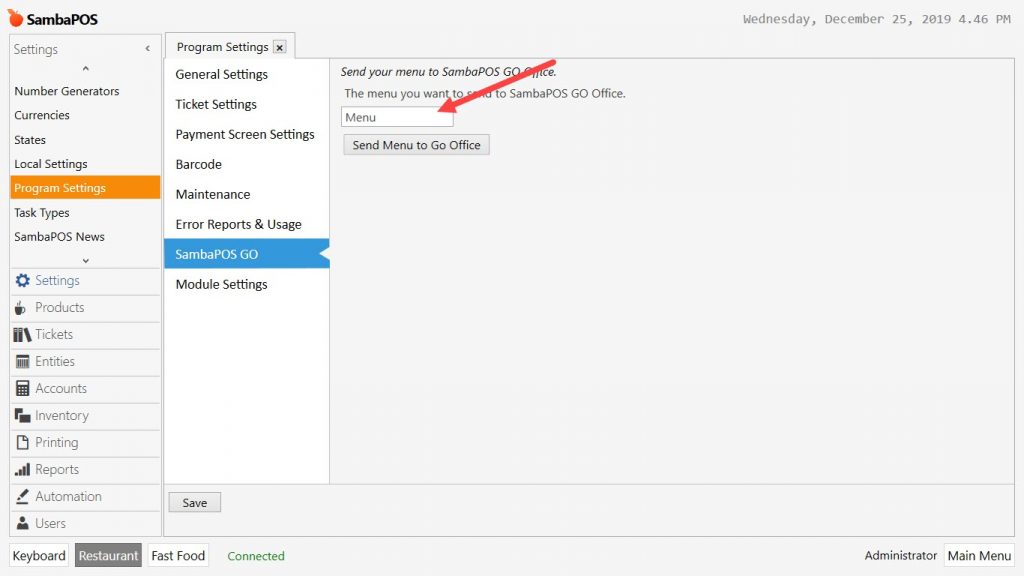
After completing necessary editings, click on Save button.
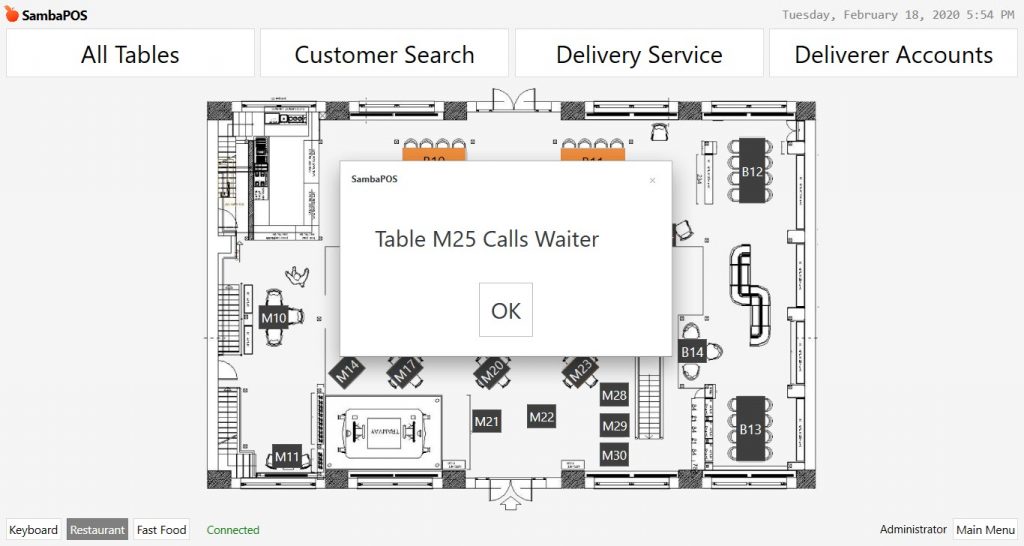
2.4. Adding Action and Rule for Call Waiter Function
You can use this function in case you select Start with Table and Ready on Tables usage strategies.
2.4.1. Adding Show Message Action
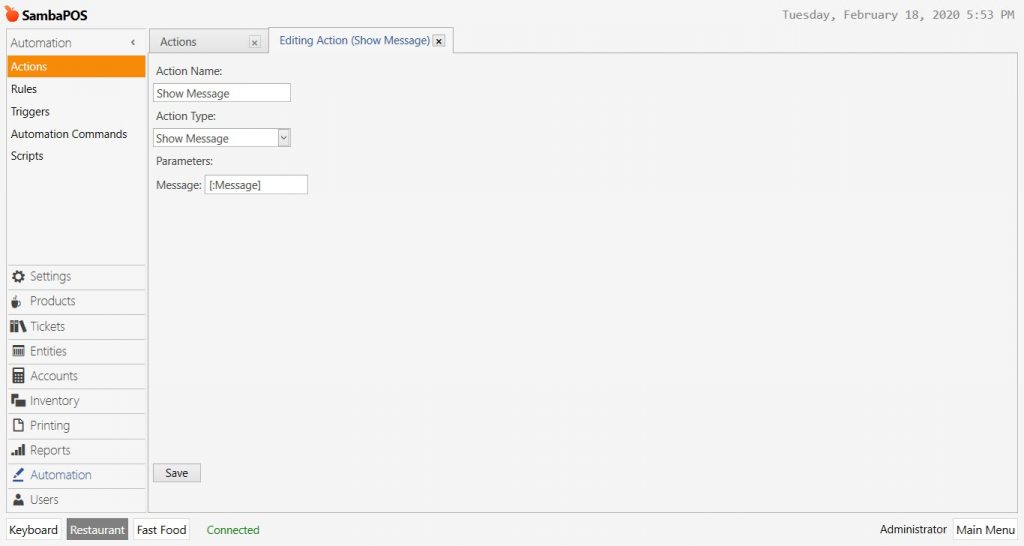
Action Name: Show Message
Action Type: Show Message
Parameters:
Message: [:Message]
After completing necessary editings, click on Save button.
2.4.2. Adding Message Received Rule
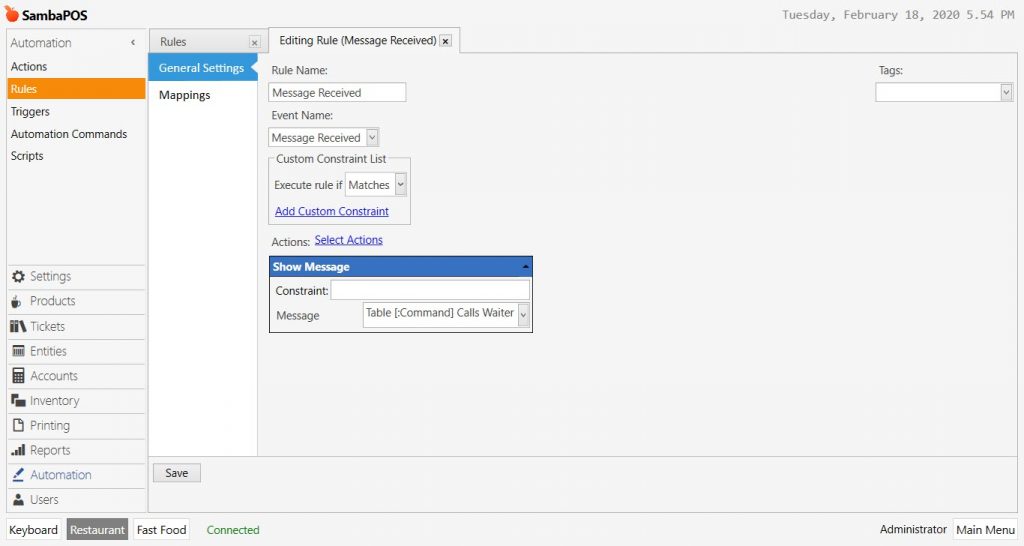
After completing necessary editings, click on Save button.
3. Settings That Should Be Done on Tablet Device
Registering the Device That SambaPOS GO Tablet Installed On
When you install GO Tablet application for the first time, Settings Screen will be appearing automatically.
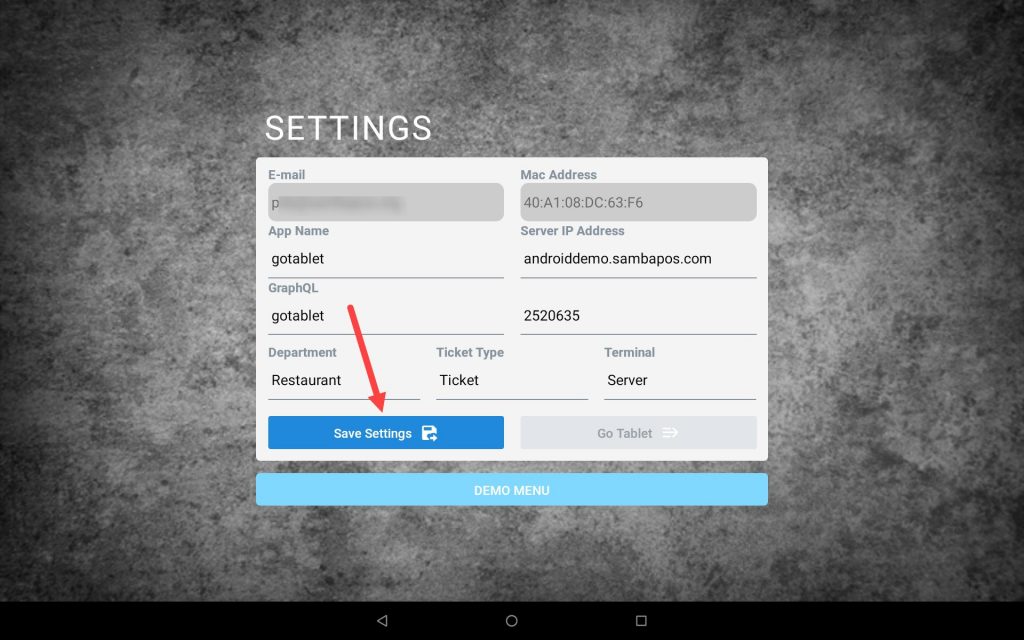
Email Address: Your SambaPOS V5 Pro License email address will be automatically written here by the app.
App Name: gotablet
GraphQL: User Name that you created on SambaPOS (In the example gotablet)
Password: Type the password that you determined while you creating the user on SambaPOS.
Terminal: Select the Terminal you want to use.
Department: Select the Department you want to use.
Ticket Type: Select the Ticket Type you want to use.
Server IP Address: Type the IP Address of computer which SambaPOS V5 Pro installed on
After you finish with this step Login to https://toffice.sambapos.com address.
4. Settings That Should Be Done on https://toffice.sambapos.com
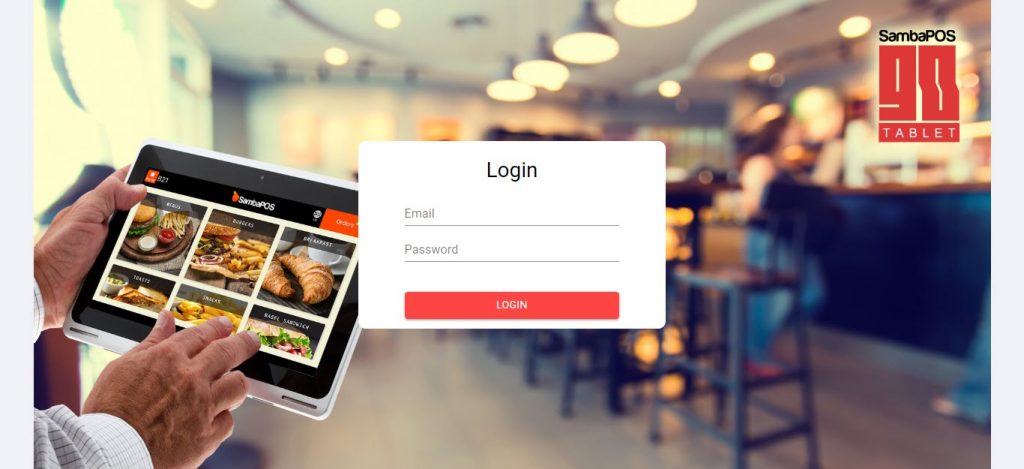
4.1. Logging in to TOffice
You need to Login to https://toffice.sambapos.com/login website by using your SambaPOS V5 Pro License email address and password.
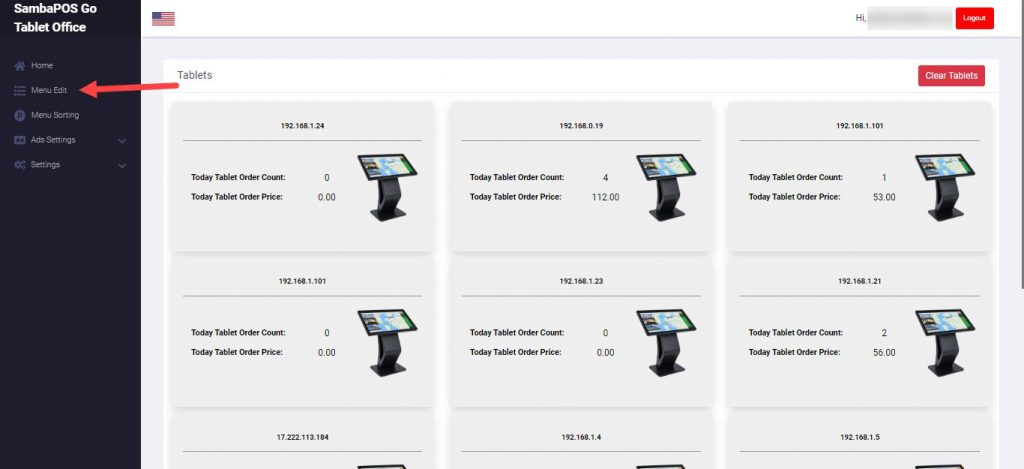
After you logged in, you will be seeing the below screen;
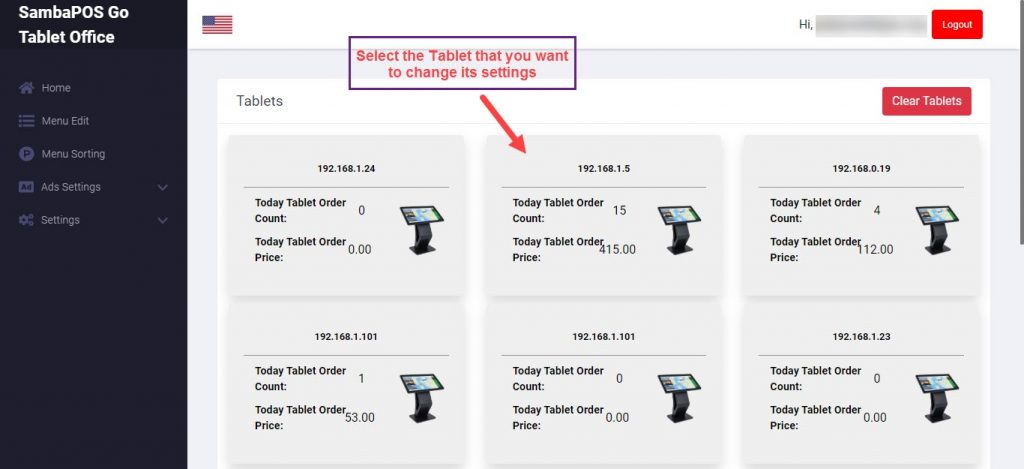
If you leave Tablet Settings Password as blank, it will be set to 1234 as default.
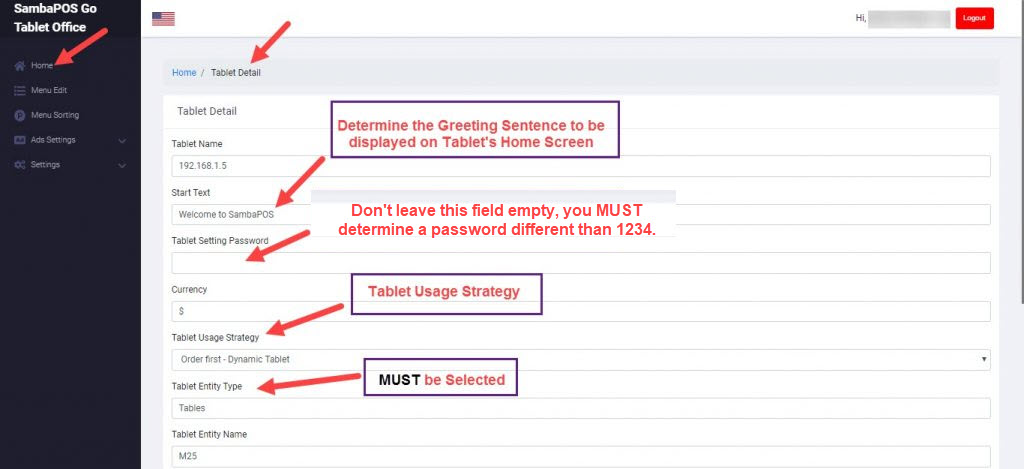
Click on related Tablet and configure the settings as shown in the image.
Tablet Name: Type the Name of Tablet
Start Text: Type the sentence to be displayed on Home Screen of Tablet
Tablet Settings Password: Determine the Tablet Password, don’t leave it empty.
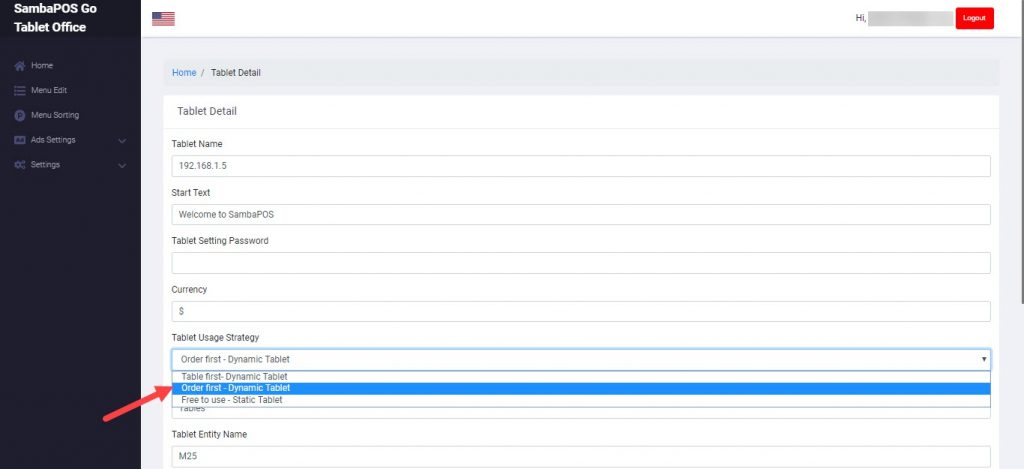
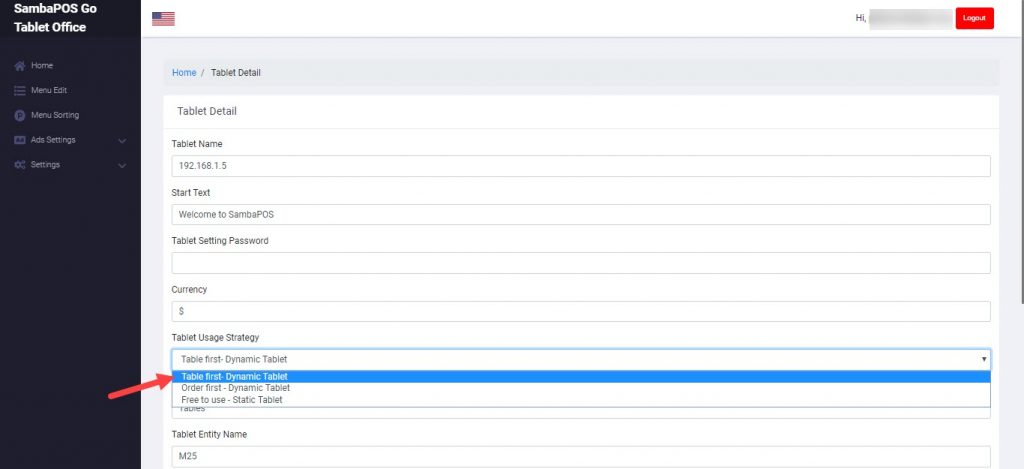
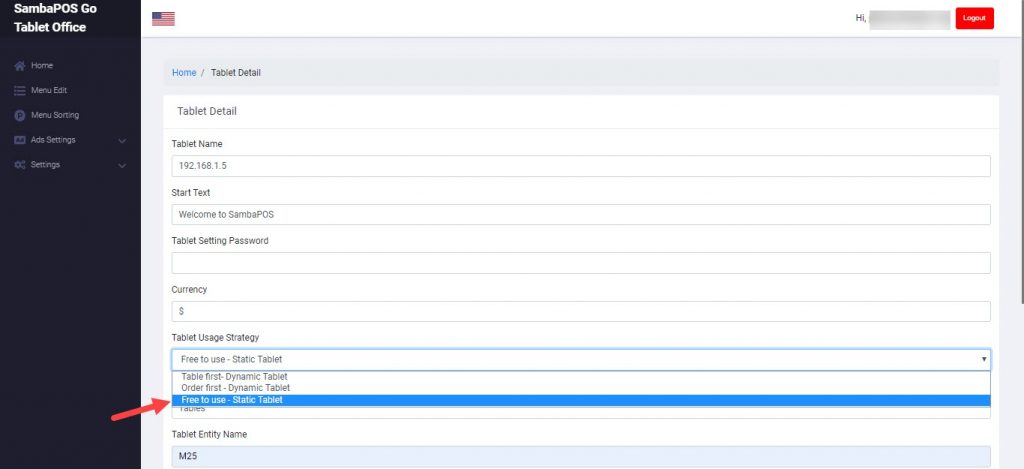
Tablet Usage Strategy: Determine if the usage strategy will be Start with Order, Start with Table or Ready on Table.
Tablet Entity Type: Select the desired SambaPOS Entity Type (Required)
Tablet Entity Name: Select the desired Entity Name to be assigned.
Important Note: Tablet Entity Type selection is Required.
After making any change on https://toffice.sambapos.com, tablets must be Updated.
4.2. Usage Strategies of GO Tablet
In case of you want to reach Settings Screen while on customer menu screen, (If it is desired to change entity for Ready on Table or Start with Table strategies, or if the tablet needs to be updated or if you want to change default settings) it is possible to reach related screen first by reaching to Password Screen by clicking 3 times on SambaPOS Logo which can be customised according to need.
4.2.1. Start with Order
In this usage strategy, first Order of Customer is taken and then it is assigned to Table.
- Users will be seeing a confirmation screen which says that Order Must be confirmed after they complete the orders and clicked on Send Order button.
- Users can go back to Menu by clicking on Menu button which can be found on top left of screen in case of tablet goes to Password Screen while they make orders
- Authorised Staff will be redirected to a screen which tables are listed and can change the settings from there.
- He selects the related table in order to complete the Order and then Order will be sent to SambaPOS.
After making any change on https://toffice.sambapos.com, tablets must be Updated.
4.2.2. Start with Table
In this usage strategy, as first the Table is selected and then orders will be added into that table.
- After Authorised Staff inserted the password he will be redirected to a screen that tables are listed and settings can be changed from.
- Authorised Staff selects the table, approves the confirmation request and then application turns back to Order Screen.
- When it is clicked on Send Orders button, the orders will be sent to SambaPOS.
After making any change on https://toffice.sambapos.com, tablets must be Updated.
4.2.3. Ready on Table
In this usage there is no any specific confirmation request or work flow sorting.
- Tablet starts on Password Screen.
- The table that pre determined on toffice.sambapos.com comes as automatically selected after Authorised Staff inserts the password.
- If Entity Name is not selected on toffice.sambapos.com from Tablet Details, it displays a screen says that Entity is not assigned.
- Authorised Staff can assign a table to the tablet from toffice.sambapos.com or using QR Code Scanner.
- After assigning table, it is possible to reach Menu by clicking on Go Menu button from top right of screen.
- In this strategy, any other confirmation isn’t necessary. All the orders will be sent to SambaPOS until authorised user change assigned entity from settings screen.
After making any change on https://toffice.sambapos.com, tablets must be Updated.
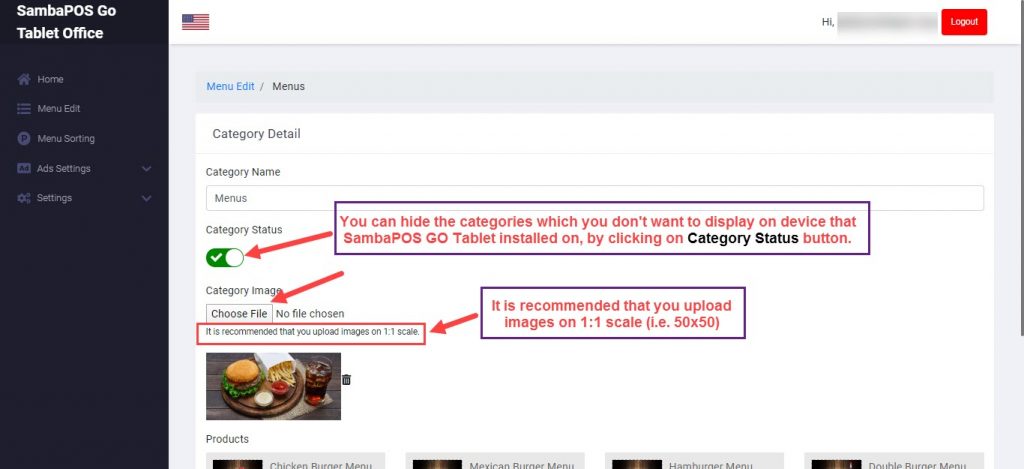
4.3. Editing Product Category on TOffice
In this screen, after you click on Menu Edit button, you can start editing the product categories.
Click on the category that you want to add image for, click on Choose File to add desired image and save the changes by clicking on Edit button.

You can hide the categories which you don’t want to display on device that SambaPOS GO Tablet installed on, by clicking on Category Status button.
After making any change on https://toffice.sambapos.com, tablets must be Updated.
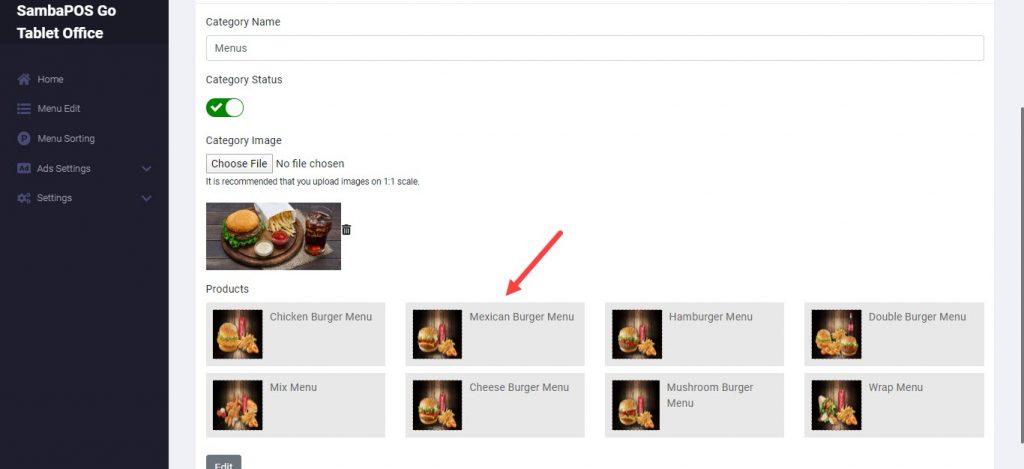
4.4. Editing Product on TOffice
Click on the category that includes the product which you want to add image and description for.
Insert the descriptions for related product.
You can hide the products which you don’t want to display on device that SambaPOS GO Tablet installed on, by clicking on Product Status button.
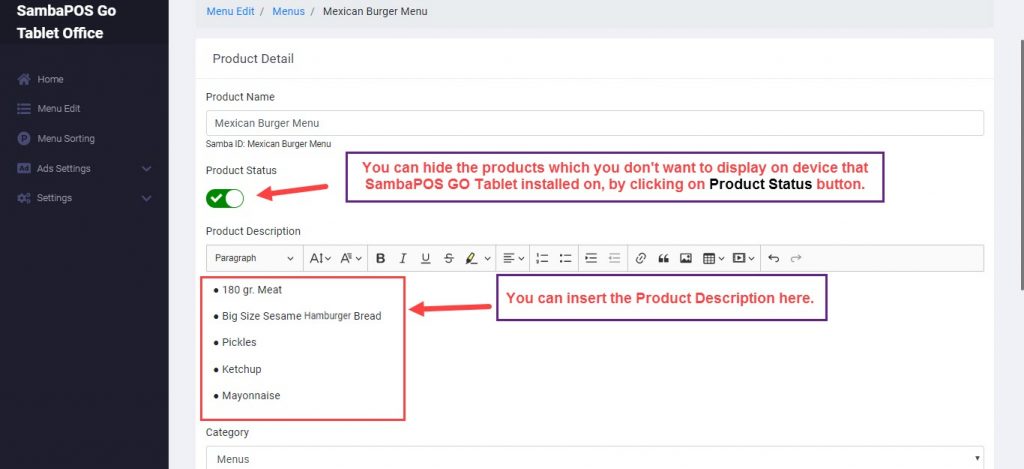
As last step, add the desired image for related product.
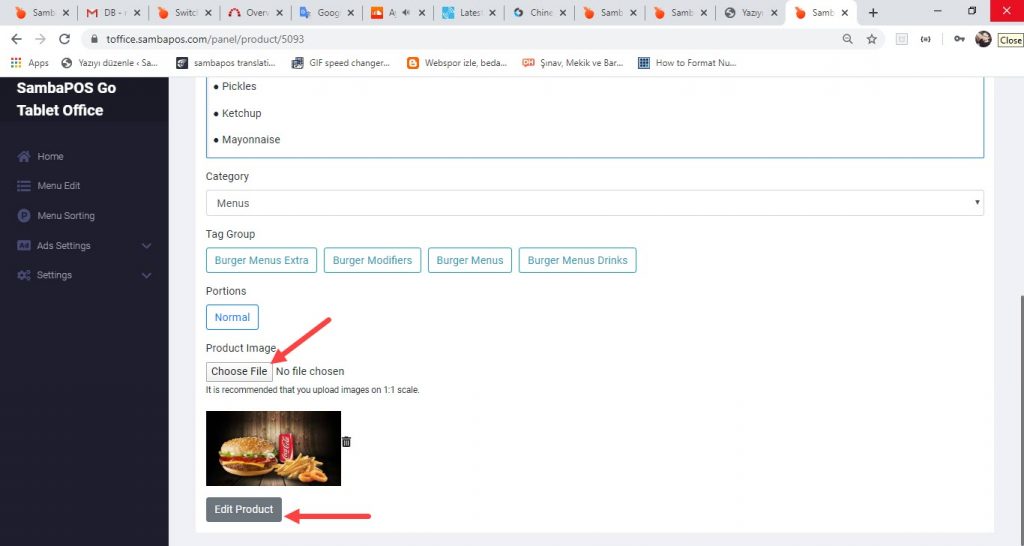
Once you completed necessary settings, save the changes by clicking on Edit Product button.
After making any change on https://toffice.sambapos.com, tablets must be Updated.
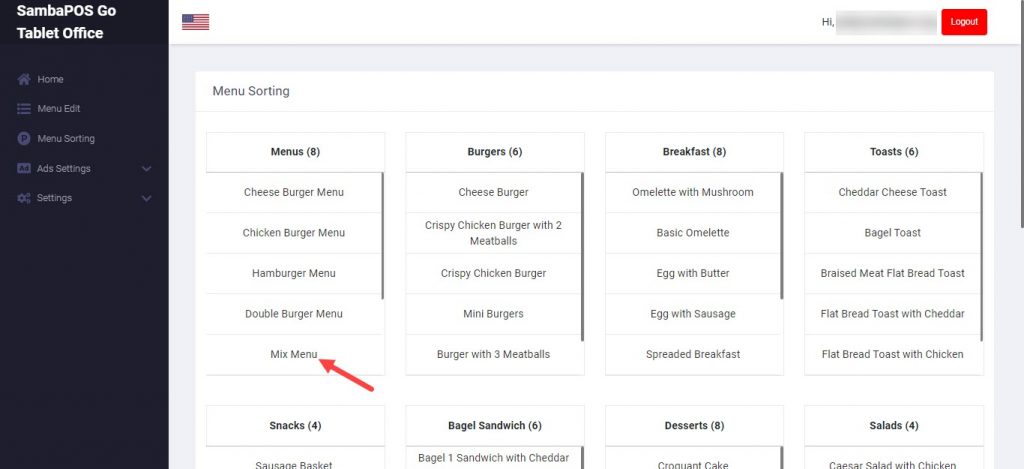
4.5. Product Sorting on TOffice
In order to set the sorting of the products that will be displayed on the device which SambaPOS GO Tablet installed on, click on Menu Sorting button from https://toffice.sambapos.com and position the related product to desired place by drag and dropping.
After making any change on https://toffice.sambapos.com, tablets must be Updated.
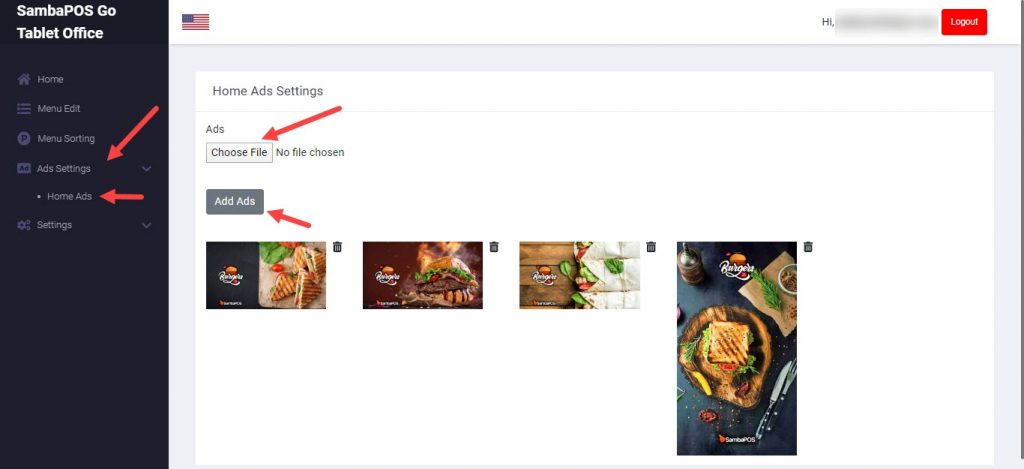
4.6. Adding Home Screen Images on TOffice
On the https://toffice.sambapos.com website, from left side of screen click on Ads Settings, Home Ads button then click on Choose Files button to add desired images and then save the changes by clicking on Add Ads button.

After making any change on https://toffice.sambapos.com, tablets must be Updated.
4.7. Configuring Detailed Settings on TOffice
4.7.1. General Settings Screen
On the https://toffice.sambapos.com website, configure your settings by first clicking on Settings and then General buttons.
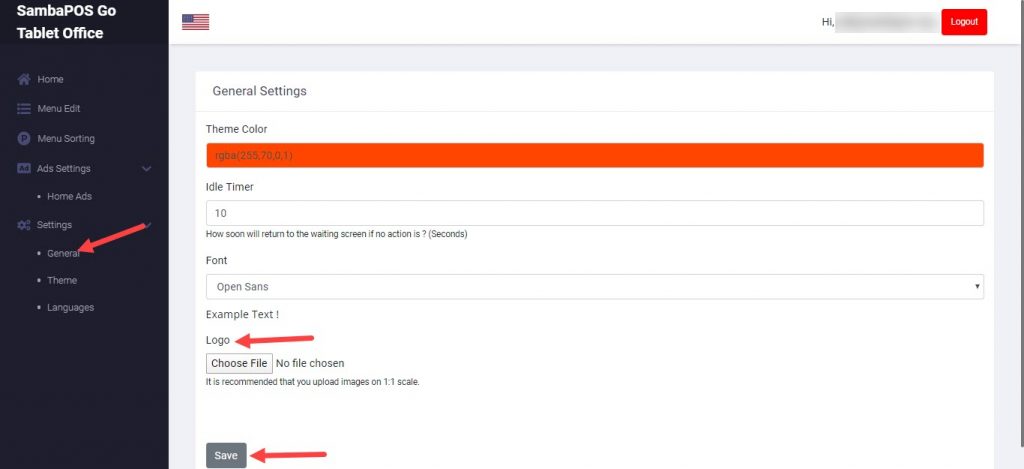
In the General Settings section;
You can determine theme color, turning back to home screen time, font type and logo.
Once you completed necessary editings, click on Save button.
After making any change on https://toffice.sambapos.com, tablets must be Updated.
4.7.2. Theme Settings Screen
On the https://toffice.sambapos.com website, configure your settings by first clicking on Settings and then Theme buttons.
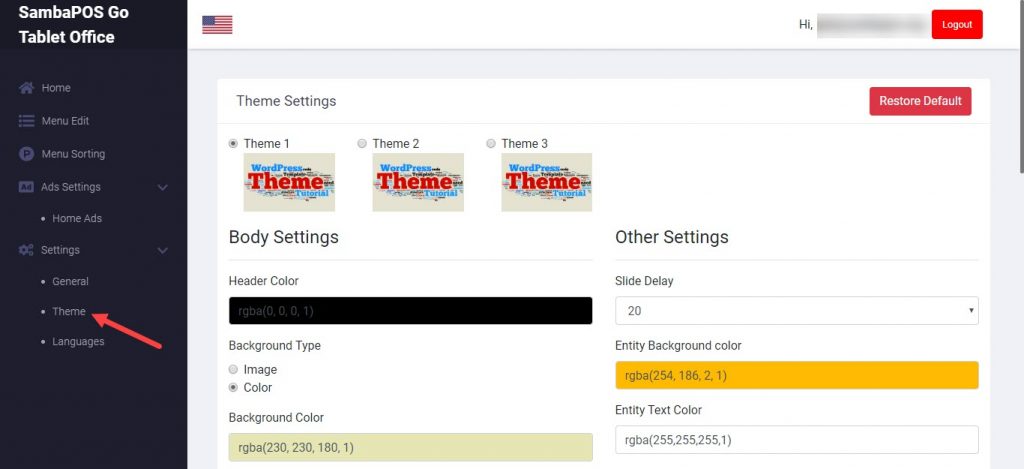
In the Theme Settings section you can determine below settings;
Column counts of Categories and Products,
Product Line Row Count,
Distance between screen of categories and products,
Distance between categories and products,
Background color and text of categories and products.
Once you completed necessary editings, click on Save button.
After making any change on https://toffice.sambapos.com, tablets must be Updated.
4.8. Applying the Changes to Device That GO Tablet Installed On
In the last step, after you completed all the settings on the device that SambaPOS GO Tablet installed on, enter the Password by clicking 3 times on SambaPOS Logo and reach to Settings Screen and then apply all the changes to device by clicking on Update button.