8.10. SambaPOS Mobile Client MC3 Setup
In this document, it will be explained how to setup SambaPOS Mobile Client MC3 product.
IMPORTANT NOTE:
In order to use SambaPOS Mobile Client MC3, you need to have minimum SambaPOS 5.5.0 version installed on your computer.
1. Before Setup
1.1. SambaPOS Setup
1.2. SambaPOS Mobile Client License
1.3. Activation
2. Mobile Device Setup and Settings
2.1 Mobile Device Features
2.2 Mobile Device Operating System Settings
2.3 Mobile Device Connection Settings
2.4 Installing the Mobile Client App
3. Windows Server Settings
3. Windows Settings
3.1. Server Features
3.2. Database Features
3.3. Network Settings
3.4. Windows Firewall Settings
3.5. MSSQL TCP/IP Ports
4. SambaPOS Settings
4.1. SambaPOS License Activation
4.2. SambaPOS Messaging Server Settings
4.2.1. Messaging Server Service Tool Exe Settings
4.2.2. SambaPOS Management Messaging Server Settings
4.3. User Settings
4.3.1. Adding Role for Waiters
4.3.2. Adding User for pda
4.3.3. Adding Application for pda
4.4. Entity Screen Settings
4.5. Ticket Tag Settings
4.6. Order Tag Settings
5. SambaPOS Mobile Client Setup and Settings
5.1. Message Server Check
5.2. Mobile Client Settings
5.2.1. IP Addres Configuration
5.2.2. Database Update Process
5.3. SambaPOS Mobile Client Usage
5.3.1. SambaPOS Mobile Client Login
5.3.2. SambaPOS Mobile Client Placing Order
5.3.3. SambaPOS Mobile Client Print Bill
5.3.4. SambaPOS Mobile Client Get Payment
6. Things to Be Careful About
6.1. Connection and Network Settings Part
6.1.1. Is your license active for SambaPOS Mobile Client?
6.1.2. Did you handle SambaPOS License activation?
6.1.3. Is Server IP and Server IP Group matching?
6.1.4. Is Mobile Client IP Group and Wifi connection matching?
6.1.5. Does the Messasge Server work?
6.1.6. Is the Message Server Port 9000+ ?
6.2. Mobile Client Part
6.2.1. After making any changes on SambaPOS, did you Update on Mobile Client App?
6.3. SambaPOS Settings
6.3.1. Is pda user created and the password is 2520634 ?
6.3.2. Did you add Waiter Role on the Entity Screen Mappings Part?
1. Before Setup
NOTE-1: In order to use SambaPOS Mobile Client MC3, you need to have minimum SambaPOS 5.5.0 version installed on your computer.
NOTE-2: You need to have SambaPOS Mobile Client License and SambaPOS V5 Pro license in the same cp.sambapos.com account.
NOTE-3: After you buy a new SambaPOS Mobile Client License or after renewing (extending) an existing Mobile Client License you need to apply below steps;
- Click on the Clear Keys button from Samba Market Part of SambaPOS V5 Pro.
- Activate license manually by running Licensing.exe from the folder that SambaPOS is installed in.
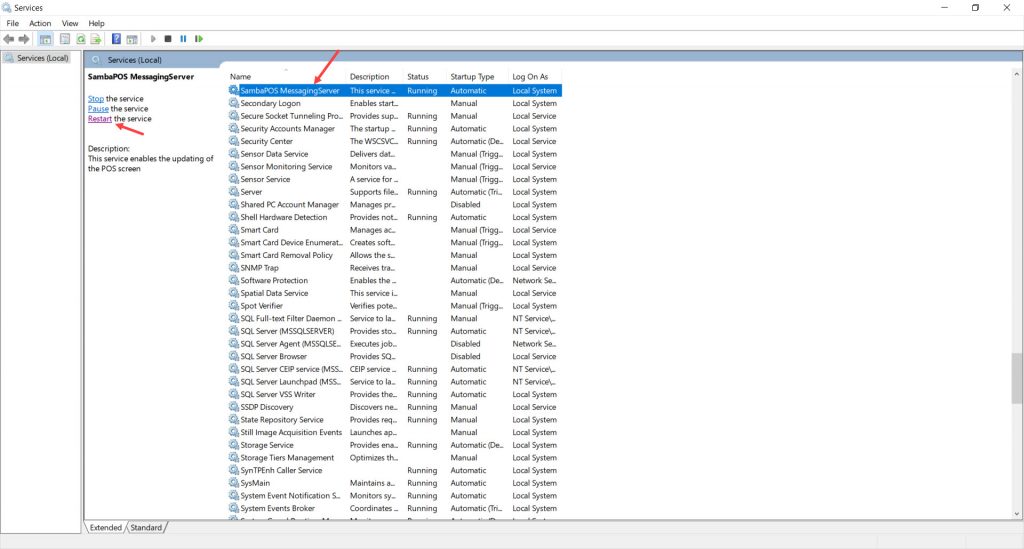
- Restart SambaPOS Messaging Server.
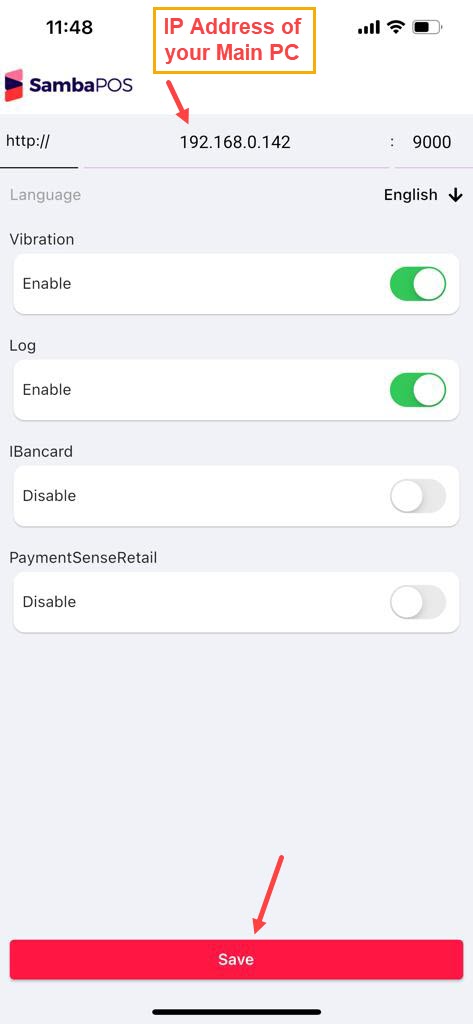
- Run MC3 App, type the Main PC’s IP Address into the Settings part and click on Save button.
- Click on the Update Database button.
- Login.
Before you upgrade SambaPOS V5 Pro version, we recommend you to Take a Backup of current database.
1.1. SambaPOS Setup
1.2. Mobile Client Android License
1.3. Activation
1.4. Reactivate Mobile Client License in a New Android Device
1.1. SambaPOS Setup
Download and install Latest Version of SQL Server SQL Server Download Link SQL Server Setup Link
Download and install SambaPOS Latest Version then activate with your license. SambaPOS Download
1.2. SambaPOS Mobile Client License
Purchase Mobile Client license for each Android or iOS device from cp.sambapos.com

1.3. Activation
Mobile Client Licenses must be in same account with SambaPOS v5 license.
2. Mobile Device Setup and Settings
2.1. Mobile Device Features
2.2. Mobile Device Operating System Settings
2.3. Mobile Device Connection Settings
2.4. Installing the Mobile Client App
2.1. Mobile Device Features
For Android Devices;
– All of the Google Services must be installed on the mobile device.
– Android version must be 6.0 or higher.
– Minimum 2 GB of RAM
For iOS Devices;
– iOS version must be 11.0 or higher.
2.2. Mobile Device Operating System Settings
– Update the version of Operating Systems.
– Check the system date of device or activate auto update.
– Close or delete all unnecessary applications.
2.3. Mobile Device Connection Settings
– Mobile device and SambaPOS Server must be in the same network and IP group.
– You need to have internet for setup. You don’t need internet after setup.
2.4. Installing the SambaPOS Mobile Client App
Google Play Store Download Link
You can download the app both from Google Play Store and App Store. You can find the app by searching “SambaPOS MC3”
3. Windows Server Settings
3. Windows Settings
3.1. Server Features
3.2 Database Features
3.3. Network Settings
3.4. Windows Firewall Settings
3.5. MSSQL TCP/IP Ports
3. Windows Settings
3.1. Server Features
Server Operating System: Windows 10 or higher Operating System and the latest version of Microsoft SQL Server
Server Hardware: Minimum Intel Celeron J1900 CPU, 4 GB of Ram, 64 GB SSD Harddisk or higher
3.2. Database Features
Latest Microsoft® SQL Server® Express With Management
SQL Server Download Link
SQL Server Setup Document Link
3.3. Network Settings
SambaPOS Server and Mobile Client must be in the same IP group.
Server: Go to Control Panel > Network and Sharing Center > Change Adapter Settings > Local Area Connection > Internet Protocol Version 4 (TCP/IPv4) > Properties > Write a static IP.
3.4. Windows Firewall Settings
You need to configure your firewall services as explained in the SQL Server Setup document.
Note: If you don’t have MSSQL database, please visit the link to configure settings
https://kb.sambapos.com/2-1-3-sql-express-server-setup/?lang=en
Mobile Client doesn’t work without MSSQL database.
Control Panel > System and Security > Windows Firewall > Turn Windows Firewall on or off > Turn off Windows Firewall for Private Network Settings and Public Network Settings
Note: To not to have notification for reactivate of Windows Firewall, please follow the steps
Control Panel > System and Security > Action Center > Change Action Center Settings > Network Firewall (Unselected)
3.5. MSSQL TCP/IP Ports
Go to SQL Server Configuration Manager and “Enable” TCP/IP Sharing to connect MSSQL Database from clients.
– Right Click My Computer > Manage > Services and Applications > SQL Server Configuration Manager > SQL Server Network Configuration > Protocol For MSSQLSERVER > TCPIP > Enabled
4. SambaPOS Settings
4.1. SambaPOS License Activation
4.2. SambaPOS Messaging Server Settings
4.3. User Settings
4.4. Entity Screen Settings
4.5. Ticket Tag Settings
4.6. Order Tag Settings
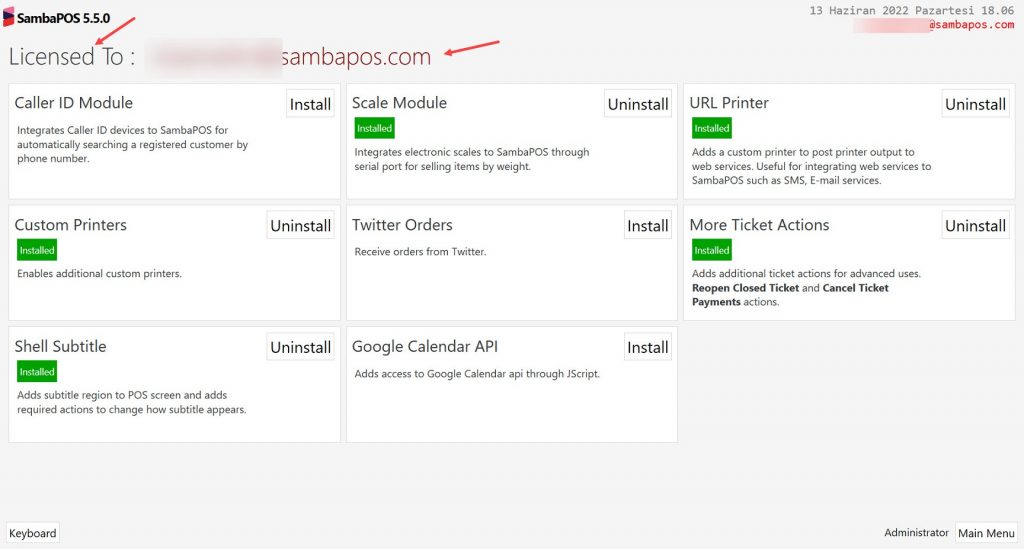
4.1. SambaPOS License Activation
Check your SambaPOS V5 Pro license. If you see “Unregistered Trial” you can not use SambaPOS Mobile Client App. You need to have SambaPOS V5 Pro license.
4.2. SambaPOS Messaging Server Settings
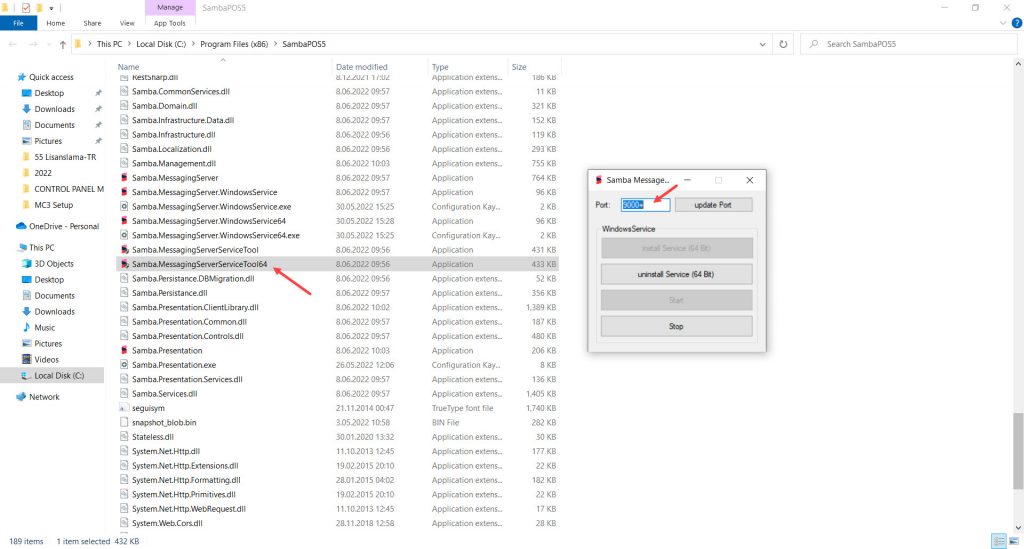
4.2.1. Messaging Server Service Tool Exe Settings
Run SambaPOS MessagingServer in SambaPOS Server PC.
C:\Program Files (x86)\SambaPOS5\Samba.MessagingServerServiceTool.exe
Port: 9000 and install
Attention!!! Please don’t forget to restart SambaPOS MessagingServer from Services, if you add a user to SambaPOS.
4.2.2. SambaPOS Management Message Server Settings
Main Menu > Manage > Settings > Local Settings > Message Server
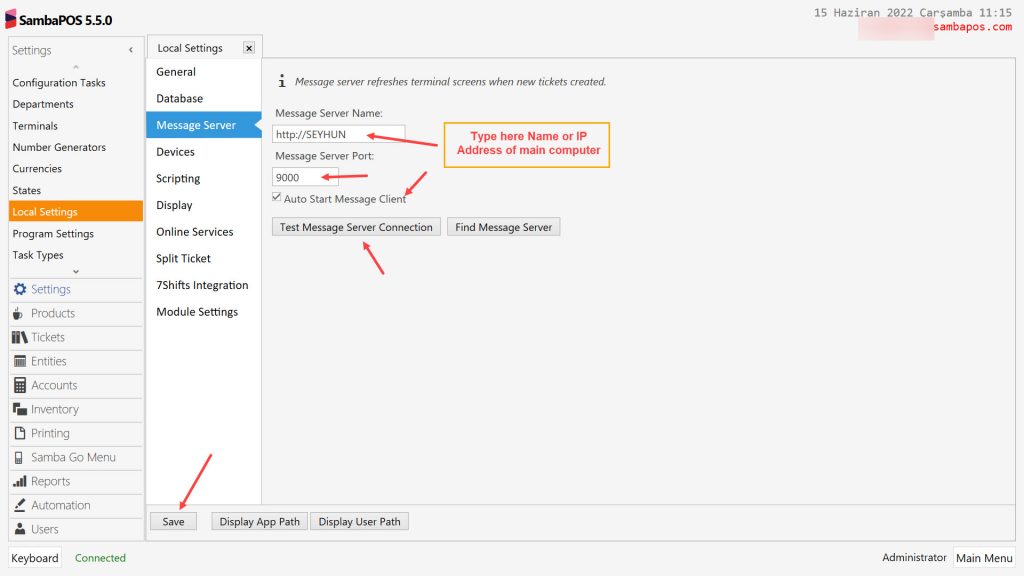
Message Server Name: http://your server pc name or http://your server pc ip (for example: 192.168.2.19)
Message Server Port: 9000
Auto Start Message Client: [X] (Selected)
After completing necessary editings, click on Save button.
4.3. User Settings
4.3.1. Adding Role for Waiters
Main Menu > Manage > Users> Role List >Add Role
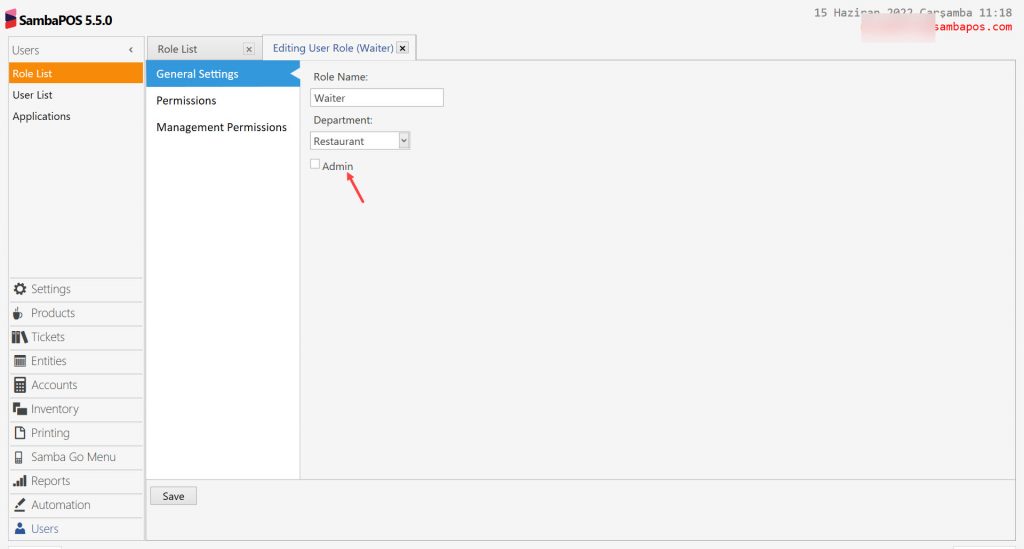
Role Name: Waiter
Departmant: Restaurant
Admin: Unselected
After completing necessary editings, click on Save button.
4.3.2. Adding User for pda
Main Menu > Manage > Users > Users List > Add User
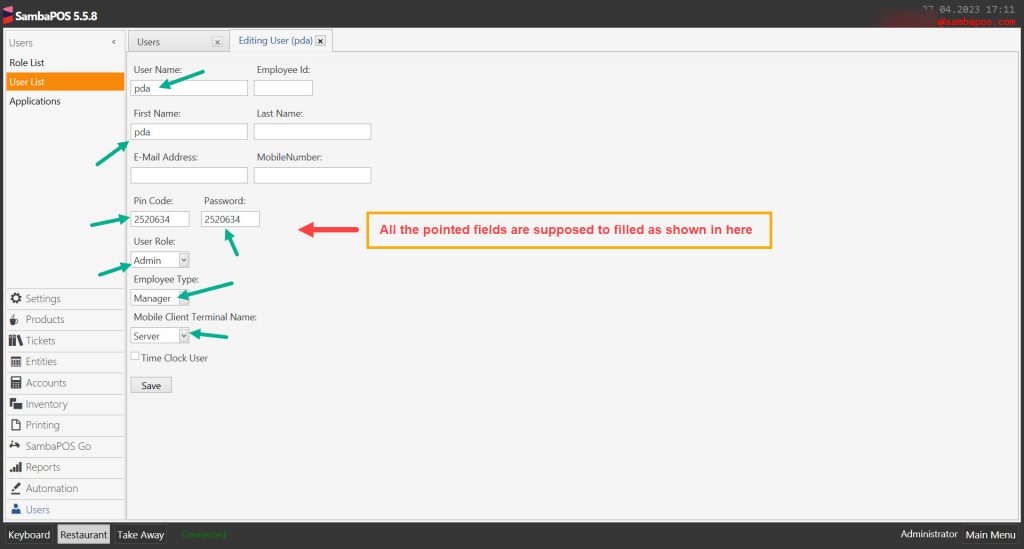
User Name: pda
First Name: pda
Pin Code: 2520634 (Exactly this pin code has to be used)
Password: 2520634 (Exactly this password has to be used)
User Role: Admin
Employee Type: Manager
Mobile Client Terminal Name: Select the Terminal that Mobile Client will be used on.
After completing necessary editings, click on Save button.
Attention! : Pda user is created for SambaPOS Mobile Client connection. It can not be used by staff. In order to perform user login from mobile application, in SambaPOS V5, you have to create new users in waiter role.
4.3.3. Adding Application for pda
Main Menu > Manage > Users > Applications > Add Application
Applicaiton Name: pda
Identifier: pda
Authentication Type: User Name & Password
Authorization Type: All Functions in Local Network
Lifetime: 365
Allowed Origin: *
Active: Selected
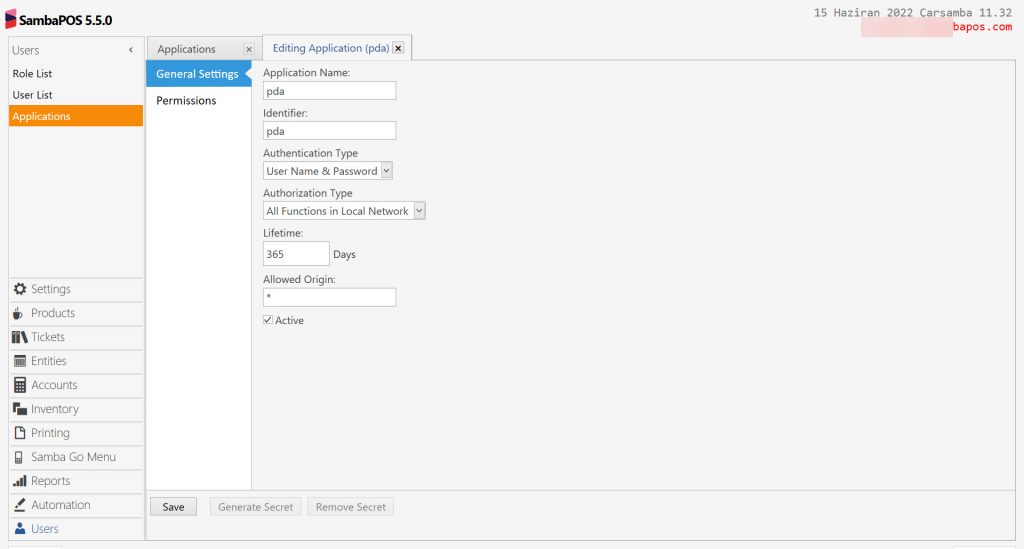
After completing necessary editings, click on Save button.
4.4. Entity Screen Settings
Main Menu > Manage > Entities > Entity Screens > All Tables (Tables) > Mappings
Add a new line for Waiter role. If you need to use more than one entity screen, you must repeat the same process for them too.
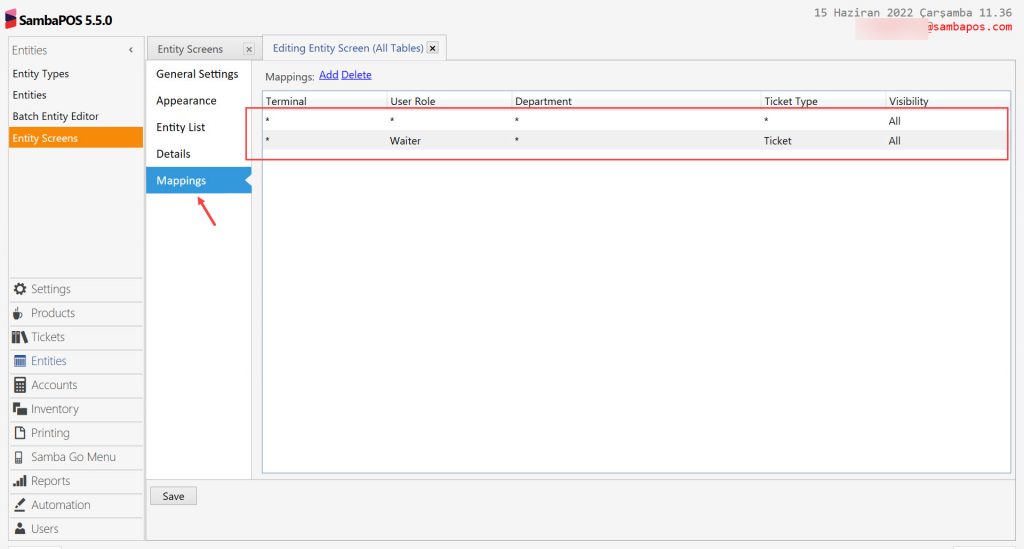
After completing necessary editings, click on Save button.
4.5. Ticket Tag Settings
Note: If you don’t need this feature, you can skip this step.
Main Menu > Manage > Tickets > Ticket Tags > Add Ticket Tag > Mappings
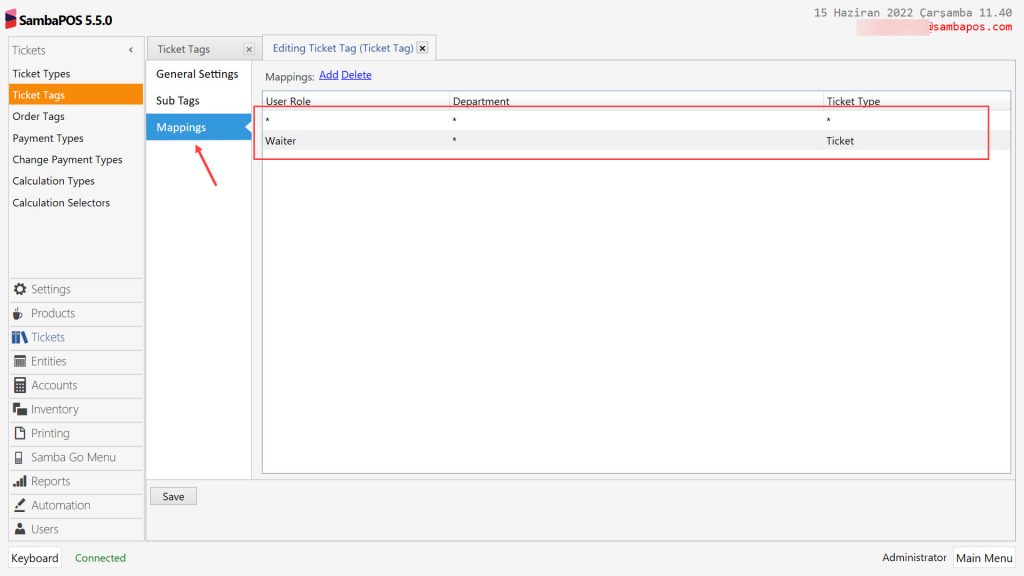
Add a line for Waiter role.
After completing necessary editings, click on Save button.
4.6. Order Tag Settings
Main Menu > Manage > Tickets > Order Tags > Add Order Tag Group
Create a tag by using lower case, name it as ”freetag” and activate Free Tagging box by selecting it.

After completing necessary editings, click on Save button.
5. SambaPOS Mobile Client Setup and Settings
5.1. Message Server Check
5.2. Mobile Client Settings
5.2.1. IP Addres Configuration
5.2.2. Database Update Process
5.3. SambaPOS Mobile Client Usage
5.3.1. SambaPOS Mobile Client Login
5.3.2. SambaPOS Mobile Client Placing Order
5.3.3. SambaPOS Mobile Client Print Bill
5.3.4. SambaPOS Mobile Client Get Payment
5.1. Message Server Check
Go to Services and restart SambaPOS Messaging Server
5.2. Mobile Client Settings
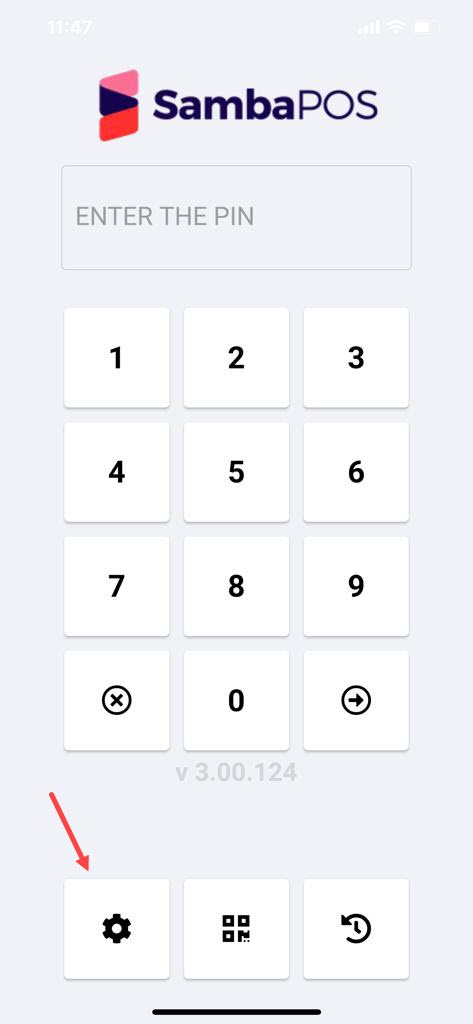
5.2.1. IP Address Configuration
SambaPOS Mobile Client Main Screen > Click on Settings Button
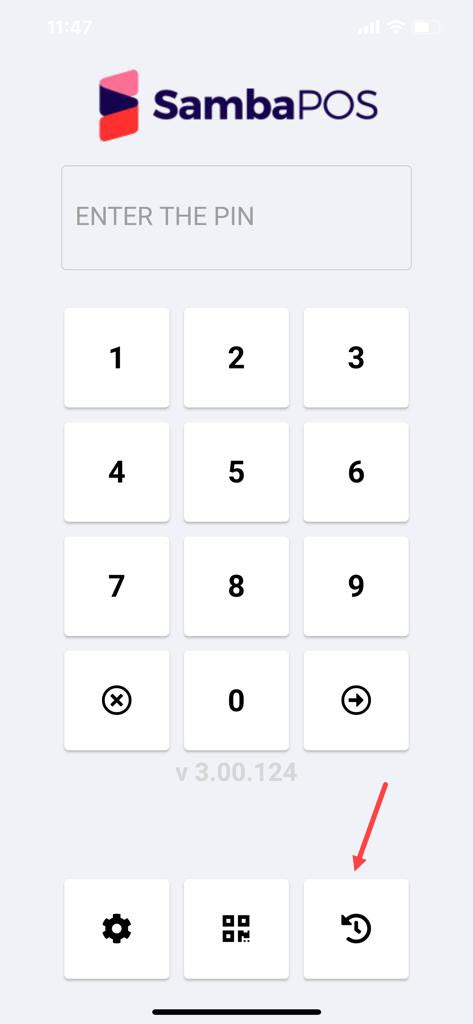
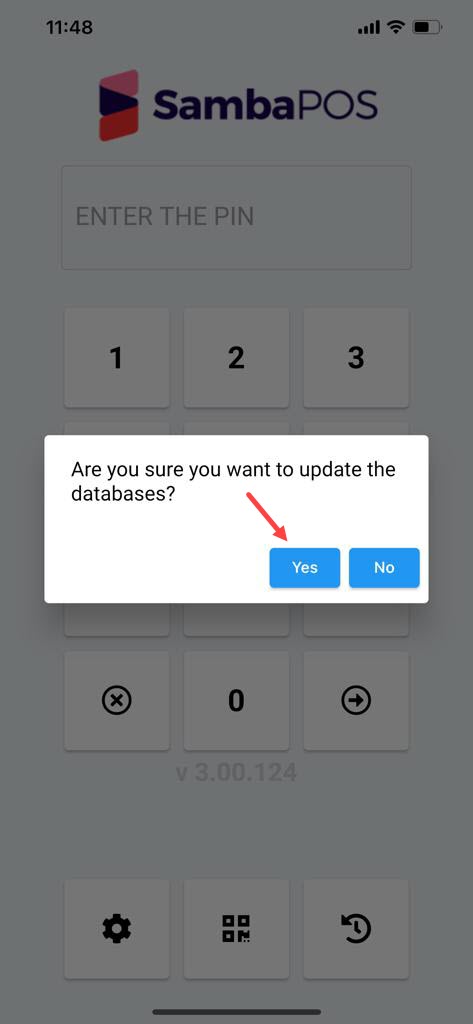
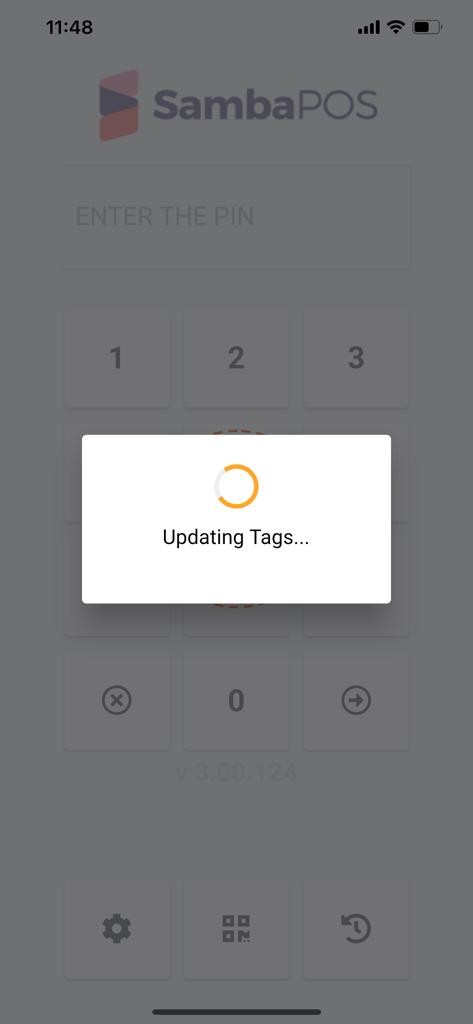
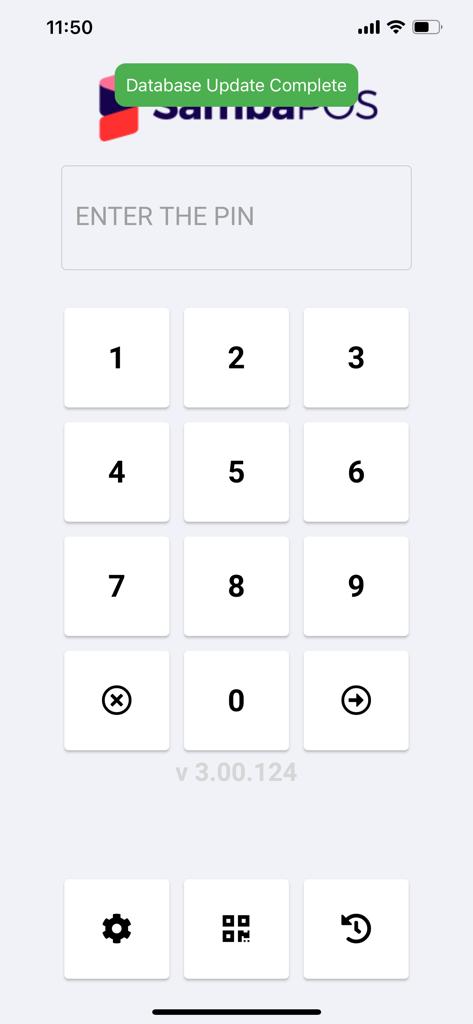
5.2.2. Database Update Process
SambaPOS Mobile Client Main Screen > Click on Database Update Button
5.3. SambaPOS Mobile Client Usage
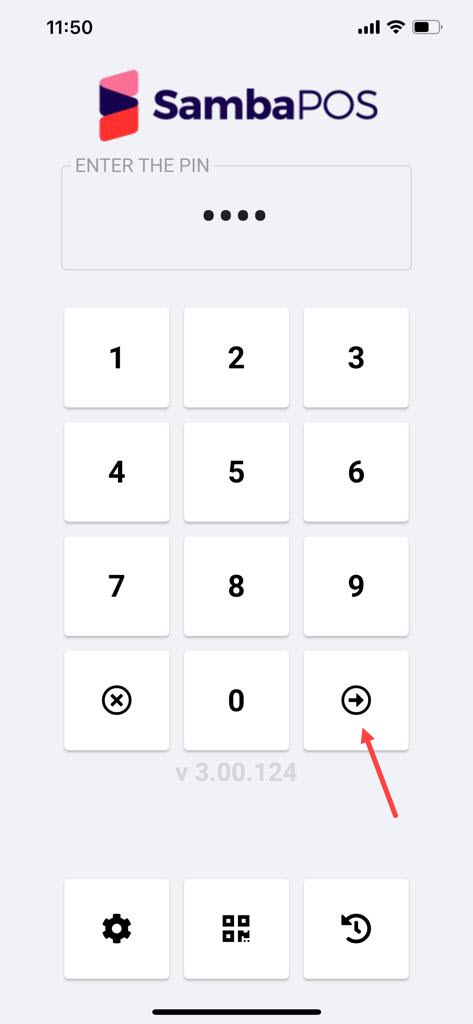
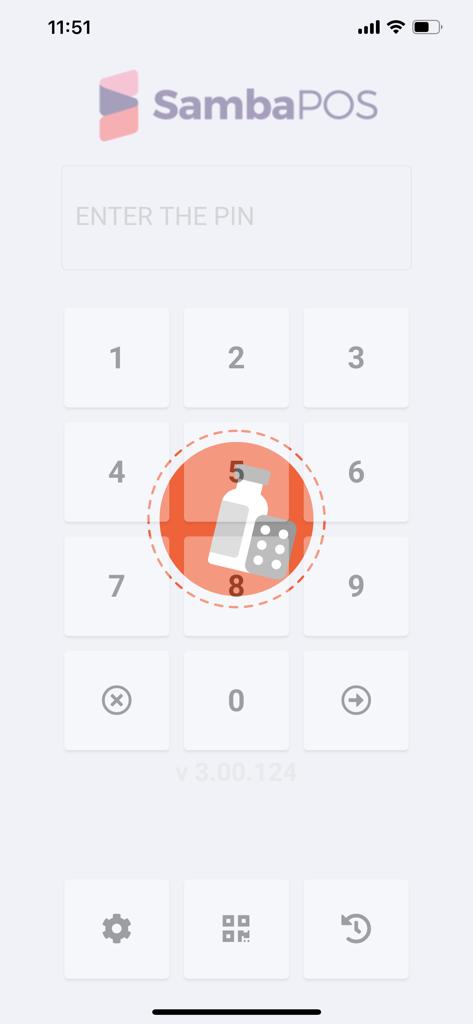
5.3.1. SambaPOS Mobile Client Login
Enter your SambaPOS user PIN and click on Login Button
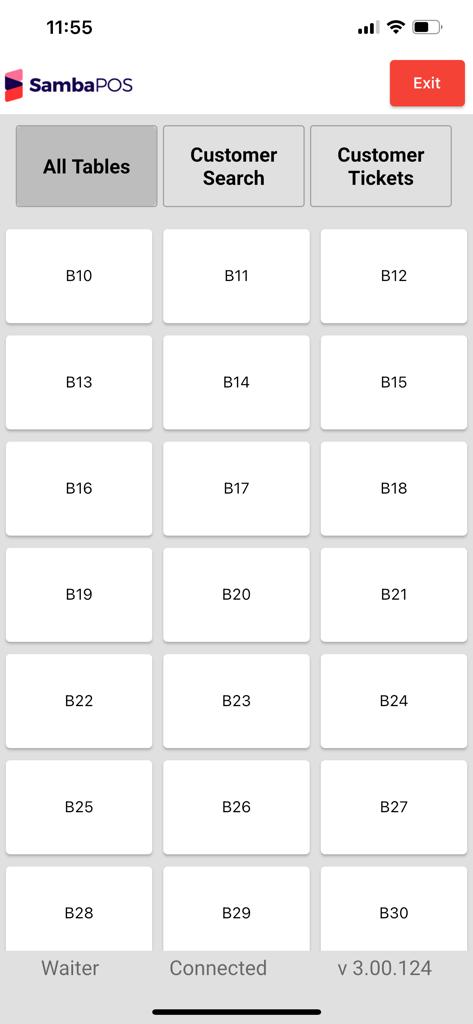
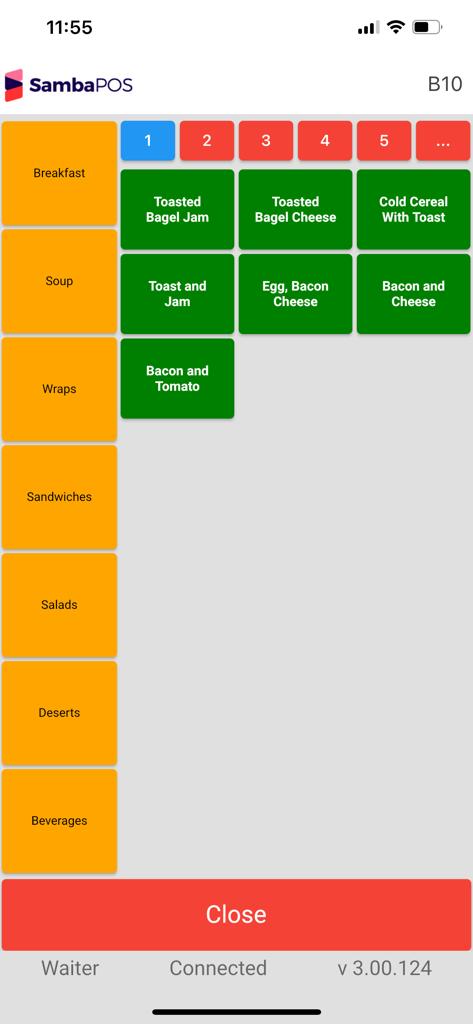
5.3.2. Placing Order on SambaPOS Mobile Client
Select desired table and start placing orders.
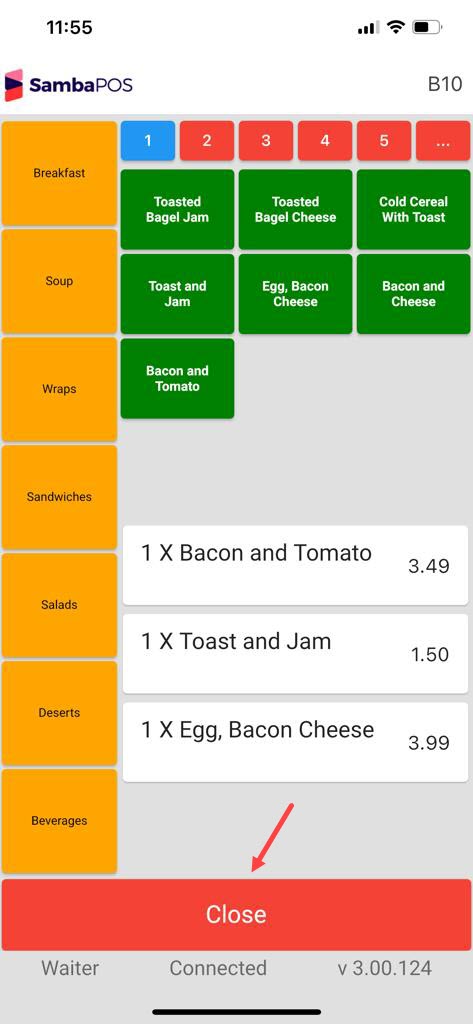

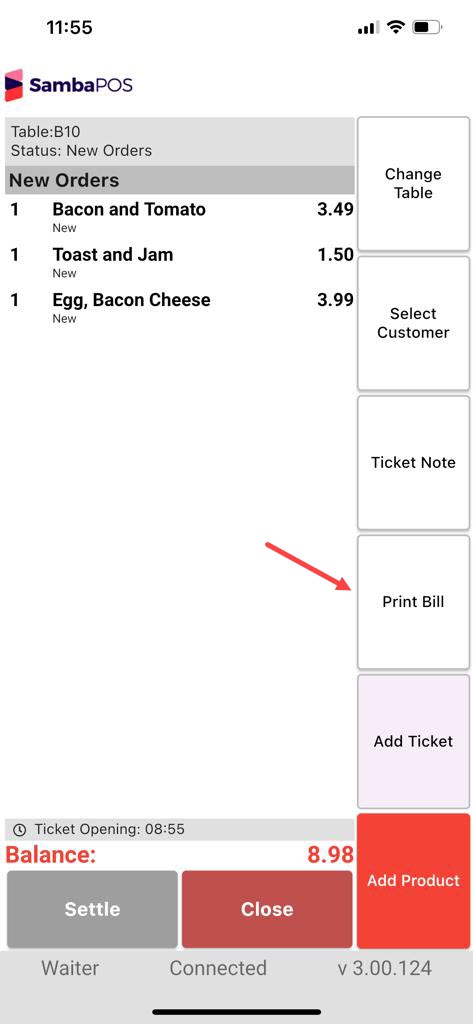
5.3.3. Printing Bill on SambaPOS Mobile Client
Select desired table, click on Print Bill button.

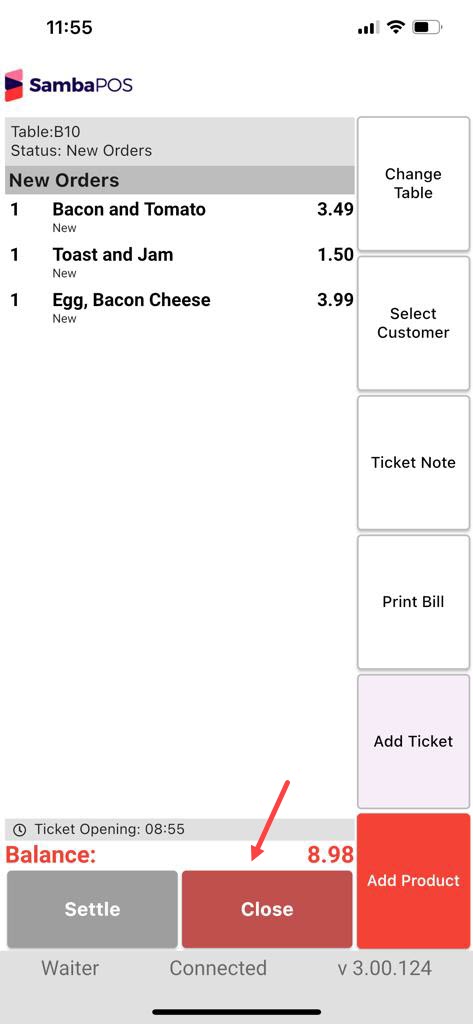
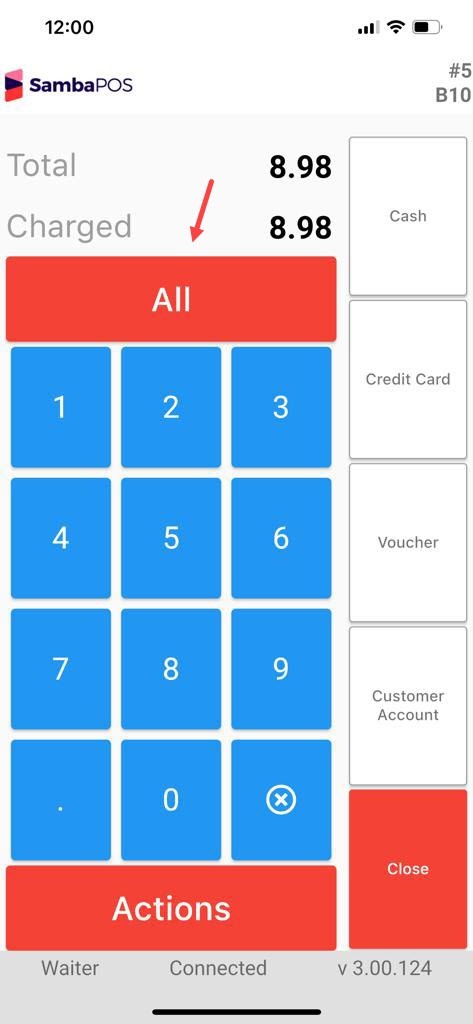
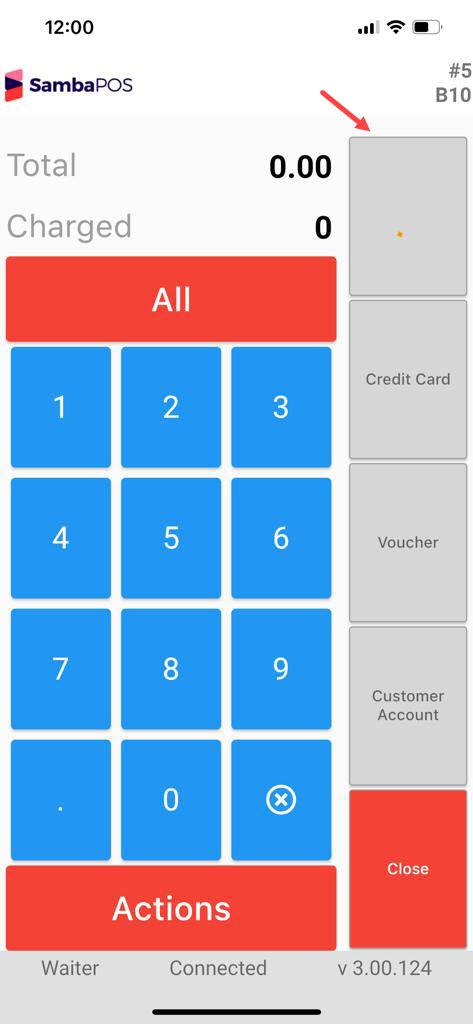
5.3.4. Getting Payment on SambaPOS Mobile Client
Select desired table, click on Settle button.


6. Things to Be Careful About
6.1. Connection and Network Settings Part
6.1.1. Is your license active for SambaPOS Mobile Client?
6.1.2. Did you handle SambaPOS License activation?
6.1.3. Is Server IP and Server IP Group matching?
6.1.4. Is Mobile Client IP Group and Wifi connection matching?
6.1.4. Does the Messasge Server work?
6.1.4. Is the Message Server Port 9000+ ?
6.2. Mobile Client Part
6.2.1. After making any changes on SambaPOS, did you Update on Mobile Client App?
6.3. SambaPOS Settings
6.3.1. Is pda user created and the password is 2520634 ?
6.3.2. Did you add Waiter Role on the Entity Screen Mappings Part?