4.68. How to Setup SambaPOS QR Menu
In this document, it will be explained how to configure SambaPOS QR Menu Setup.
1. Before Setup
NOTE: In order to use SambaPOS QR Menu, you need to have minimum SambaPOS V5 Pro 5.3.6 version.
Before you upgrade SambaPOS V5 Pro version, we recommend you to Take a Backup of current database.
1.1. SambaPOS Setup
1.2. Samba QR Menu License
1.1. SambaPOS Setup
Download and install Latest Version of SQL Server Download Link SQL Server Setup Link
Download and install SambaPOS Latest Version then activate with your license. Download
1.2. SambaPOS QR Menu License
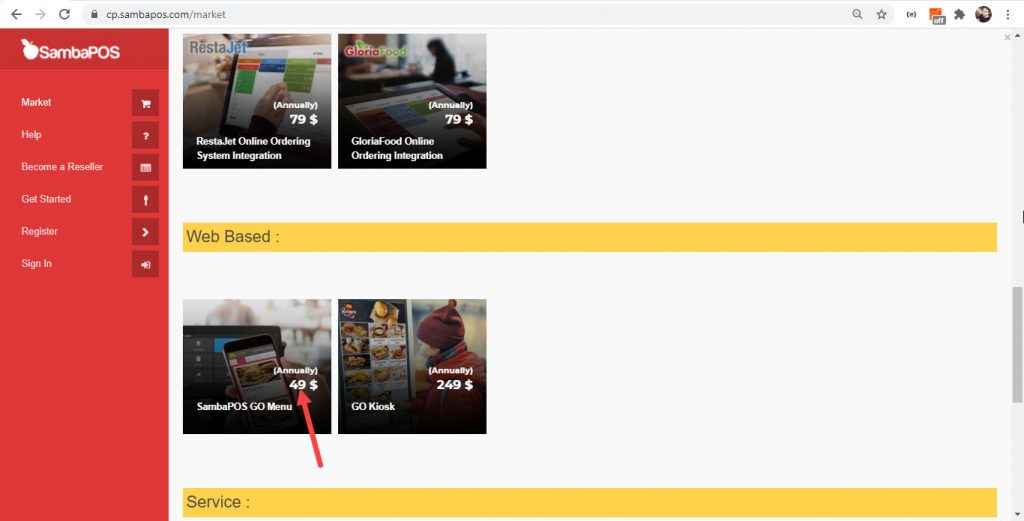
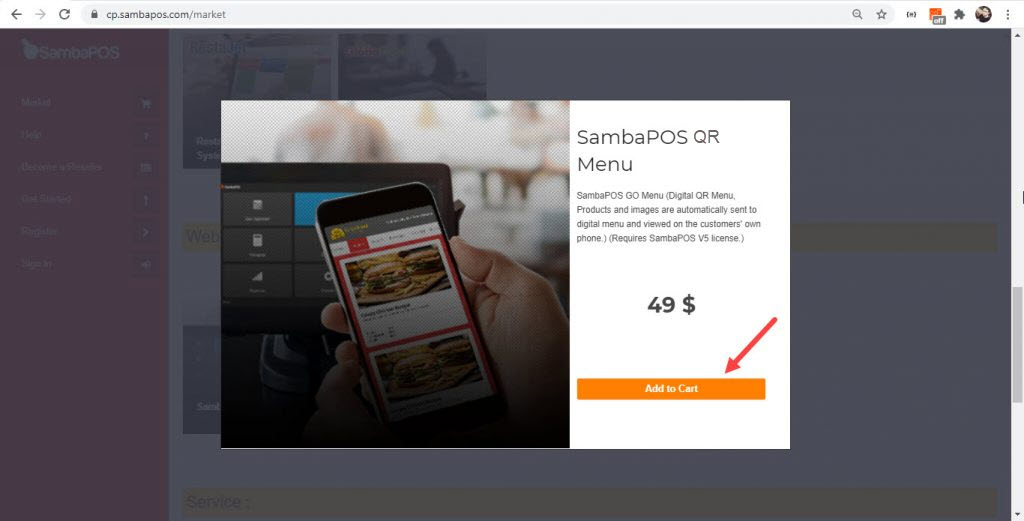
Purchase SambaPOS QR Menu license from cp.sambapos.com
Important Note:
SambaPOS QR Menu License must be in same account with SambaPOS V5 Pro license.
2. Windows Server Settings
2.1. Server Features
Server Operating System: Windows 10 or above operating system and the latest version of Microsoft SQL Server
Server Hardware: Minimum Intel Celeron J1900 CPU, 4 GB of Ram, 64 GB SSD Harddisk or higher
2.2. Database Features
Latest version of Microsoft SQL Express Server
Download Link
Setup Document Link
2.3. Windows Firewall Settings
Please deactivate all third party internet security and firewall services.
Note: If you don’t have MSSQL database, please visit the link to configure settings
https://kb.sambapos.com/2-1-3-sql-express-server-setup/?lang=en
– Please deactivate all third party internet security services and Windows Firewall.
Control Panel > System and Security > Windows Firewall > Turn Windows Firewall on or off > Turn off Windows Firewall for Private Network Settings and Public Network Settings
Note: To not to have notification for reactivate of Windows Firewall, please follow the below steps
For Windows 7: Control Panel > Action Center > Change Action Center Settings > Network Firewall (Unselected)
For Windows 10: Control Panel > System and Security > Action Center > Change Action Center Settings > Network Firewall (Unselected)
3.5. MSSQL TCP/IP Ports
Go to SQL Server Configuration Manager and “Enable” TCP/IP Sharing to connect MSSQL Database from clients.
– Right Click My Computer > Manage > Services and Applications > SQL Server Configuration Manager > SQL Server Network Configuration > Protocol For MSSQLSERVER > TCPIP > Enabled
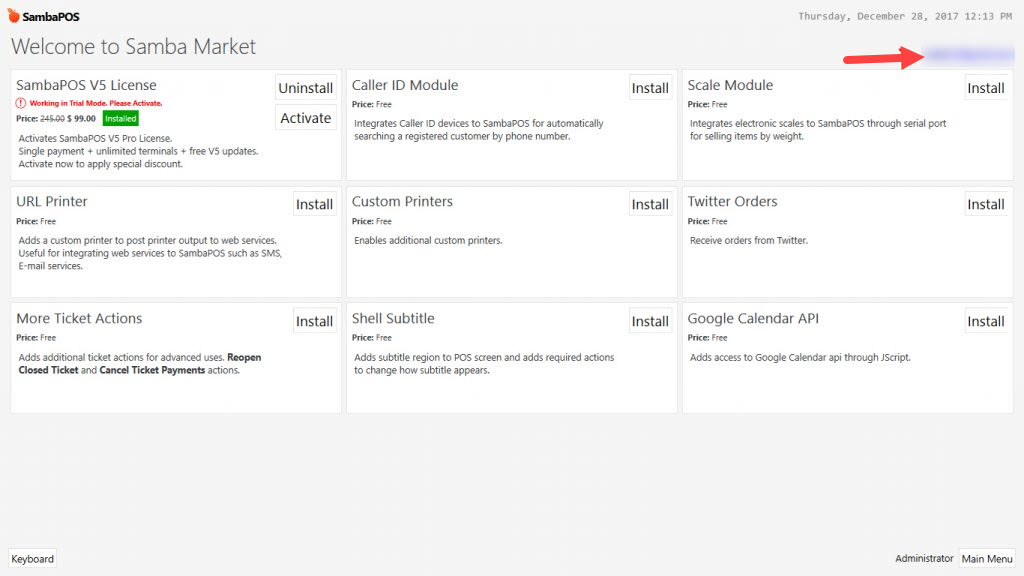
3. SambaPOS License Activation
Check your SambaPOS V5 license. If you see “Unregistered Trial” you can not use SambaPOS QR Menu. You need to have SambaPOS V5 license.
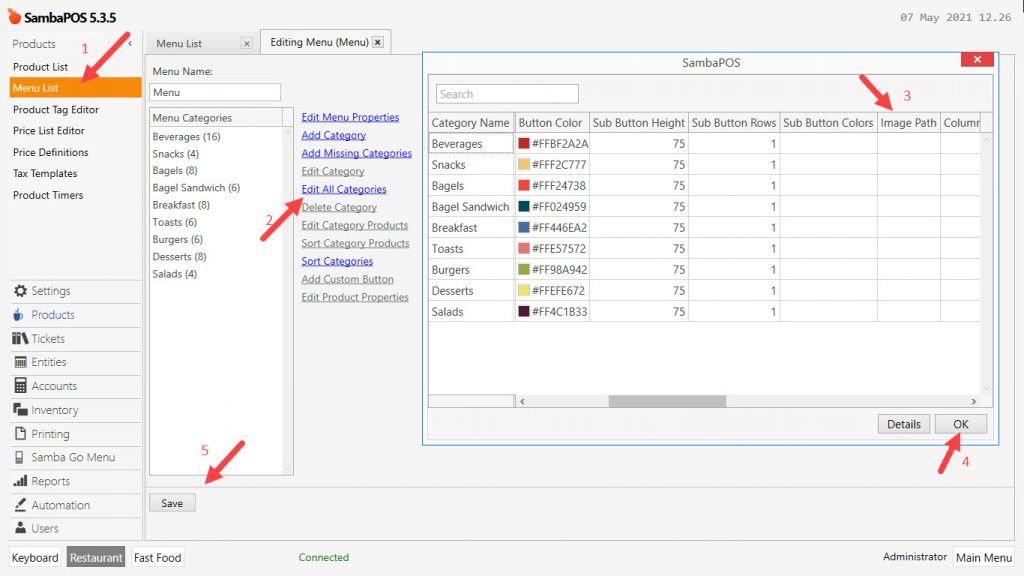
4. Adding Image to Categories
Main Menu > Manage > Products > Menu List > Menu > Edit All Categories > Image Path Column > Select desired image for related category.
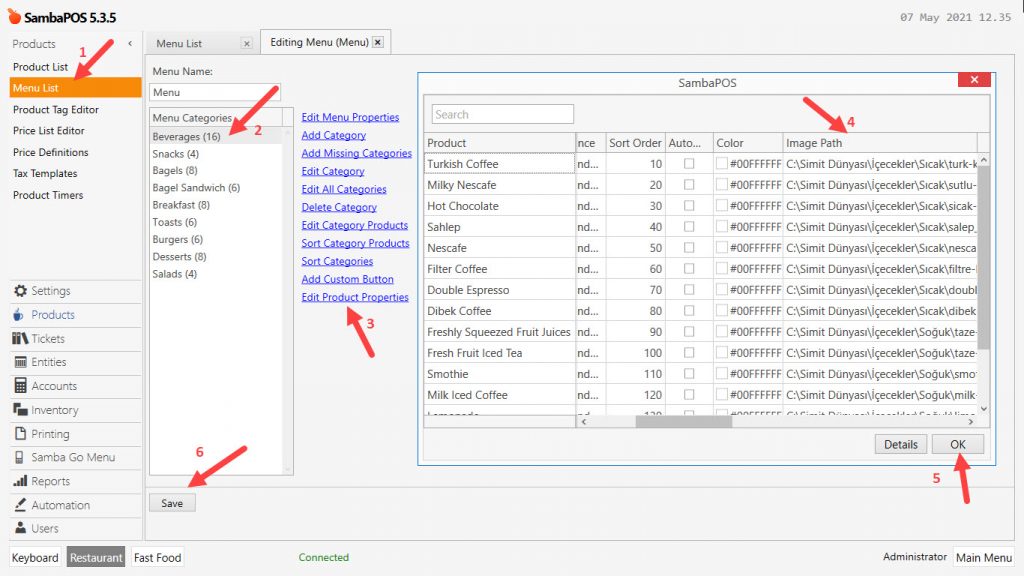
5. Adding Image to Products
Main Menu > Manage > Products > Menu List > Menu > Select Desired Category > Edit Product Properties > Image Path Column > Select desired image for related product.
6. SambaPOS QR Menu Settings
Main Menu > Manage > SambaPOS GO Menu
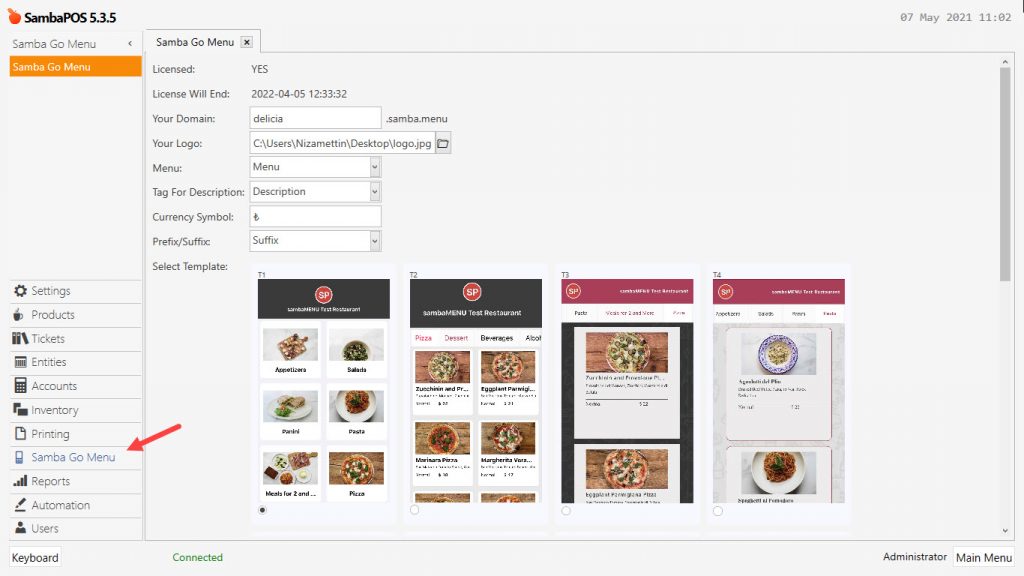
License: Indicates that if you have SambaPOS QR Menu License
License Will End: Shows ending time for your license
Your Domain: You can type here the domain name you desire, your restaurant name etc.
Your Logo: You can determine logo for your restaurant
Menu: You can select which menu to be displayed
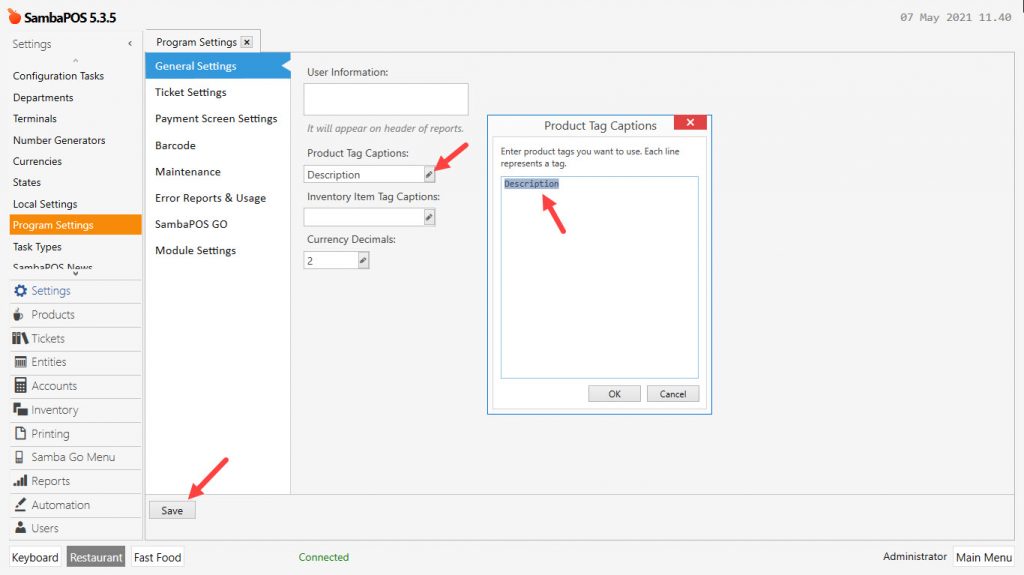
Tag For Description: In here you need to create a Product Tag Caption for the product descriptions from;
Main Menu > Manage > Settings > Program Settings > Product Tag Captions
Curreny Symbol: Select symbol for your currency
Prefix/Suffix: Determine where to put your currency symbol
Select Template: You can select a theme to use
IMPORTANT NOTE:
In order to save the changes, you need to restart SambaPOS before you click on the Send Menu to GO Menu button.
Once you complete filling necessary fields, click on Send Menu to Samba GO Menu button;
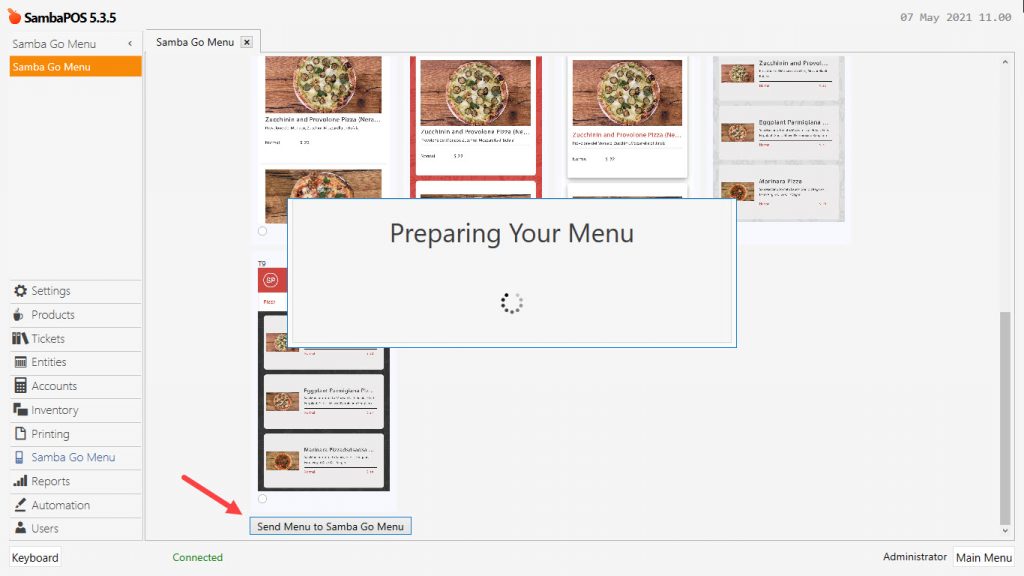
After that you will see a screen as shown in the image below;
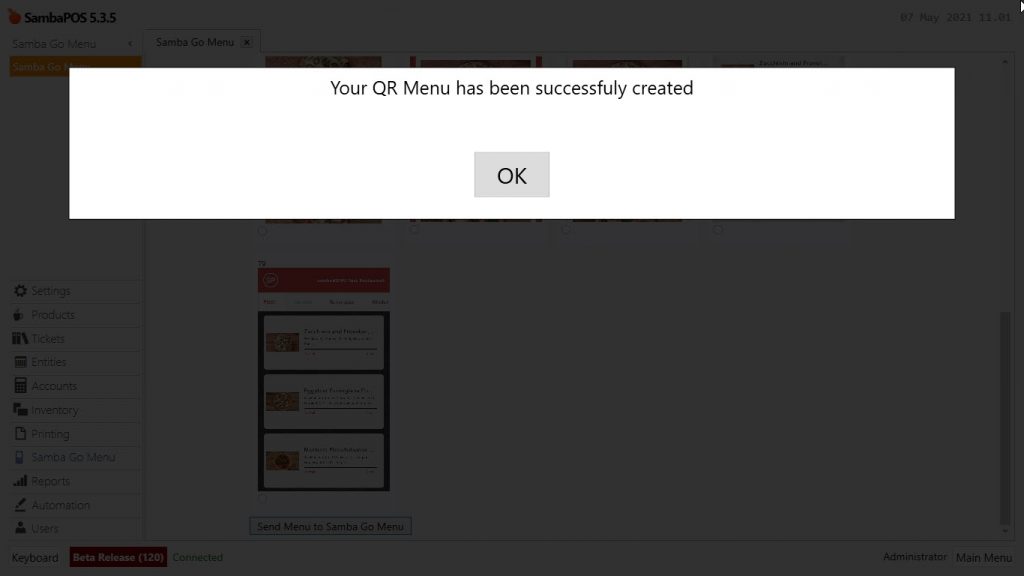
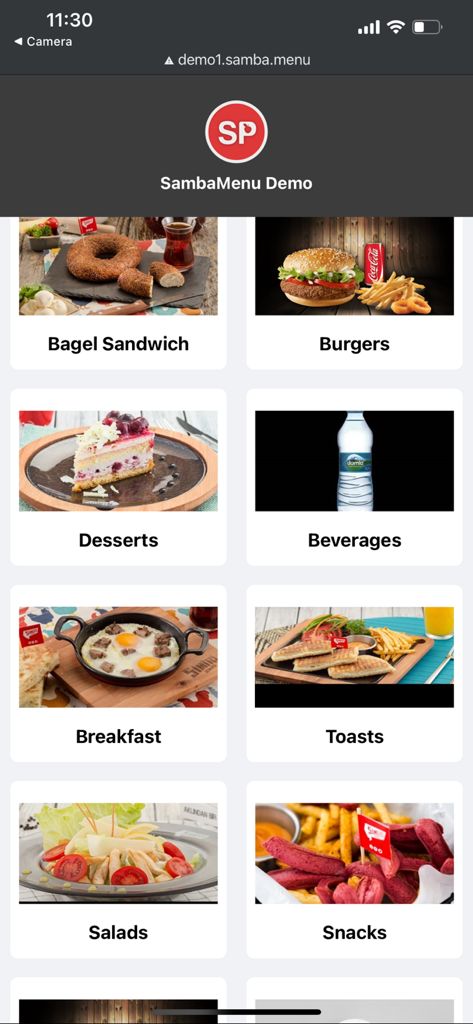
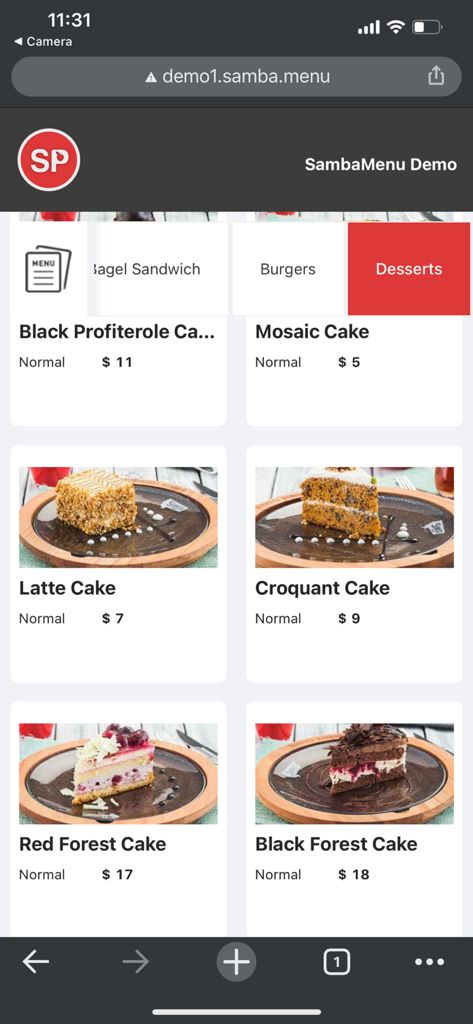
You will be redirected to browser to display Samba GO Menu;
You need to convert your URL of your restaurant to QR Code format, you can use below link for this purpose;
https://www.the-qrcode-generator.com/
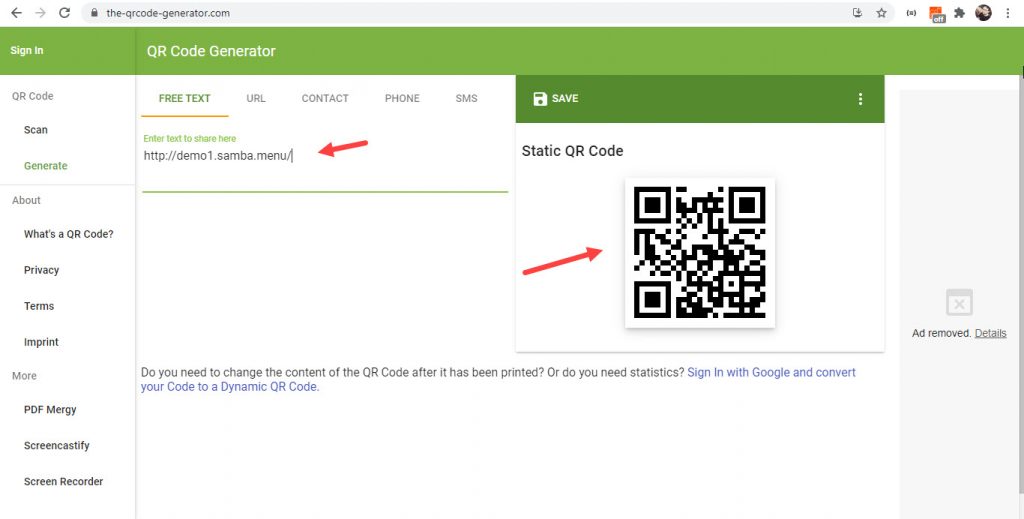
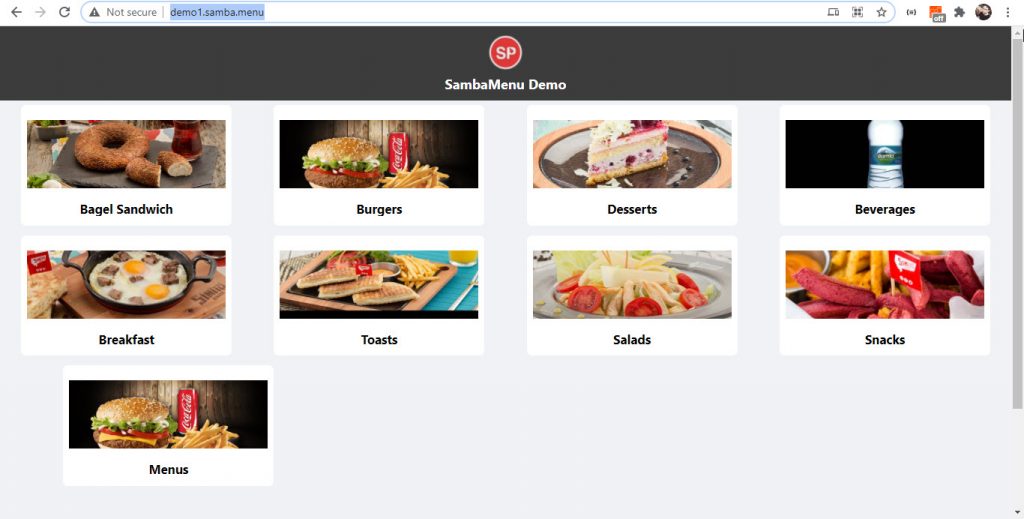
Once you scan the created QR Code on your phone, it will be opened via your phone’s browser.
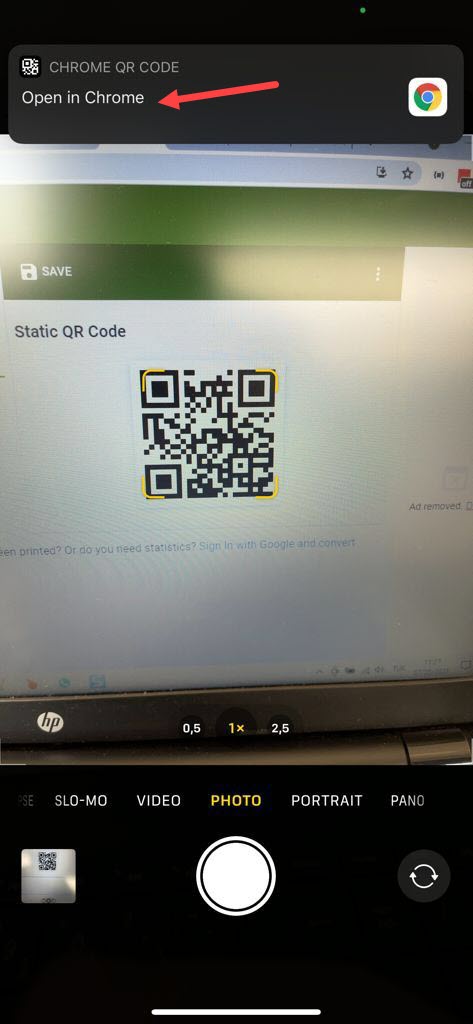
From now on your customers will be seeing your menu on their phones as below;