8.5. Android Caller ID Mobile Application
In this document, it will be explained setup and usage of Android Caller ID Application.
By using Android Caller Id Application, you will be able to redirect the incoming calls of your mobile phone to SambaPOS just like using a normal caller Id device. You can track the customers who called you and get their orders through this app.
In order to use this feature, you need to have SambaPOS 5.2.22 version installed.
You can purchase the license through Community Portal (https://cp.sambapos.com )
IMPORTANT NOTE: All of the Google Services must be installed on the mobile device.
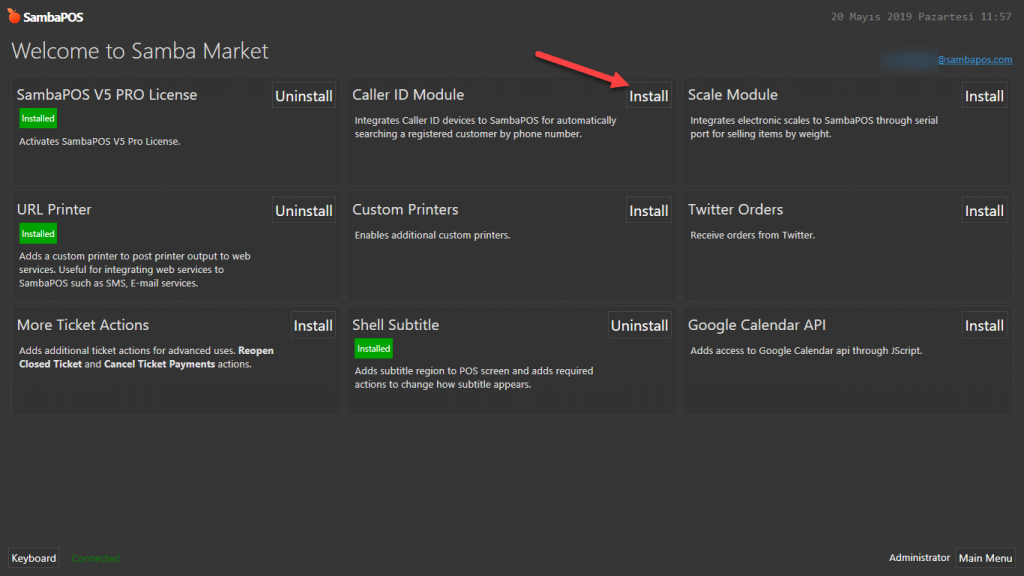
1. Installing Caller ID Module on SambaPOS
Samba Market > Caller ID Module > here, click on Install and Restart the SambaPOS.
2. Installing Advanced Delivery Screen Setup
If Advanced Delivery Screen Setup is not installed, you should install it by following the steps of this this document.
3. Adding Cellular Caller Id As Device
Main Menu > Manage > Settings > Local Settings > Devices > Click on Add, select CellularCallerId, and configure settings as below image.
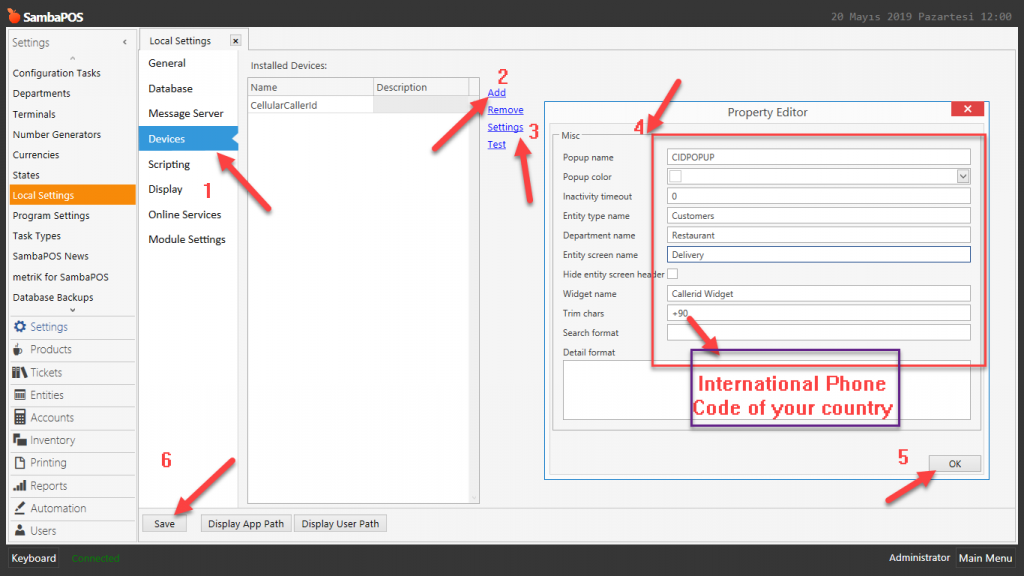
Device Name: CellularCallerId
Click on Settings and configure as below;
Popup Name: CIDPOPUP
Entity Type Name: Customers
Department Name: Restaurant
Entity Screen Name: Delivery
Widget Name: Callerid Widget
Trim Chars: Internation Phone Code of your country.
After completing necessary editings, click on Save button.
4. Configuring Caller ID Pop Up Settings
4.1. Adding Action
Main Menu > Manage > Automation > Actions > here, click Add Action.
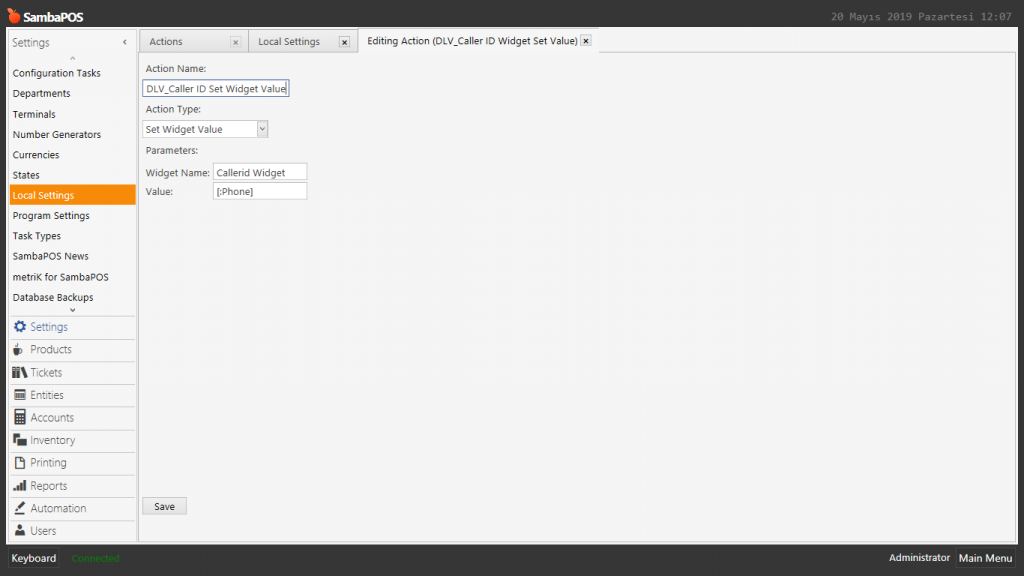
Action Name: DLV_Caller ID Set Widget Value
Action Type: Set Widget Value
Widget Name: Callerid Widget
Value: [:Phone]
After completing necessary editings, click on Save button.
4.2. Adding Rule
Main Menu > Manage > Automation > Rules > here, click Add Rule.
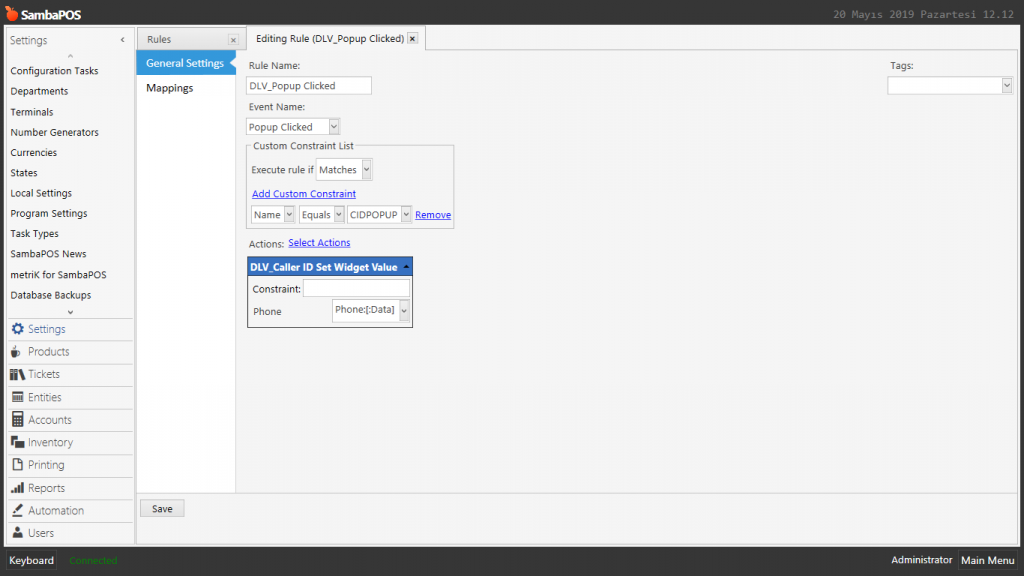
Rule Name: DLV_Popup Clicked
Event Name: Popup Clicked
Execute Rule if: Matches
Add Csutom Constraint:
Name|Equals|CIDPOPUP
Select Action:
Action: DLV_CallerID Set Widget Value
Phone: Phone:[:Data]
After completing necessary editings, click on Save button.
5. Delivery Service Customer Screen Settings
Main Menu > POS > Delivery Service Screen > here, right click on mouse, open the Design Mode, select Customers Window, right click and select Properties, type Callerid Widget into Name field and then click Ok.
Switch off the Design Mode by right clicking on mouse so that the changes will be saved.

6. Configuring Settings of Android Caller ID Application
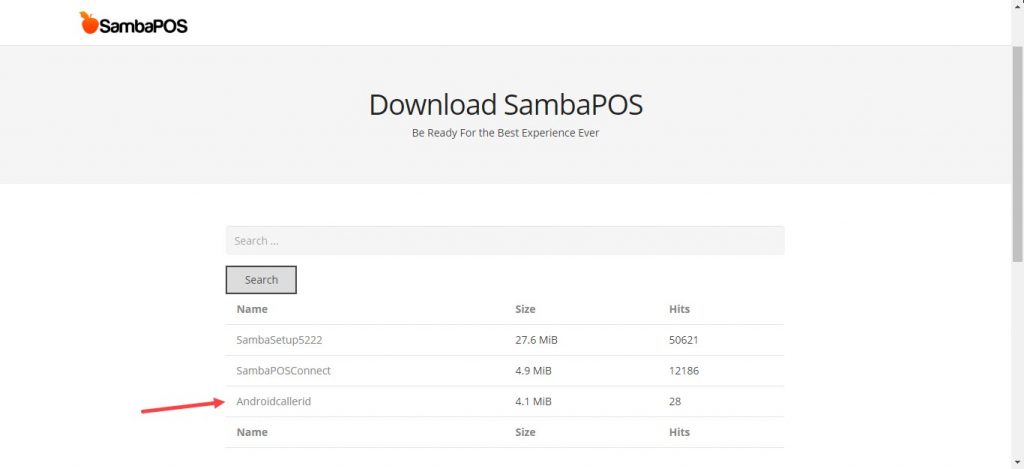
Download Android Caller ID Application from here, install it to your phone and configure the settings according to below images.
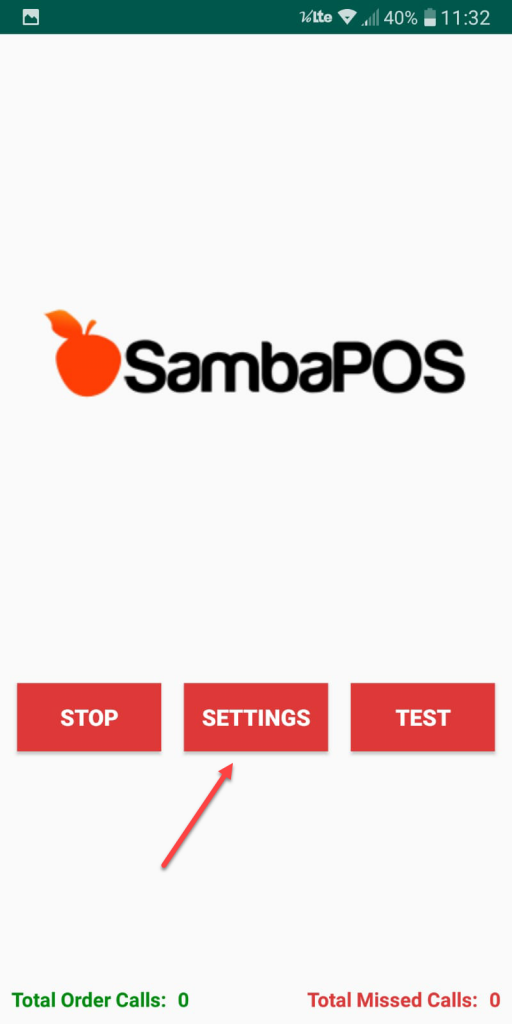
After installing the application, you will see a screen like below;
Configure Settings part as below image;
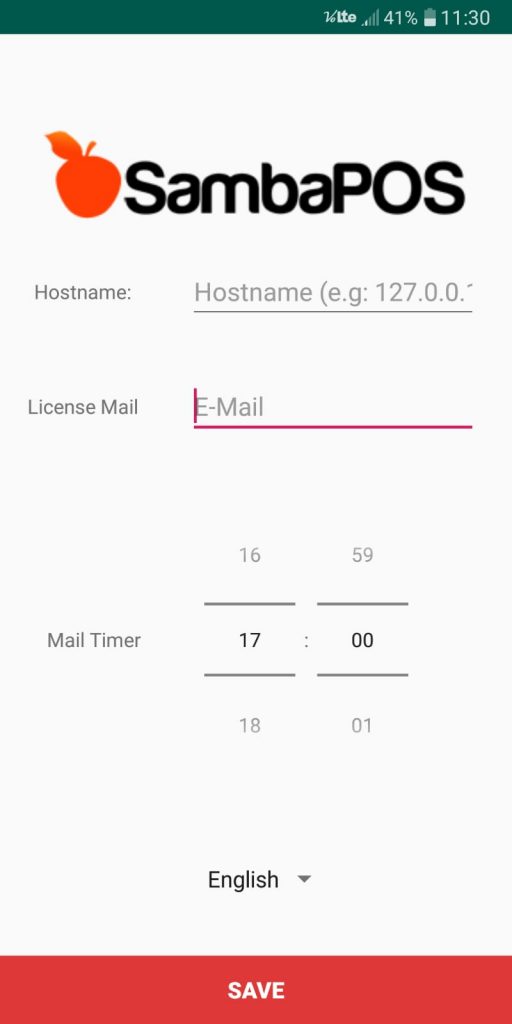
Host Name: IP Address of Server Computer
License EMail Address: The email address that your license is registered or cp.sambapos.com User Name
Mail Timer: The hours that call logs will be sent as email.
After completing necessary editings, click on Save button.