4.39. Enabling UK Post Code Lookup
In this document, it will be explained how to enable Post Code Lookup for UK.
Document Index
1. Getting API Key from Google
2. Applying Post Code Configuration Task from SambaPOS
3. Inserting Post Code Information of Customer on SambaPOS
4. Editing Ticket Template
5. Editing Delivery Screen Waiting Orders Ticket Lister
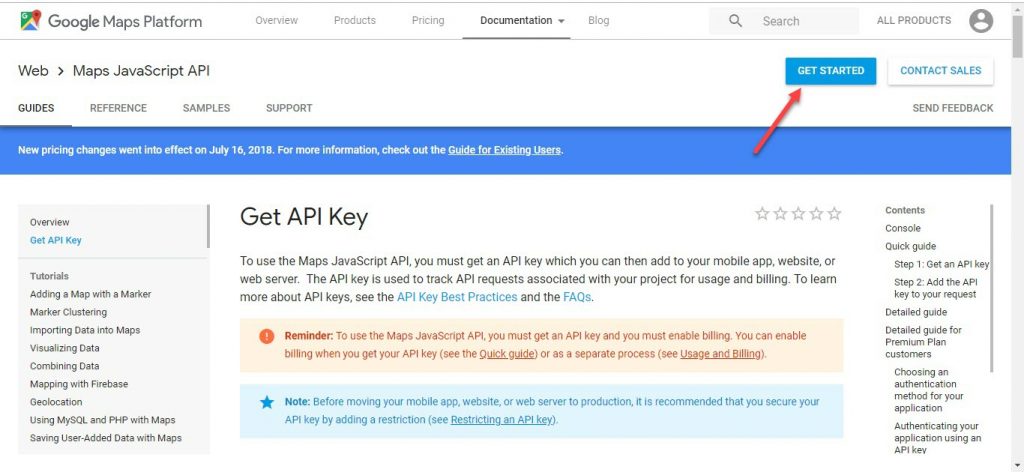
1. Getting API Key from Google
Go to this website and then click on Get Started button.
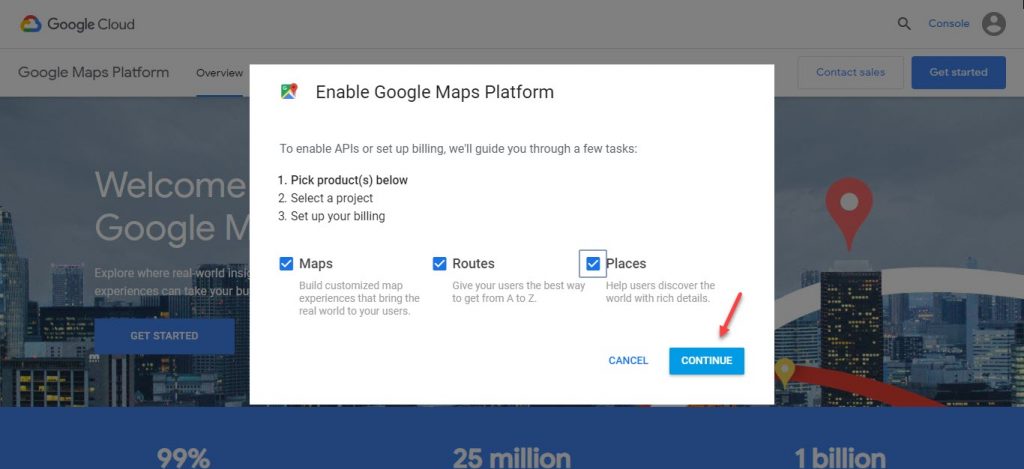
In here, select the services that you would like to use and click on Continue button;
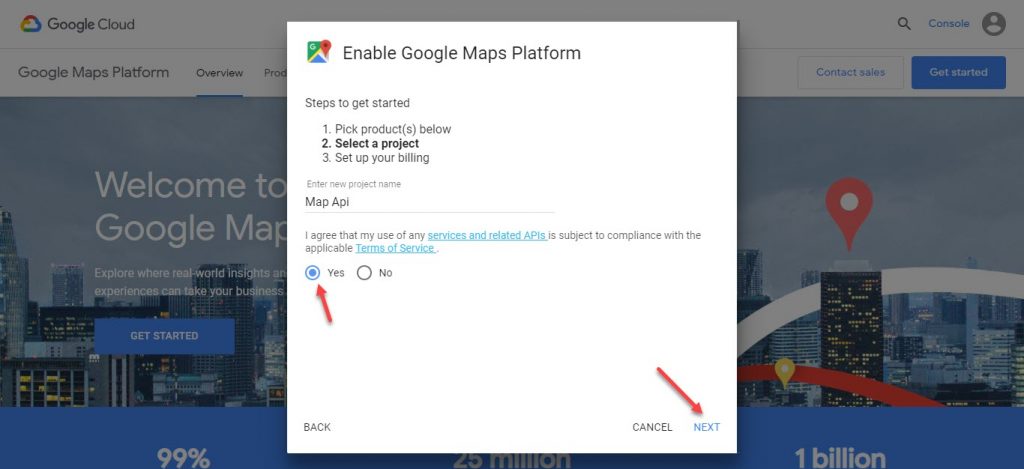
On this step, accept Terms of Use and click on Next button;
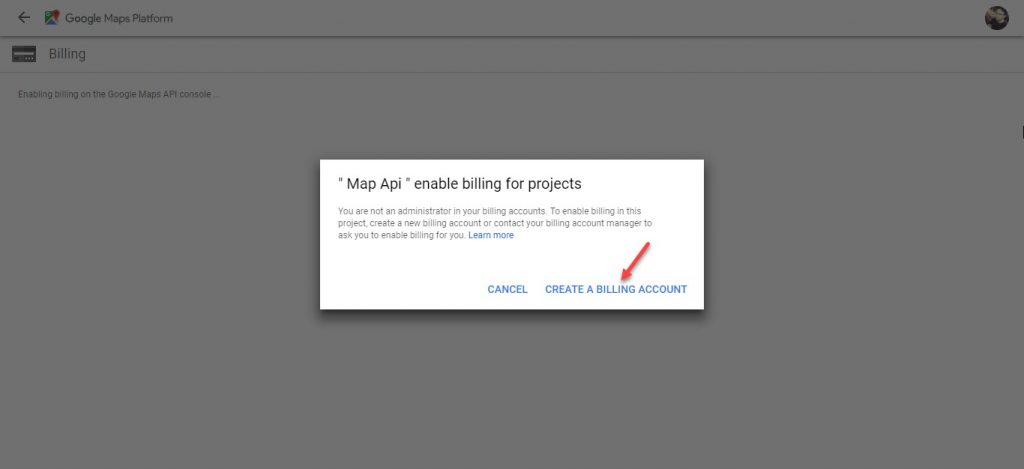
In here, click on Create a Billing Account,
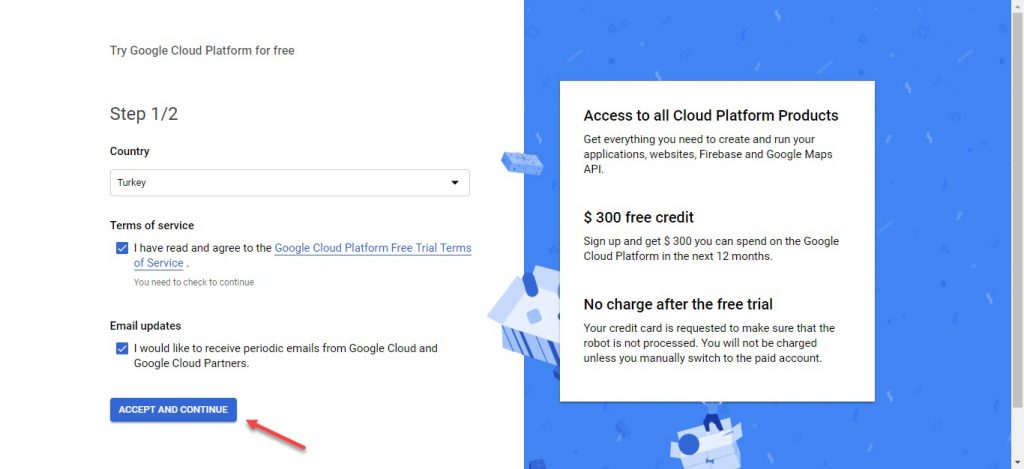
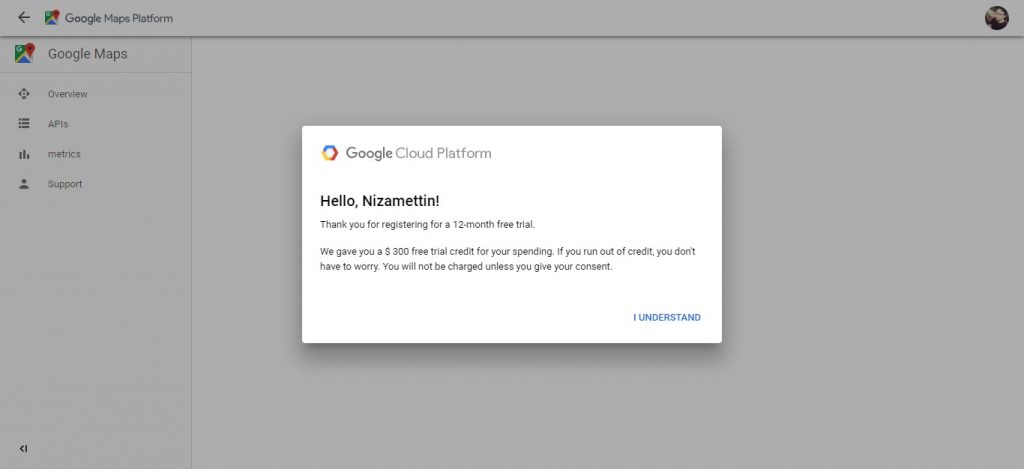
On this step, determine your region and accept Free Trial Terms of Services check box;
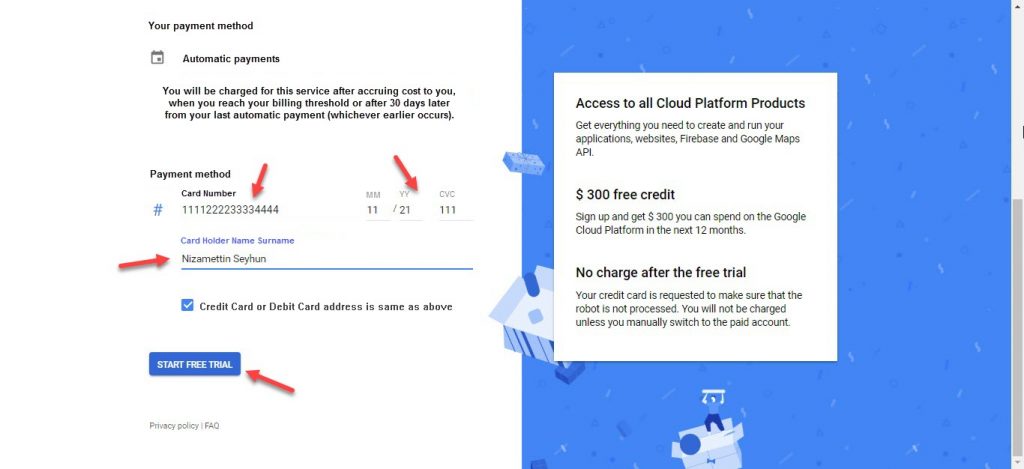
On this step, enter your payment options and then click on Start Free Trial button;
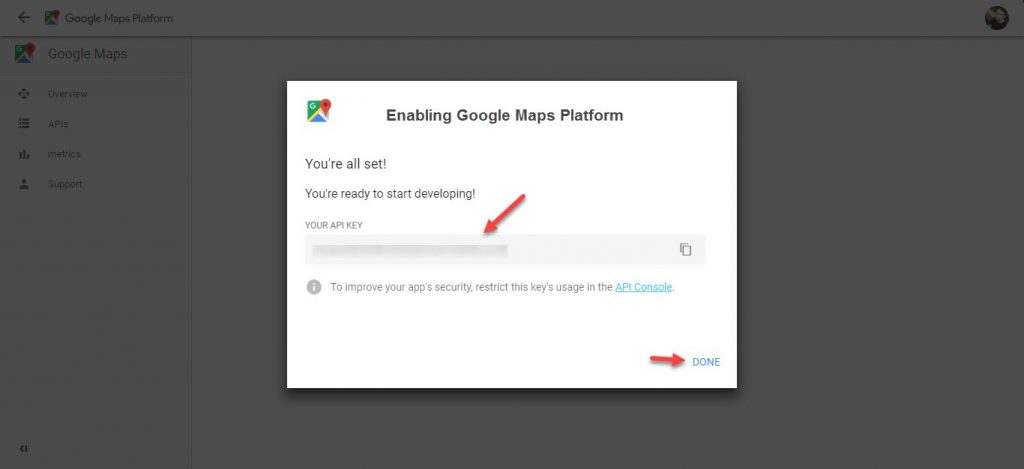
Once you click on Set Free Trial button, you will see below screens;
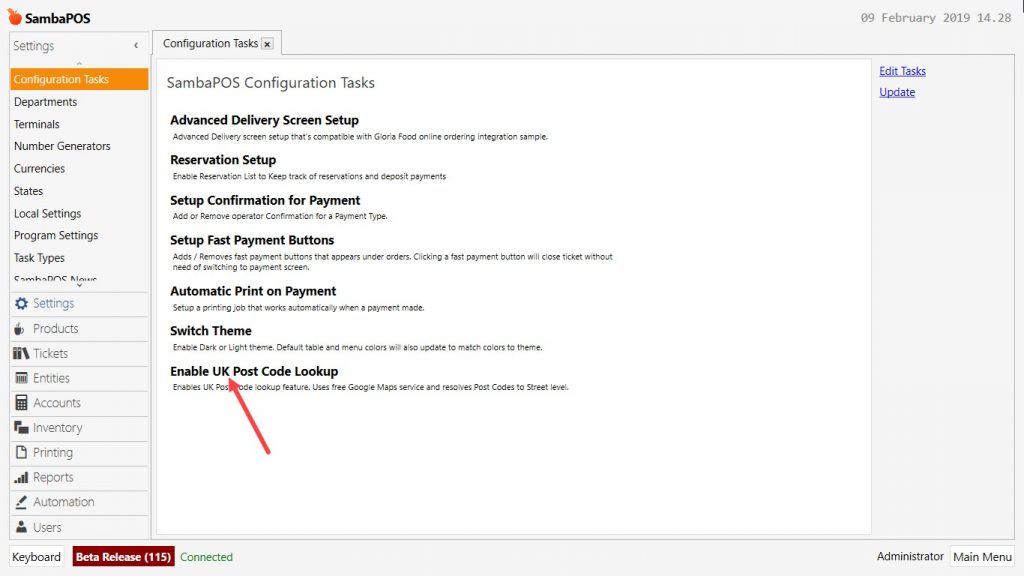
2. Applying Post Code Configuration Task from SambaPOS
Go to Main Menu > Manage > Settings > Configuration Tasks > here, click on Enable UK Post Code Lookup.
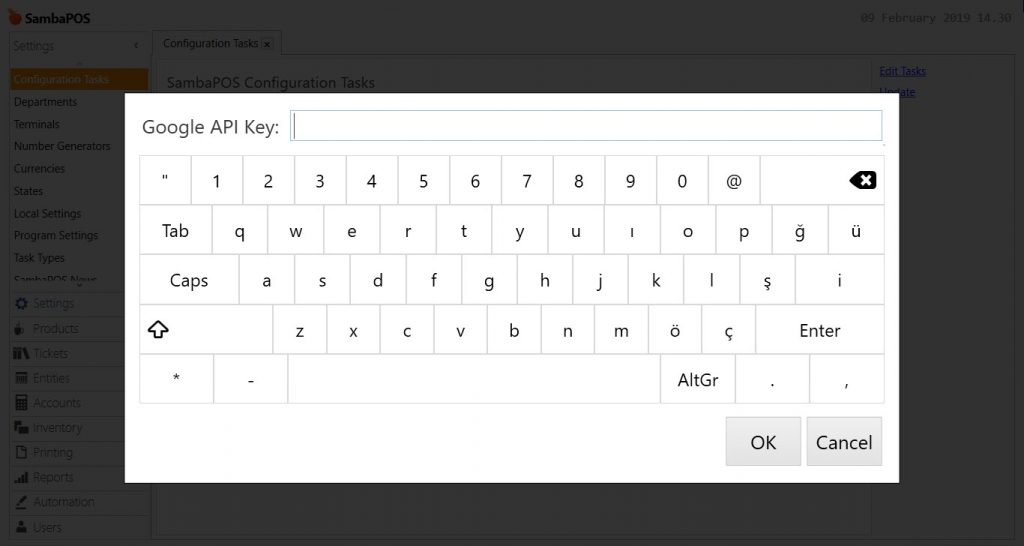
When you click on Enable UK Post Code Lookup, you will see below screen, in here because of you already received your API Key from Google, you can click on OK button and continue;

Once you click on OK button, it will ask you to insert API Key which you received on previous step. (Step 1)
Copy and paste it into necessary field.
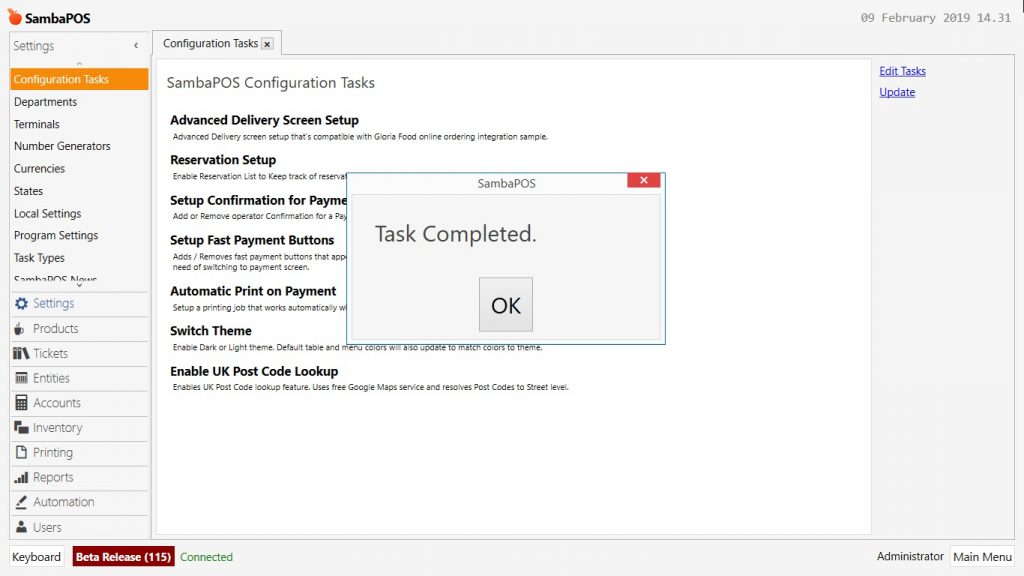
If everything went smooth, you will see the message Task Completed on your screen.
After completing necessary editings, click on Save button.
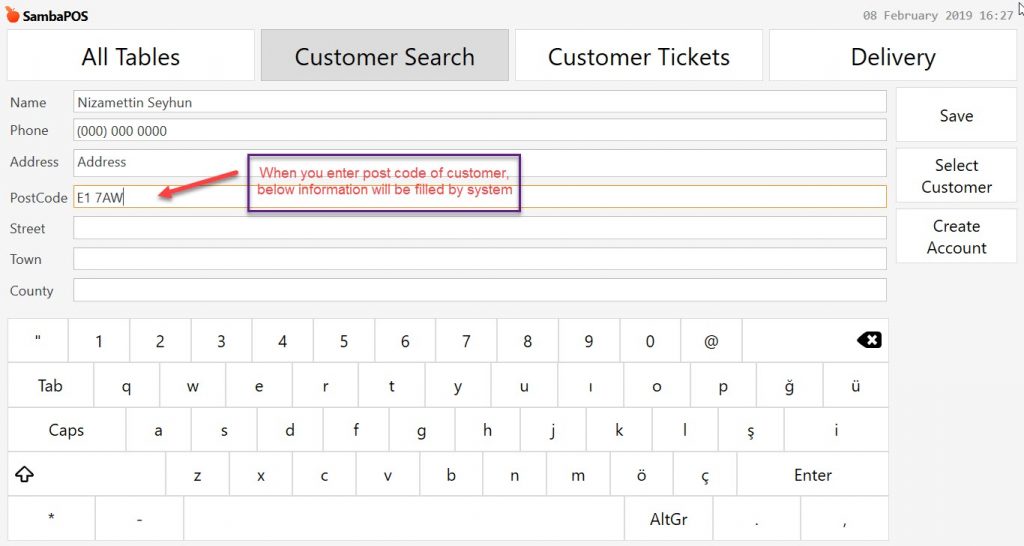
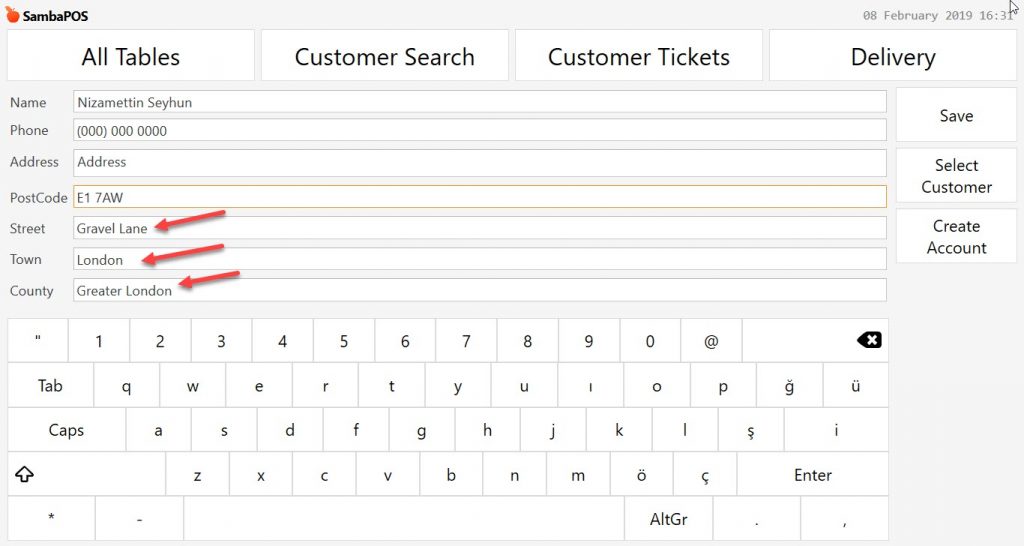
3. Inserting Post Code Information of Customer on SambaPOS
Go to Main Menu > POS > Customer Search > here click on New Customer.
After completing necessary editings, click on Save button.
4. Editing Ticket Template
Go to Main Menu > Manage > Printing > Printer Templates > Ticket Template > here, copy below code group and paste it into Template field;
<L00>Customer:{ENTITY NAME:Customer} |

After completing necessary editings, click on Save button.
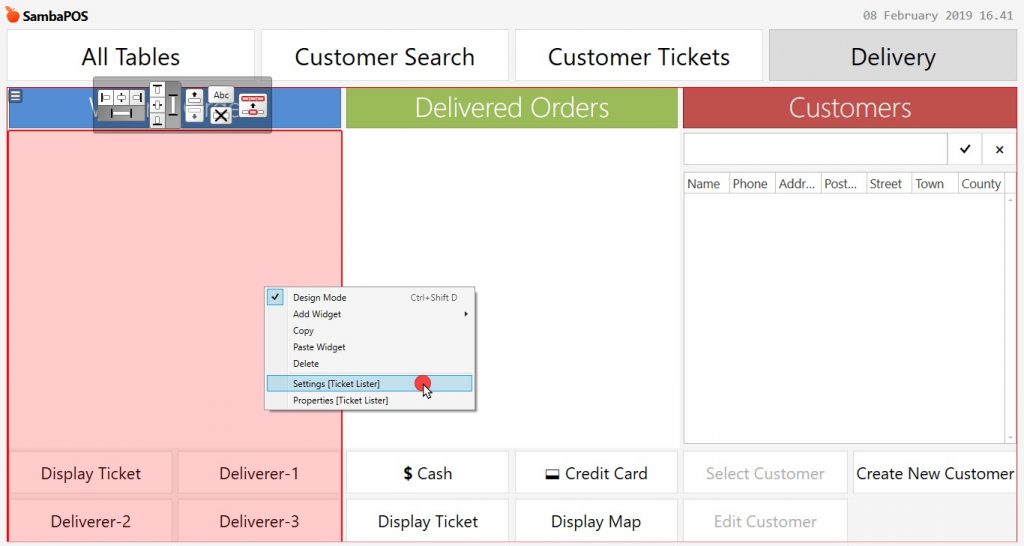
5. Editing Delivery Screen Waiting Orders Ticket Lister
In here click on Waiting Orders Window, right click mouse and select Settings(Ticket Lister)Go to Main Menu > POS > Delivery Entity Screen > here, right click on mouse and activate Design Mode.
Copy and paste below code group into Format Field;
<L00><block 10 transparent left *><L00></timer></size></block> |

After completing necessary editings, click on Ok button. To save the changes that you made, right click on mouse and click on Design Mode.