2.4.13.a. How to Create Basic Customer Screen Html?
Creating Customer Screen for Browser – Basic Setup
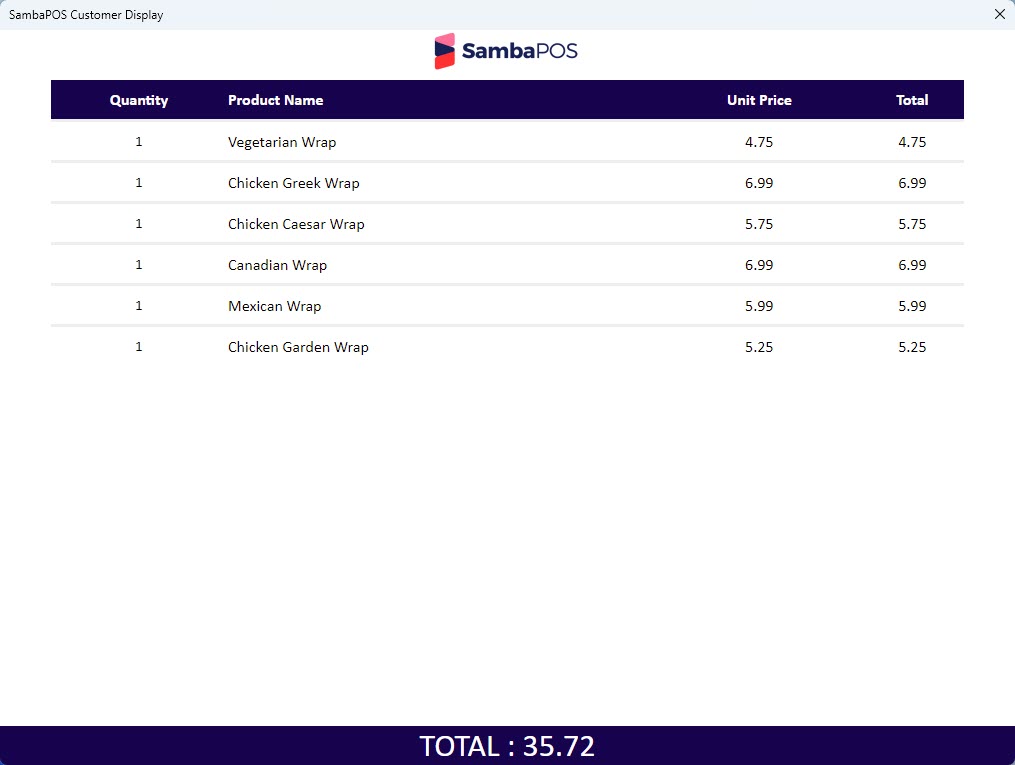
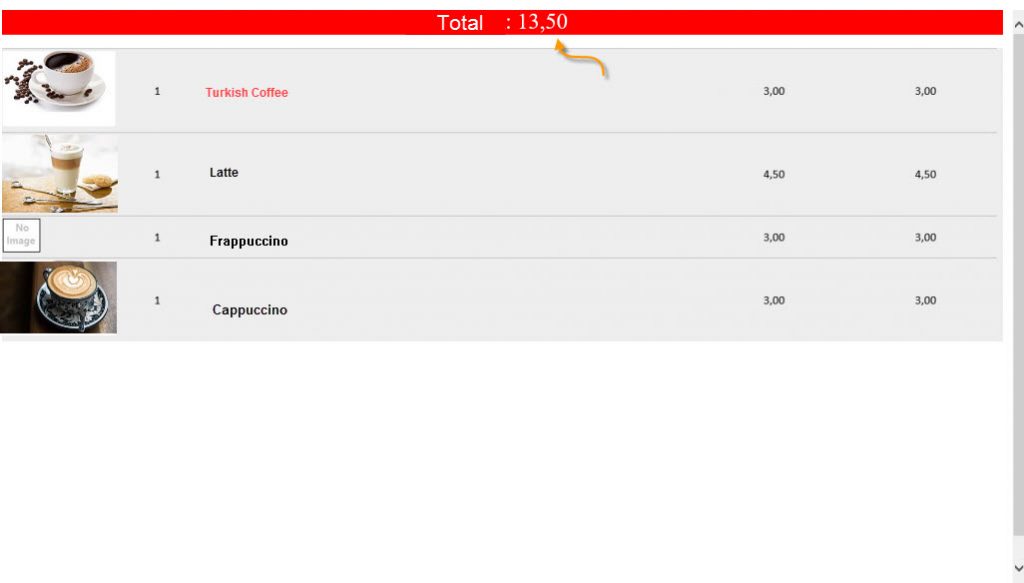
Purpose: Create it in case of the restaurant has Fast Food (Pre Paid) sales, to be able to display orders on Customer Screen line by line. (Product Image, Product Name, Product Quantity, Total Price)
Usage Area: Restaurants which has Fast Food (Pre Paid) sales.
Before Starting:
In order to use this Customer Screen Configuration you need to have SambaPOS 5.7.2 or above version installed on your computer from our website.
Improtant Notes:
NOT-1: In order to use this Customer Screen Configuration you need to have SambaPOS 5.7.2 or above version installed on your computer from our website.
NOT-2: In case you want to use the images and templates which are used in this document you can click here SambaPOS-Customer-Display.
NOT-3: After completing necessary settings you need to restart your computer for once.
Customer Screen View:
1. Printer Settings
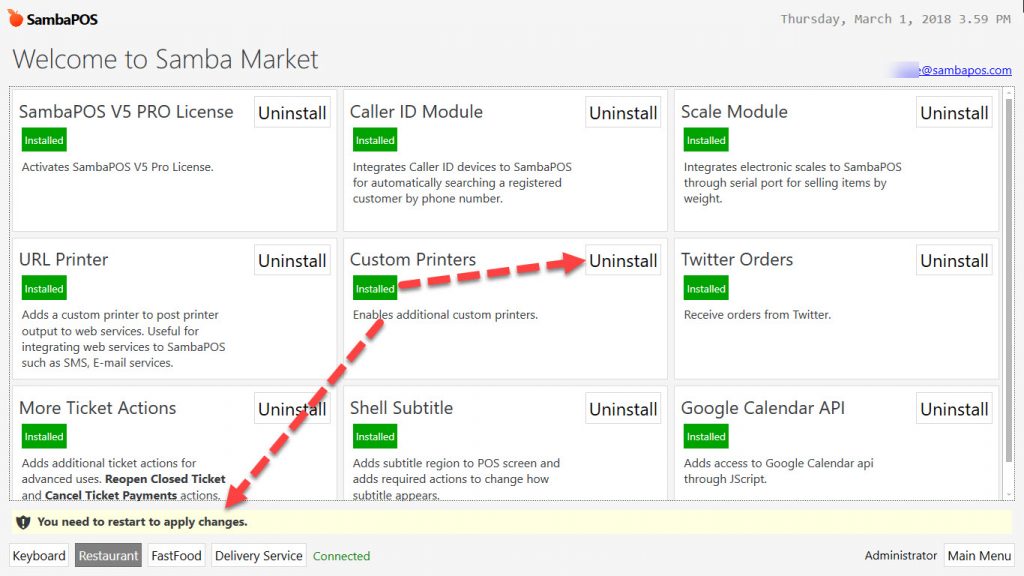
1.1 Installing Custom Printer Module
Login to SambaPOS as admin, on the navigation screen click on SambaMarket menu. From here install the Custom Printer Module. After completing installation, logout Sambapos and restart it.
1.2 Adding Printer
Go to Manage > Printing > Printers from here click on Add Printer link.
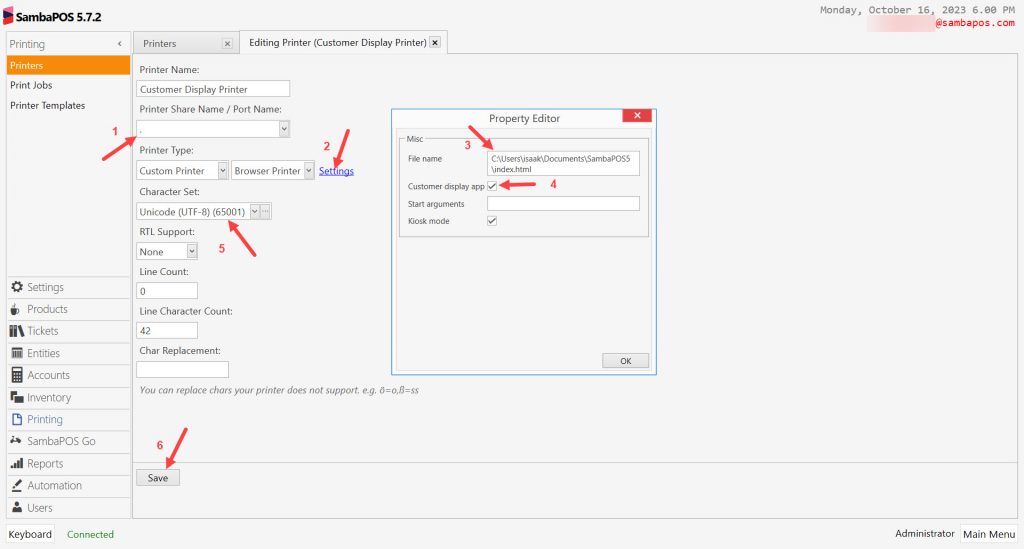
- Printer Name: CD-Customer Display Printer
- Printer Sahre Name/Port Name: . (Put period punctuation mark)
- Printer Type: Custom Printer | Browser Printer | Settings
- Character Set: Unicode (UTF-8) (65001)
- Line Count: 0
- Line Character Count: 42
- Settings Link:
- File Name: C:\Users\isaak\Documents\SambaPOS5\index.html
- Pay attention to usage of “\” while writing the physical address.
- Click on on Customer Display App checkbox.
- Create a folder named image to add product pictures into.
- Copy the product pictures as 150x100px size and PNG or JPG format.

1.3 Adding Printer Templates
1.3.1. Adding CD-Customer Display Template
Go to Manage > Printing > Printer Templates from here click on Add Printer Template link.
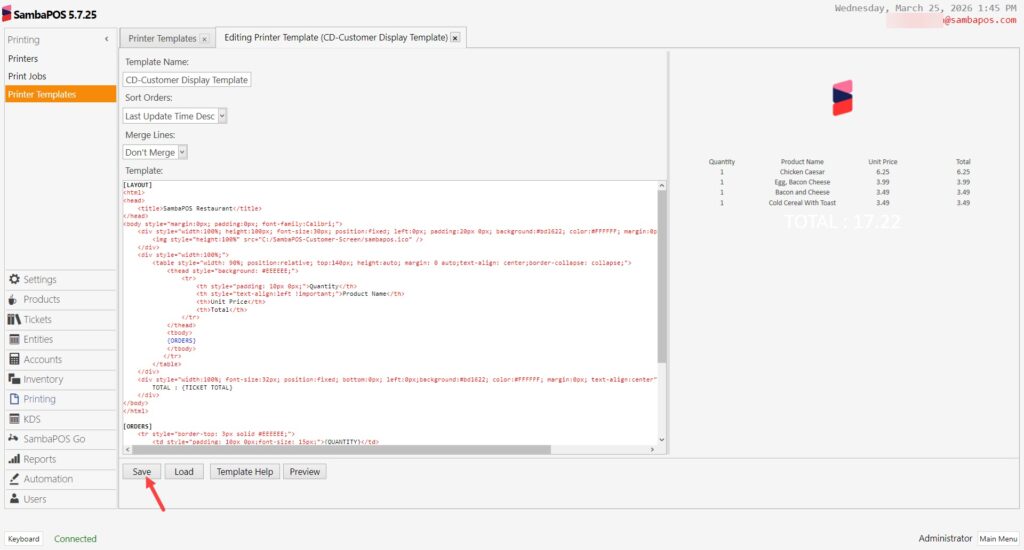
- Template Name: CD-Customer Display Template
Sort Orders: Last Update Time Desc (You can try other options too) - Template: In this field, copy Html code group below and paste it. It is possible to make change in case of necessity.
“Note: Change the path of image folder according to your settings.
For example: ‘C:\SambaPOS-Customer-Screen\logo’
You can download index.html page from here.
You can download the CD-Customer Display Template from here.
After completing necessary fields, click on Save button.
1.3.2. Adding CD-Customer Display Banner Template
Go to Manage > Printing > Printer Templates from here click on Add Printer Template link.
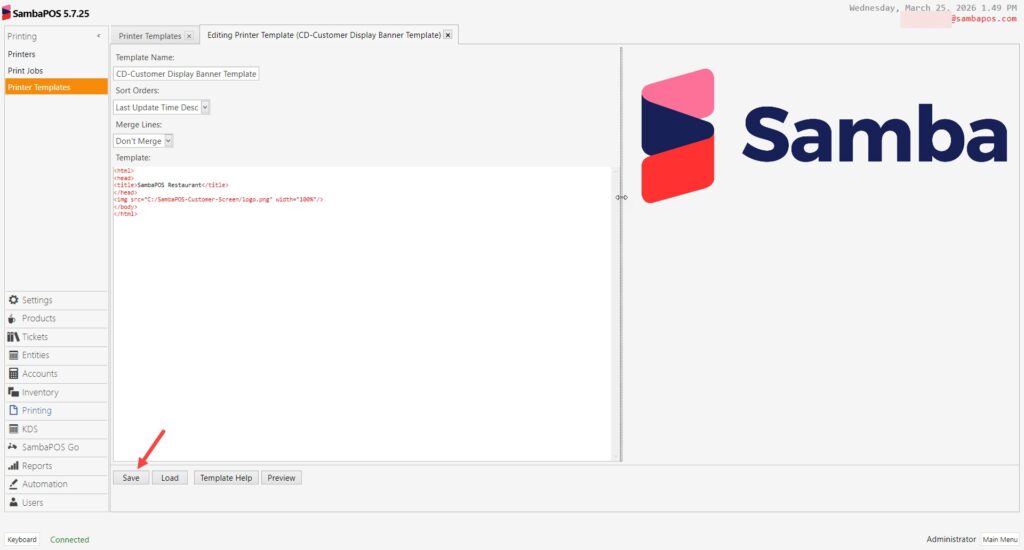
- Template Name: CD-Customer Display Template
Sort Orders: Last Update Time Desc (You can try other options too)
Template:
<html>

<head>

<title>SambaPOS Restaurant</title>

</head>

<img src="C:/SambaPOS-Customer-Screen/logo.png" width="100%"/>

</body>

</html>
After completing necessary fields, click on Save button.
1.4 Adding Print Jobs
1.4.1. Adding CD-Customer Display Print Job
Go to Manage> Printing > Print Jobs from here click on Add Print Job link.
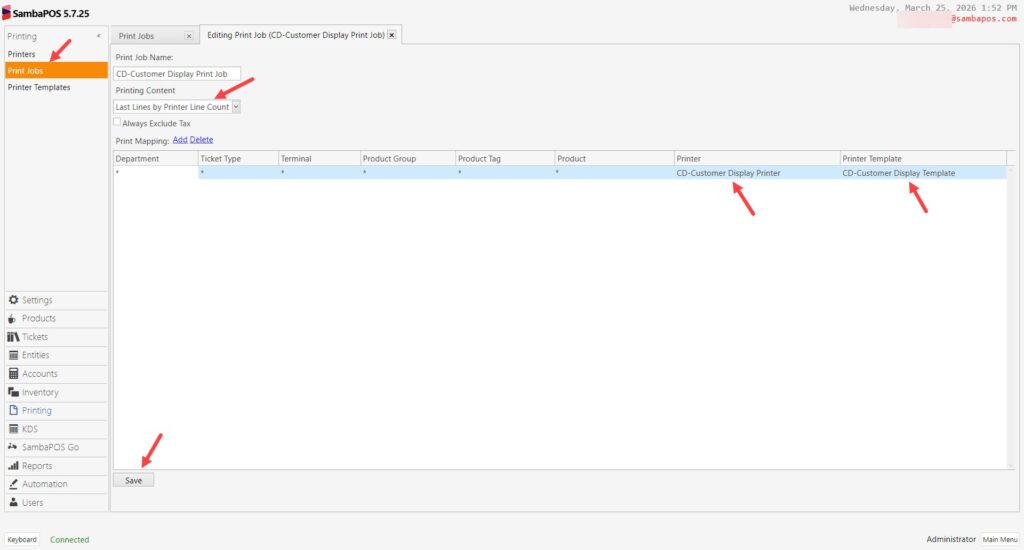
- Print Job Name: CD-Customer Display Print Job
- Printing Content: Select All lines template.
- Printer: CD-Customer Display Printer
- Printer Template: CD-Customer Display Template
After completing necessary fields, click on Save button.
1.4.2. Adding CD-Customer Display Banner Print Job
Go to Manage> Printing > Print Jobs from here click on Add Print Job link.
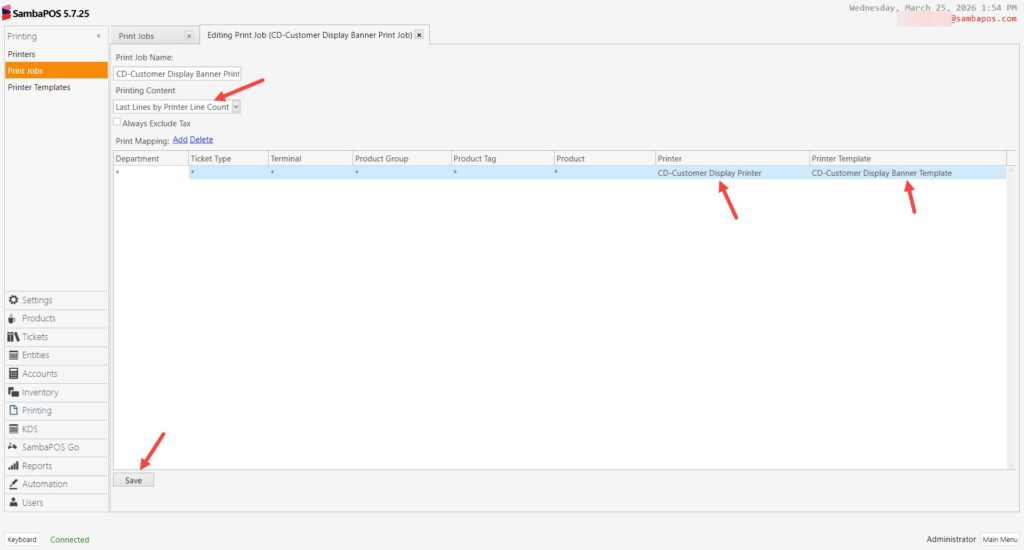
- Print Job Name: CD-Customer Display Banner Print Job
- Printing Content: Select All lines template.
- Printer: CD-Customer Display Printer
- Printer Template: CD-Customer Display Banner Template
After completing necessary fields, click on Save button.
2. Adding Actions
2.1. Adding CD-Printing Customer Display Orders Action
Go to Manage > Automation > Actions from here click on Add Action link.
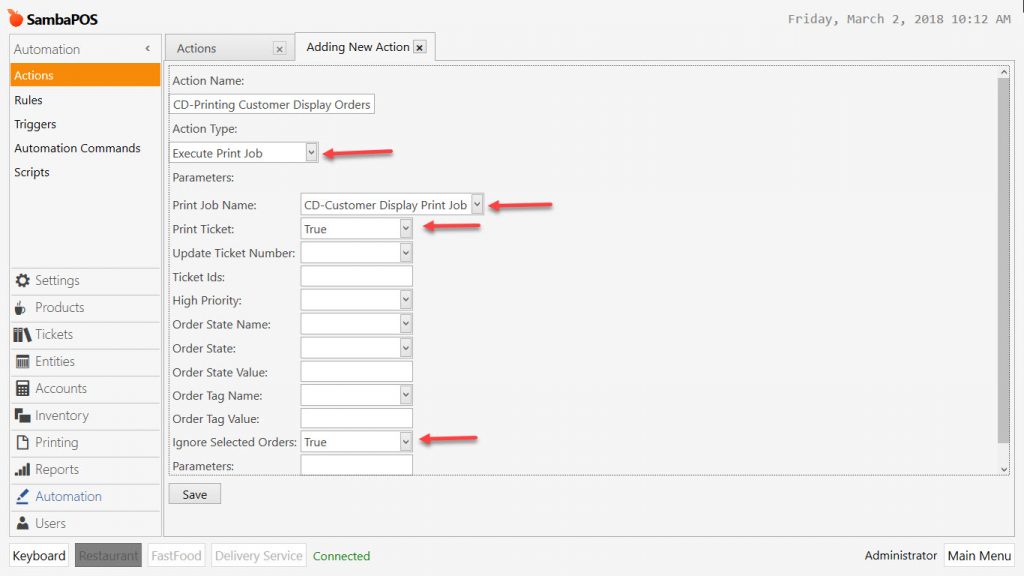
- Action Name: CD-Printing Customer Display Orders
- Action Type: Execute Print Job
- Print Job Name: CD-Customer Display Print Job
- Print Ticket: True
- Ignore selected Orders: True
After completing necessary fields, click on Save button.
2.2. Adding CD-Customer Display Banner Action
Go to Manage > Automation > Actions from here click on Add Action link.
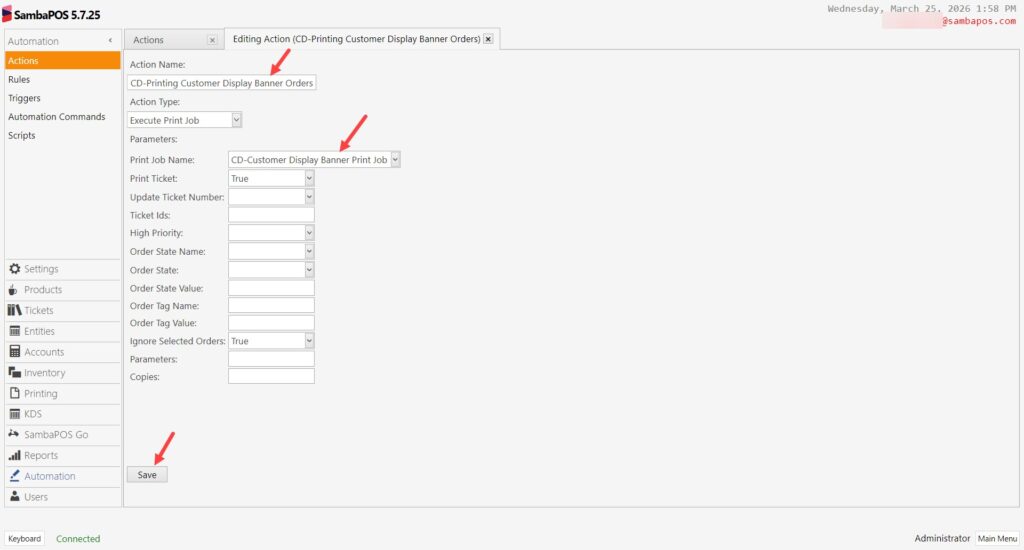
- Action Name:CD-Printing Customer Display Banner Orders
- Action Type: Execute Print Job
- Print Job Name: CD-Customer Display Banner Print Job
- Print Ticket: True
- Ignore selected Orders: True
After completing necessary fields, click on Save button.
3. Adding Rules
3.1 CD- Ticket Total Changed
Go to Manage > Automation > Rules from here click on Add Rule button.
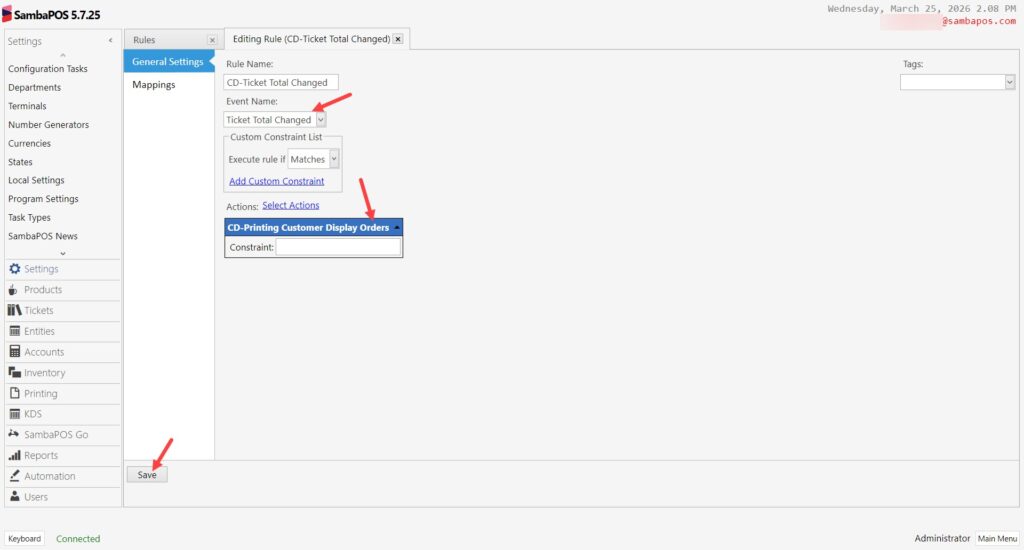
- Rule Name: CD- Ticket Total Changed
- Event Name: Ticket Total Changed
- Actions > Select Action: CD-Print Customer Display Orders
After completing necessary fields, click on Save button.
3.2 CD-Tag Orders
Go to Manage > Automation > Rules from here click on Add Rule button.
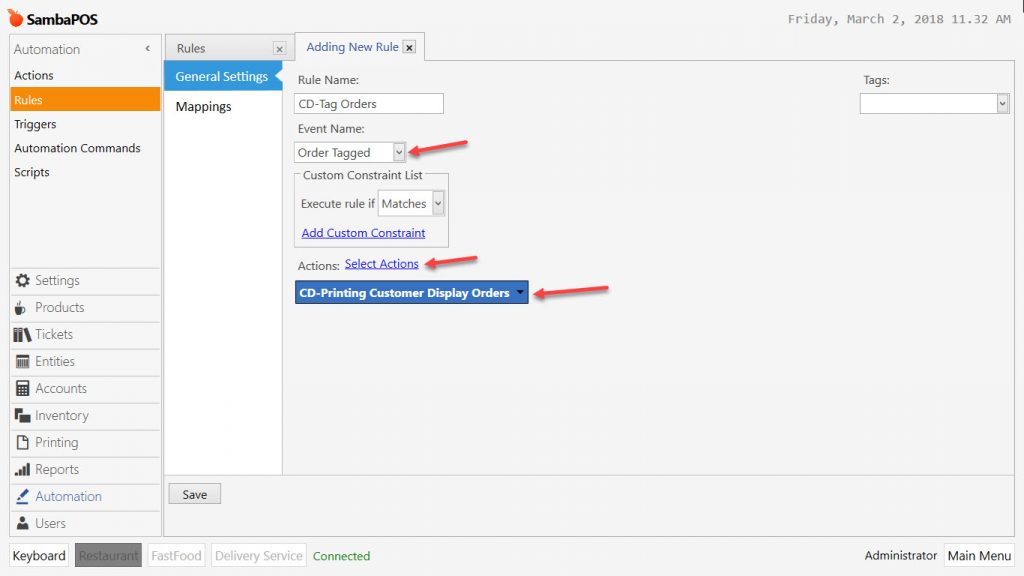
- Rule Name: CD-Tag Orders
- Event Name: Order Tagged
- Actions> Select Action: CD-Print Customer Display Orders
After completing necessary fields, click on Save button.
4. Editing Rules
4.1. Editing Default Close Ticket Rule
Main Menu > Manage > Automation > Rules > Close Ticket Rule > Here add CD-Printing Customer Display Banner Orders Action into the rule.
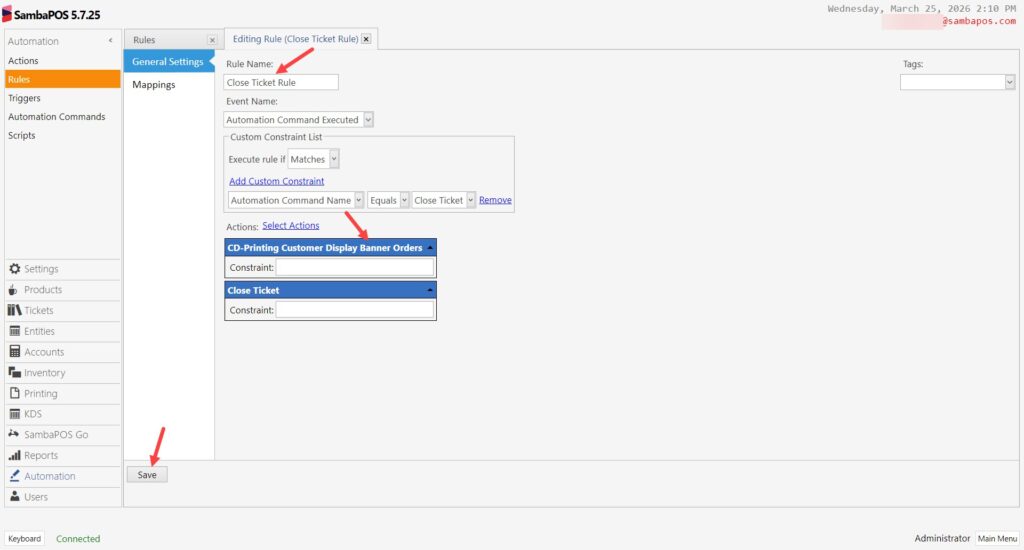
After completing necessary fields, click on Save button.
4.2. Editing Ticket Payment Check Rule
Main Menu > Manage > Automation > Rules > Ticket Payment Check Rule > Here add CD-Printing Customer Display Banner Orders Action into the rule.

After completing necessary fields, click on Save button.
5. Adding Product Tag
Go to Manage > Settings > Program Settings from here click on General Settings section.
To add image to the products, click on Edit button from Product Tag Captions title and create a Tag column named “ProdImage”.
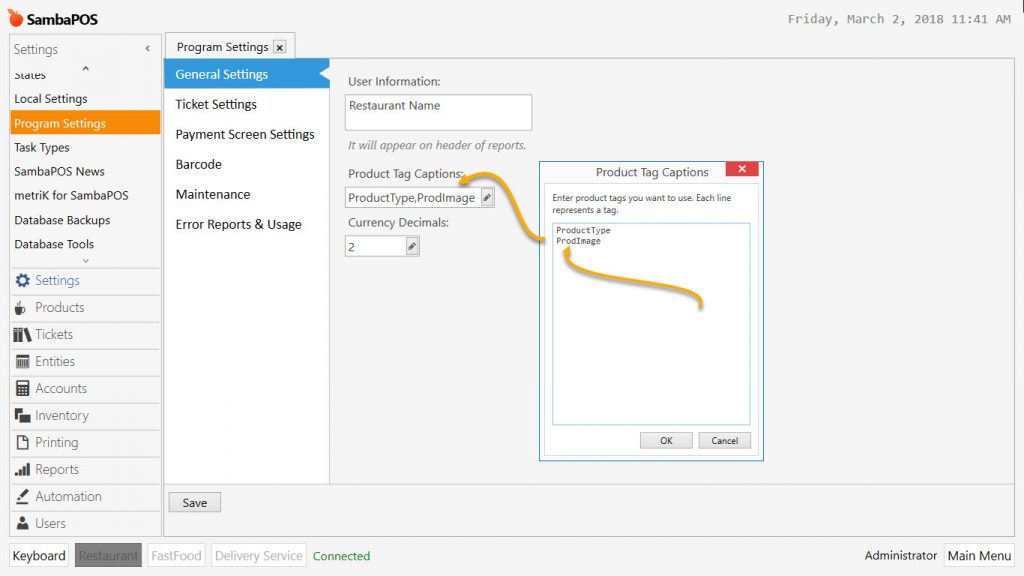
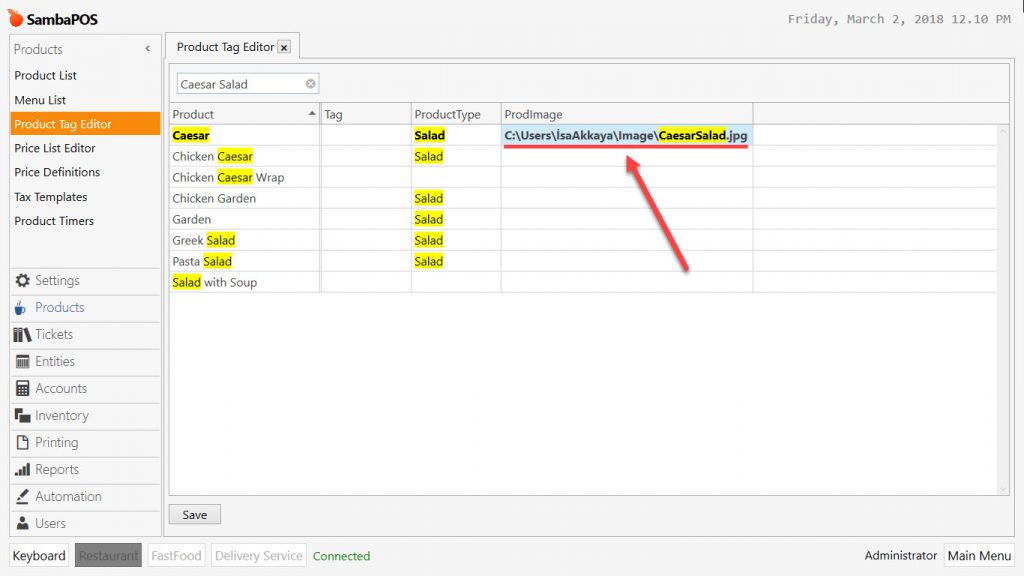
To add path of product images, go to Manage > Products > Product Tag Editor from here write the paths into ProdImage column for each product.
Image size should be 150×100 px. Image sizes can be changed according to need.
Name of the tag that image will be displayed is “ProdImage”, this name has been used on the codes for the template designing. In case of using a different Product Tag Name it is necessary to change the code as well.
<img src=”{ITEM TAG:ProdImage}”/>
For the products that has no image noimage.JPG file will be displayed automatically.
6. Important Notices
- Customer Screen runs on Internet Explorer. In case of using an old version of Explorer then update to the latest version.
- In order to move the customer screen to second screen firstly you need to activate the second screen from Control Panel.
- When customer screen runs for the first time it is displayed on working screen.
- To use the window on the screen move it to the second screen by CTRL+Space buttons and click on ENTER button.
- Create the screen template design as Html.
- Write correctly the name of files, physical adress, name of image folder and Index.html file.
- Be careful about product image pathes of Batch product tags .
- Be careful about Path of [ORDERS] block codes on design template.
- Be careful about file extentions. (jpg,jpeg)