2.3.2.c. How to Use Floor Plan Image in Entity Screen?
Tables which added in SambaPOS are entities. Entities can be located according to floor and layout plan of restaurant. It is possible to provide a more effective view by adding floor plan (in JPG or PNG format) of restaurant in SambaPOS, also possible to select it as background picture.
1- Adding Entities
Add the entities that will be used on floor plan. On navigation screen go to Manage > Entities > Entities and click on Batch Create Entities link.
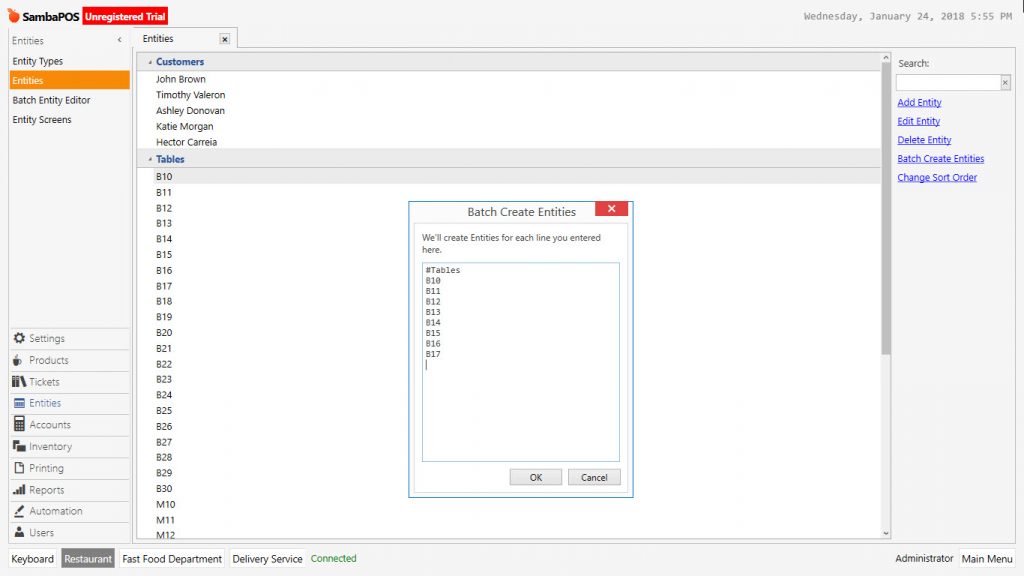
For example; On the Batch Create Entity screen the row that located at the top and described as # Entity Type indicates that these entities will be opened in this entity type. Click Ok button after writing entity names.
2- Adding Entity Screen
It is possible to create a new entity screen, from navigation screen go to Manage > Entities > Entity Screens click on Add Entity Screen button.
General Settings Section;
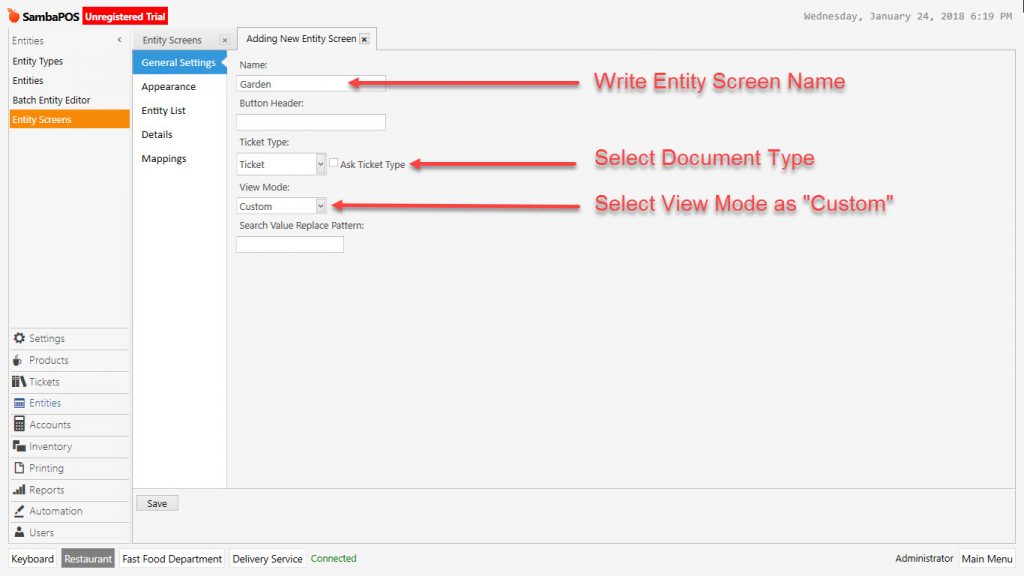
- Name: Field that name of Entity Screen will be written. (In example it is written as Garden.)
- Ticket Type: Field that ticket type is selected.
- View Mode: In this field select custom option in order to put tables to the floor plan.
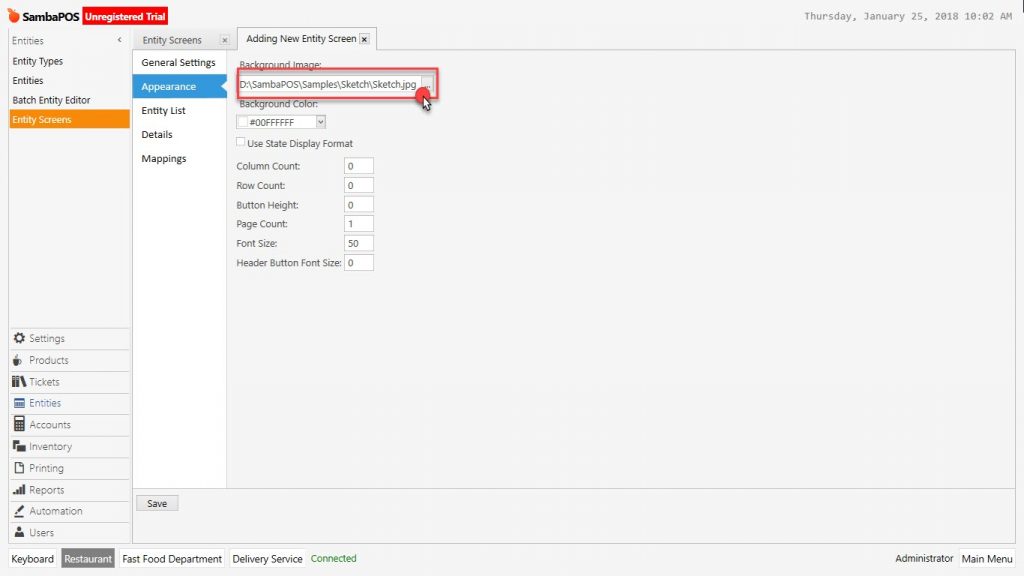
Appearance Section;
In here select the floor plan picture from saved path in computer.
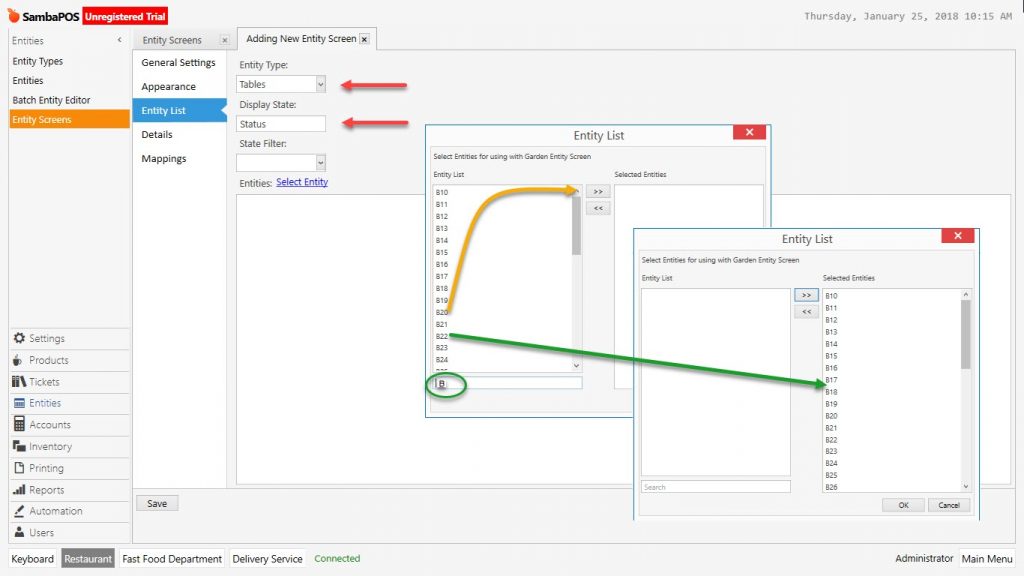
Entity List Section;
After selecting previosly created entity type, write Status in the View Mode field. Select previously created entities by clicking on Select Entity link.
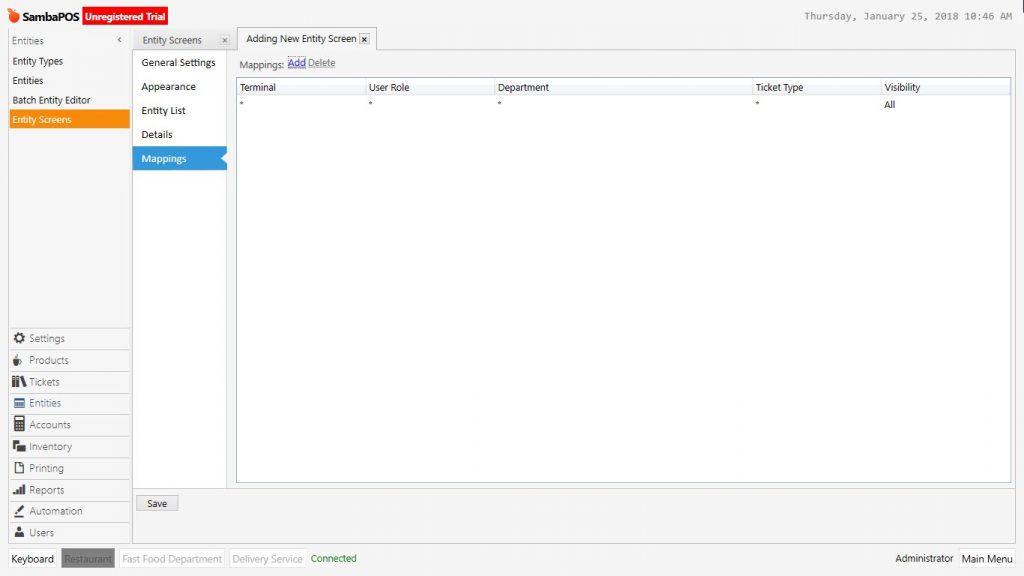
Mappings Section;
Field that desired role, department and ticket type are configured for the Entity Screen. At least one row should be added.
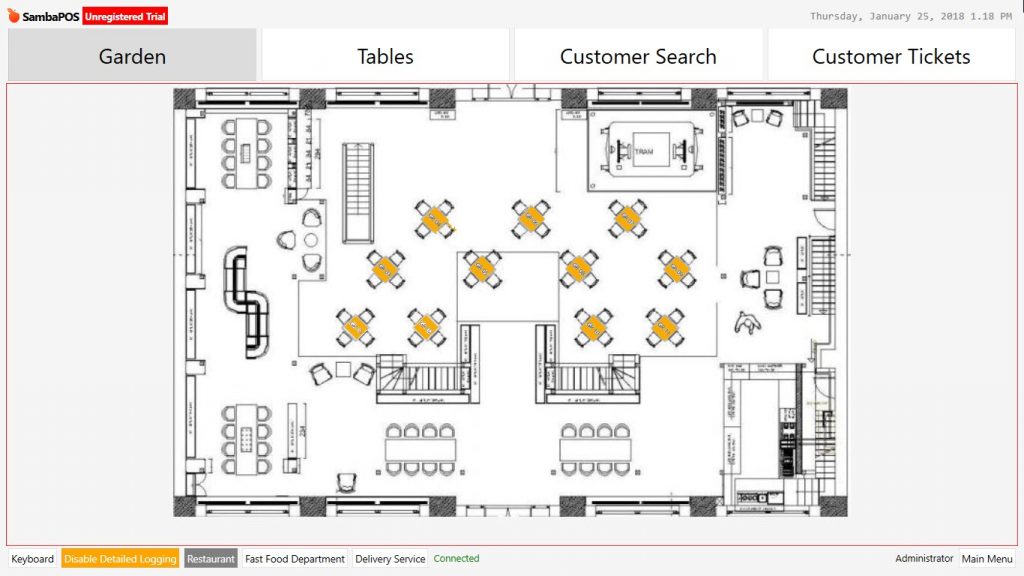
3- Placing the Tables
After completing creation of entity screen, when clicked POS on navigation screen, entity screen (which is written as Garden) will be displayed. When clicked on Garden entity screen, selected background picture is displayed.
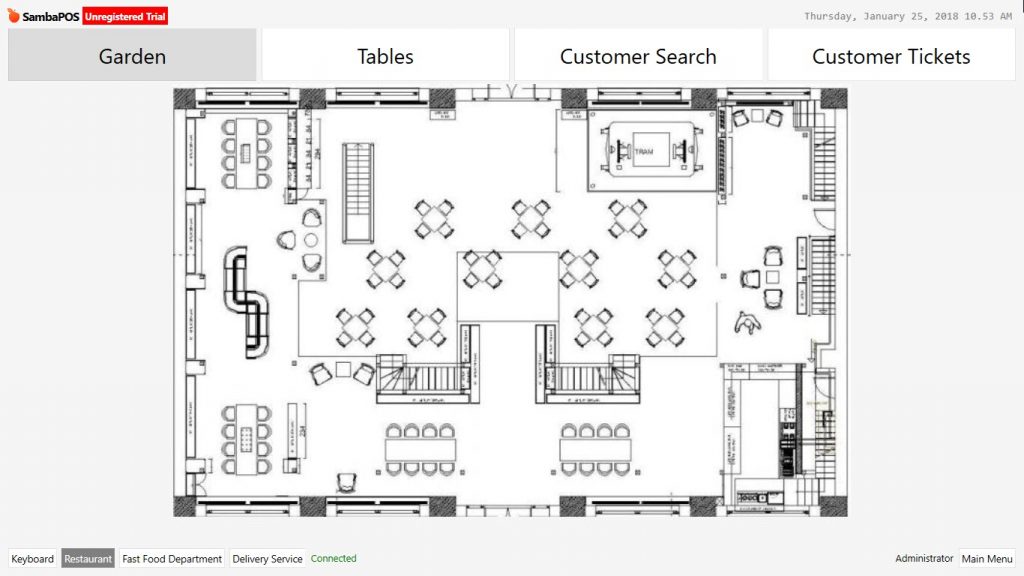
Displayed view is just a picture, tables need to be placed on this picture. To do this, right click of mouse button on the picture, select Design Mode menu and activate it.
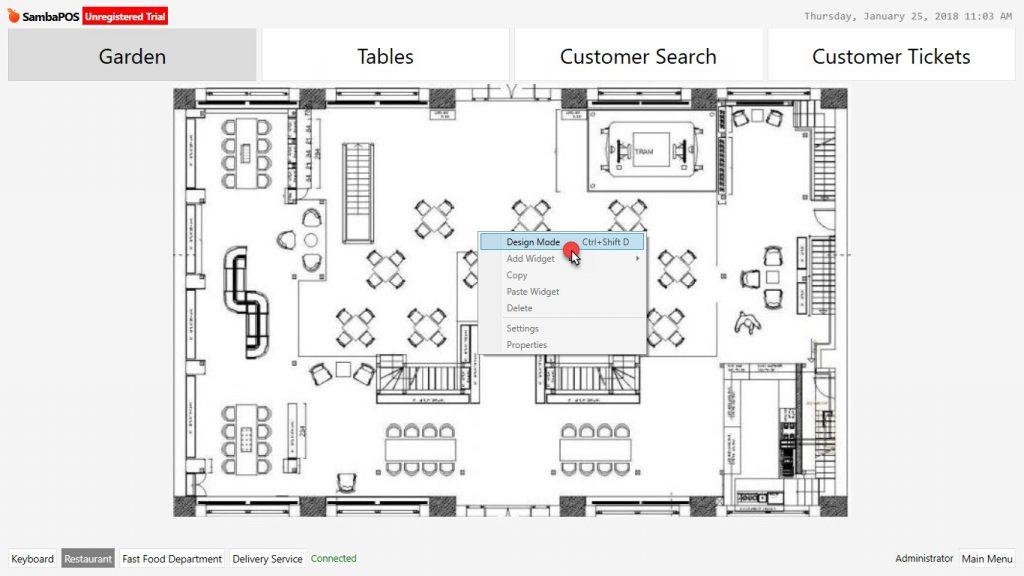
Red line which is around the screen, indicates that the screen is in designing mode.
To add entity button, right click of mouse while design mode is activated. Select the Entity Button from under the Add Widget row. So that a button which is respresenting an entity will be added. This should be done for each entity that need to be added on the floor plan.
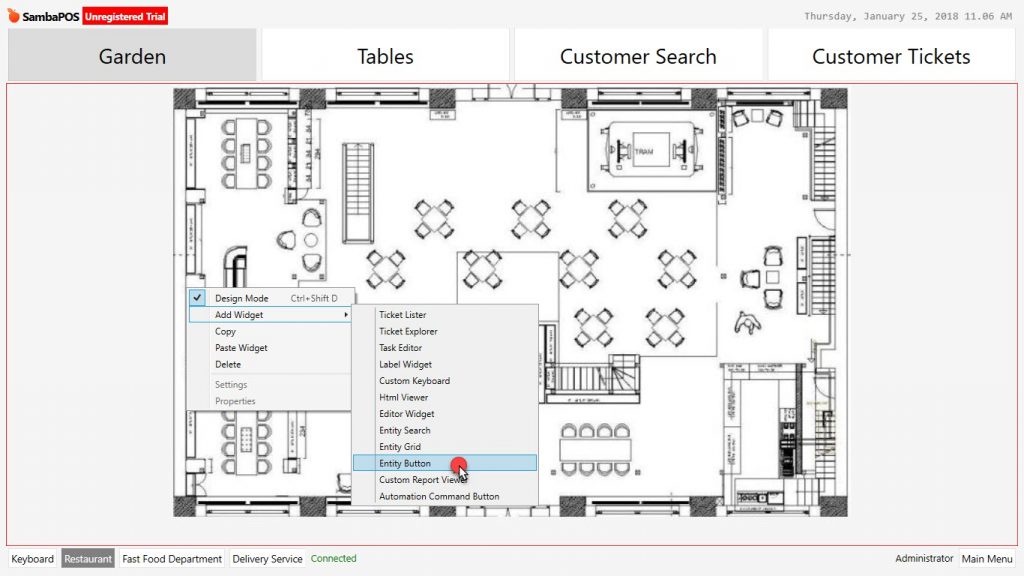
After clicking on Entity Button add button to the left top corner of screen. The added button can be dragged to desired place by mouse.
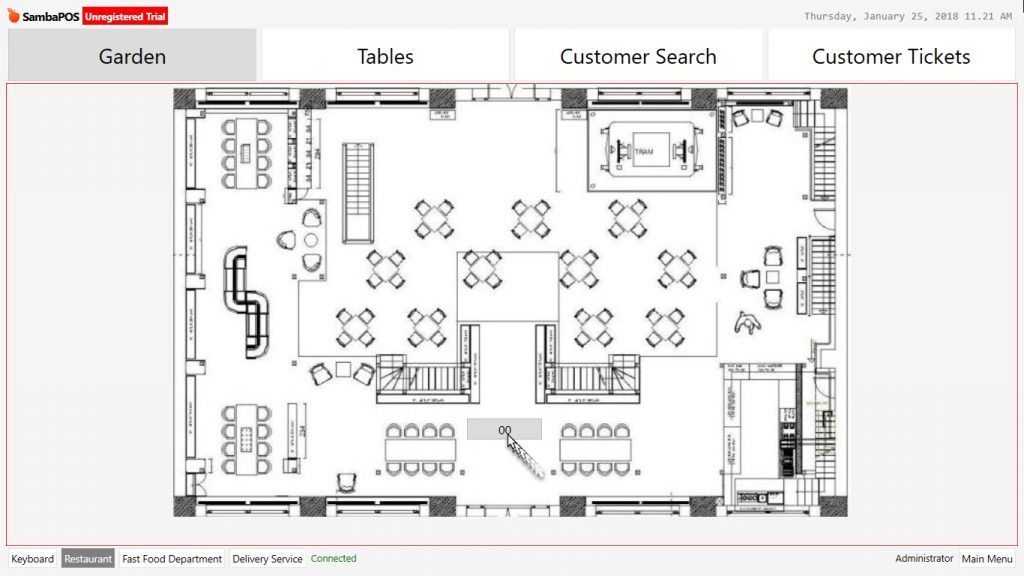
After moving entity button to the related table on floor plan, right click of mouse and select Setttings.(Entity Button)
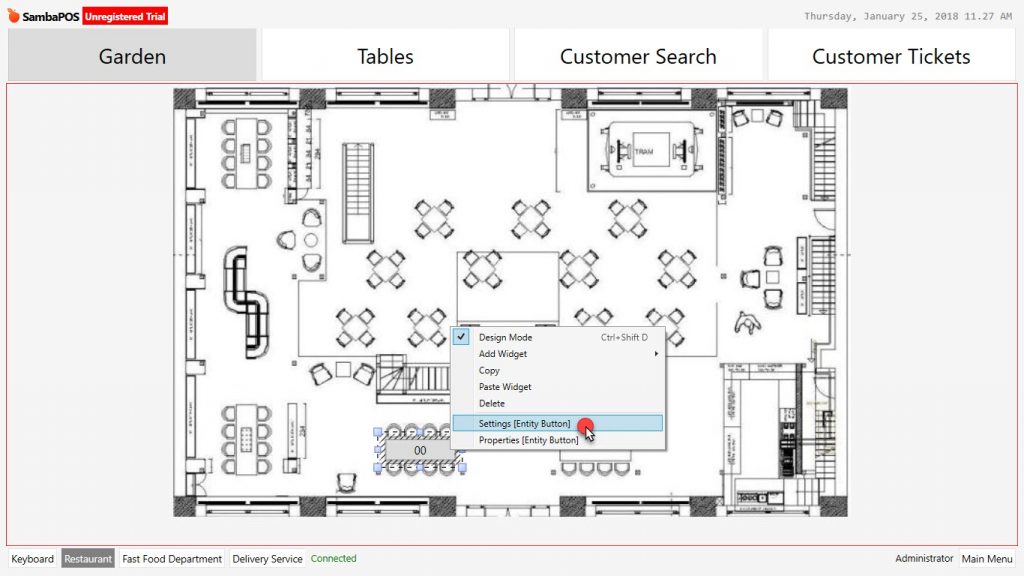
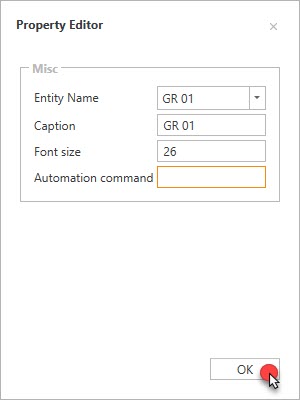
In the window, select the previously created entity. In Caption field write the name of table which will be seen on the screen and then click Ok button.
After completing this process a button will be created for table on the floor plan. This process should be done for all tables on the floor plan.
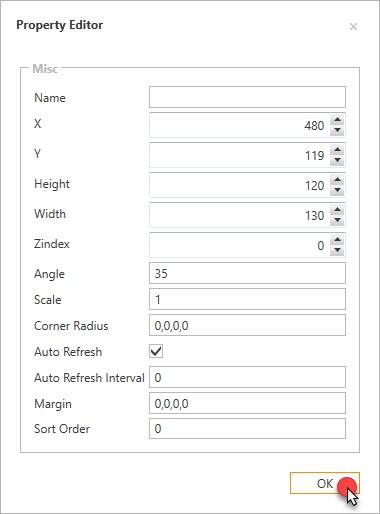
Tables can be oval, circular, rectangular or angled. To do this editing right click on entity button and select Properties.(Entity Button)

From Property Editor size, angle, rounding of button can be designed by giving desired values.
In order to delete Entity Button or Custom Screen Widget which created by mistake or more than need, right click of mouse and select Delete link.
After editing all tables on the floor plan, Custom View Table adding process will be completed.