2.2.9. How to Edit Basic Print Jobs?
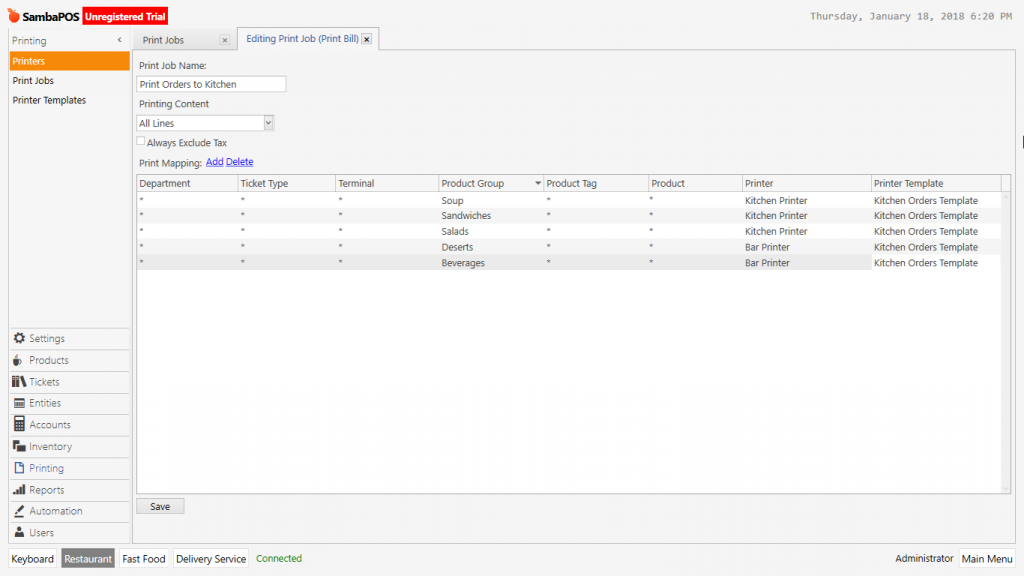
To edit print job, on the navigation screen go to Manage > Printing > Print Jobs > select a printing job to edit and click on Edit Print Job link.
- Print Job Name: Field that Print Job will be named. (Example; print bill, print orders, print invoice, print formal invoice etc.)
- Printing Content: Field for selection of which products will be written at the end of the task.
- Add Printing Relation: In this field at least one row relation should be added. Association is necessary to send departments, ticket types, product group or product to the desired printer.
- Department: Field that printing job will be used by which department.
- Ticket Type: Field that selecting ticket type of print job will be working on it.
- Product Group: Select product group for print job will be working on.
- Product: Select the product for print job will be working on.
- Printer: In here select the printer for print job and determine the printer for orders will be sent to.
- Printer Template: Field that Printer Template is selected.
After completing related processes, click on Save button and print job will be finished.

