2.2.10.a. How to Create / Change User Roles?
User roles are used to organise, limit and determine the roles and authoritiy of users. User can only see and perform process on the screens that related to own task area. User can not display and perform process on the screens that out of role.
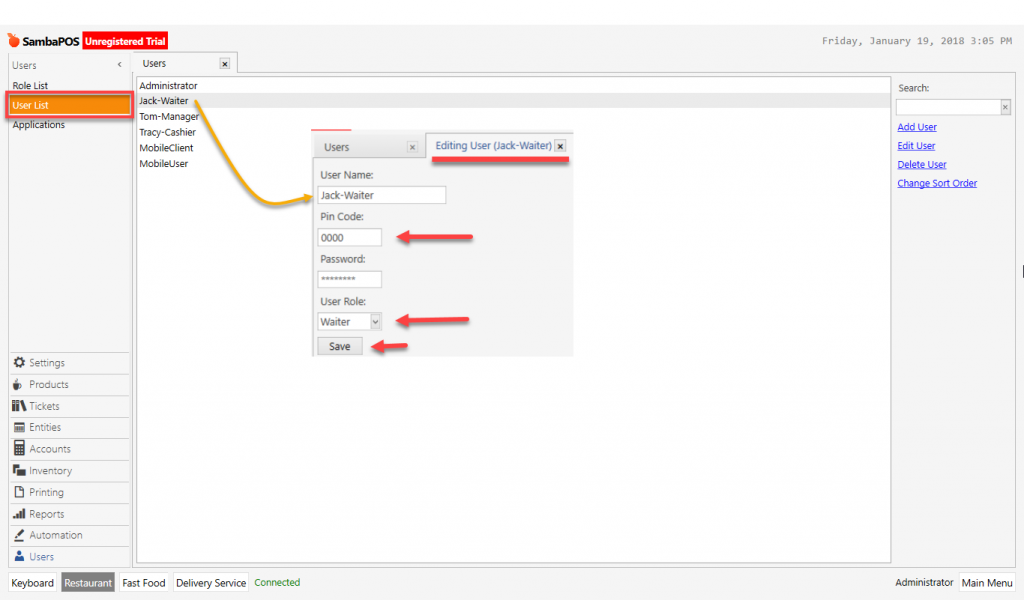
There are three stages for creation of authorization groups. Firstly prepare the roles by paying attention of user’s duties and responsibilities in the restaurant. When you adding the users, this will be assigned to Role / Authority groups.
- Program Role – Authorizations
- User Administration Section Authorizations
- User Association Authorizations
1. Program Role – Authorizations
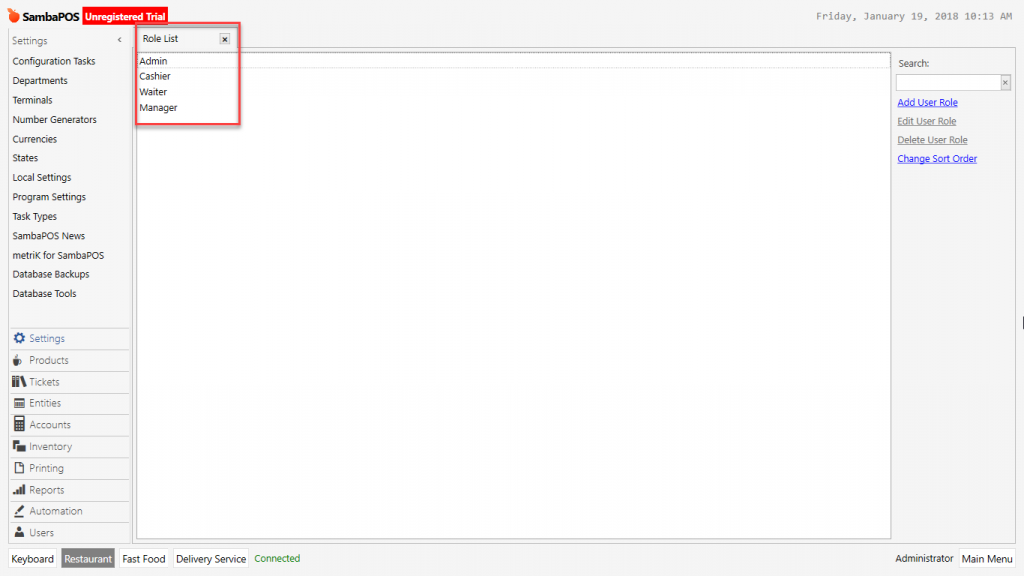
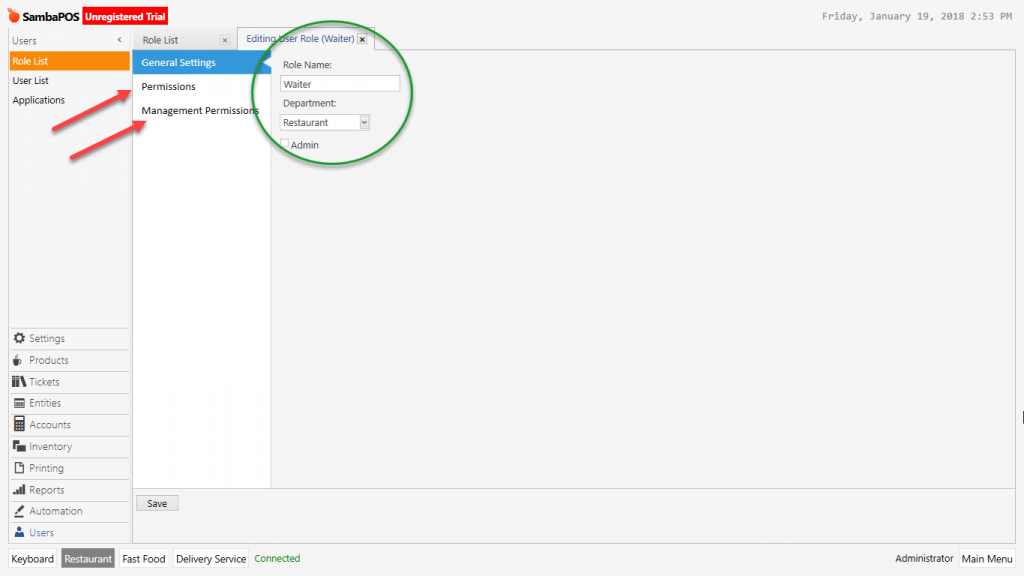
Manage > Users > Roles > Authorizations from here by adding a new role, type the role name. Create Role Authorization Groups by clicking on titles which listed on Roles Section. Create basic role authorization groups like in the example below. You can create or edit new Role-Authorization Groups by customizing according to groups or users.
Sample Role Authorization Groups Names;
Admin
Manager
Cashier
Waiter
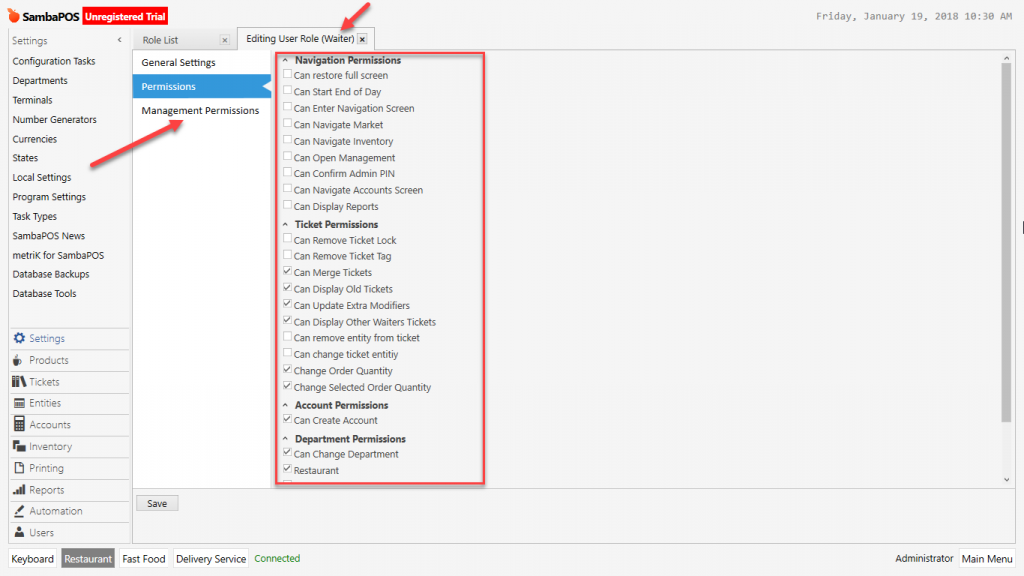
Click and activate the small box which will be authorized. You can make changes about these authorizations by editing roles later on.
Navigation Permissions
Navigation is the main screen which is displayed by entering admin password. On the navigation screen as default; Work Periods, POS, Tickets, Accounts, Warehouses, Samba Market, Reports, Manage and Logout titles are exist.
Authority Titles
- Can Restore Fullscreen: It gives permisson to zoom in or out for screen window.
- Can Display Account Screen: On the navigation screen the place that income and expense information and entity account’s displaying authorization.
- Can Approve Admin Pin: The authorization that on the previously determined Automation Commands requiring Admin Pin approval. For example; Admin Password Necessity can be used for automation commands such as Void, Gift, Lost.
- Can Navigate Warehouses: Accessing to Warehouses on navigation screen can be authorized.
- Can Open Management: On the navigation screen this authorization gives permission to access program setup, settings and editings.
- Can Navigate Market: On the Navigation Screen accessing Market section can be authorized.
- Can Enter Navigation Screen: Displaying authorization of entering main screen after typing SambaPOS Entry password.
- Can Start End of Day: Entry authorization of Work Periods on the Navigation Screen.
- Can Display Reports: Access authorization for Reports on the Navigation Screen.
Account Permissions
- Can Create Account: Creating account authorization for debiting and crediting of Entities (Customers, Members).
Ticket Permissions
Activate by selecting the titles that entity, ticket and order authorizations are edited.
Authorization Titles
- Can Remove Ticket Lock: Determines locking or pausing of document processes.
- Can Remove Ticket Tag: Authorization of removing ticket tag.
- Can Merge Tickets: For the same document types, combining authorization of more than one documents with their contents and accounts into a single document.
- Can Display Old Tickets: Authorization to see the tickets title on the navigation screen.
- Can Update Extra Modifiers:
- Can Display Other Waiters Tickets: The users who are in the same role / authorization group can continue processes on ticket that they took orders. Only the user who first took the order into ticket can see and perform process, other users can not. (The user who has Admin authorization can see and perform process.)
- Can Remove Entity From Ticket: If it is selected, user can change or remove the entity, if it is not selected, user can’t change the entity.
- Can Change Order Quantity: Authorization for using the (+ – ) buttons to increase or decrease order quantity when taking order.
- Change Selected Order Quantity: Authorization of using (+ – ) buttons on the ticket quantity selection of taken orders.
- Can Change Ticket Entity: If it’s selected user can change or move ticket entity. ( Table, Customer )
Reporting Permissions
- Can Change Report Date Filter: In the reports section, user can display the reports which since last work period, can not make change on the report dates.
Department Permissions
- Can Change Department: To the users who are created for this role, gives the authorization to work on departments. User; can work according to created role group authorizations.
2. Management Section Authorizations
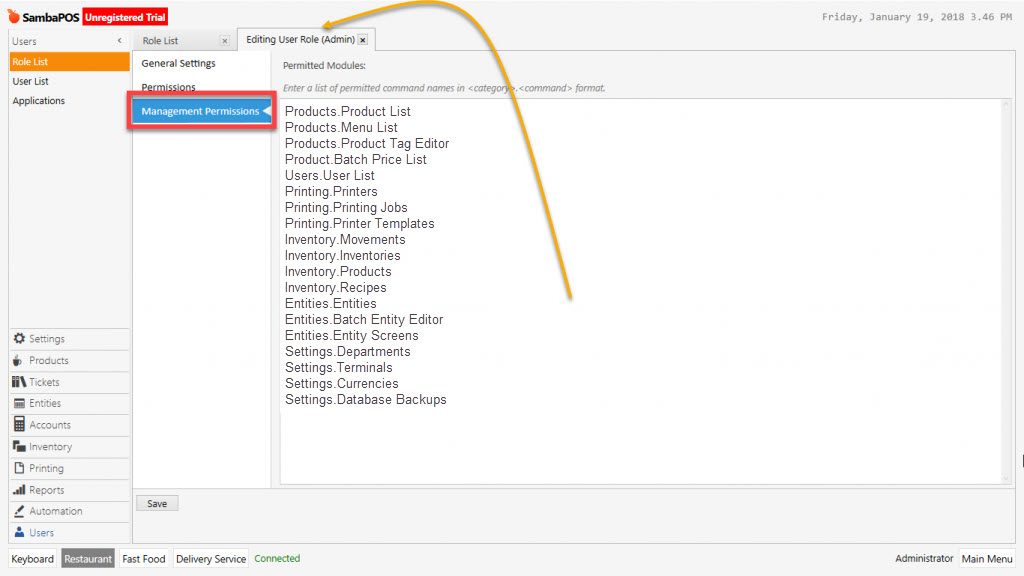
Management Authorization; It is about roles that has been granted to access to management section. For this authorization write authorized category name and add related title after typing “.” (Period)
Example;
Products.Product List
Products.Menu List
Products.Product Tag Editor
Product.Batch Price List
Users.User List
Printing.Printers
Printing.Printing Jobs
Printing.Printer Templates
Inventory.Movements
Inventory.Inventories
Inventory.Products
Inventory.Recipes
Entities.Entities
Entities.Batch Entity Editor
Entities.Entity Screens
Settings.Departments
Settings.Terminals
Settings.Currencies
Settings.Database Backups
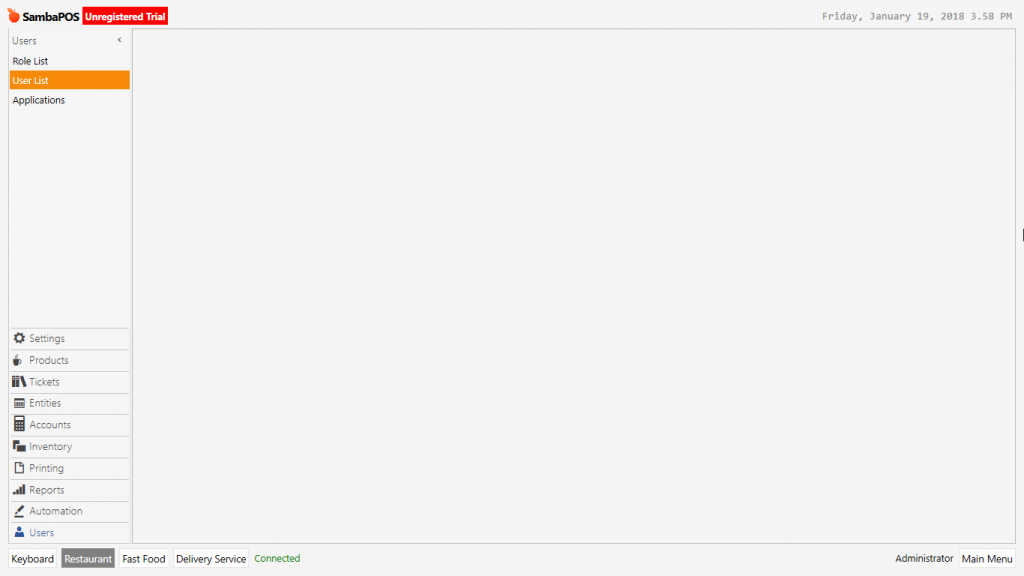
When you perform the management section authorization like above example, only permitted titles will be displayed like in the image below.
3. Mapping Authorizations
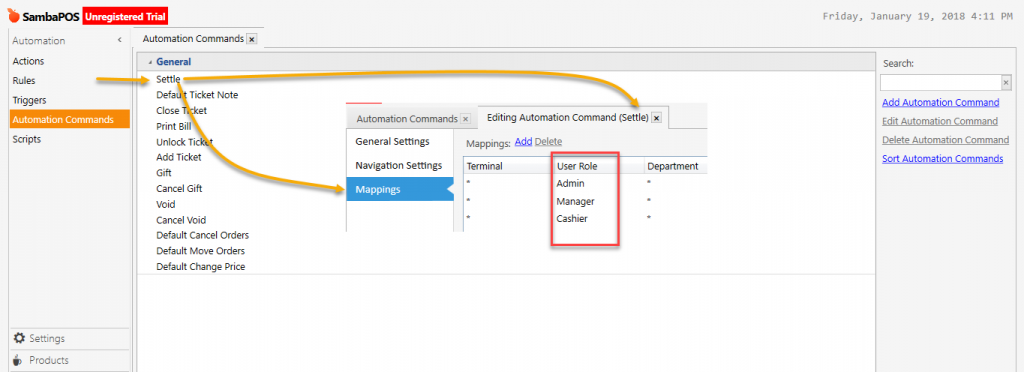
Beside user authorizations it’s also possible to perform role mapping on program functions. Role mapping titles are listed below.
Automation Commands
Rules
Document Types
Ticket Tags
Order Tags
Payment Methods
Change Types
Calculation Selectors
Product Timers
In the below sample getting payment Automation Command Mapping only Admin, Manager and Cashier can get the payment, other roles can not.

