2.1.3.b. Transferring Data from Local DB to SQL Database
1. Checking Local DB Version
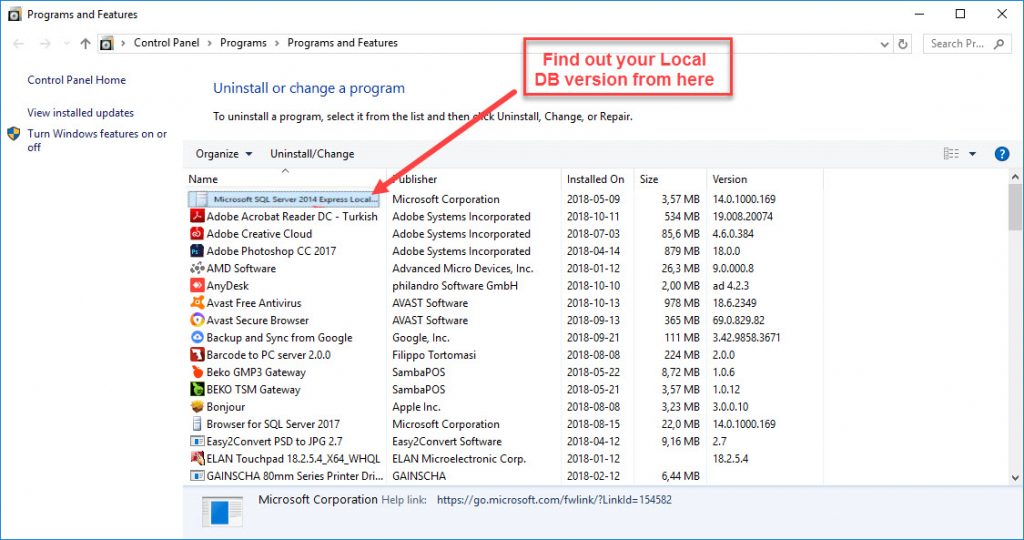
On you computer, Start > Control Panel > Programs and Features > from the list, find out Microsoft SQL Server Local DB version number.
2. Determining Connection String According to Local DB Version
LocalDB String Phrase for SQL Server 2012 : (LocalDB)\v11.0
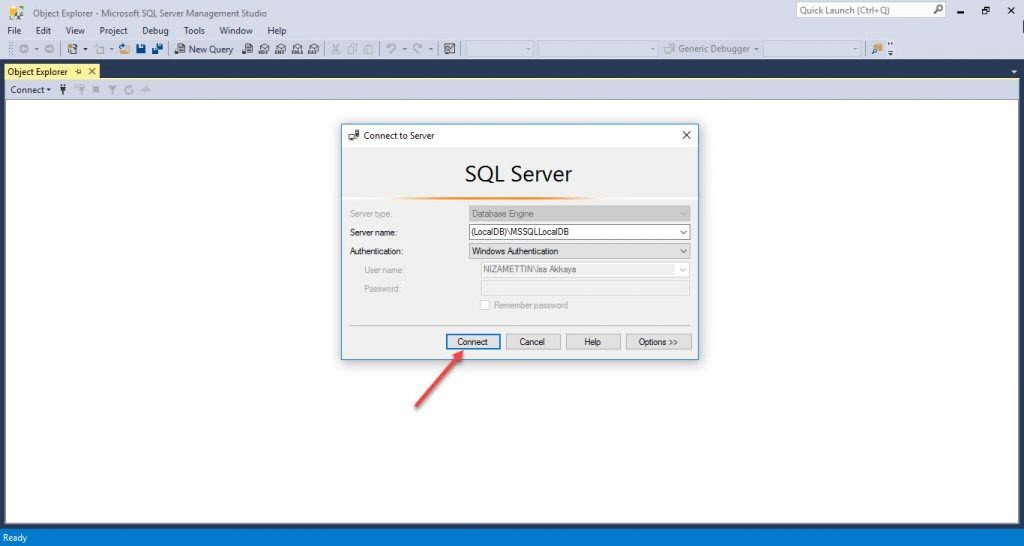
LocalDB String Phrase for SQL Server 2014 : (LocalDB)\MSSQLLocalDB
Start the SQL Management Studio, write necessary phrase into Server field according to your need and Login via Windows Authentication.
3. Getting Data from Local DB
After you logged in, find your Local DB. Usually its named as SAMBAPOS;
![]()
Right click on SAMBAPOS5, in the menu; Tasks > Generate Scripts
![]()
Click on Next in the window.
![]()
In the New Window select Script Entire Database, click on Next, determine the path to save the Script and then click on Advanced.
![]()
Select the SQL Version on your computer for Script For SQL Version;
![]()
Click on Types Of Data To Script, select Schema and Data, click on Ok and Next;
![]()
In the window, click on Next again;
![]()
After completing the process, click on Finish button;
![]()
4. Transferring Data from Local DB to SQL
Login to SQL Management Studio and run the Script which you have created at the step 3;
![]()
When you run the Script, if there is a database which has same name with marked in red box, you will get the below error message.
![]()
In this case, change the database name and click on CTRL+F buttons, write current name of your database into the first line, new name of your database into second line of the box on right top corner and then select Replace All;
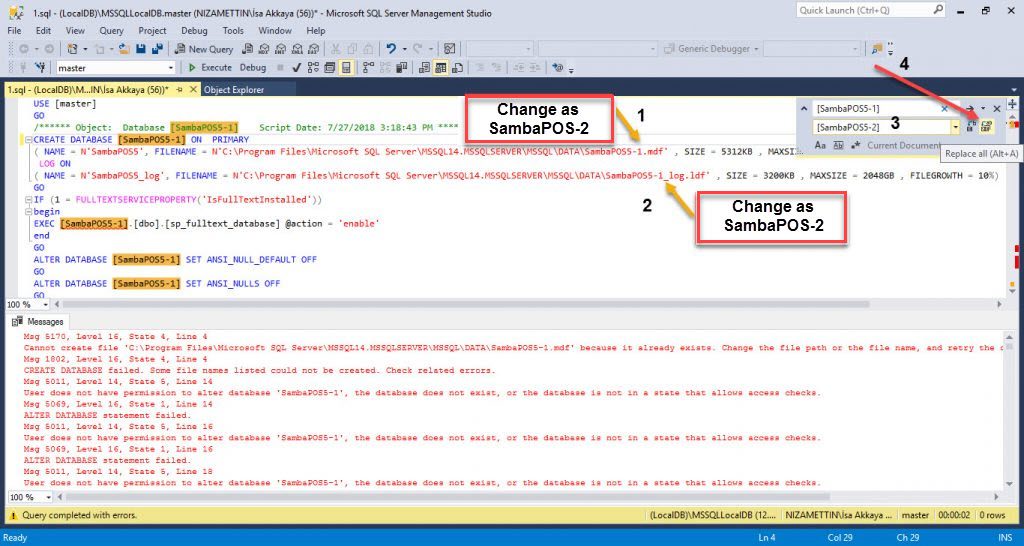
After completing necessary editings, when you click on Execute button, a screen will be occured like below;
![]()
5. Connecting New Database that Created on SQL and SambaPOS
Login to SambaPOS;
Main Menu > Manage > Settings > Local Settings > Database > here click on Edit Connection, enter necessary information and then click on Apply button;
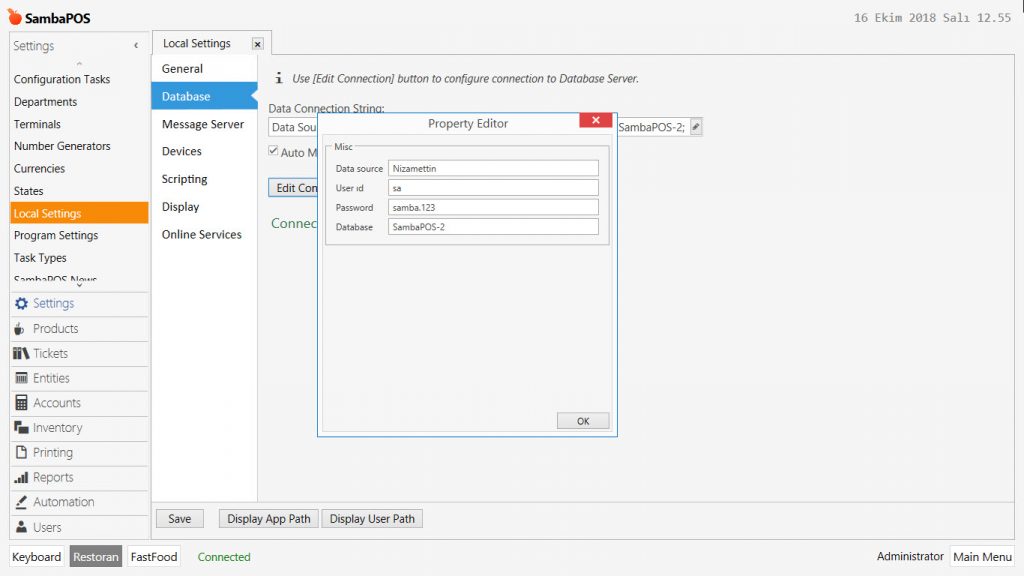
In the newly created Database, all the information from Local DB, will be transferred to SQL Database.