8.20. Wintec Scale Setup
In this document, it will be explained how to setup Wintec brand scale with SambaPOS.
How it works;
Important Note:
In order to list Wintec Scale Device under the SambaPOS > Devices section, your SambaPOS version must be 5.7.22 or above.
1. Installing Scale Module on Samba Market
You need to install Scale Module on Samba Market and restart the SambaPOS.
Main Menu > Samba Market > Click on Install button in Scale Module Part.
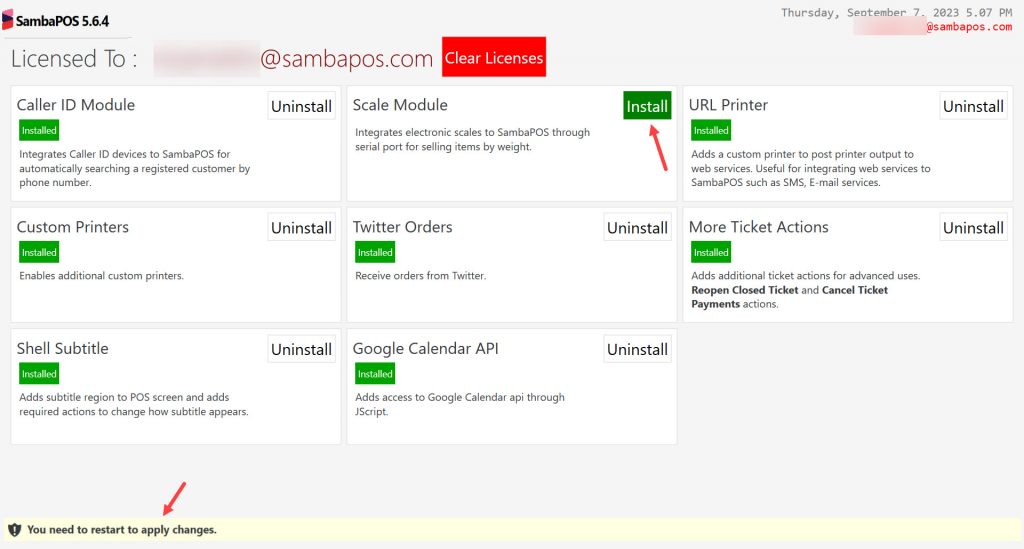
After installing the scale module, you need to restart SambaPOS.
2. Moving Necessary DLL Files
While SambaPOS is completely shut down navigate to C:\Program Files (x86)\SambaPOS5\wintec
Copy the following files;
WintecDriverDisplay.dll
WintecLibDSD.dll
Paste them into This PC > Local Disk (C:) > Program Files (x86) > SambaPOS5
3. Adding Wintec Scale as a Device from SambaPOS
Go to Main Menu > Manage > Settings > Local Settings > Devices > Add Device > Select Wintec Scale > Click on Settings button and configure it according to below image.
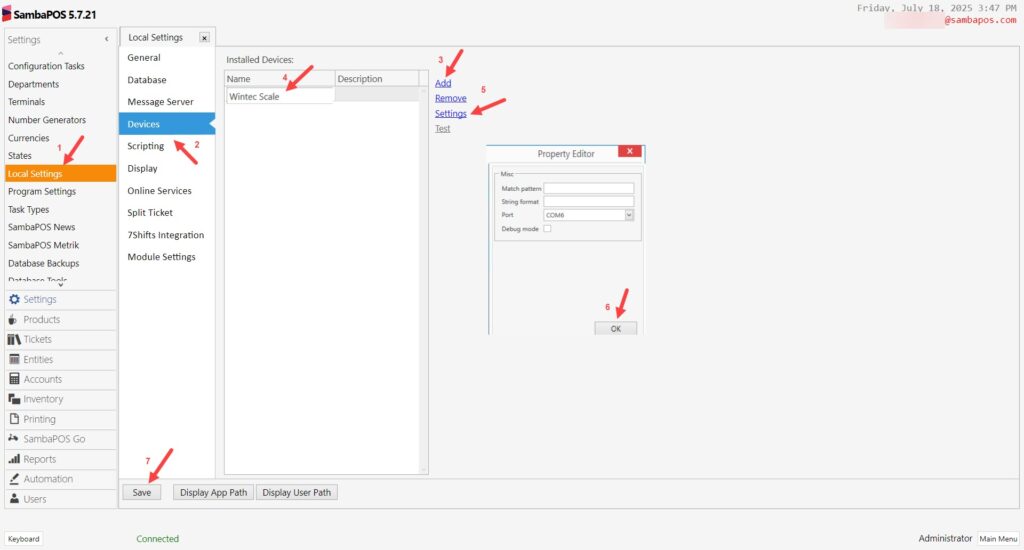
Port: Select the port your device is connected.
After completing necessary editings, click on Save button.
4. Adding Automation Commands
4.1. Adding Send Tarra to Wintec Automation Command
Main Menu > Manage > Automations > Automation Commands > Here, click on Add Automation Command button.
General Settings Section;
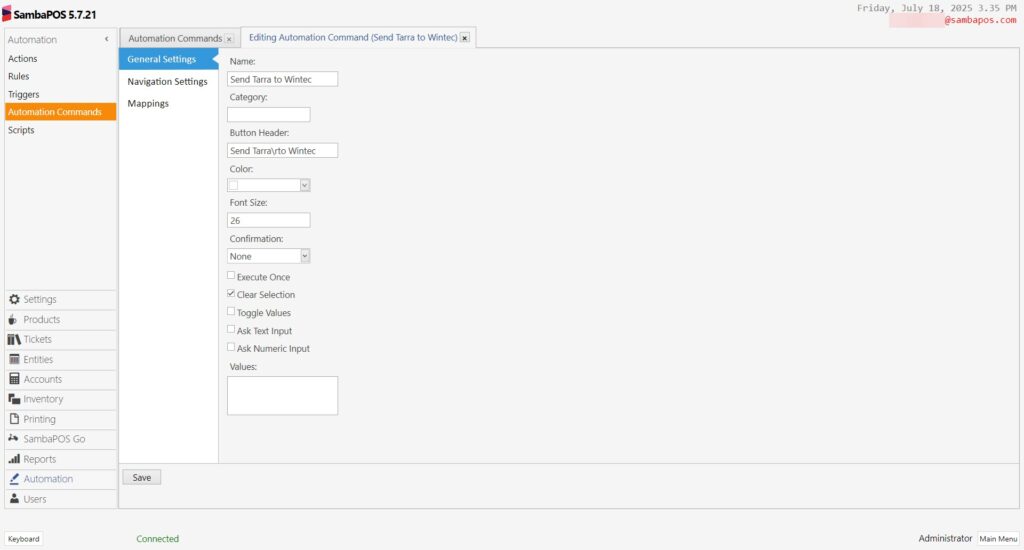
Name: Send Tarra to Wintec
Button Header: Send Tarra\rto Wintec
Mappings Section;
Add a line by clicking on Add button and set it as shown in the image.
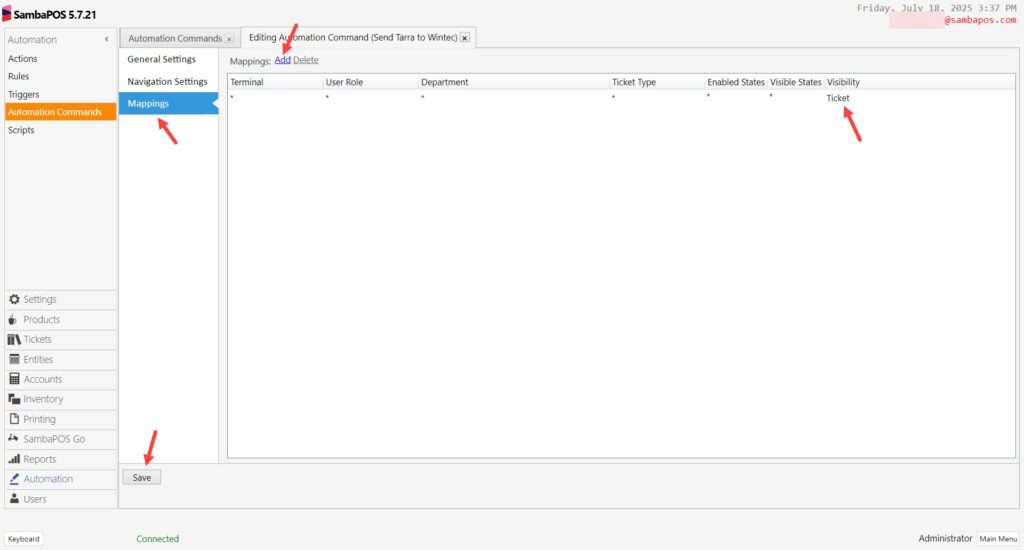
After completing necessary editings, click on Save button.
4.2. Adding Clear Tarra From Wintec Automation Command
Main Menu > Manage > Automations > Automation Commands > Here, click on Add Automation Command button.
General Settings Section;
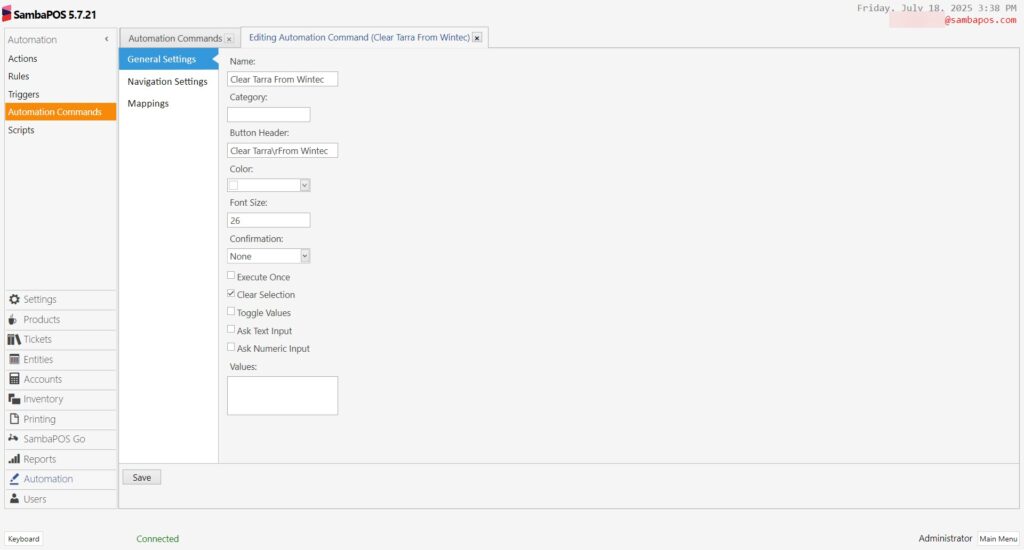
Name: Clear Tarra From Wintec
Button Header: Clear Tarra\rFrom Wintec
Mappings Section;
Add a line by clicking on Add button and set it as shown in the image.
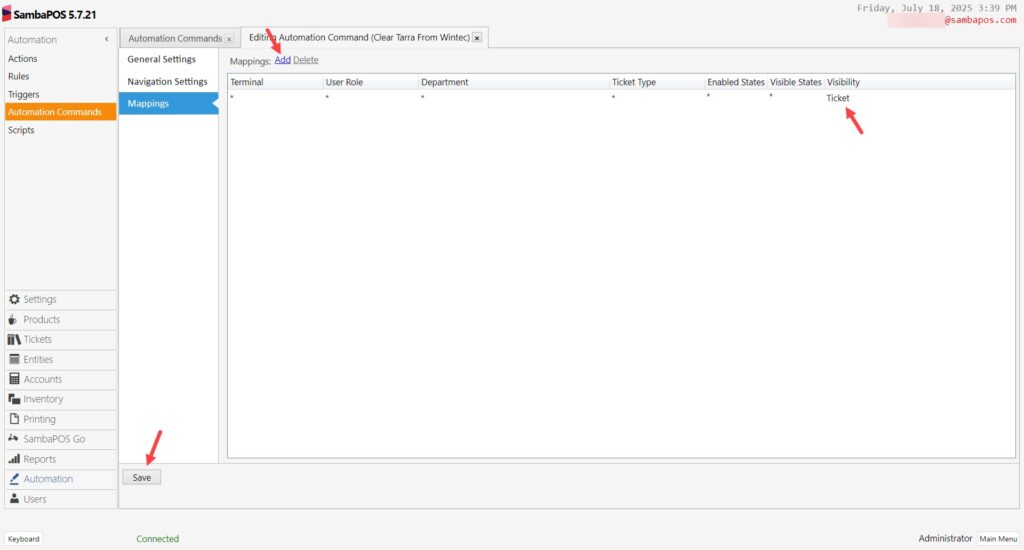
After completing necessary editings, click on Save button.
5. Adding Actions
5.1. Adding Send Tarra to Wintec Action
Main Menu > Manage > Automations > Actions > Here, click on Add Action button.
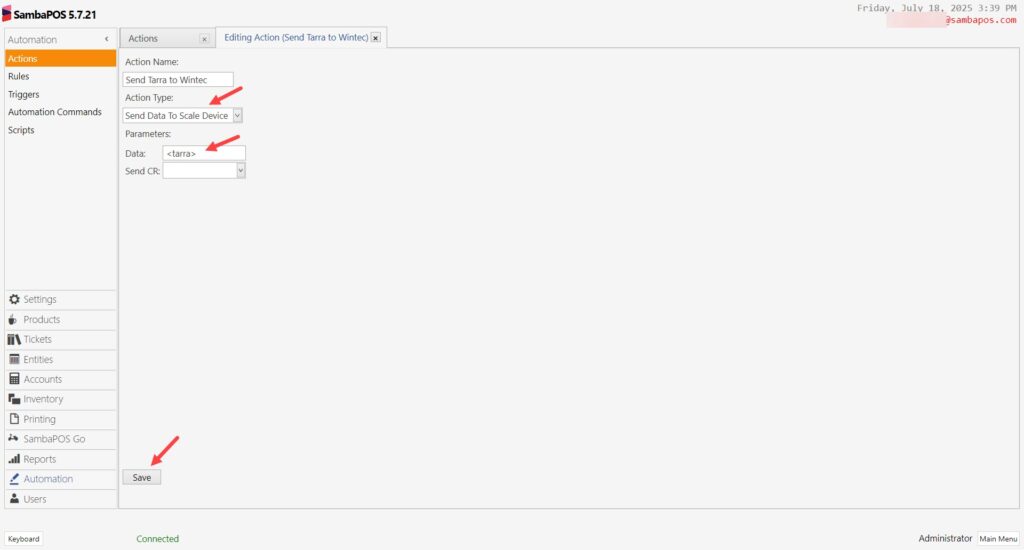
Action Name: Send Tarra to Wintec
Action Type: Send Data To Scale Device
Parameters:
Data: <tarra>
After completing necessary editings, click on Save button.
5.2. Adding Clear Tarra From Wintec Action
Main Menu > Manage > Automations > Actions > Here, click on Add Action button.
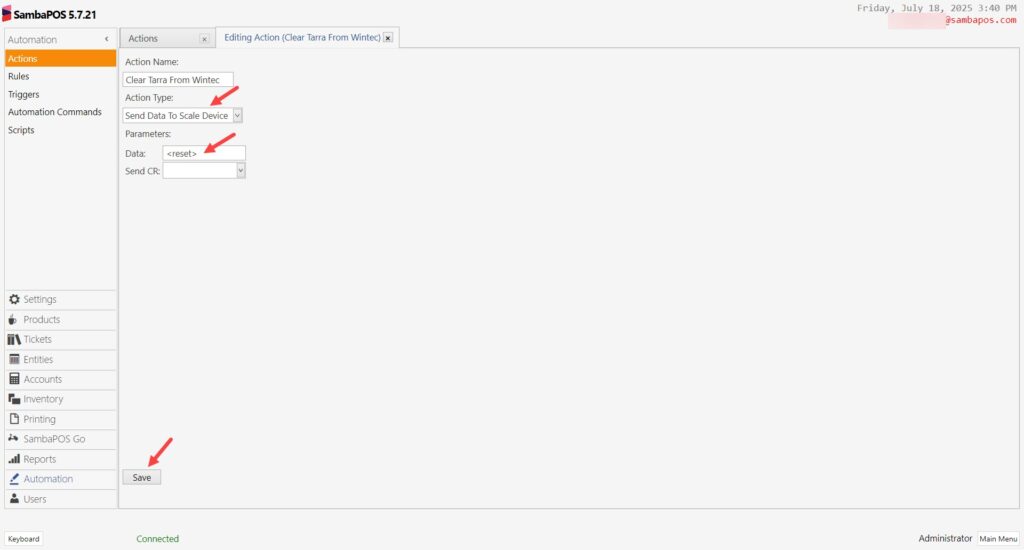
Action Name: Clear Tarra From Wintec
Action Type:Send Data To Scale Device
Parameters:
Data: <reset>
After completing necessary editings, click on Save button.
6. Editing Close Ticket Rule
Main Menu > Manage > Automations > Rules > Close Ticket > Here, click on Select Actions and add Clear Tarra From Wintec Action into the rule.
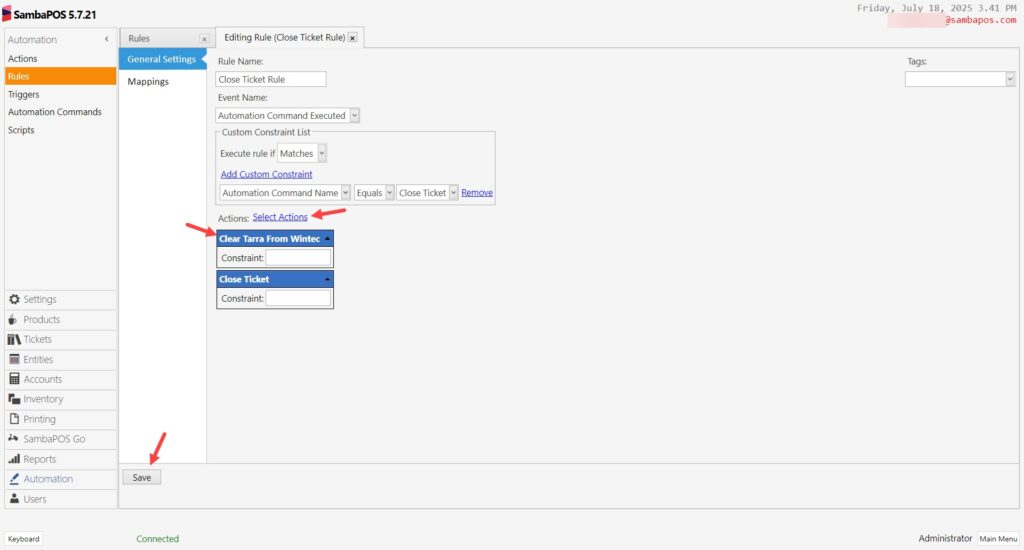
After completing necessary editings, click on Save button.
7. Adding Rules
7.1. Adding Send Tarra to Wintec Rule
Main Menu > Manage > Automations > Rules > Here, click on Add Rule.

Rule Name: Send Tarra to Wintec
Event Name: Automation Command Executed
Execute Rule If: Matches
Add Custom Constraint:
Automation Command Name|Equals|Send Tarra to Wintec
Select Actions:
Action: Send Tarra to Wintec
After completing necessary editings, click on Save button.
7.2. Adding Clear Tarra From Wintec Rule
Main Menu > Manage > Automations > Rules > Here, click on Add Rule.
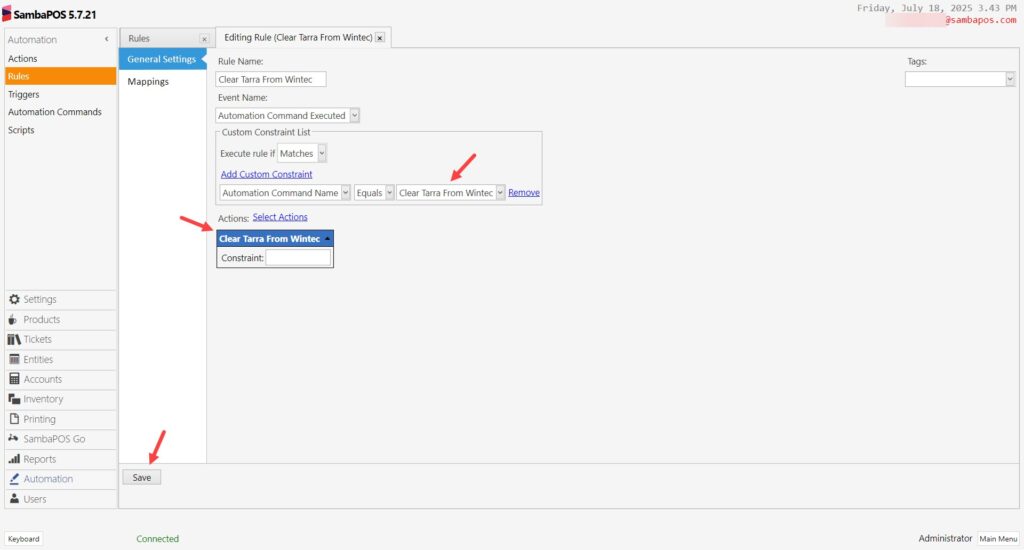
Rule Name:Clear Tarra From Wintec
Event Name: Automation Command Executed
Execute Rule If: Matches
Add Custom Constraint:
Automation Command Name|Equals|Clear Tarra From Wintec
Select Actions:
Action: Clear Tarra From Wintec
After completing necessary editings, click on Save button.