8.19. How to Configure SambaPOS KDS V2?
In this document it will be explained how to configure SambaPOS KDS V2.
System Requirements;
1. You need to have SambaPOS KDS License in the same account that you have SambaPOS V5 Pro License.
2. It is necessary to purchase SambaPOS KDS License as much as device counts to be used.
3. SambaPOS KDS V2 works only Tablet Devices.
4. You need to have minimum SambaPOS 5.7.14 version.
5. Mobile Device Features
For Android Devices;
– All of the Google Services must be installed on the mobile device.
– Android version must be 6.0 or higher.
– Minimum 2 GB of RAM
For iOS Devices;
– iOS version must be 11.0 or higher.
Where to Download;
You can download SambaPOS KDS application from Google Play Store and Appstore.
You can purchase SambaPOS KDS License from cp.sambapos.com account’s Store Section.
We Can Gather the Steps to Be Done Under 5 Main Headers;
1. Windows Server Settings
2. About SambaPOS KDS License
3. Settings That Should Be Done on SambaPOS
4. Settings That Should Be Done on https://kdspanel.sambapos.com/
5. Usage of SambaPOS KDS on Tablet Device
1. Windows Server Settings
1.1. Server Features Server Operating System:
Windows 10 or above operating system and the latest version of Microsoft SQL Server
Server Hardware:
Minimum Intel i5 10th Gen CPU, 8 GB of Ram, 120 GB SSD Harddisk or higher
1.2. Database Features Latest version of Microsoft SQL Express Server Download Link Setup Document Link
1.3. Network Settings SambaPOS Server and Mobile Client must be in the same IP group. Server:
Go to Control Panel > Network and Sharing Center > Change Adapter Settings > Local Area Connection > Internet Protocol Version 4 (TCP/IPv4) > Properties > Write a static IP.
1.4. Windows Firewall Settings Please deactivate all third party internet security and firewall services.
Note: If you don’t have MSSQL database, please visit the link to configure settings https://kb.sambapos.com/2-1-3-sql-express-server-setup/?lang=en
SambaPOS KDS V2 doesn’t work without MSSQL database.
– Please deactivate all third party internet security services and Windows Firewall.
Control Panel > System and Security > Windows Firewall > Turn Windows Firewall on or off > Turn off Windows Firewall for Private Network Settings and Public Network Settings
1.5. MSSQL TCP/IP Ports Go to SQL Server Configuration Manager and “Enable” TCP/IP Sharing to connect MSSQL Database from clients.
– Right Click My Computer > Manage > Services and Applications > SQL Server Configuration Manager > SQL Server Network Configuration > Protocol For MSSQLSERVER > TCPIP > Enabled
1.6. Message Server Settings
1.6.1. SambaPOS Message Server Controls and Settings
SambaPOS KDS V2 uses SambaPOS Message Server for communication.
You might be using SambaPOS Message Server with default settings.
If you don’t use Message Server or if using it with different settings than default in this case you have to configure necessary settings by following below explanations.
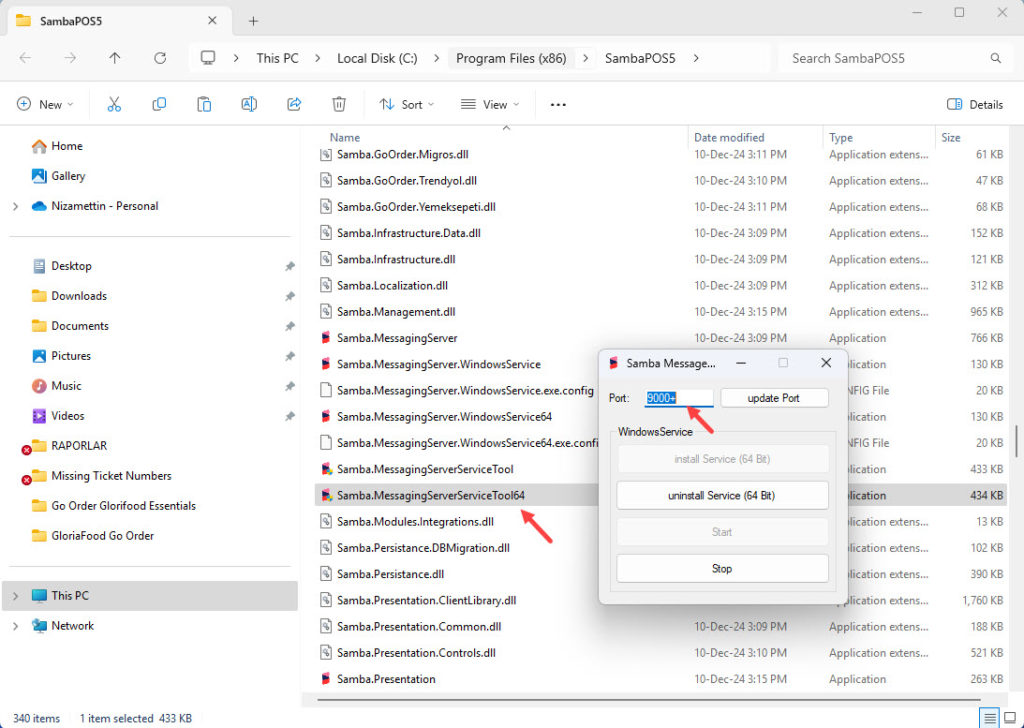
To configure Message Server Settings, execute “Samba.MessagingServerServiceTool.exe” file which is located in the directory that SambaPOS is installed.
Port: 9000+
Note: Port has to be 9000+ By checking image below you can see how it is supposed to be simply configured and also notice that it has to be on Start status.
1.6.2. SambaPOS Manage Message Server Settings
Message Server settings are supposed to be configured also in SambaPOS by following the settings above.
Go to Manage > Settings > Local Settings > Message Server, in here perform the mentioned settings and click on SAVE button.
Message Server Name: http://main_computer_name (Name of SambaPOS V5 installed main computer) or http://123.123.123.123 (IP address of SambaPOS V5 installed computer)
Message Server Port: 9000 Auto Start Message Client: [X] (Has to be selected)
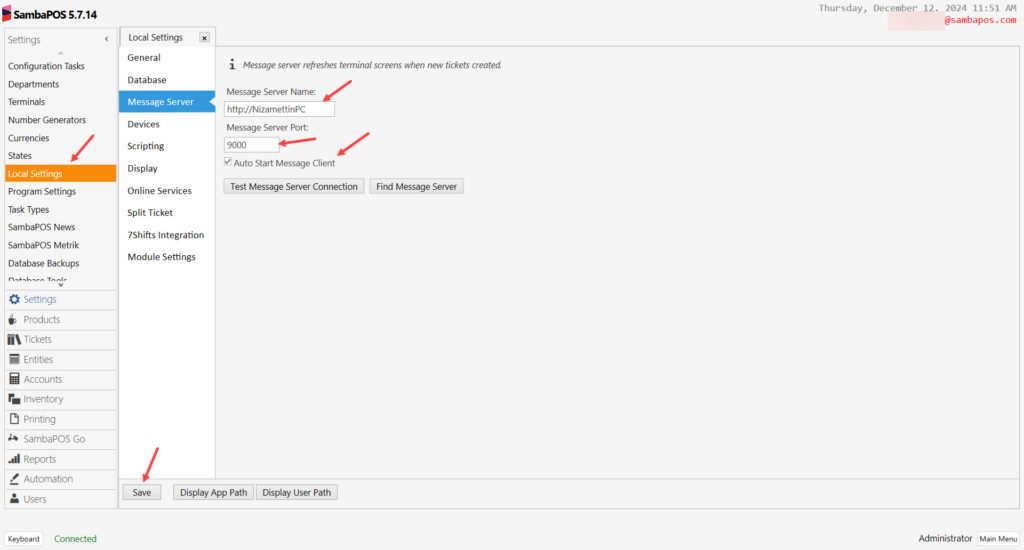
After completing necessary editings, click on Save buton.
2. About SambaPOS KDS License
2.1. SambaPOS KDS License
If you don’t have SambaPOS KDS License, you have to purchase it from SambaPOS CP website.
Important Note:
Your SambaPOS KDS License and SambaPOS V5 Pro license have to be defined under the same email address on our CP website.
2.2. SambaPOS License Activation Check Check the SambaPOS Main License status.
3. Settings That Should Be Done on SambaPOS
3.1. Creating Kitchen State
You need to create a new Status on SambaPOS and use the same Status Name for Status Screen on the kdsadmin.sambapos.com;
Main Menu > Manage > Settings > States > Add State > Here, add a new state by clicking on Add State button.
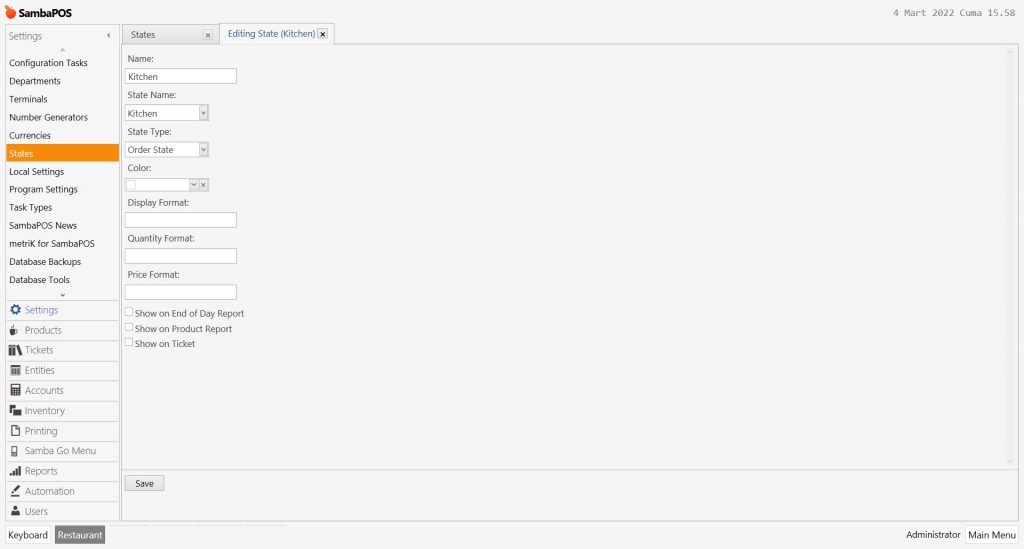
Name: Kitchen
State Name: Kitchen
State Type: Order State
After completing necessary editings, click on Save button.
3.2. Creating User
Main Menu > Manage > Users > Users List > Here, click on Add User.
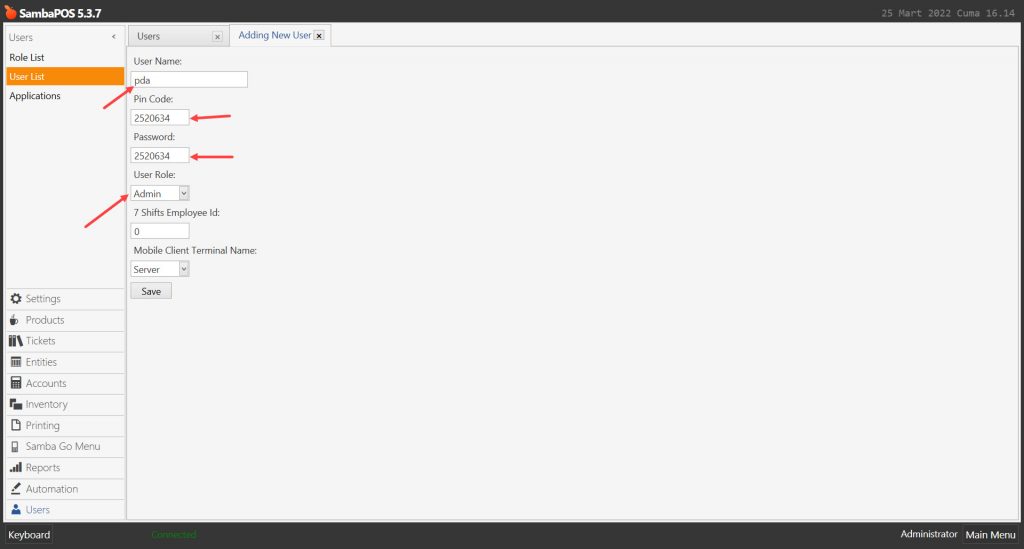
User Name: pda
Pin Code: 2520634 (Exactly this pin code has to be used)
Password: 2520634 (Exactly this password has to be used)
Role: Admin
After completing necessary editings, click on Save button.
3.3. Creating Application
Main Menu > Manage > Users > Applications > Here, click on Add Application.
General Settins Section;
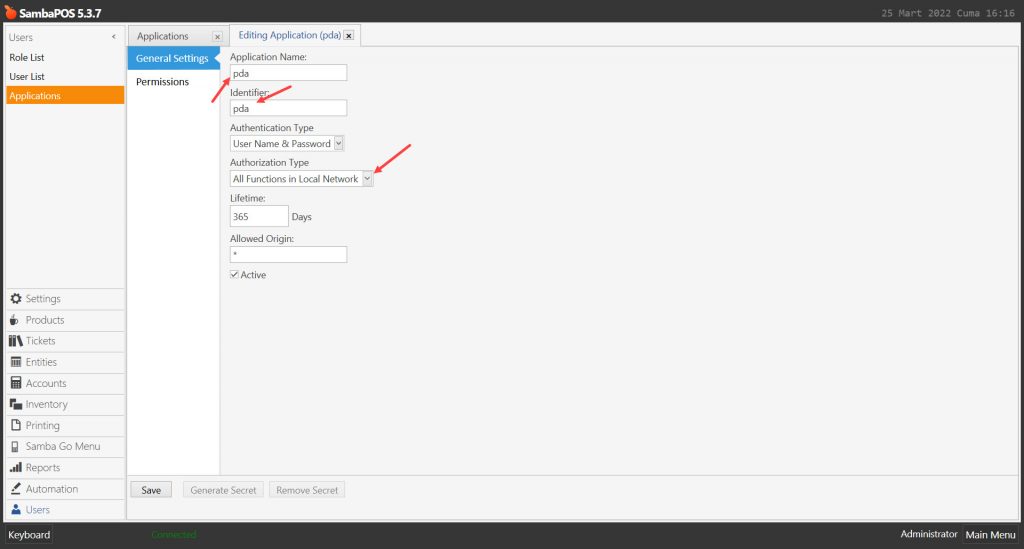
Application Name: pda
Identifier: pda
Authentication Type: User Name & Password
Authorization Type: All Functions in Local Network
Lifetime: 365
Allowed Origin: *
Active: Must be selected
After creating pda application you need to restart SambaPOS Messaging Server.
Once you completed necessary editings, click on Save button.
3.4. Sending Menu to SambaPOS KDS
Main Menu > Manage > Settings > Program Settings > SambaPOS KDS;
In here, you need to type the name of Menu that you want to send to SambaPOS KDS and click on Send Menu to SambaPOS KDS button.
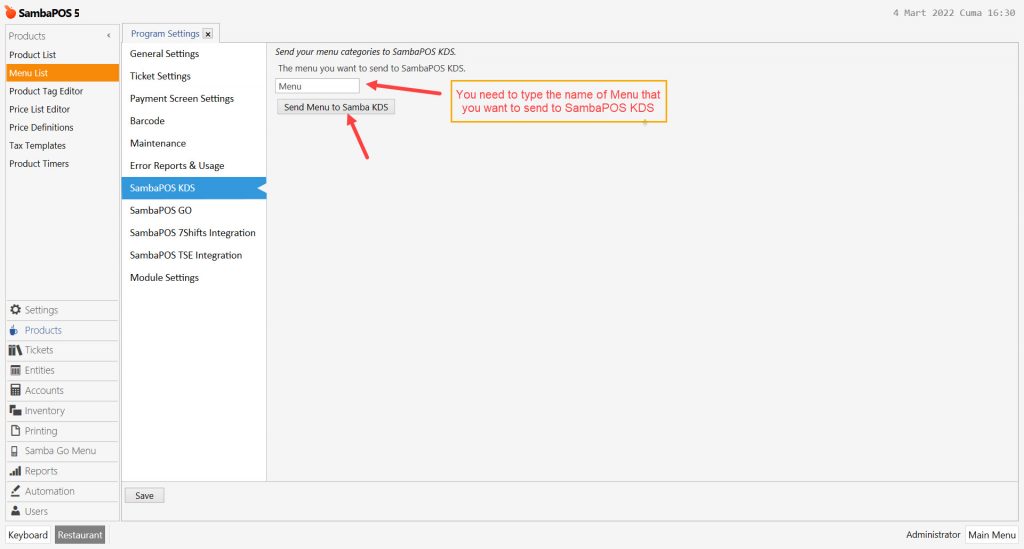
After completing necessary editings, click on Save button.
4. Settings That Should Be Done on kdspanel.sambapos.com
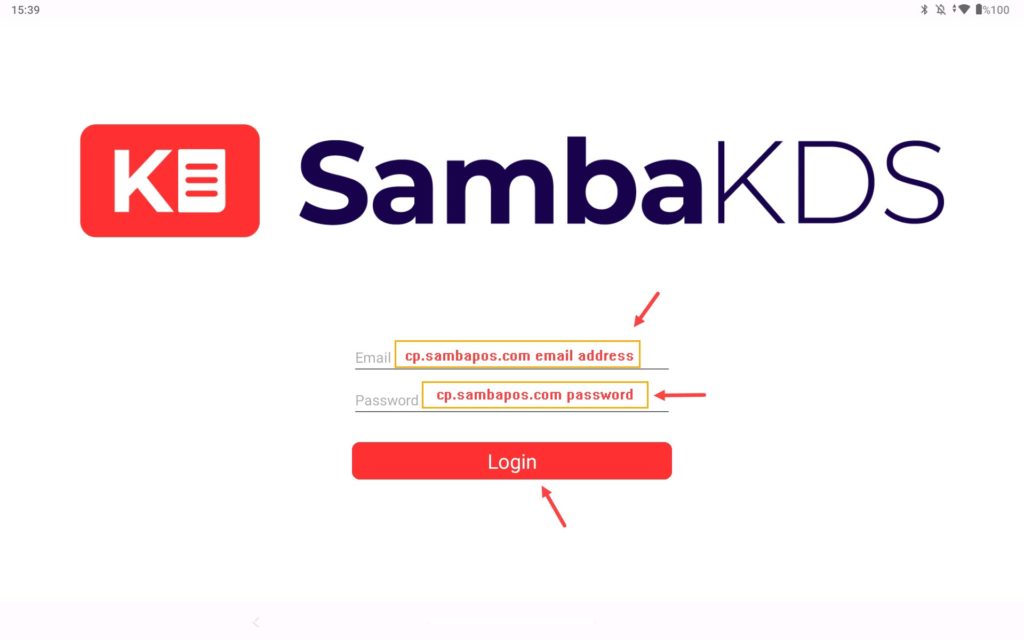
4.1.1. Logging in to Tablet Device
At the beginning you need to login to SambaPOS KDS on tablet for once by using your cp.sambapos.com account email address and password; 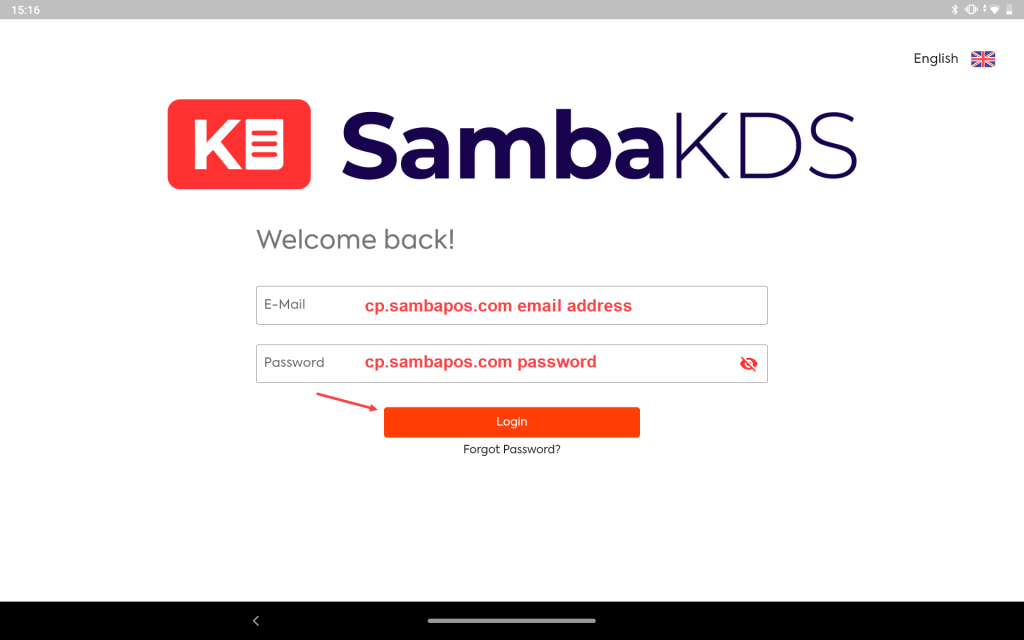
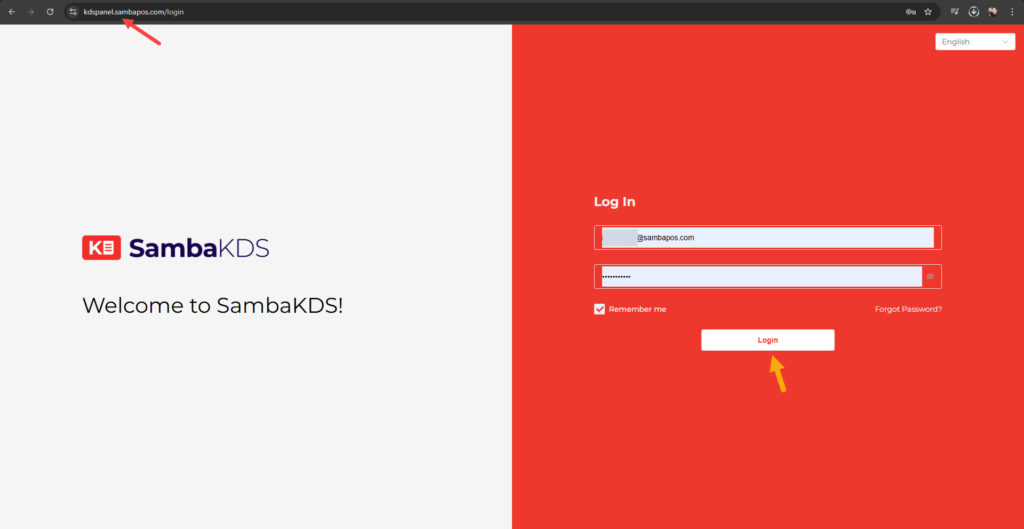
4.1.2. Logging in to kdspanel.sambapos.com
You need to Login to https://kdspanel.sambapos.com/ website by using your SambaPOS V5 Pro License email address and password.
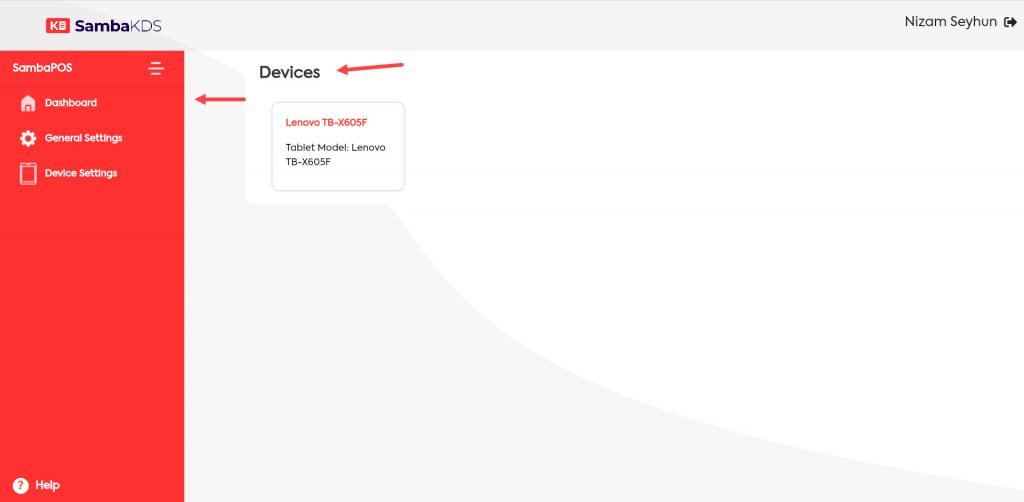
4.2. Dashboard Screen
Your devices will be listed in this screen
4.3. General Settings Screen
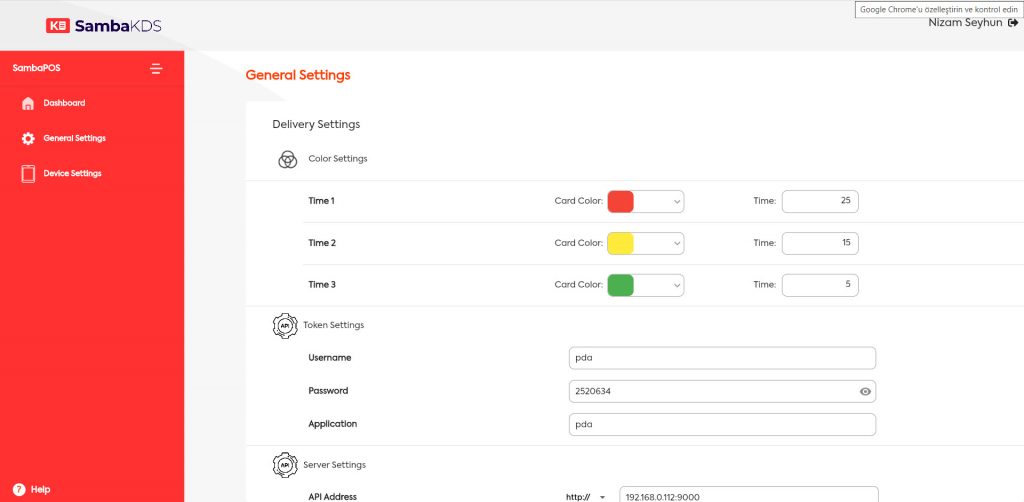
4.3.1. Color Settings
In here you can determine the card colors according to order time such as Green for as soon as the order is placed, Yellow after 15th minutes and Red after 25th minutes etc.
4.3.2. Token Settings
Username: pda
Password: 2520634
Application: pda
4.3.3. Server Settings
In here, you need to type IP Address of your main computer and then type :9000 as shown in the image.
Example >> 192.168.0.146:9000
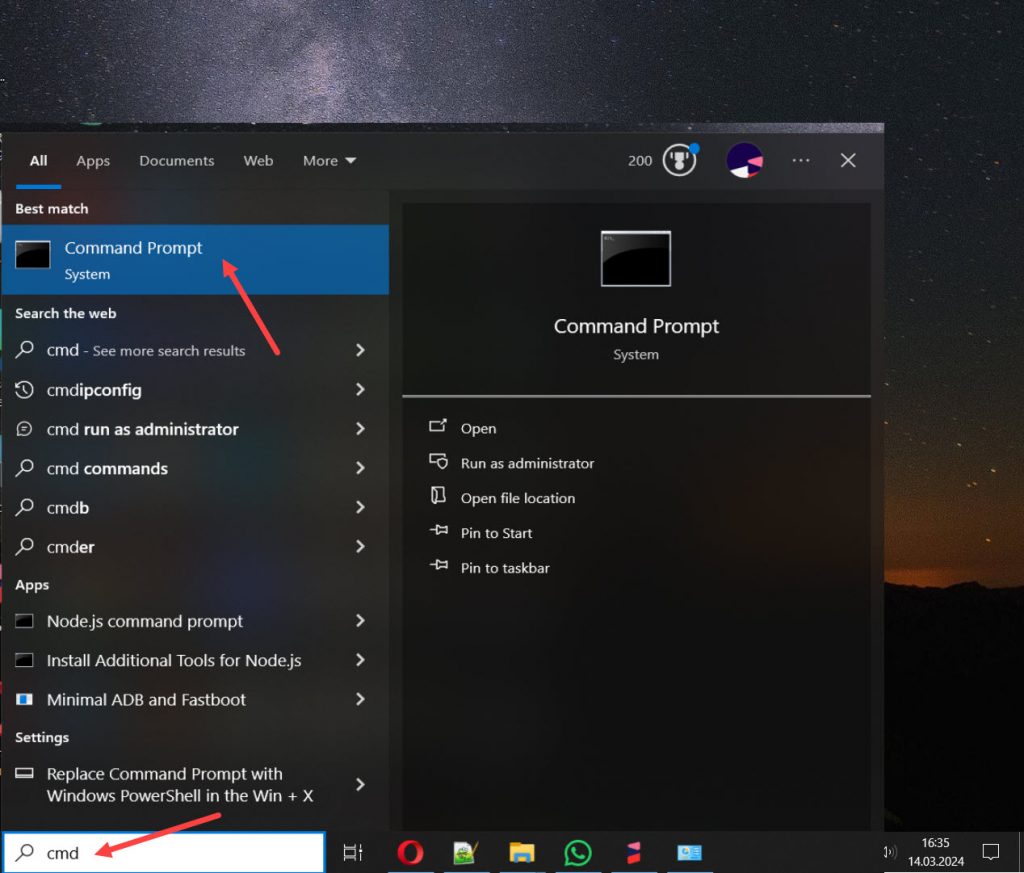
In order to find your Main Computer’s Ip Address;
– Into search field of your computer type CMD and click on Enter button;
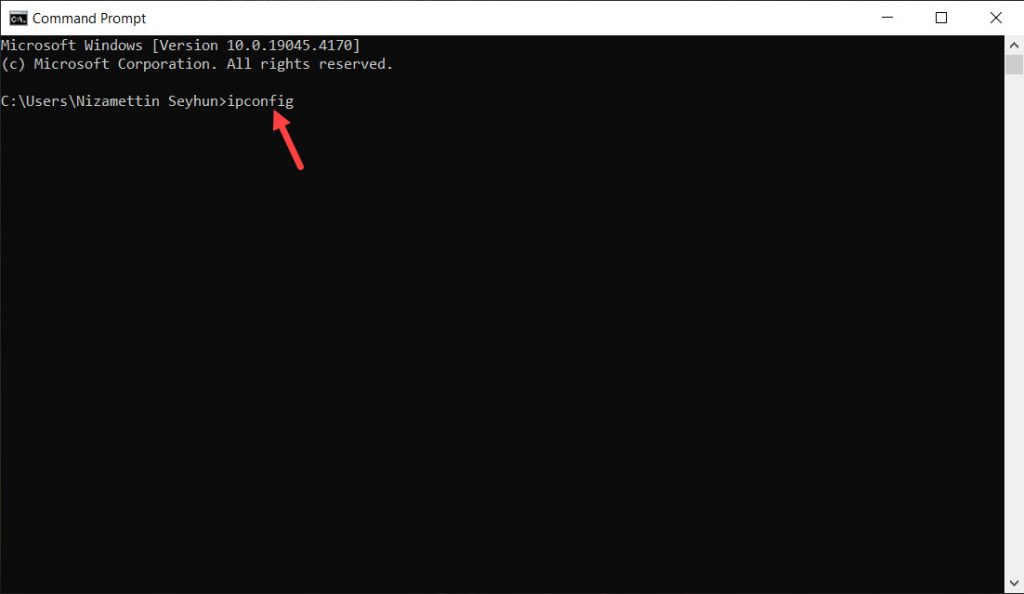
– In the CMD screen type ipconfig and click on Enter button;
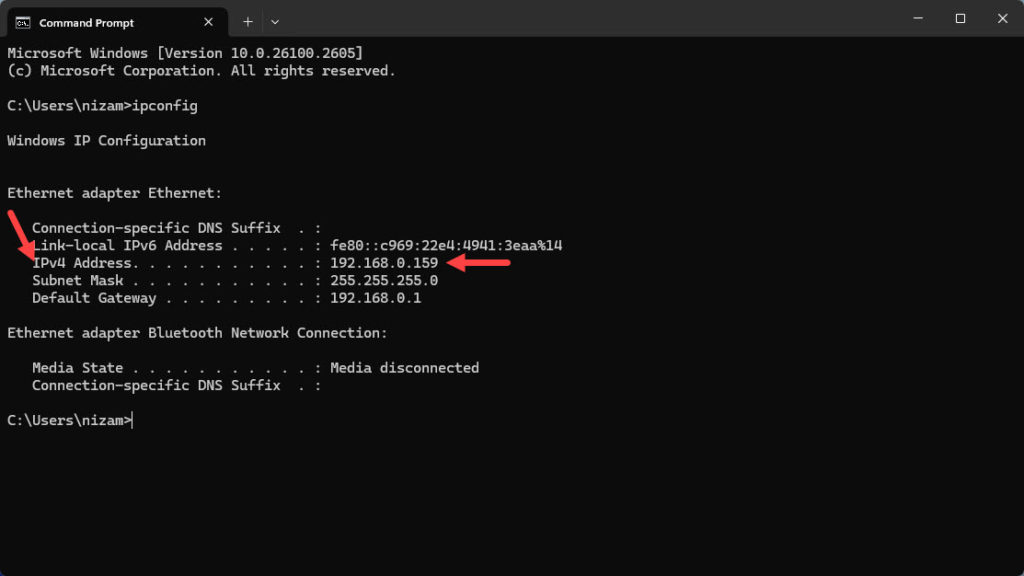
– In the CMD Screen IPv4 Address line refers to your computer’s IP Address;
4.3.4. Status Settings
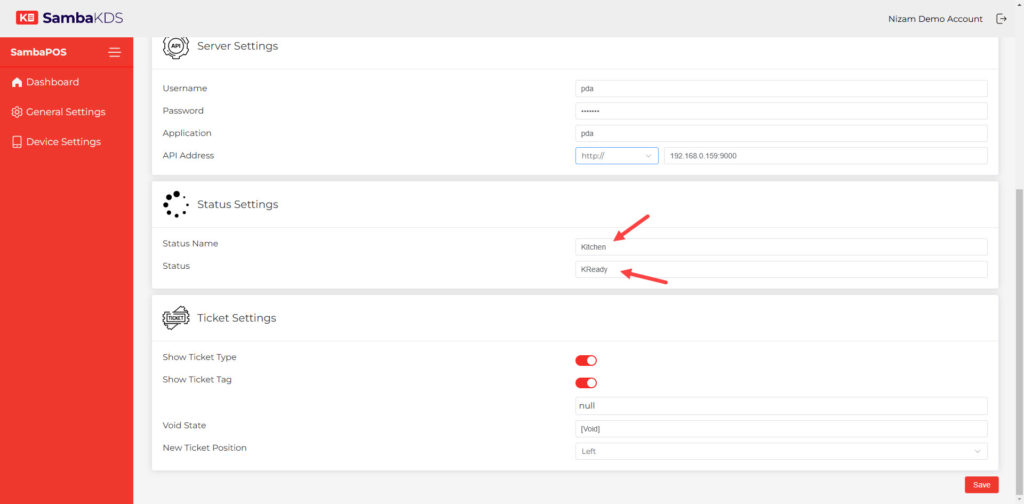
Status Name: Kitchen
Status: KReady
4.3.5. Ticket Settings
4.3.5.1. Show Ticket Type:
Select this option if you want to display the Ticket Type Name on the SambaPOS KDS.
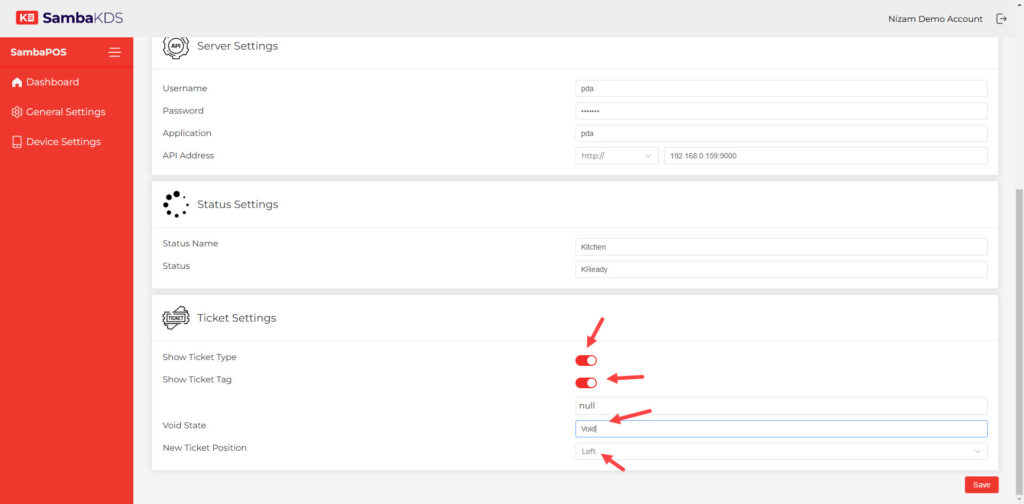
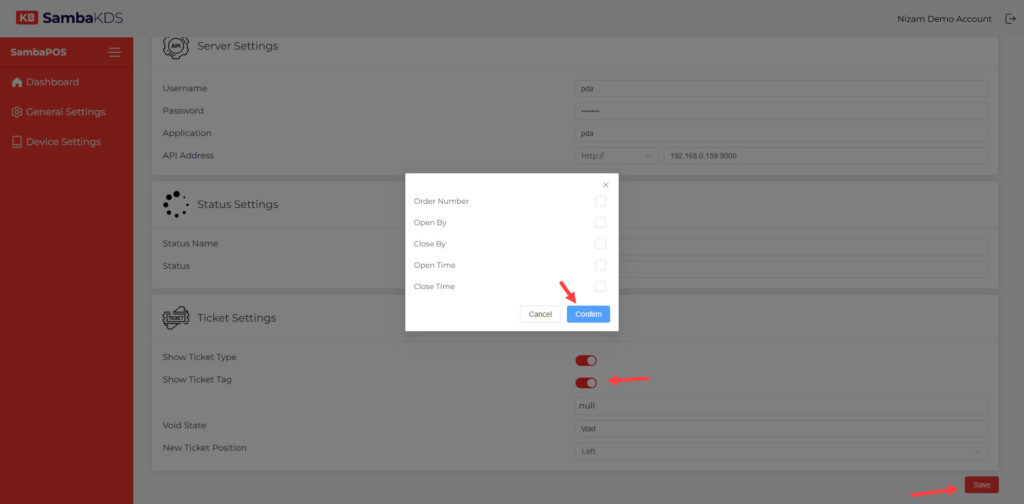
4.3.5.2. Show Ticket Tag:
You can use this option if you want to display the Ticket Tags on the SambaPOS KDS.
4.3.5.3. Void State: Void
After completing necessary editings, click on Save button.
4.4. Device Settings Screen
In here select your device to configure;
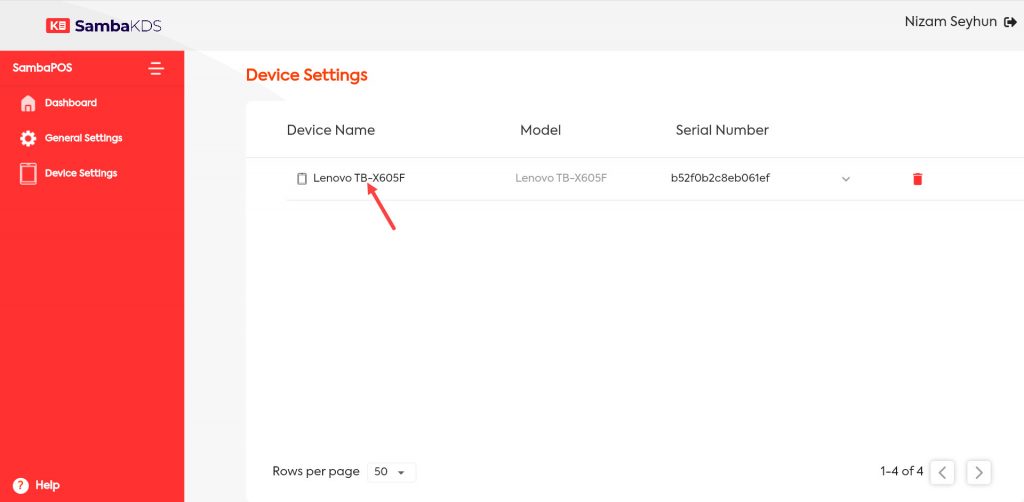
Device Name:
You can name your device according to your needs as Food, Drink etc.
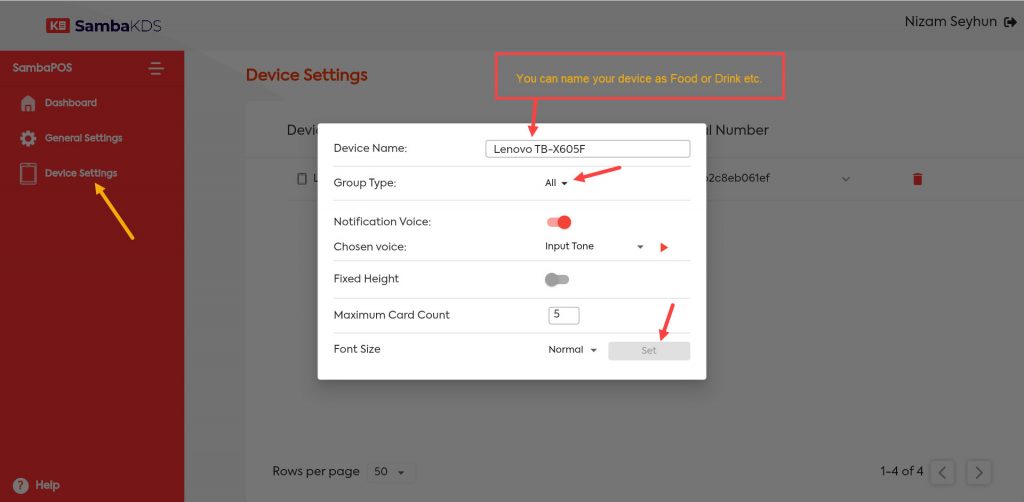
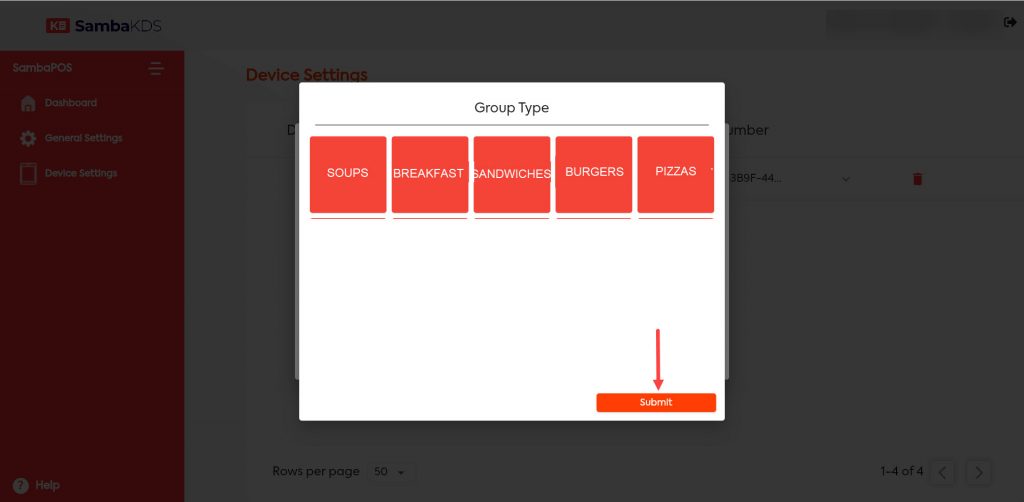
Group Type:
From the Group Type option, you can determine the categories to be sent to related devices;
Notification Voice:
You can Enable or Disable notification voice by this option.
Choosen Voice:
You can change the Notification Voice from here.
5. Usage of SambaPOS KDS on Tablet Device
Login to KDS App with your SambaPOS License Email Address and Password;
Once you logged in click on Settings Button;
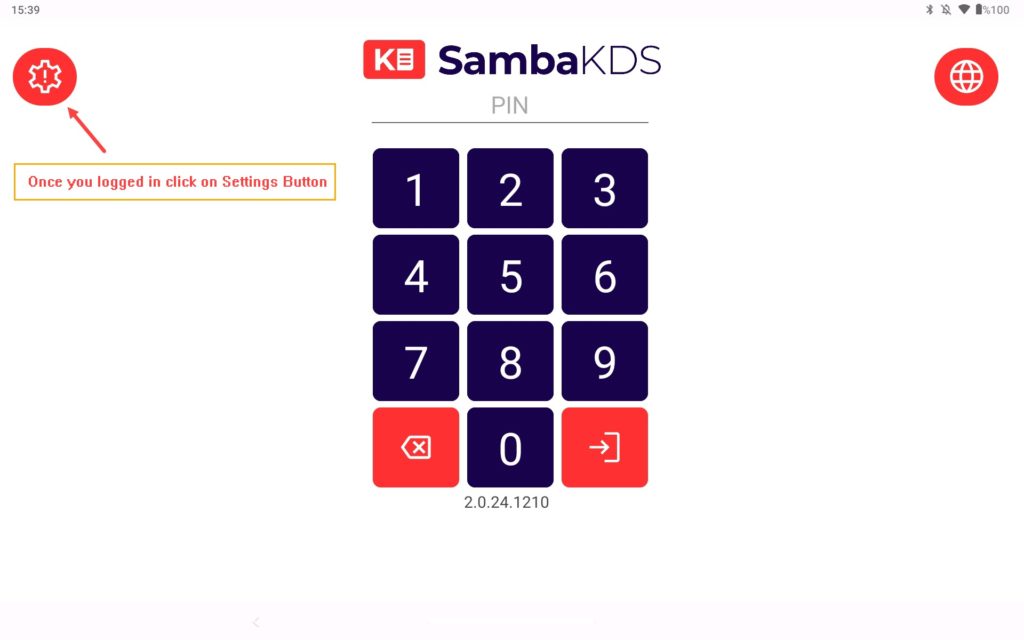
After you clicked on the Settings button you will see the below screen;
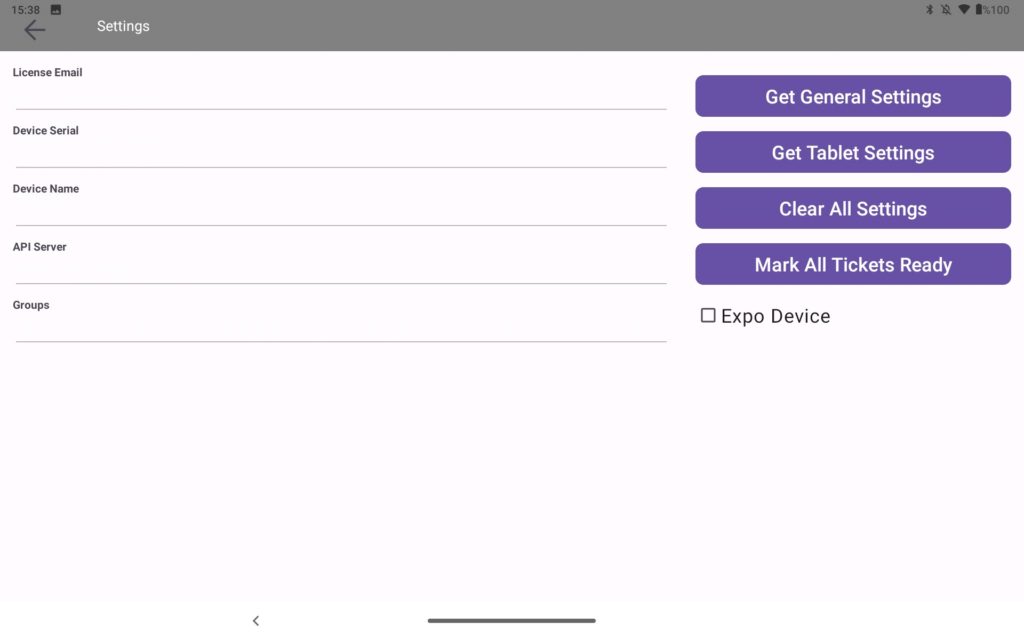
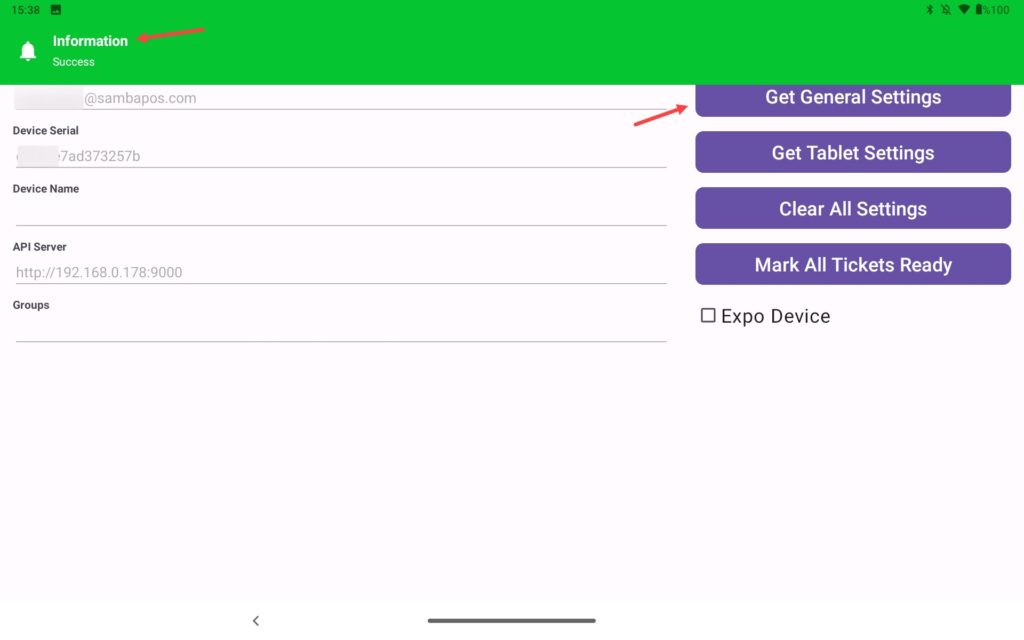
In this screen first you need to click on General Settings Button;
After that you need to click on Get Tablet Settings Button;

Once you finished clicking Settings Button then you need to click on Back Arrow button which is upper left side of the screen;

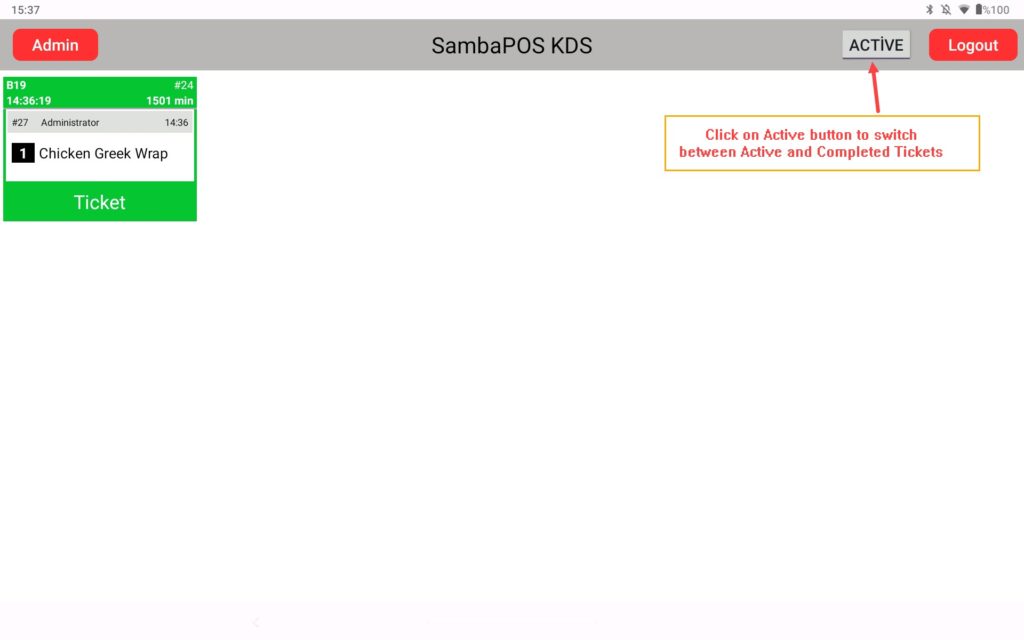
Now when you place an order on SambaPOS you will be able to display it on KDS Screen as below;
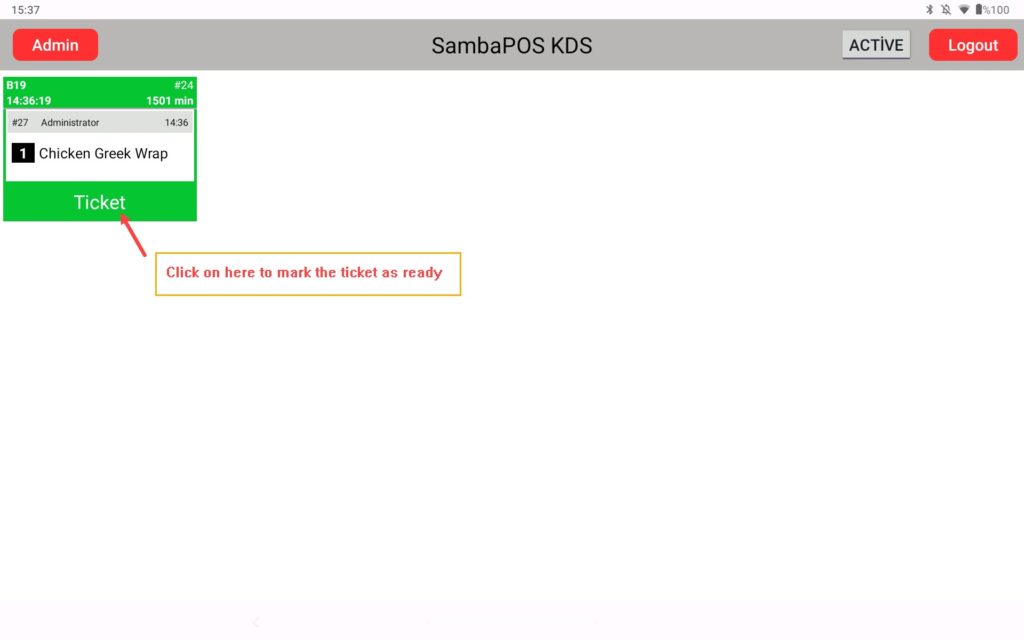
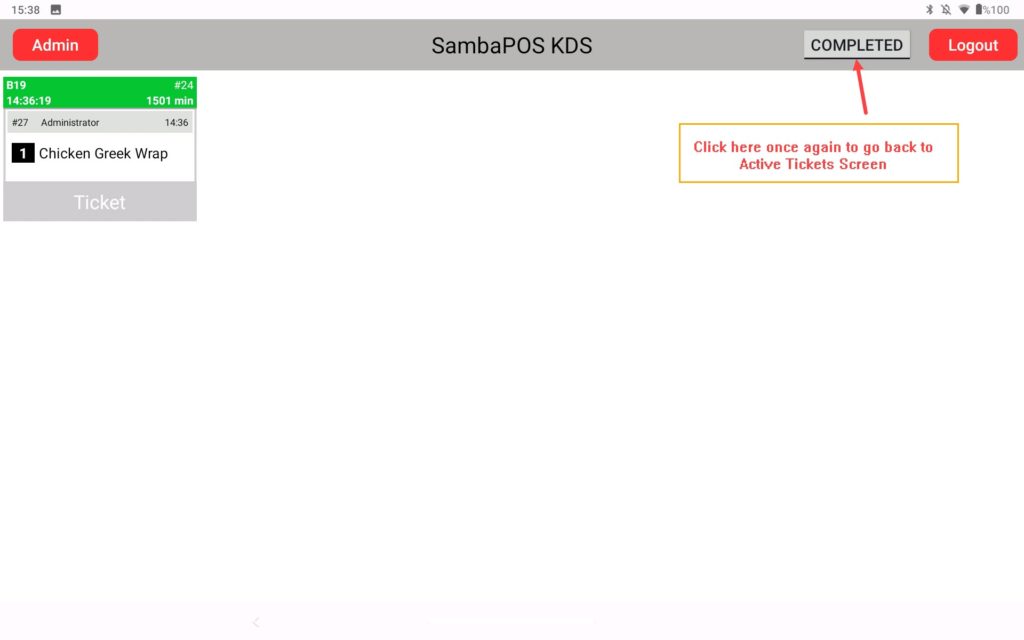
If you click on Active button once you will be seeing the Completed Tickets;