6.29. Go Order GloriaFood Integration
In this document it will be explained how to handle Go Order GloriaFood Integration.
1. Before Installation
1.1. Hardware, Operating System and SambaPOS Requirements
- Windows 10 or above Windows Operating System,
- The latest version of Microsoft SQL Server,
- SambaPOS 5.7.14 or above version. Should be started with these configurations.
1.2. About Online Order Integration Module License
If you don’t have SambaPOS Go Order GloriaFood Integration License, you have to purchase a license by using SambaPOS CP website.
Important Note:
Your SambaPOS Go Order GloriaFood Integration License and SambaPOS V5 Pro license have to be defined under the same email address on our CP website.
2. Windows Server Settings
2.1. Server Features
Server Operating System: Windows 10 or higher Operating System and the latest version of Microsoft SQL Server
Server Hardware: Minimum Intel i5 10th Gen CPU, 8 GB of Ram, 120 GB or higher SSD Harddisk
2.2. Database Features
Latest Microsoft® SQL Server® Express With Management
SQL Server Download Link
SQL Server Setup Document Link
2.3. Windows Firewall Settings
You need to configure your firewall services as explained in the SQL Server Setup document.
Note: If you don’t have MSSQL database, please visit the link to configure settings
https://kb.sambapos.com/2-1-3-sql-express-server-setup/?lang=en
Control Panel > System and Security > Windows Firewall > Turn Windows Firewall on or off > Turn off Windows Firewall for Private Network Settings and Public Network Settings
2.4. MSSQL TCP/IP Ports
Go to SQL Server Configuration Manager and “Enable” TCP/IP Sharing to connect MSSQL Database from clients.
– Right Click My Computer > Manage > Services and Applications > SQL Server Configuration Manager > SQL Server Network Configuration > Protocol For MSSQLSERVER > TCPIP > Enabled
3. Go Order GloriaFood Key Creation
If you don’t have an account on Gloria Food (www.gloriafood.com) website, you need to start by creating a new account.
After creating the account, go to Online Ordering > Integrations > Your Integrations > Add Integration > Custom Integration.
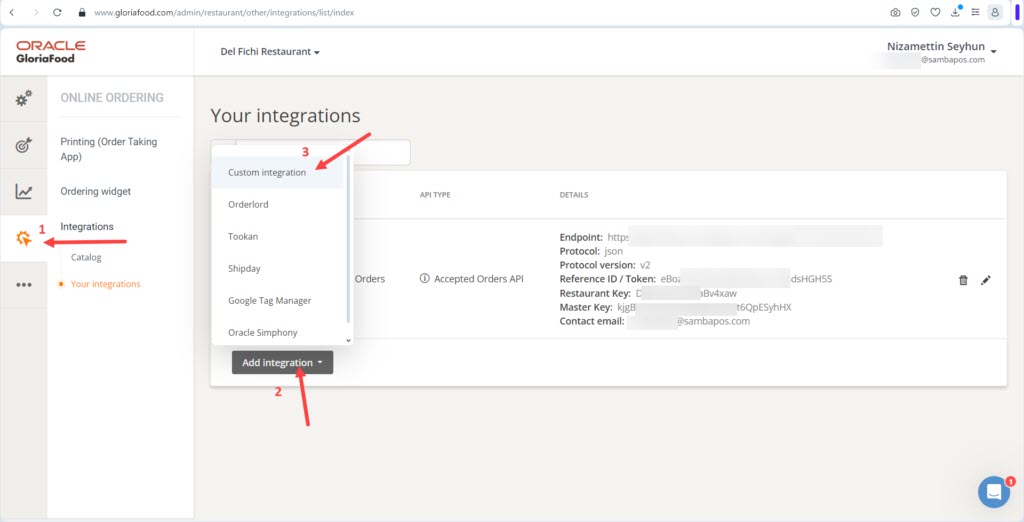
After clicking on Add Integration button, API creation page will be seen.
Template: Push Accepted Orders
Protocol: JSON
Protocol Version: Version 2
Endpoint URL: Type this into that field: https://gf-producer.sambapos.com/integration/ordering_system
Authentication Keys > Master Key: Click on Generate button
Custom Fields > Restaurant Token: Click on Generate button
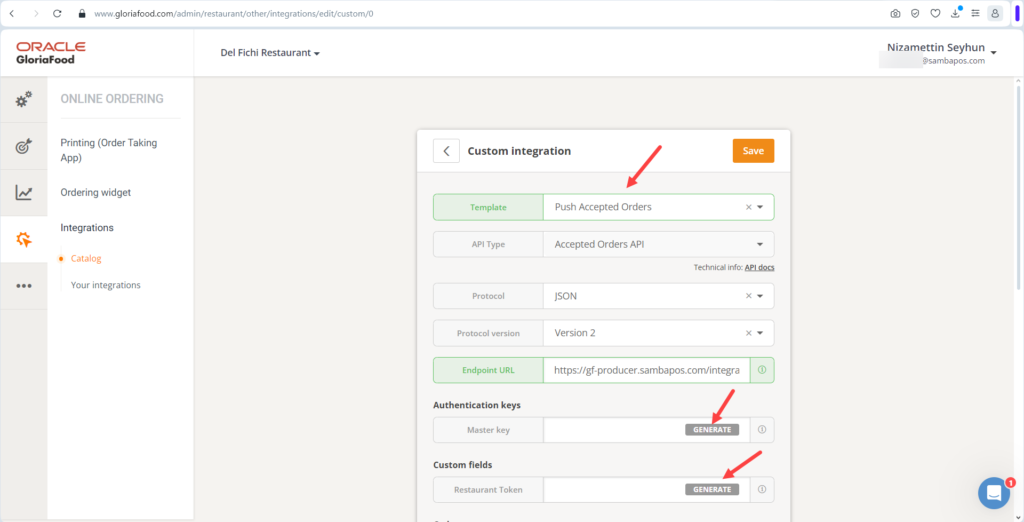
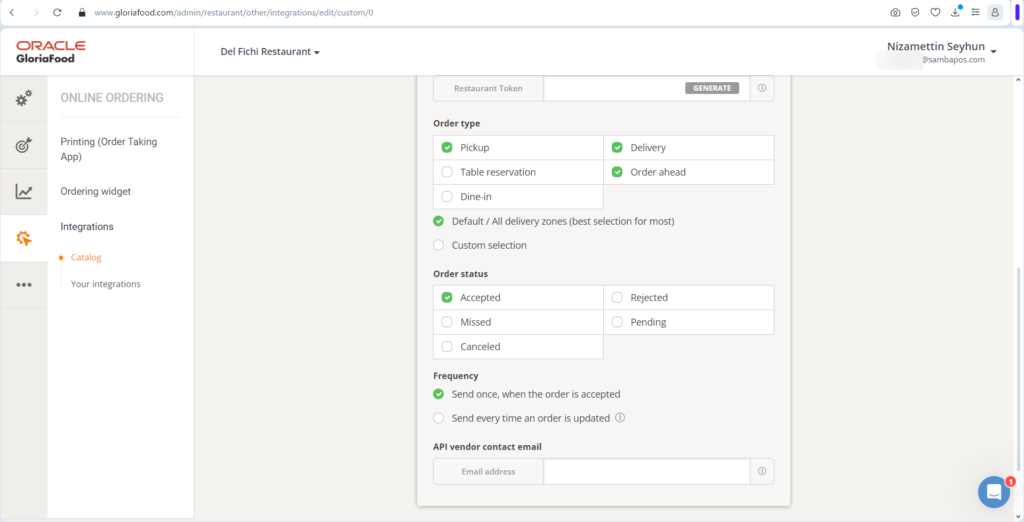
After handling the settings as shown in the above images, click on Save button;
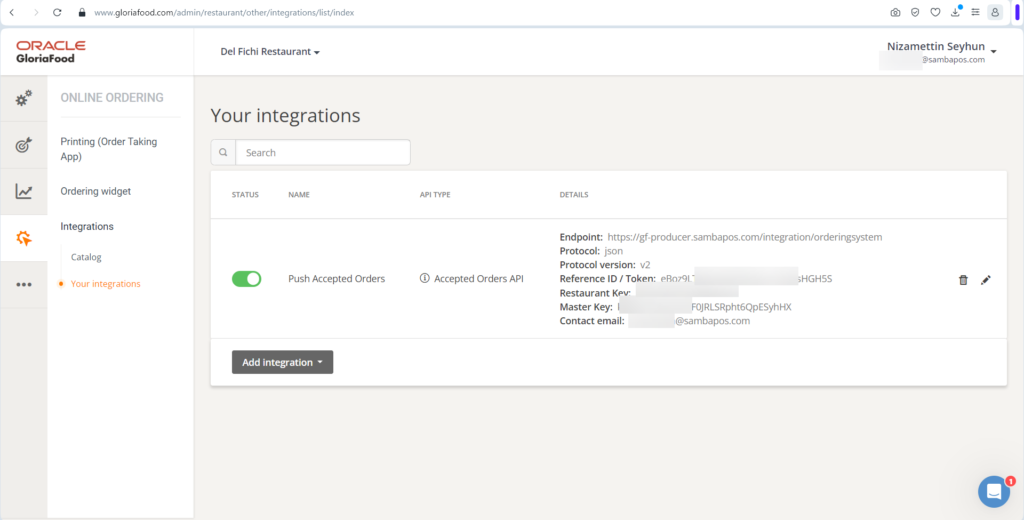
NOTE:
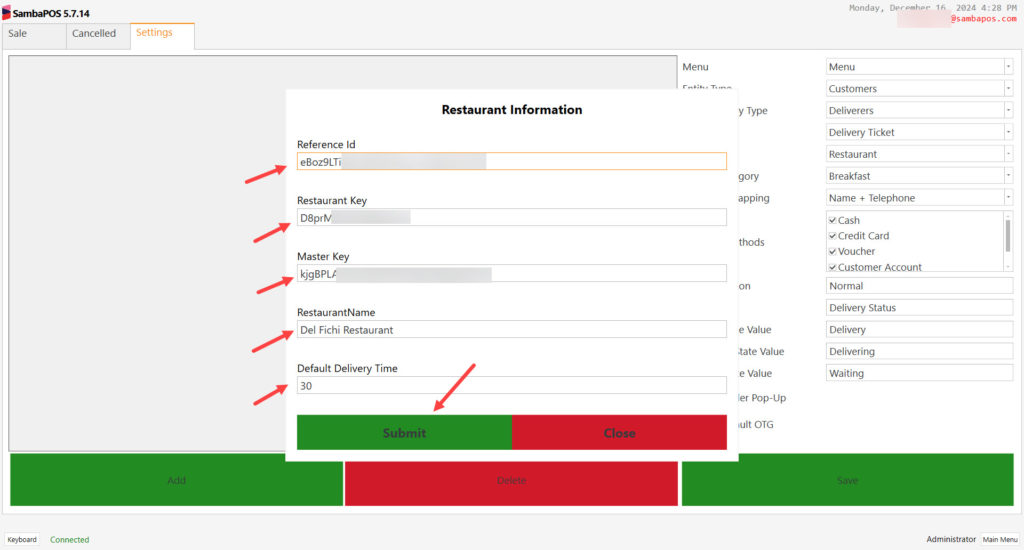
We will need Reference ID, Restaurant Key and Master Key and Restaurant Name information on Go Order GloriaFood Screen Settings Section.
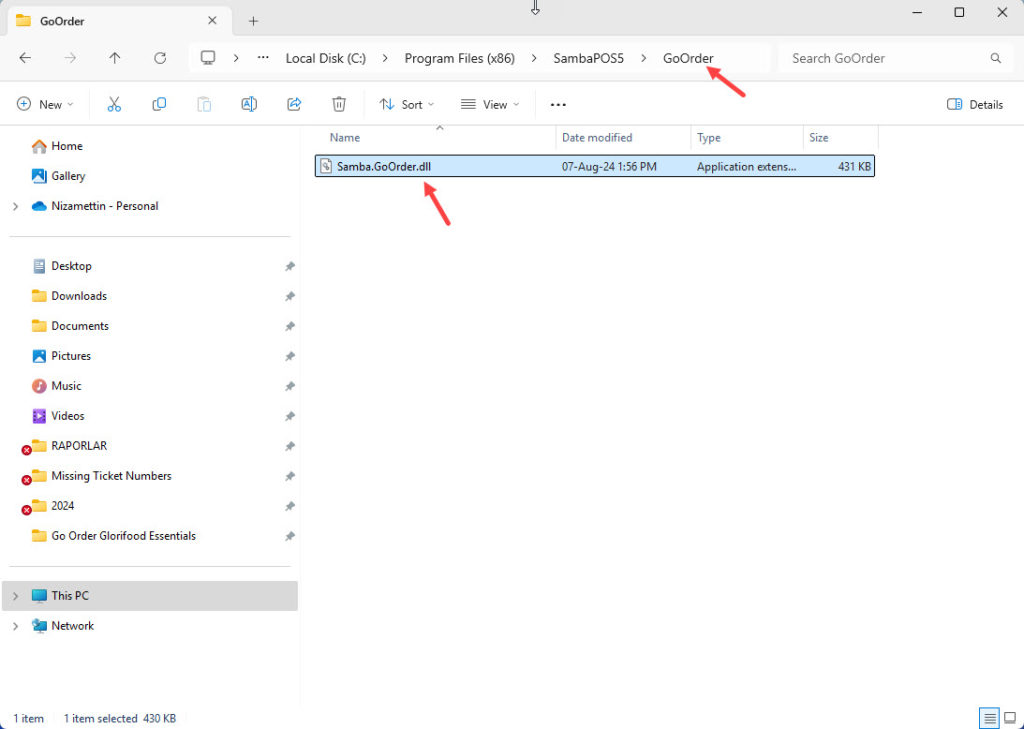
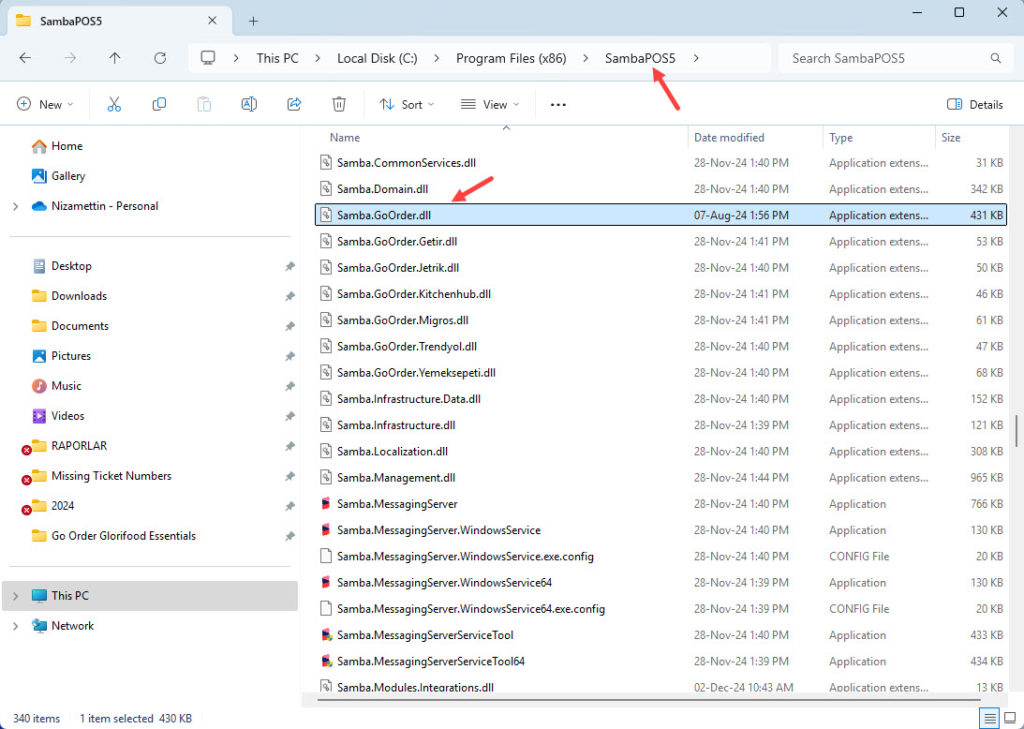
4. Moving the Samba.GoOrder.dll to Main SambaPOS Folder
Move the Samba.GoOrder.dll file from GoOrder folder to the SambaPOS Main Folder while SambaPOS is completely shut down.
5. SambaPOS Settings
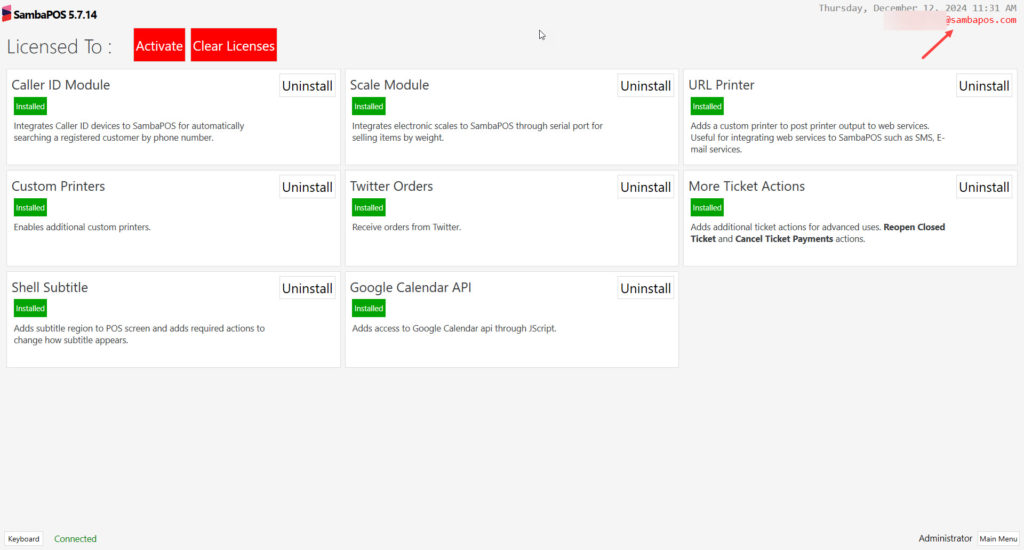
5.1. SambaPOS License Activation Check
Check the SambaPOS Main License status.
5.2. Message Server Settings
5.2.1. SambaPOS Message Server Controls and Settings
Online Order Module uses SambaPOS Message Server for communication. You might be using SambaPOS Message Server with default settings. If you don’t use Message Server or if using it with different settings than default in this case you have to configure necessary settings by following below explanations.
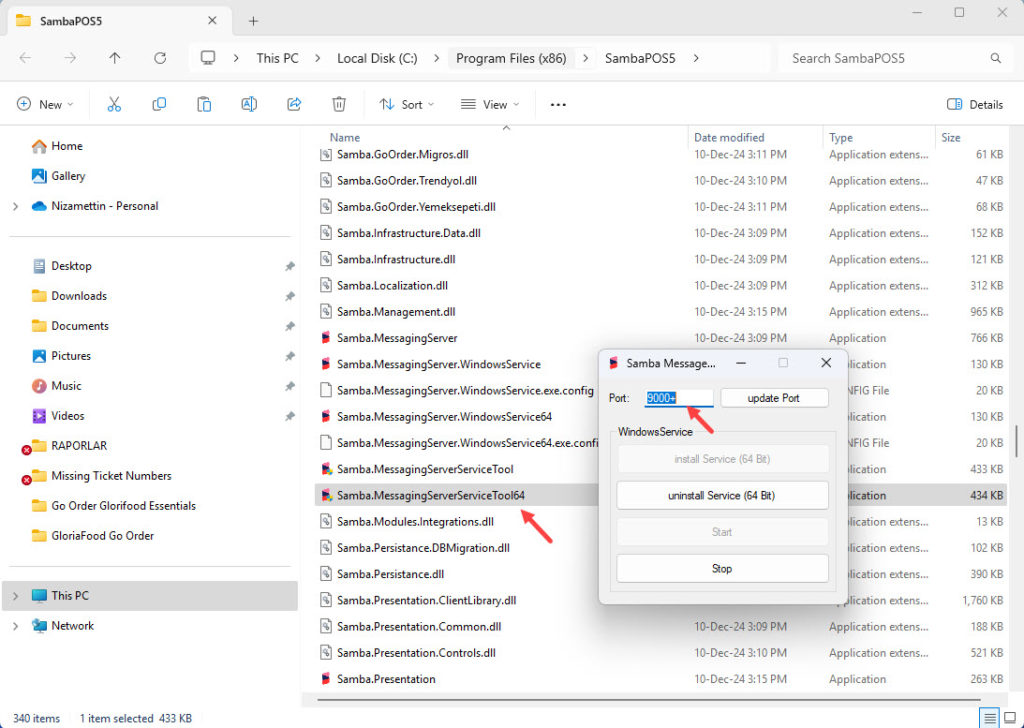
To configure Message Server Settings, execute “Samba.MessagingServerServiceTool.exe” file which is located in the directory that SambaPOS is installed.
Port: 9000+
Note: Port has to be 9000+ By checking image below you can see how it is supposed to be simply configured and also notice that it has to be on Start status.
5.2.2. SambaPOS Manage Message Server Settings
Message Server settings are supposed to be configured also in SambaPOS by following the settings above. Go to Manage > Settings > Local Settings > Message Server, in here perform the mentioned settings and click on SAVE button.
Message Server Name: http://main_computer_name (Name of SambaPOS V5 installed main computer)
or http://123.123.123.123 (IP address of SambaPOS V5 installed computer)
Message Server Port: 9000
Auto Start Message Client: [X] (Has to be selected)
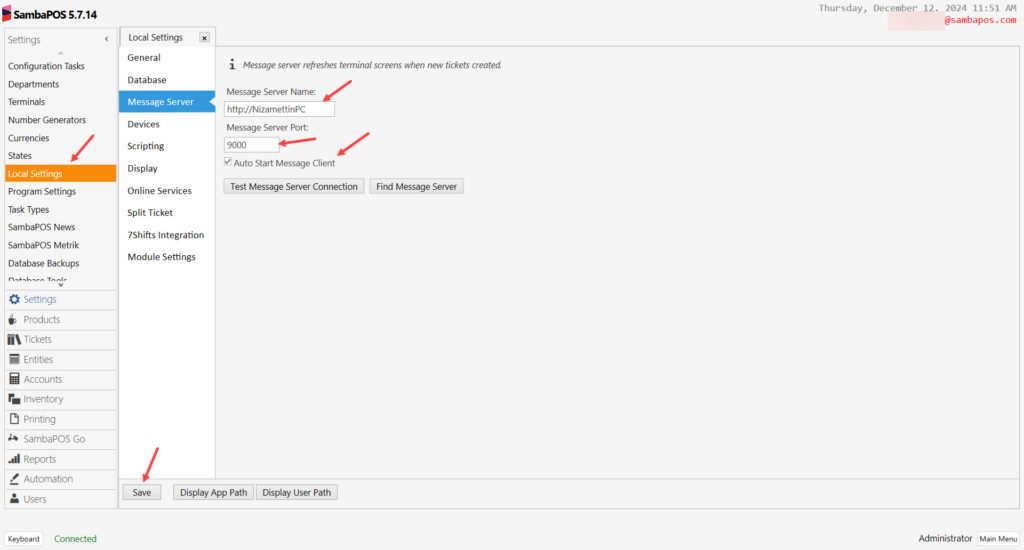
After completing necessary editings, click on Save buton.
5.3. Configuring Custom Navigation Screen
Main Menu > Manage > Settings > Program Settings > Maintenance > Here, click on Create Default Navigation Buttons.

After completing necessary editings, click on Save buton.
After creating buttons, go to Main Menu > Manage > Settings > Local Settings > Display > here, click on Allow Custom Navigation.
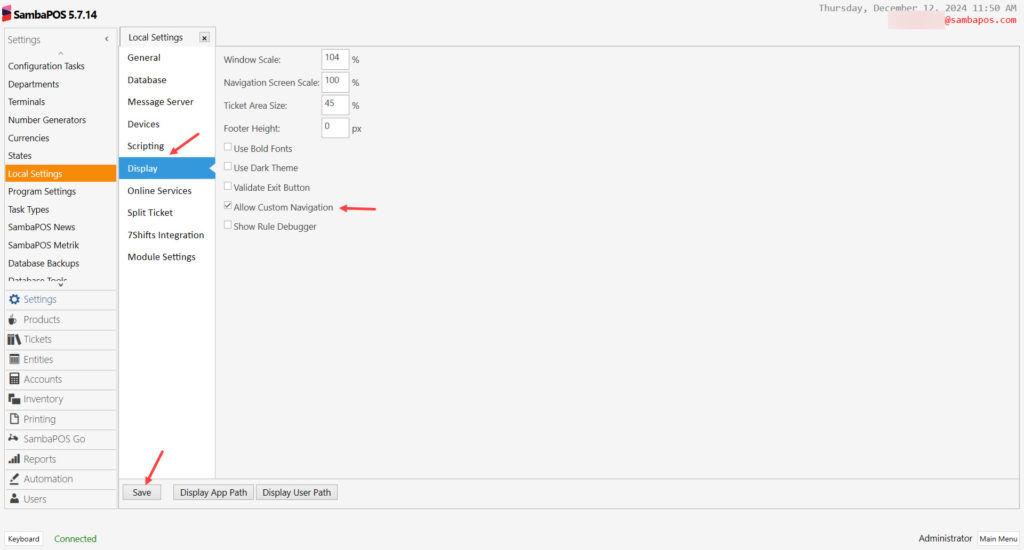
Display:
Allow Custom Navigation: Must be selected
After completing necessary editings, click on Save buton.
5.4. Adding Automation Command
Main Menu > Manage > Automation > Automation Commands > here click on Add Automation Command.
General Settings Section;

Name: Go Order GloriaFood
Button Header: Go Order\rGloriaFood
Clear Selection: Must be selected.
Navigation Settings Section;
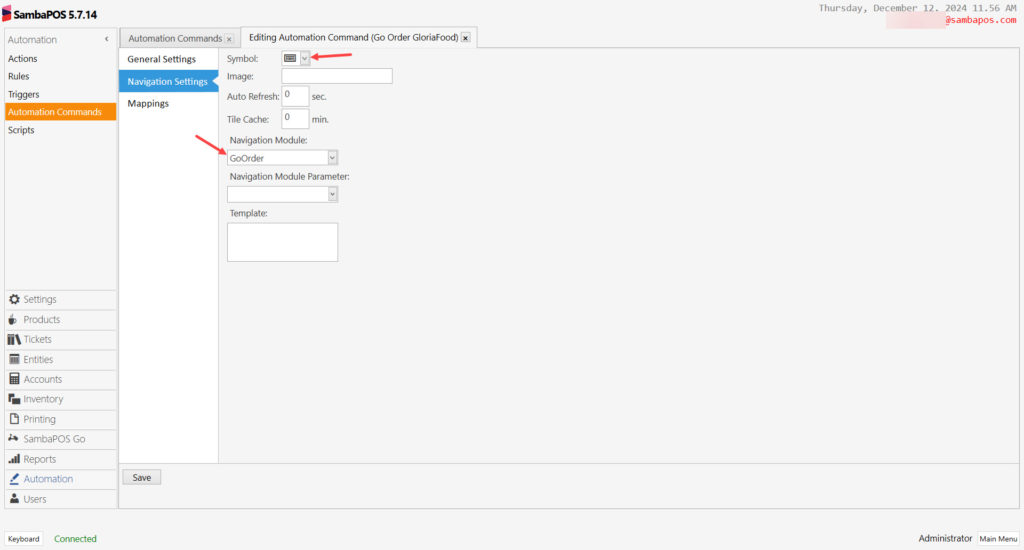
Navigation Module: GoOrder
Mappings Section Settings;
In here add a row by clicking on Add button and configure the settings as below image.
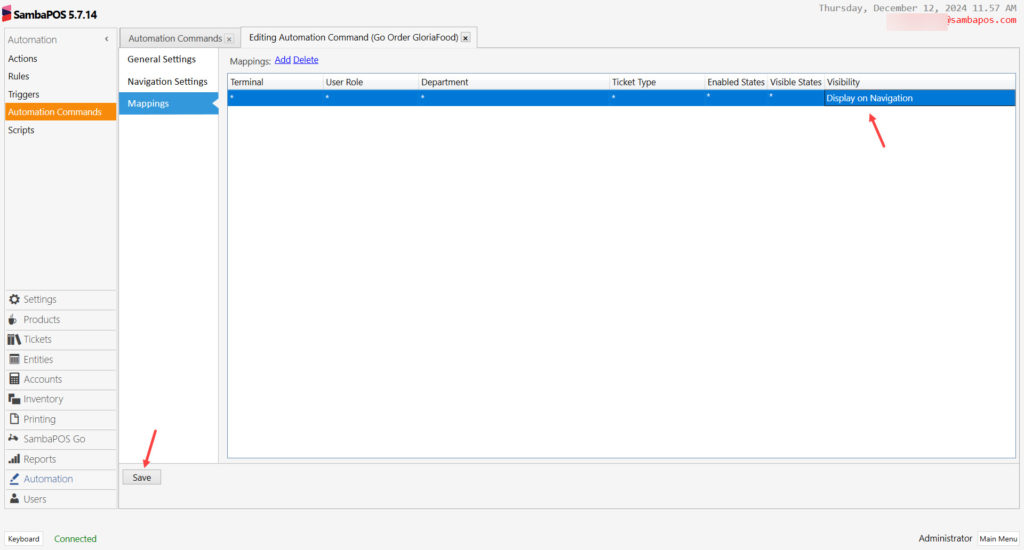
After completing necessary editings, click on Save buton.
When you finish with the above steps, Restart the SambaPOS 5 Pro.
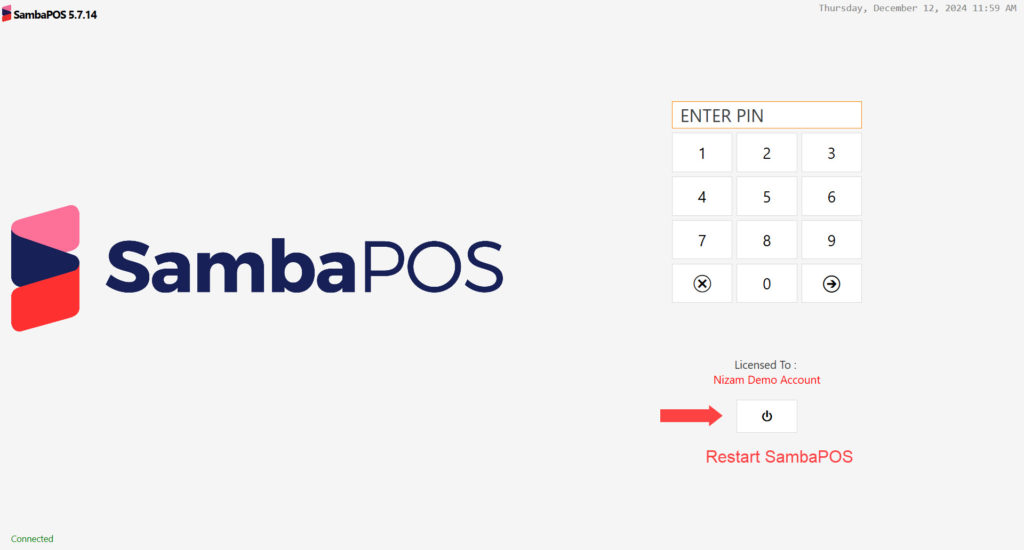
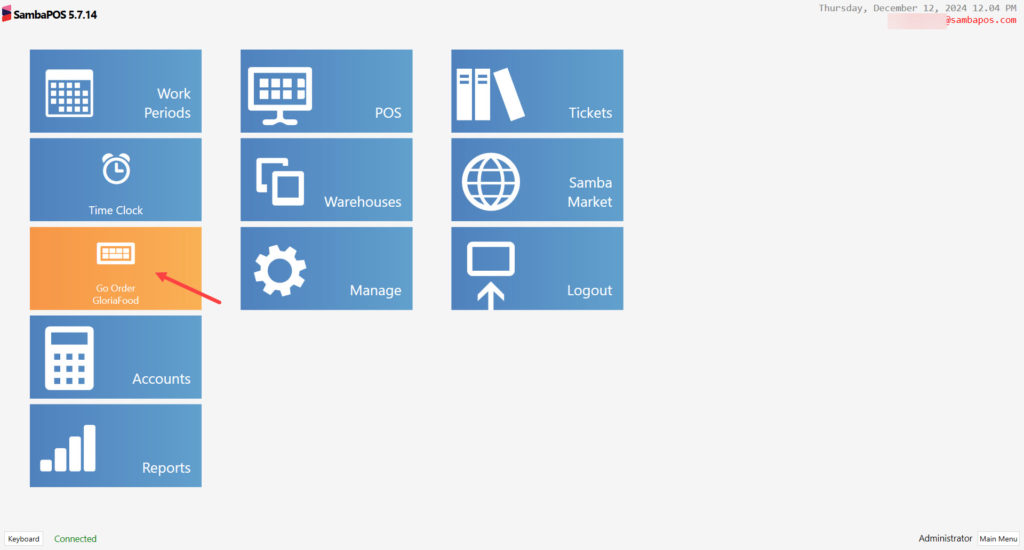
After restarting SambaPOS5 you can start using GoOrder GloriaFood Automation Command.
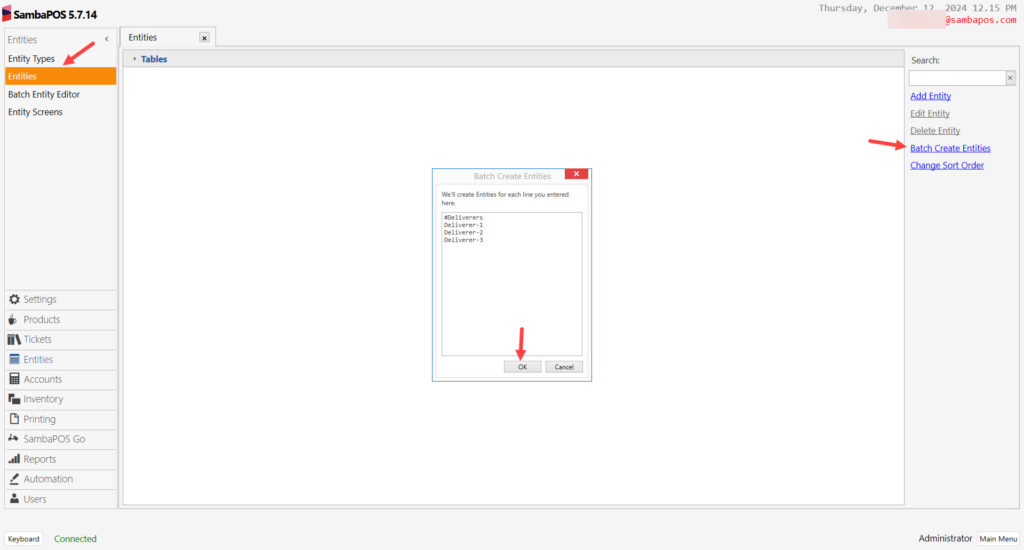
5.5. Creating Deliverer Entities
If you already have Deliverers as Entities, the import file which mentioned above will add those deliverers automatically into Online Order Entity Screen. If you don’t have, you need to create them according to steps below;
Go to Manage > Entities > Entities > from here click on Batch Create Entities link, in the window put # symbol and create your Deliverers. After completing necessary editings, click on Ok button.
5.6. Creating Delivery Ticket Type
Go to Main Menu > Manage > Tickets > Ticket Types > here click on Add Ticket Type.
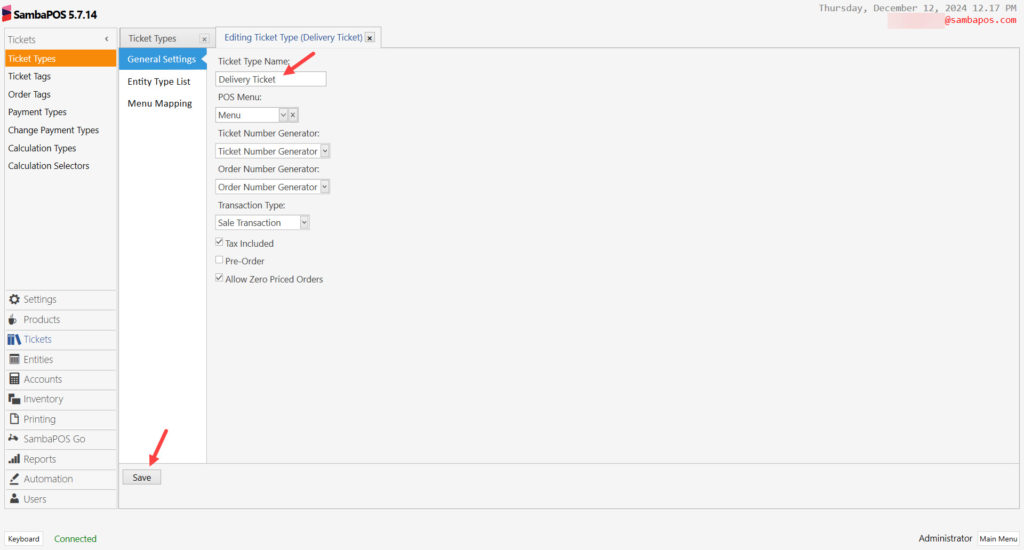
After completing necessary editings, click on Save button.
5.7. Creating Default Order Tag
Go to Main Menu > Manage > Tickets > Order Tags > Here click on Add Order Tag Group.
Genereal Settings Section;
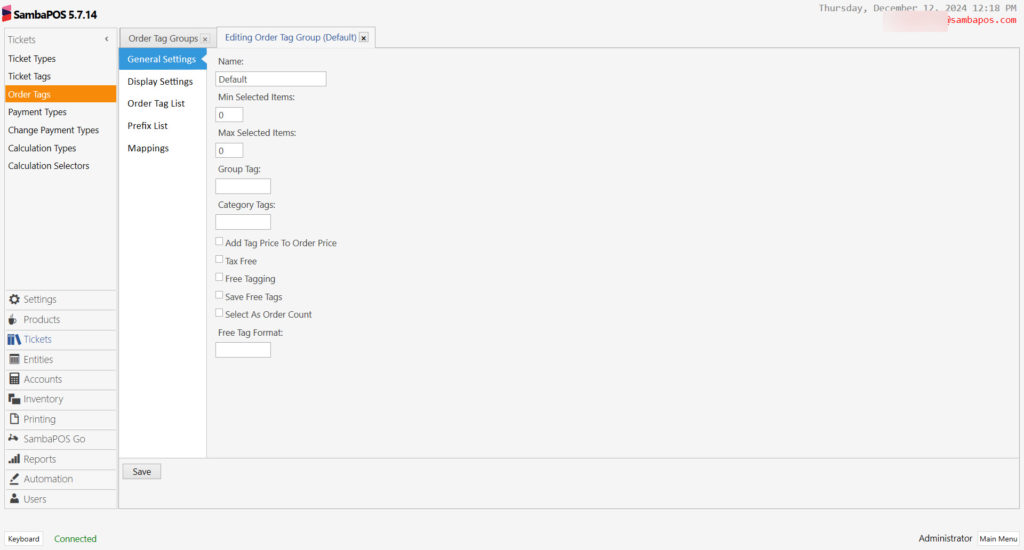
Name: Default
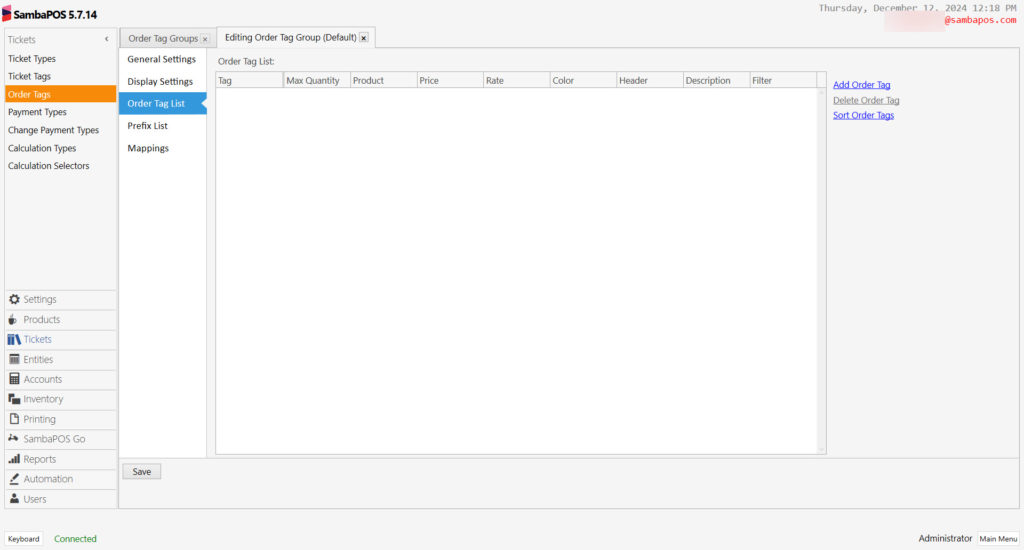
Order Tag List Section;
Leave this section empty;
Mappings Section;
Leave mappings empty as well;
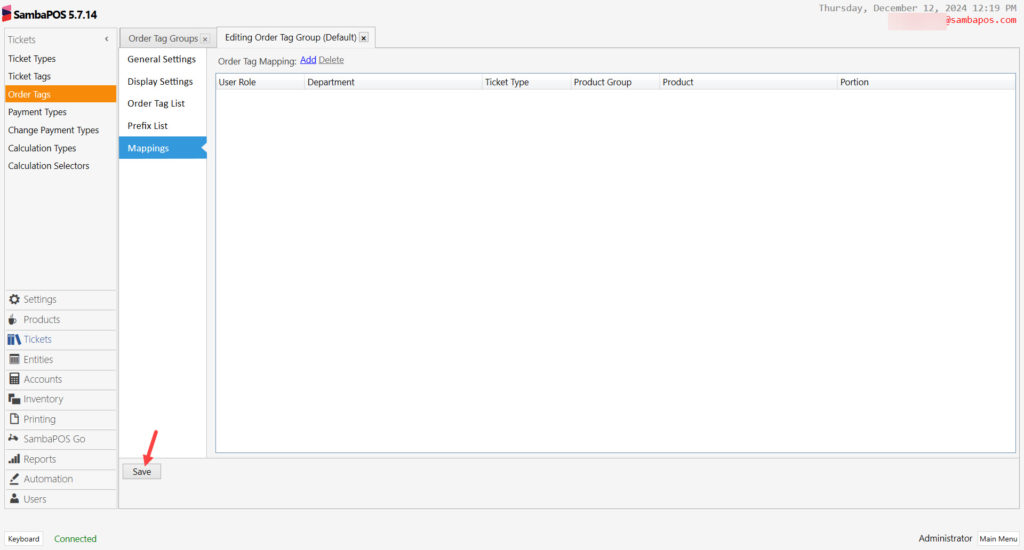
After completing necessary editings, click on Save button.
5.8. Creating Delivery Fee Calculator
5.8.1. Creating Delivery Fee Account
Go to Main Menu > Manage > Accounts > Accounts > here click on Add Account.
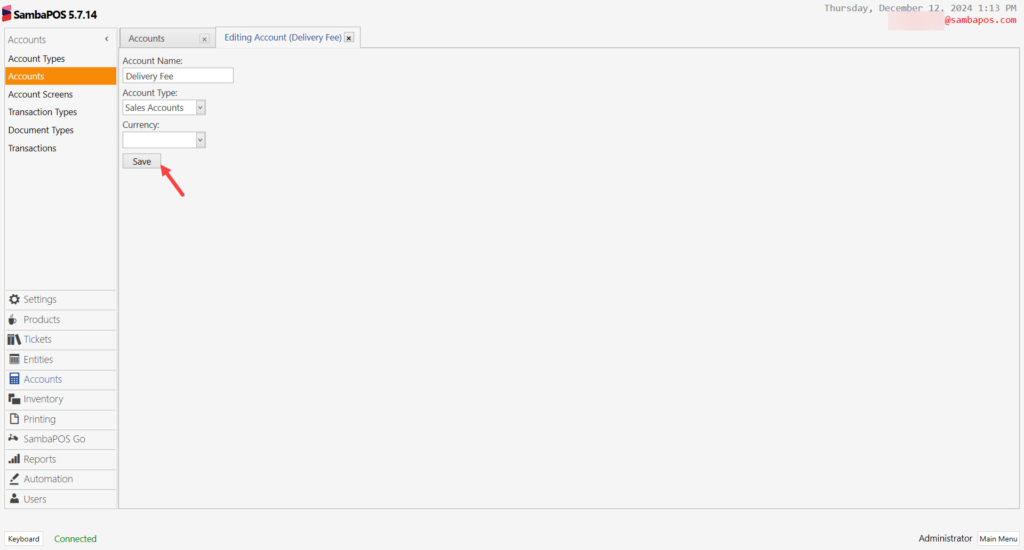
After completing necessary editings, click on Save button.
5.8.2. Creating Delivery Fee Transaction Type
Go to Main Menu > Manage > Accounts > Transaction Types > here click on Add Transaction Type.
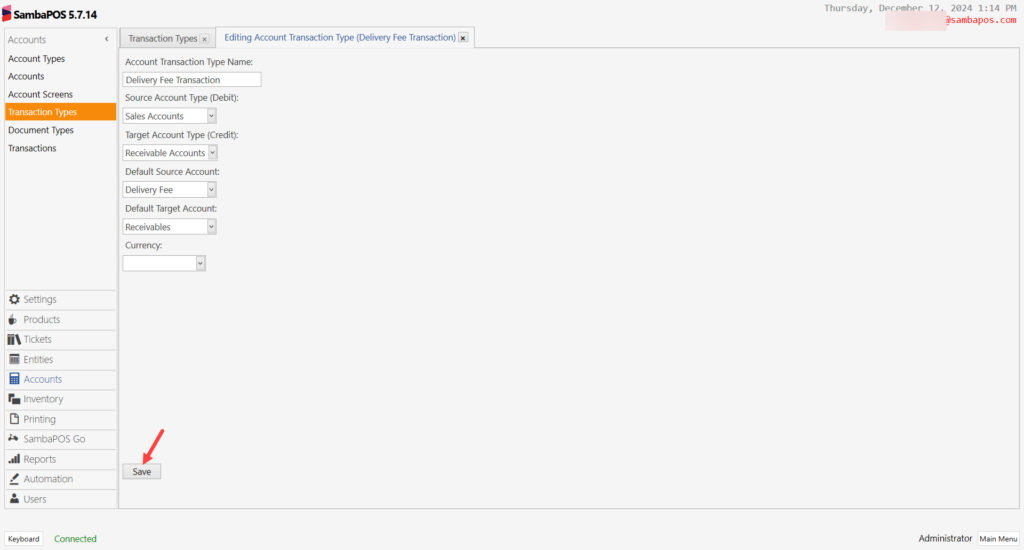
After completing necessary editings, click on Save button.
5.8.3. Creating Delivery Fee Calculation Type
Go to Main Menu > Manage > Tickets > Calculation Types > here click on Add New Calculation Type.
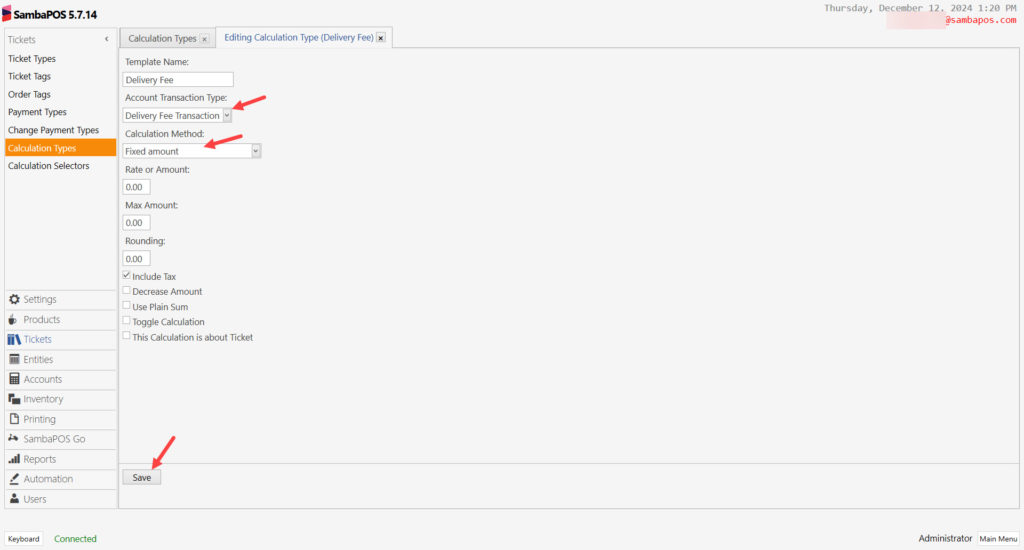
After completing necessary editings, click on Save button.
5.8.4. Creating Delivery Fee Calculation Selector
Go to Main Menu > Manage > Tickets > Calculation Selectors > here click on Add Calculation Selector.
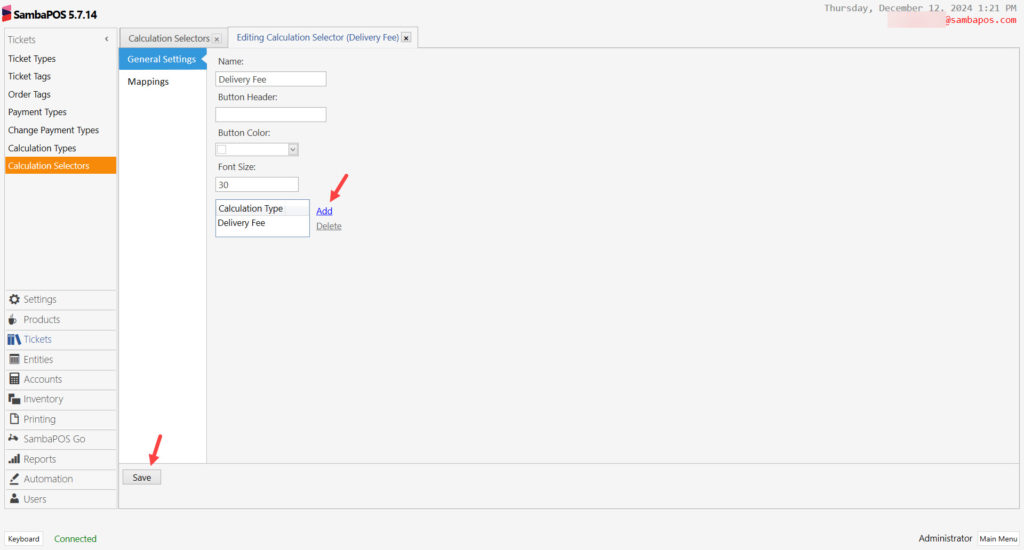
After completing necessary editings, click on Save button.
5.9. Creating GO Order GloriaFood Printing Templates
5.9.1. Creating Go Order Kitchen Orders Template
Main Menu > Manage > Printing > Printer Templates > Here, click on Add Printer Template.
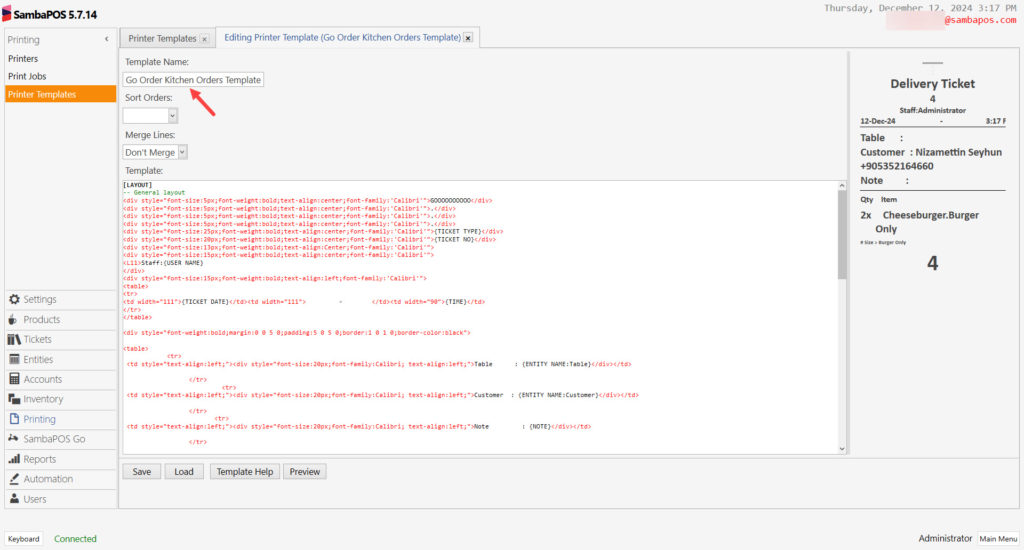
Into Template field copy/paste Go Order GloriaFood Kitchen Orders Template
After completing necessary editings, click on Save button.
5.9.2. Creating Go Order Bill Template
Main Menu > Manage > Printing > Printer Templates > Here, click on Add Printer Template.

Into Template field copy/paste Go Order GloriaFood Bill Template
After completing necessary editings, click on Save button.
5.10. Creating GO Order GloriaFood Print Jobs
5.10.1. Creating GF Orders to Kitchen Printer Print Job
Main Menu > Manage > Printing > Printer Jobs > Here, click on Add Job.
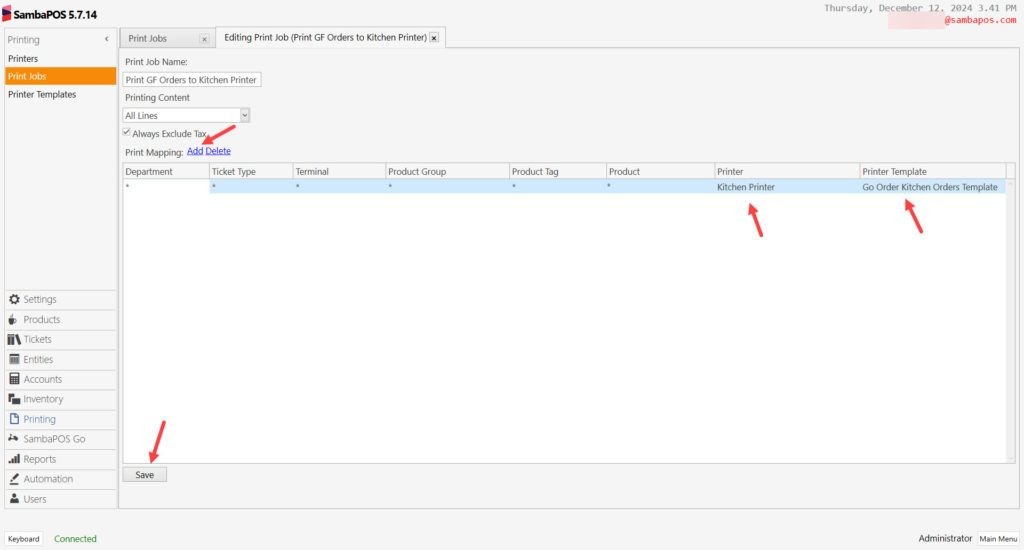
After completing necessary editings, click on Save button.
5.10.2. Creating Print GF Orders to Bill Printer Print Job
Main Menu > Manage > Printing > Printer Jobs > Here, click on Add Job.

After completing necessary editings, click on Save button.
5.11. Creating GO Order GloriaFood Printing Actions
5.11.1. Creating Execute GF Orders to Kitchen Print Job Action
Main Menu > Manage > Automation > Actions > Here, click on Add Action.
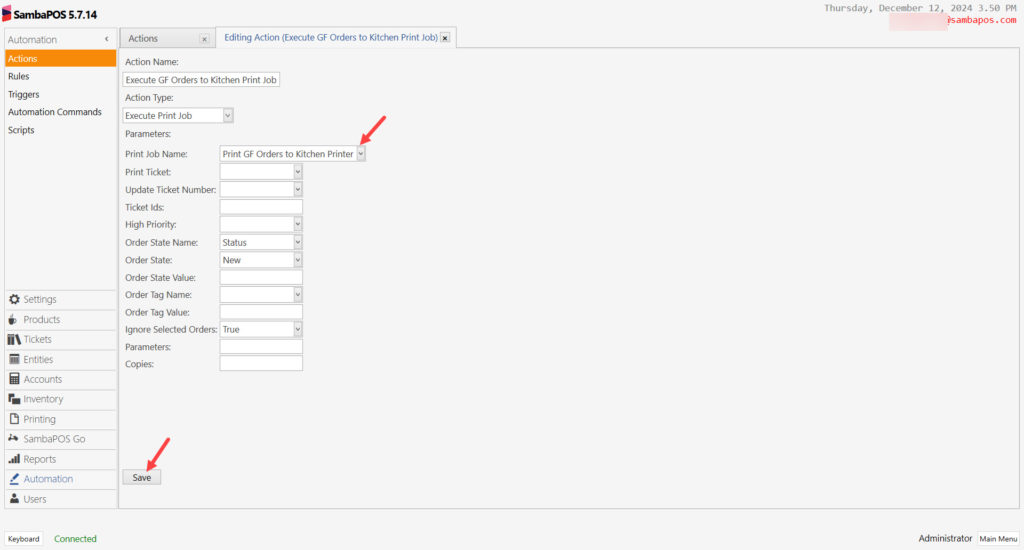
Action Name: Execute GF Orders to Kitchen Print Job
Action Type: Execute Print Job
Parameters:
Print Job Name: Print GF Orders to Kitchen Printer
Order State Name: Status
Order State: New
Ignore Selected Orders: True
After completing necessary editings, click on Save button.
5.11.2. Creating Execute GF Orders to Bill Print Job Action
Main Menu > Manage > Automation > Actions > Here, click on Add Action.

Action Name: Execute GF Orders to Bill Print Job
Action Type: Execute Print Job
Parameters:
Print Job Name: Print GF Orders to Bill Printer
Order State Name: Status
Order State: New
Ignore Selected Orders: True
After completing necessary editings, click on Save button.
5.12. Editing Ticket Closing Rule
Main Menu > Manage > Automation > Rules > Ticket Closing Rule > Here, click on Select Actions and add Execute GF Orders to Kitchen Print Job and Execute GF Orders to Bill Print Job actions into the rule and then set the Constraint parts as shown in the below image.

Actions:
– Edit Execute Kitchen Orders Print Job Action
Contsraint: ('{TICKET TYPE}'=='Ticket')
– Add Execute GF Orders to Kitchen Print Job Action
Contsraint: ('{TICKET TYPE}'=='Delivery Ticket')
– Add Execute GF Orders to Bill Print Job Action
Contsraint: ('{TICKET STATE:Provider}'=='GloriaFood')
After completing necessary editings, click on Save button.
6. GloriaFood GO Order Settings Screen
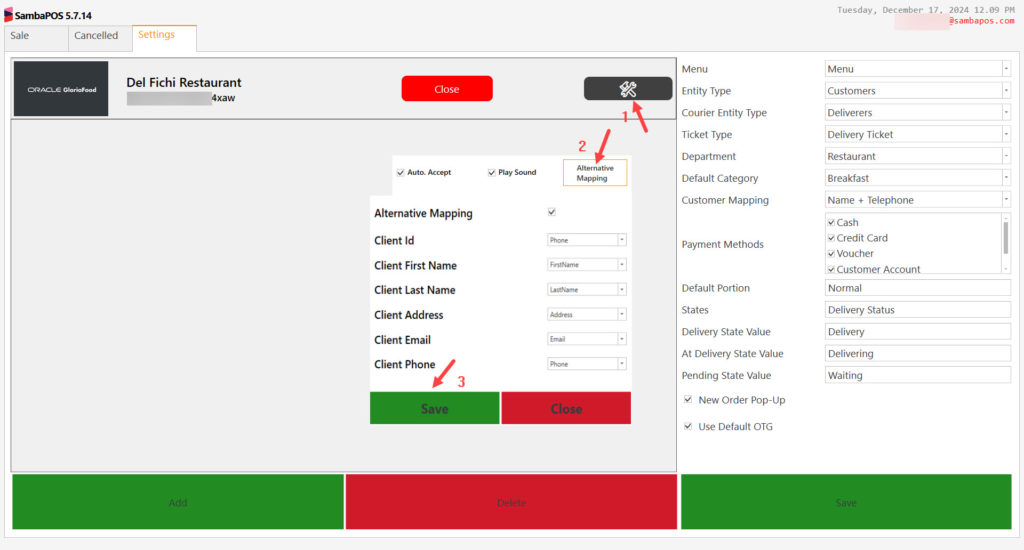
6.1. Handling General Settings
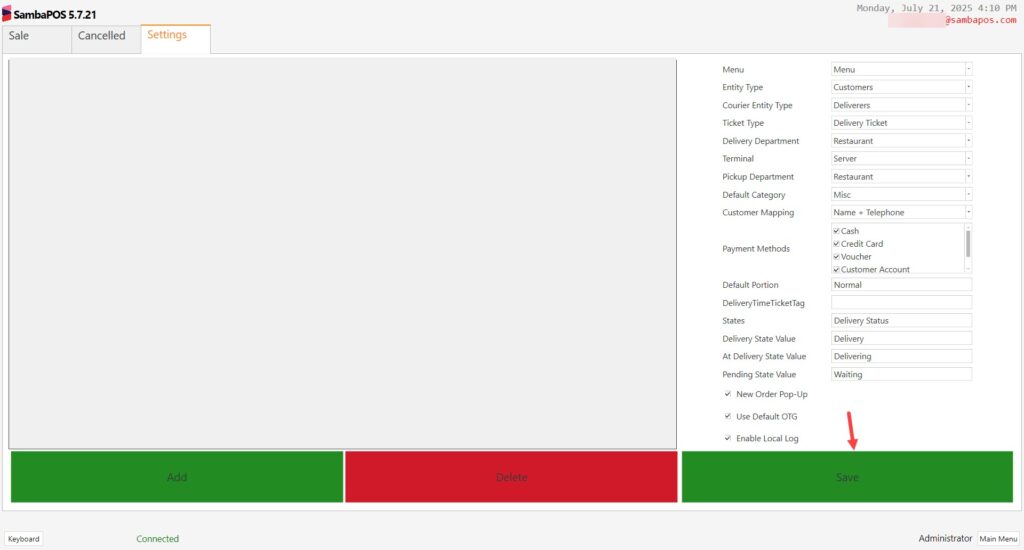
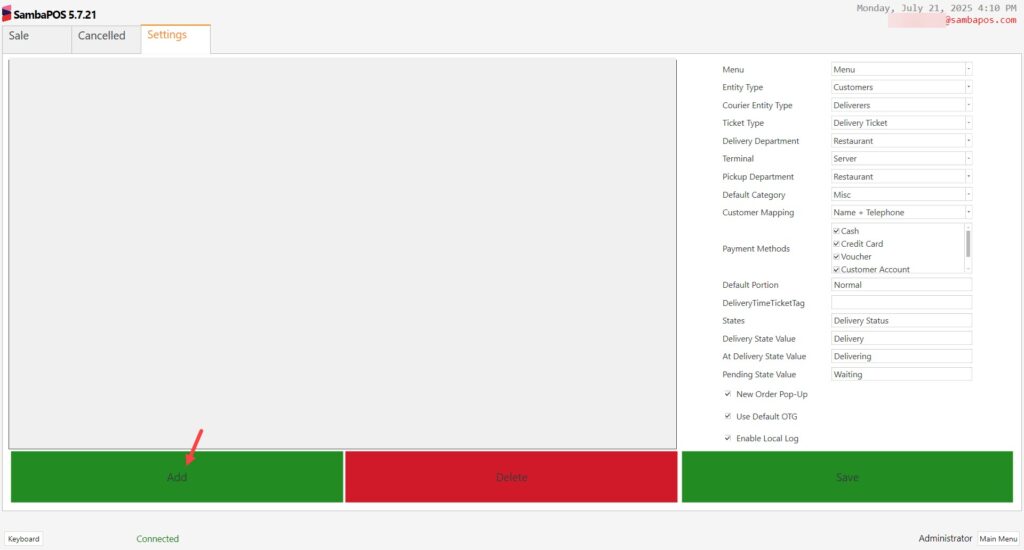
6.2. Adding GloriaFood as GO Order Integration
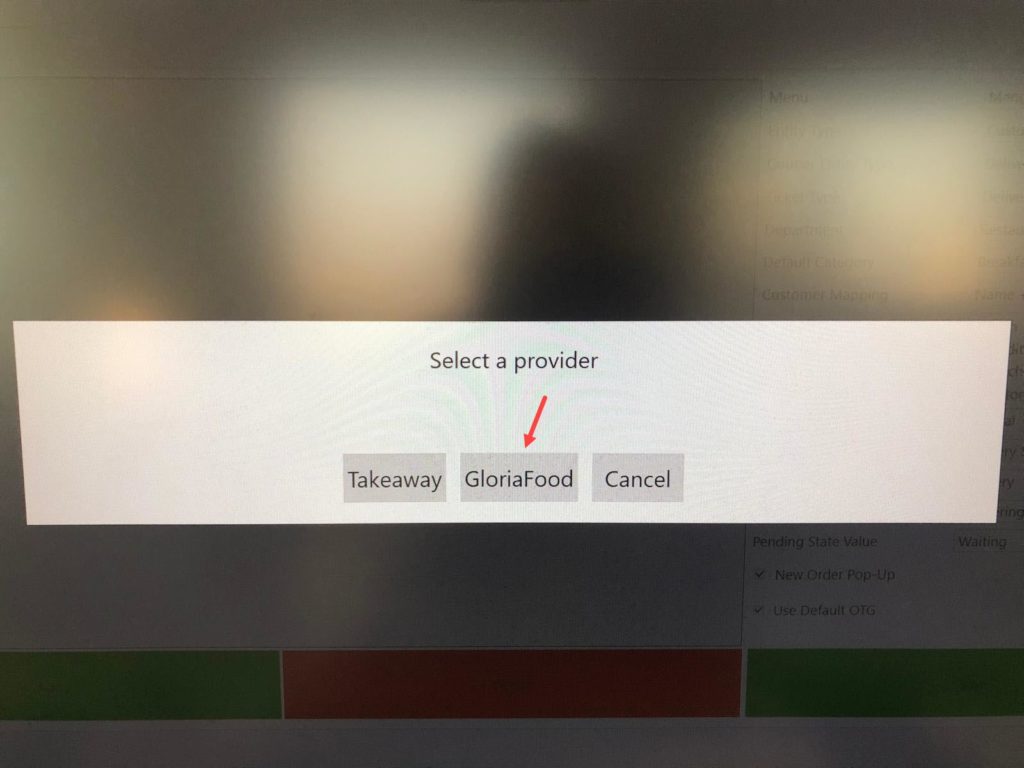
In this screen click on Add button and select GloriaFood as Provider.
In this screen we need to insert required data which we generated on the 3. Go Order GloriaFood Key Creation step;
In this screen you can handle your default settings for the Integration such as Auto Accept, Play Sound etc;
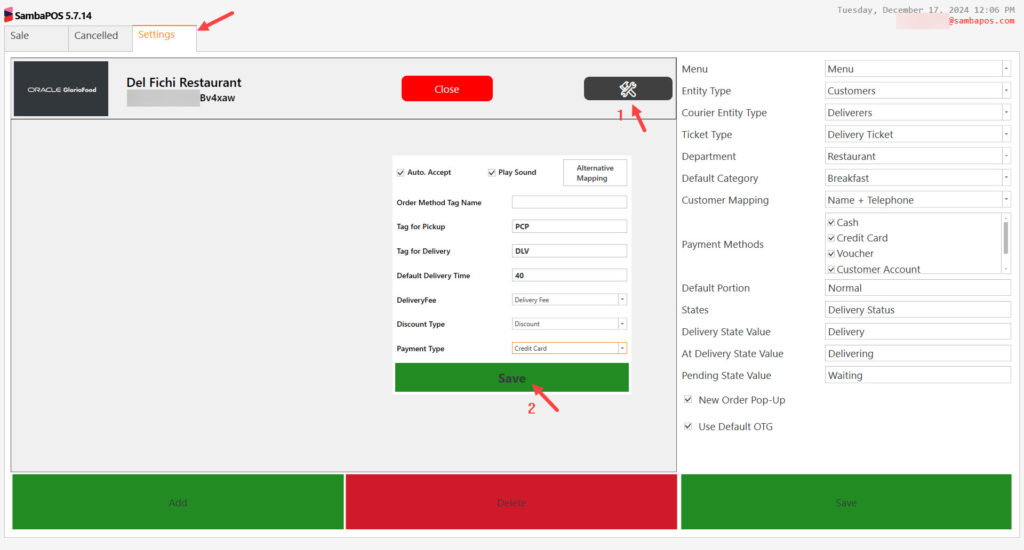
If you want to set an Alternative Mapping, you can handle it by clicking on Alternative Mapping button;
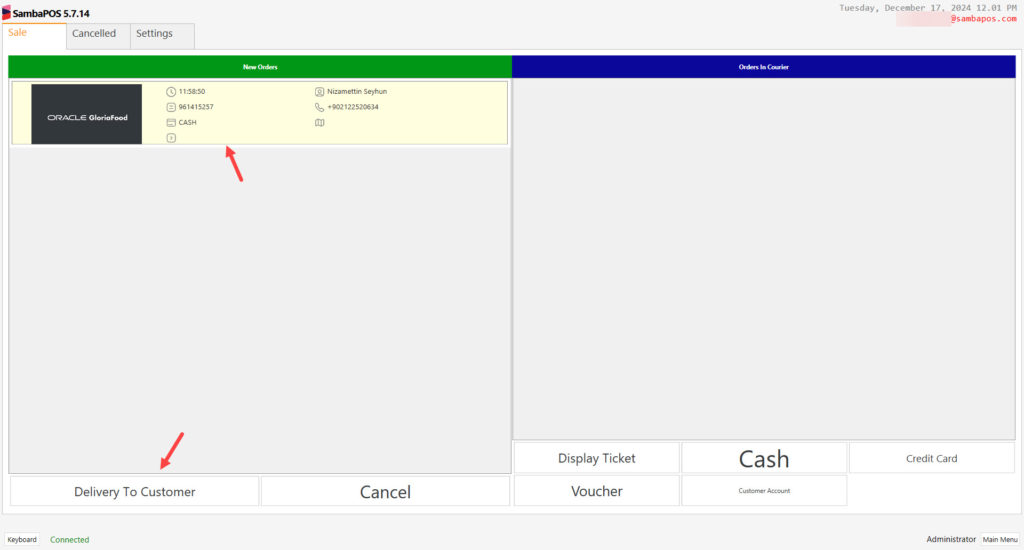
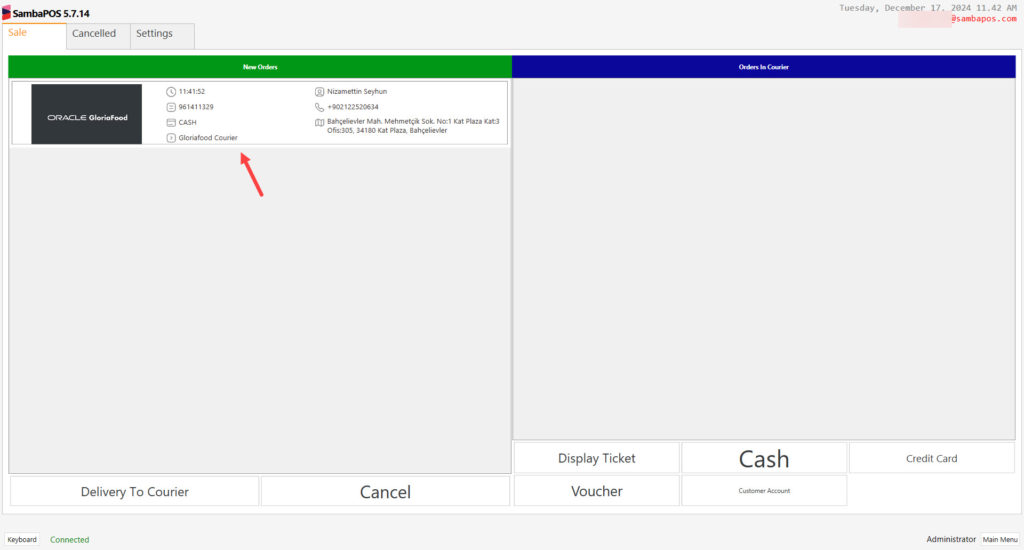
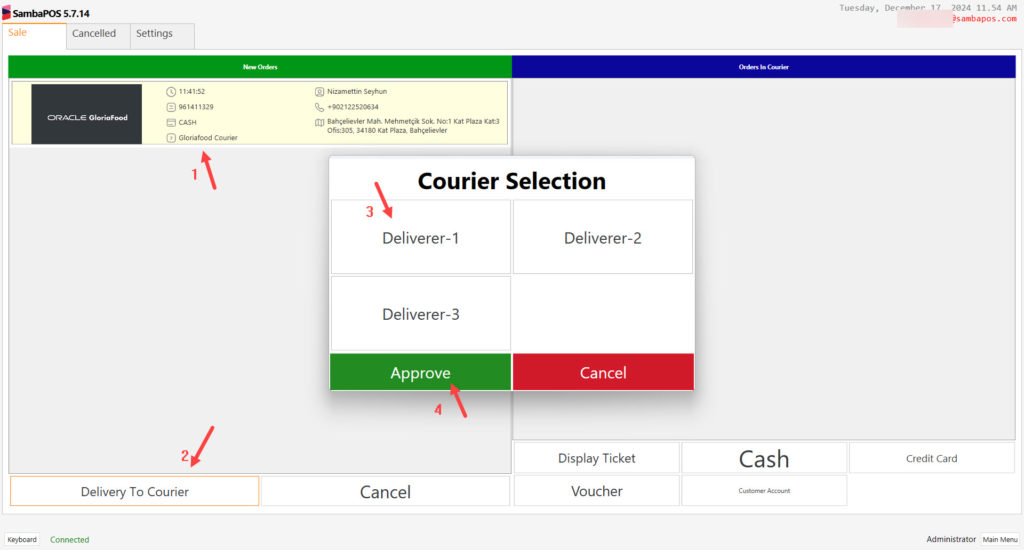
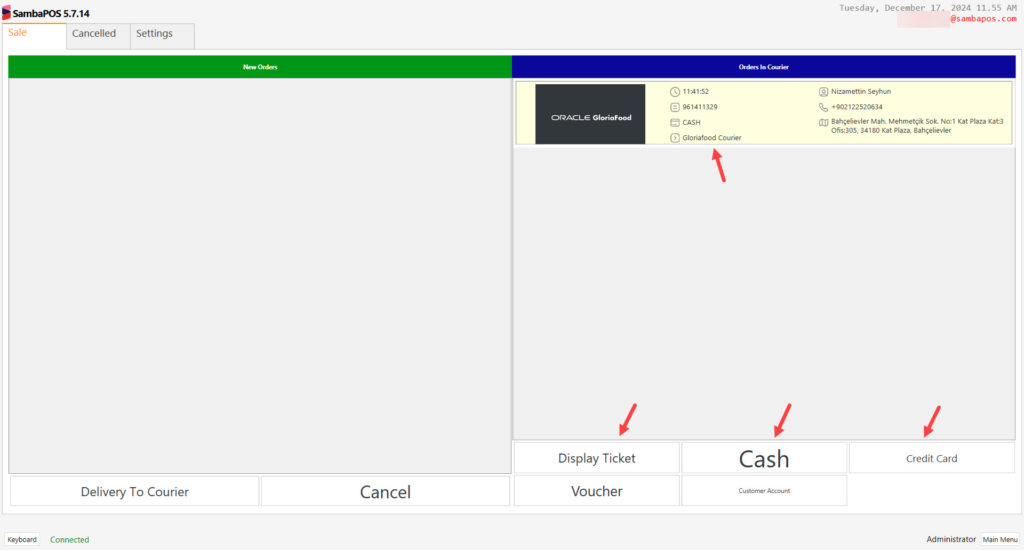
6.3. Go Order GloriaFood Sales Screen
The orders which are received from GloriaFood Integration will be displayed on this screen.
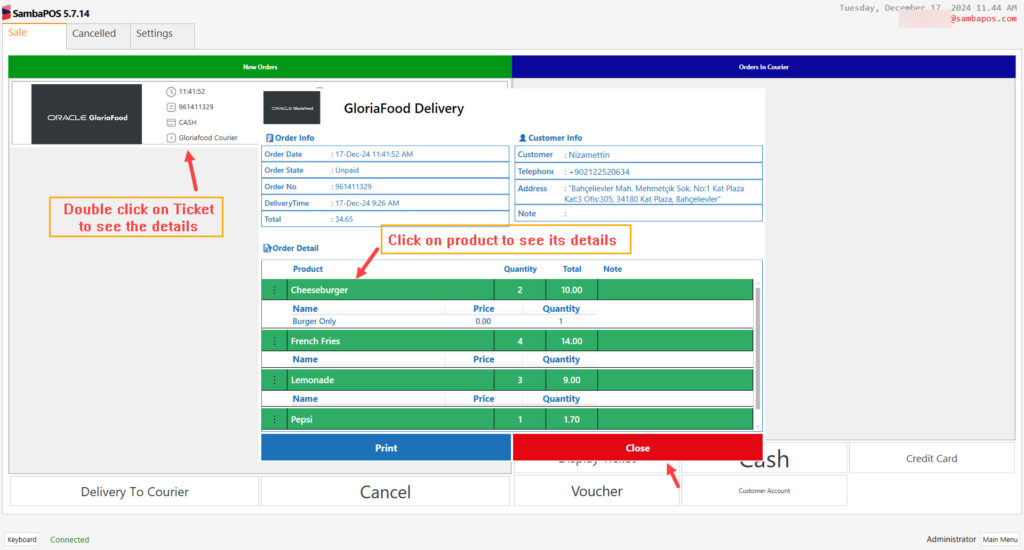
You can display ticket details by clicking once on them, you can display product details by clicking once to the items.
Delivery Order Sample:
Pickup Order Sample:
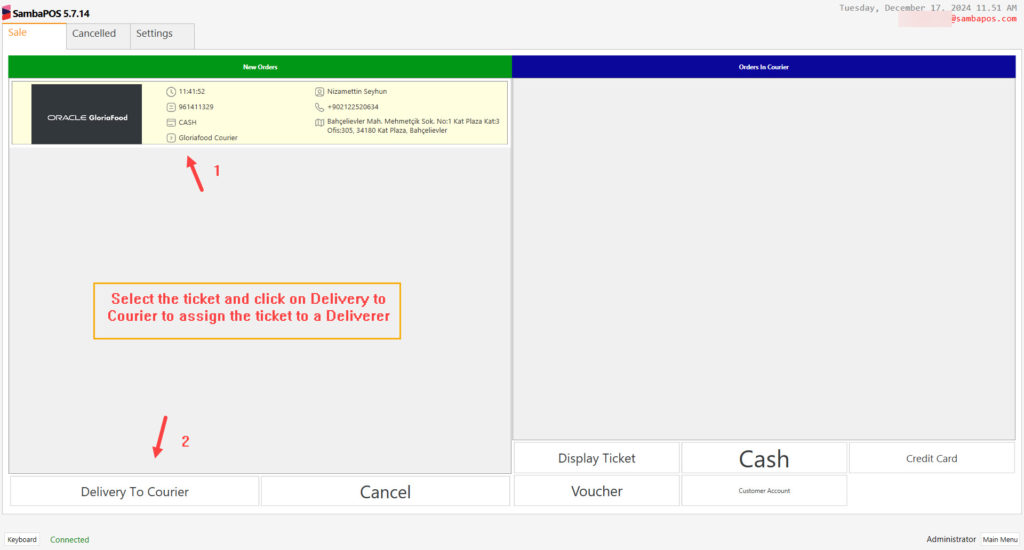
You can display ticket details by clicking once on them, you can display product details by clicking once to the items.
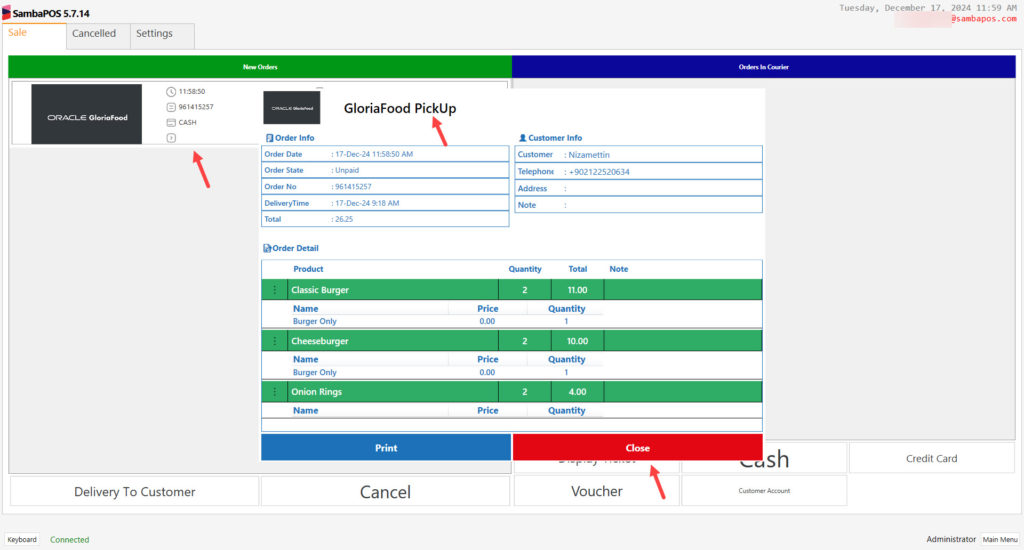
Click on Delivery to Customer button to give the order to customer and get the payment accordingly.