6.2. How to Configure Payment Sense (Pay at Table) Settings?
Requirements
- Sign PaymentSense agreement.
- Receive Ingenico device from PaymentSense.
- You need to have SambaPOS V5 Pro license.
- Add SambaPOS PaymentSense Integration license into your license account from cp.sambapos.com License is FREE.
- Download PaymentSense Pay At Table Gateway Exe. http://sambapos.com/?wpfb_dl=198
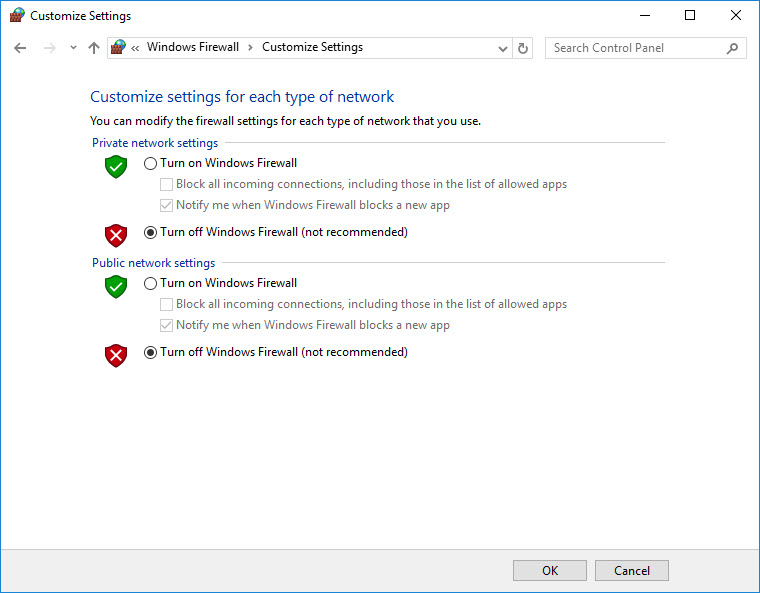
Windows Firewall Settings
Please deactivate all third party internet security services and Windows Firewall.
Control Panel > System and Security > Windows Firewall > Turn Windows Firewall on or off > Turn off Windows Firewall for Private Network Settings and Public Network Settings.
Note: In order to not to have notification for reactivation of Windows Firewall, please follow the steps below;
Control Panel > System and Security > Action Center >Change Action Center Settings > Network Firewall (Unselected).
SambaPOS V5 Pro Settings
1. Adding User
Go to Main Menu > Manage > Users > User List > from here click on Add User button.
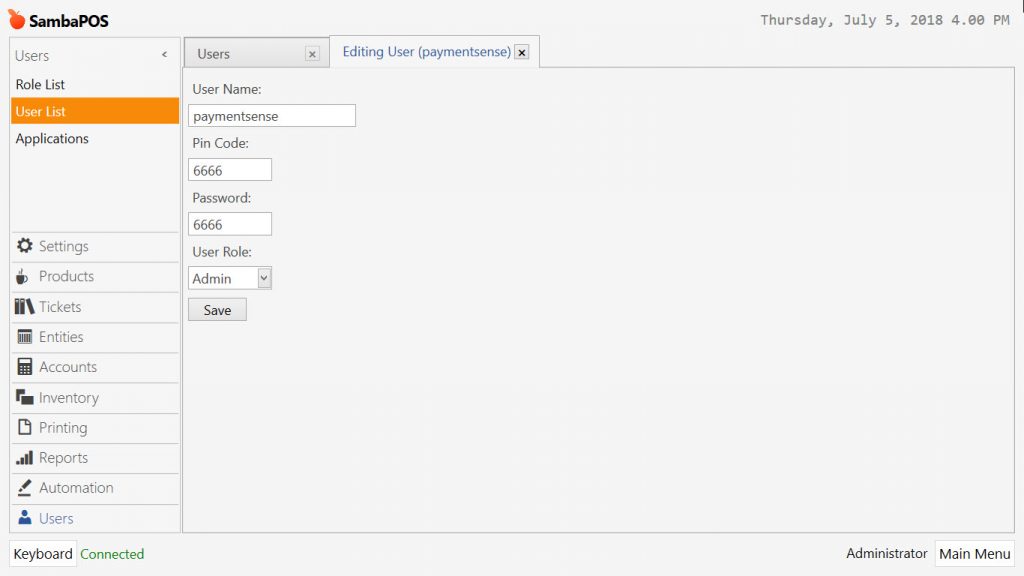
User Name: paymentsense
Pin Code: 6666
Password: 6666
User Role: Admin
After completing necessary editings, click on Save button.
2. Adding Application
Go to Main Menu > Manage > Users > Applications > from here click on Add Application button.
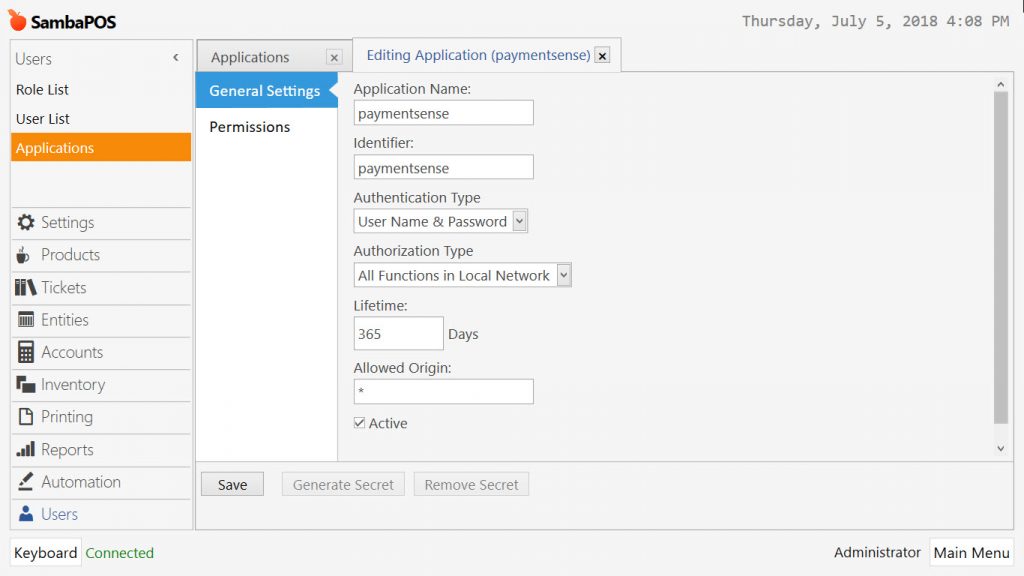
General Settings Section;
Application Name: paymentsense
Identifier: paymentsense
Authentication Type: User Name & Password
Authorization Type: All Functions in Local Network
Lifetime: 365
Allowed Origin: *
Active: Select this box.
After completing necessary editings, click on Save button.
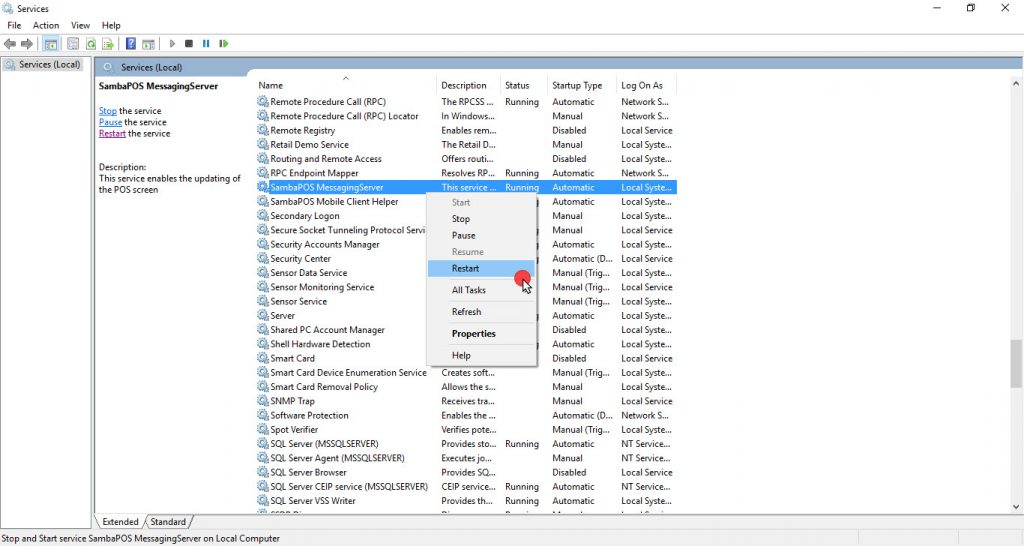
Important Note: After adding a new user or application, you have to RESTART Message Server. To restart Message Server;
Write Services in the search section of computer, (Windows/Start/Run) and run it by double clicking. Find SambaPOS MessagingServer, right click mouse and click on Restart button.
PaymentSense PAT Gateway Settings
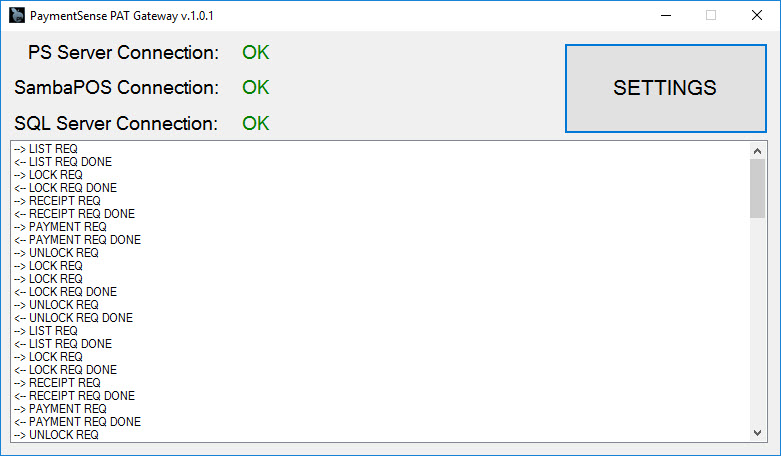
Run Gateway program by clicking on PaymentSense PAT Gateway icon on the desktop.
If you configured the settings correctly, your screen should be like in the image below;
Click on Settings button;
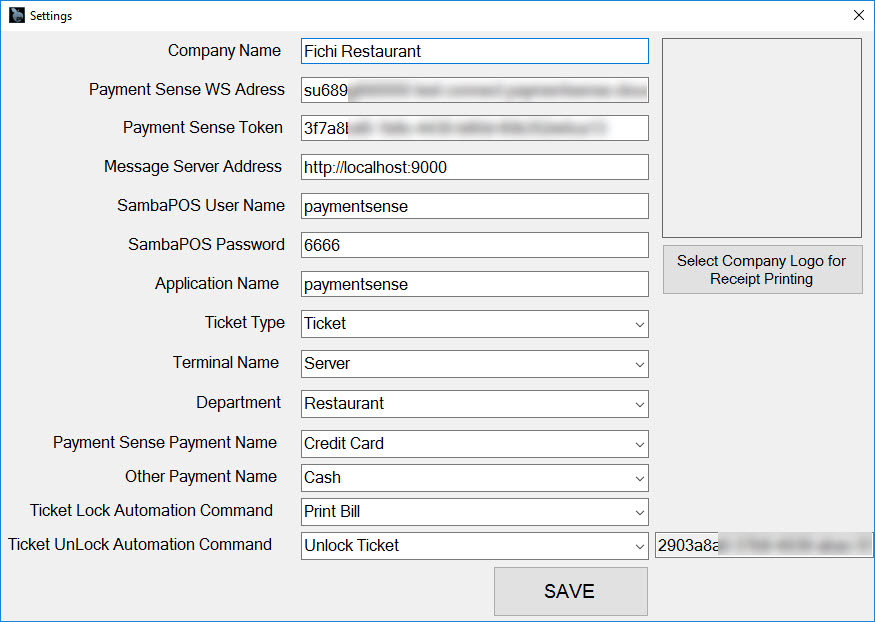
Company Name: Write name of your company. (In the image; Fichi Restaurant)
Payment Sense WS Address: It will be provided by Payment Sense.
Payment Sense Token: It will be provided by Payment Sense.
Message Server Address: http://localhost:9000
SambaPOS User Name: paymentsense
SambaPOS Password: 6666 (password of created user)
Application Name: paymentsense
Ticket Type: Ticket (Select from dropdown menu according to your need)
Terminal Name: Server (Select from dropdown menu according to your need)
Department: Restaurant (Select from dropdown menu according to your need)
Payment Sense Payment Name: Payment name that, incoming payments through Payment Sense will be transferred. In the image; Credit Card
Other Payment Type: Other payment name that, incoming payments through Payment Sense will be transferred. In the image; Cash.
Ticket Lock Automation Command: Print Bill
Ticket Unlock Automation Command: Unlock Ticket
After completing necessary editings, click on Save button. Once you finished with settings, you need to RESTART the Payment Sense Pay At Table Gateway application.
How to Use PaymentSense Pay At Table Integration
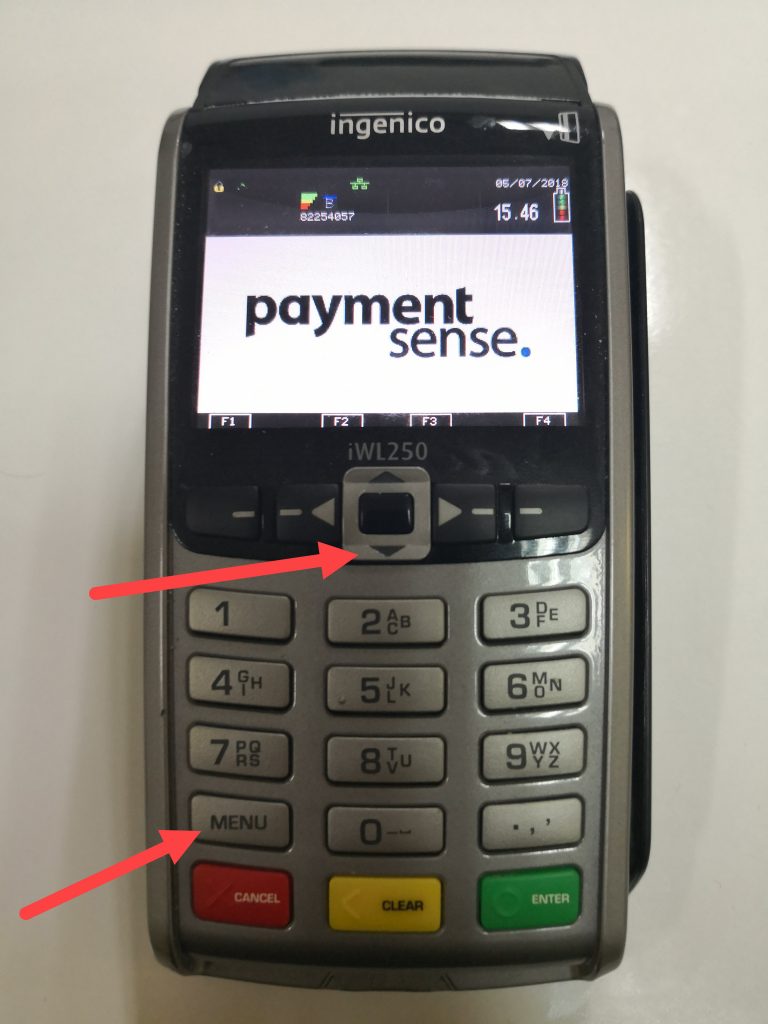
In order to start getting payment on the Ingenice device, press on Down Arrow Button or Menu Button;
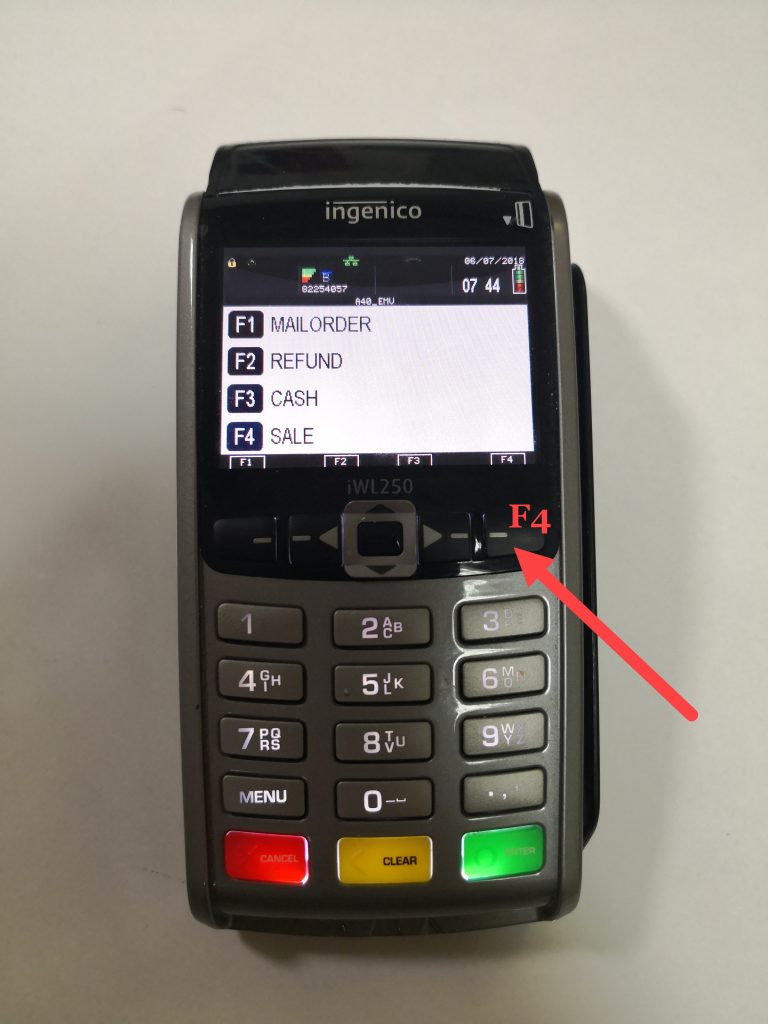
After that you will see the screen on the image below, in here, click on F4 Button to start getting payment.
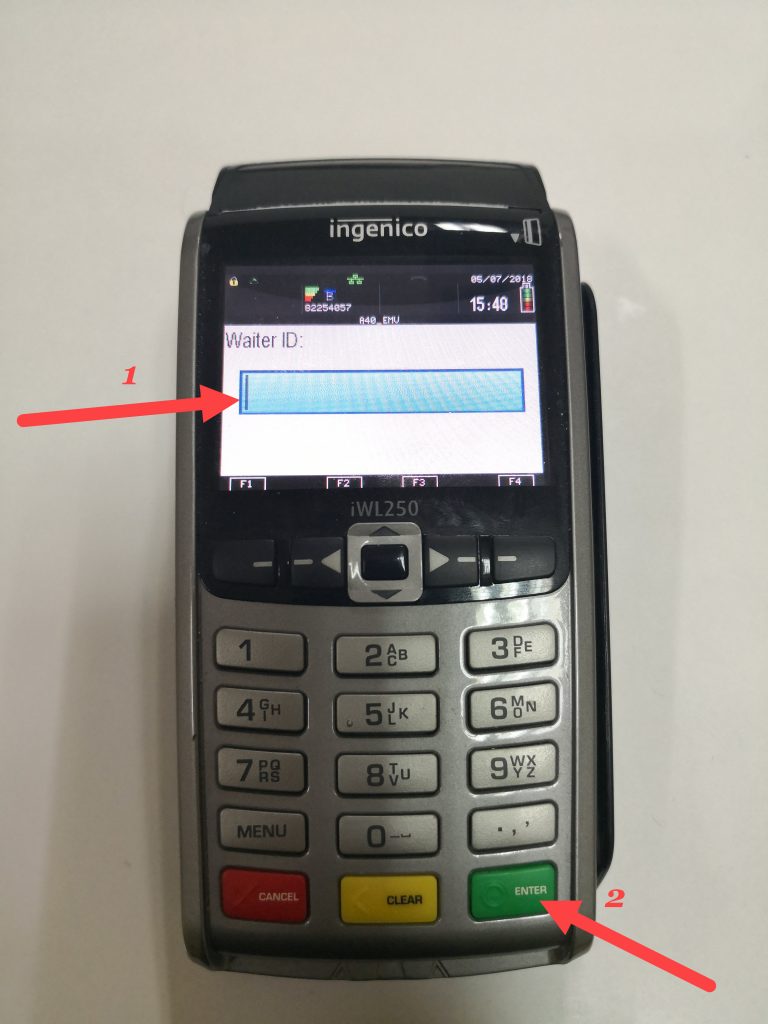
In this step, type the Waiter ID (Give a number ID for each Waiter. For example; 1= Waiter Jack, 2= Waiter Katie etc.) and then press on the Green Enter Button.
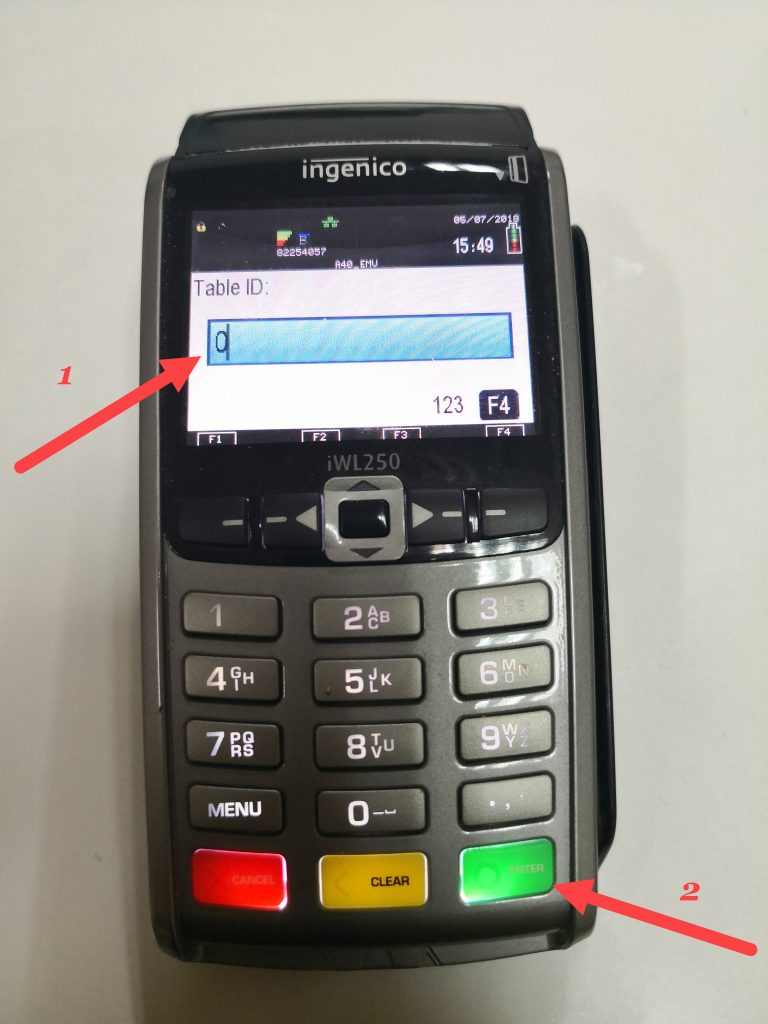
In the next step, as Table ID, if you type 0, it will display all of the opened tables. Also you can type any open table name directly to get its payment.
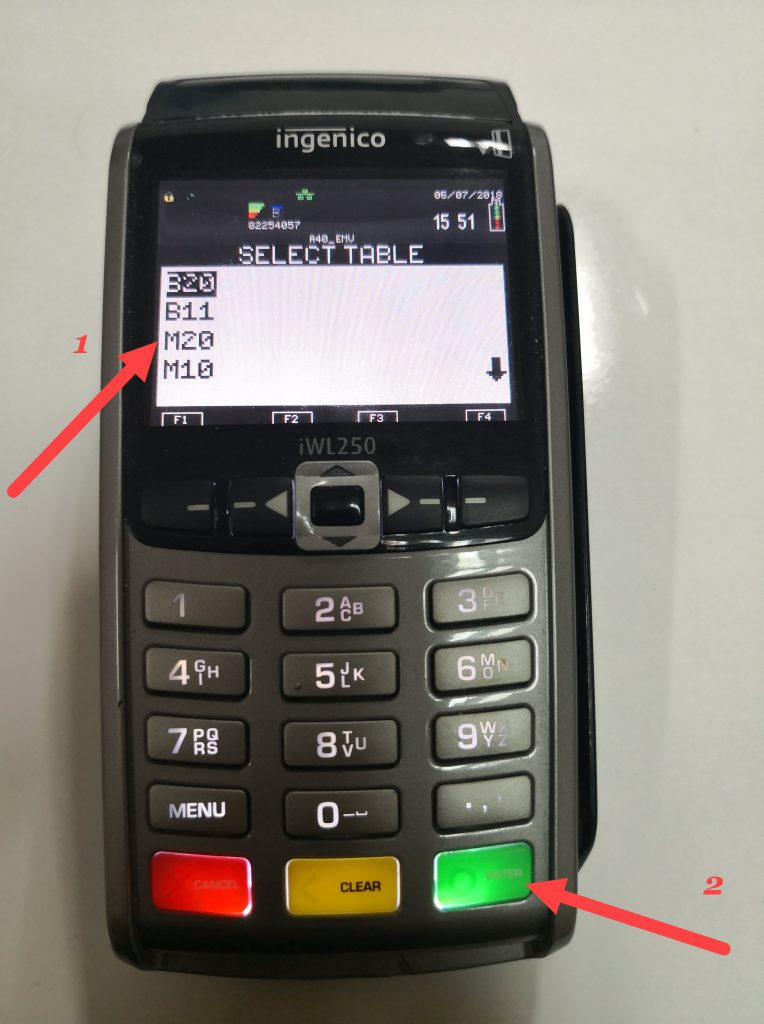
Select the table that you want to get its payment and press on Green Enter Button.
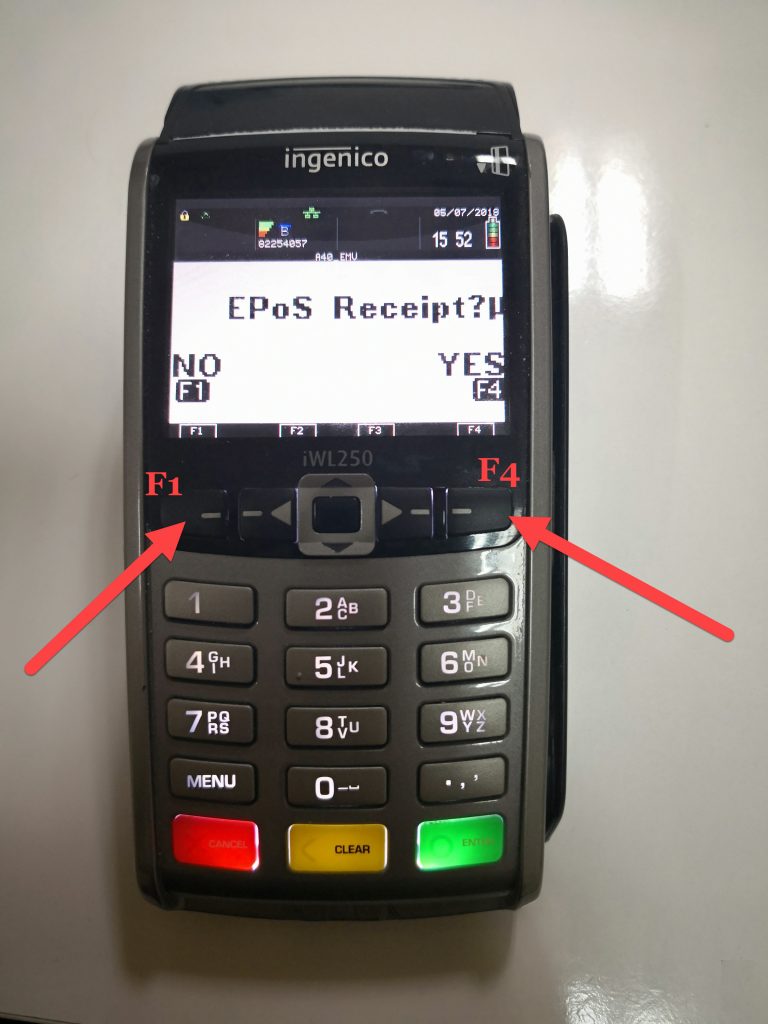
In this step, it will ask if you want an information receipt or not. If you don’t want, press on NO (F1) button, if you want it, then press on YES (F4) button. This information receipt doesn’t have any financial value and it will include restaurant name and order details.
If you press on YES (F4), you will receive a receipt like in the image below;
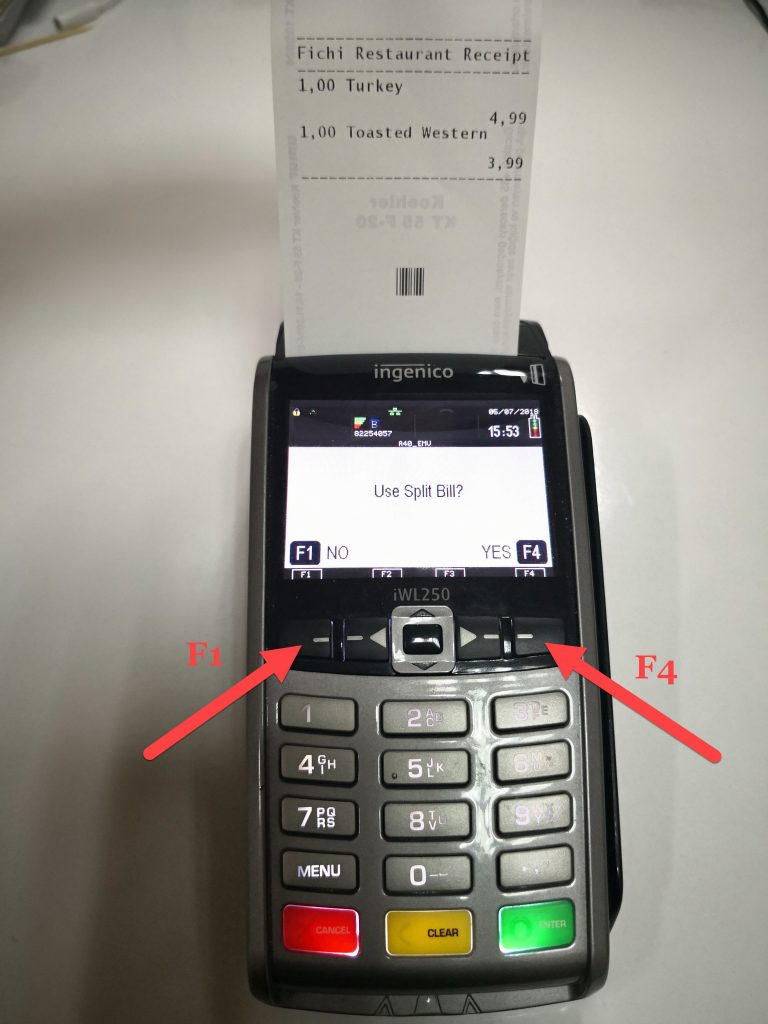
In this step, you will be asked if you want to get the payment by splitting or not. If you don’t want to split the payment, press on NO (F1), if you want, press on YES (F4).
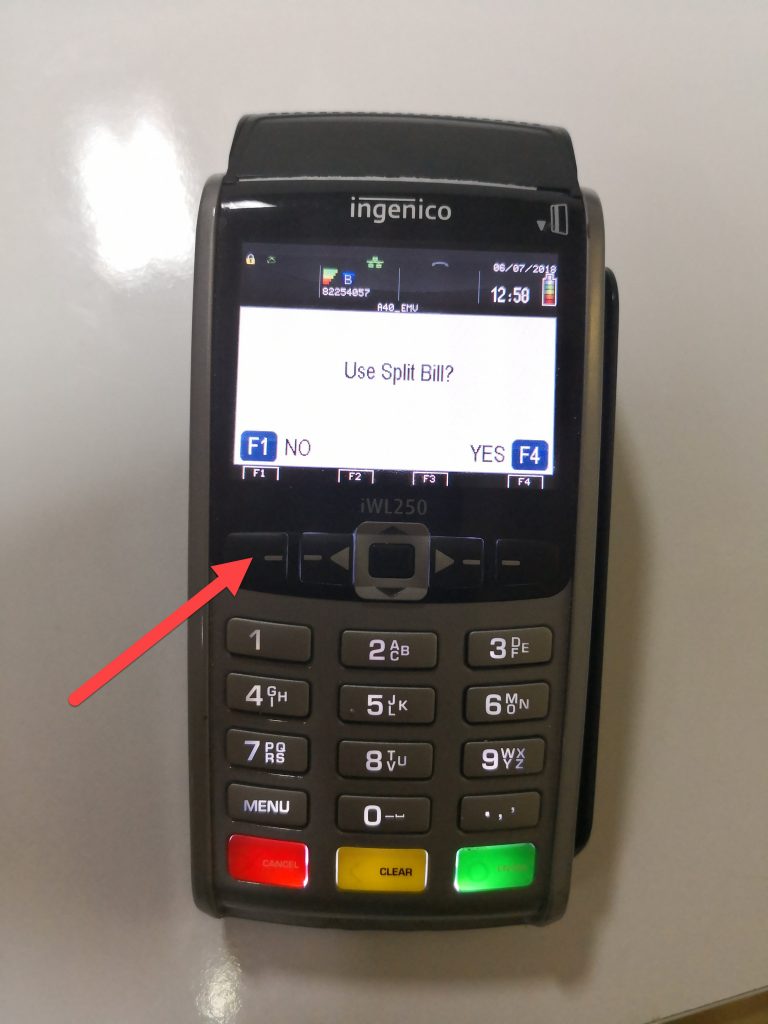
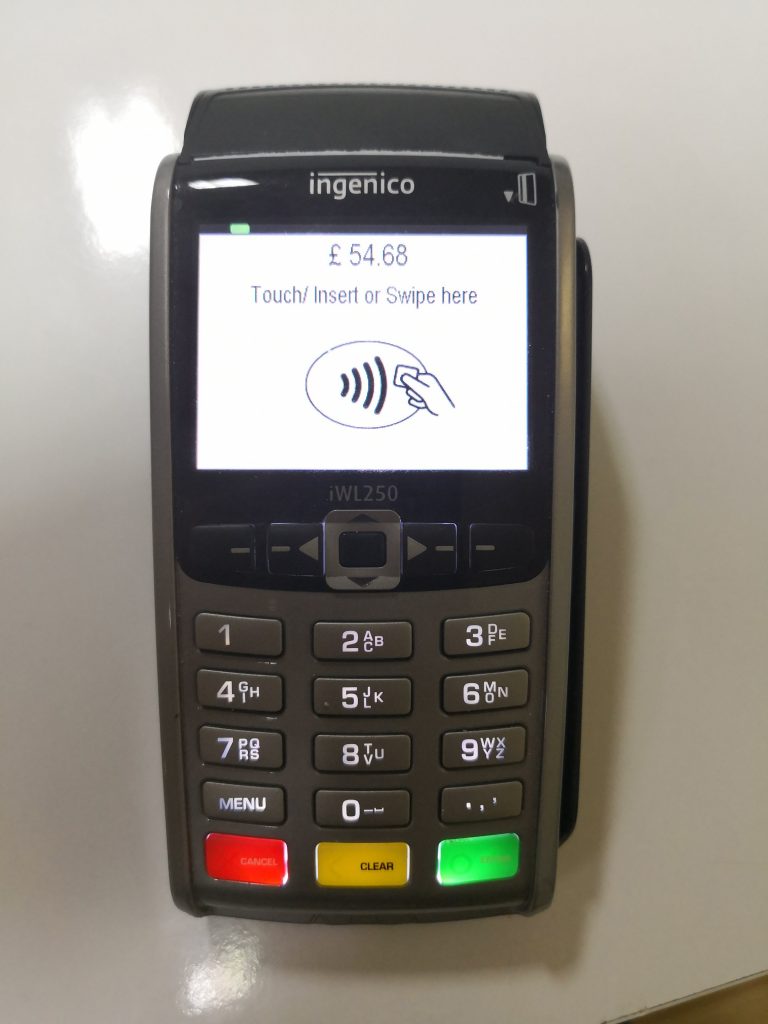
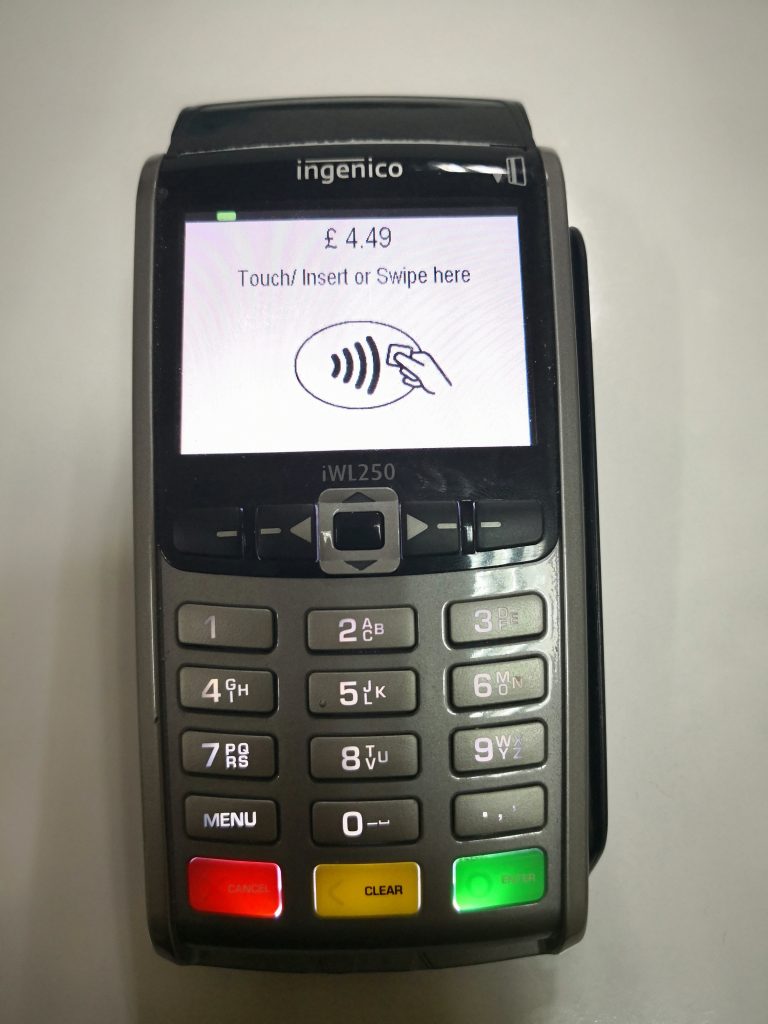
After pressing on F1 button, you will see the screen which is asking for you to Touch, Insert or Swipe the card to get payment;
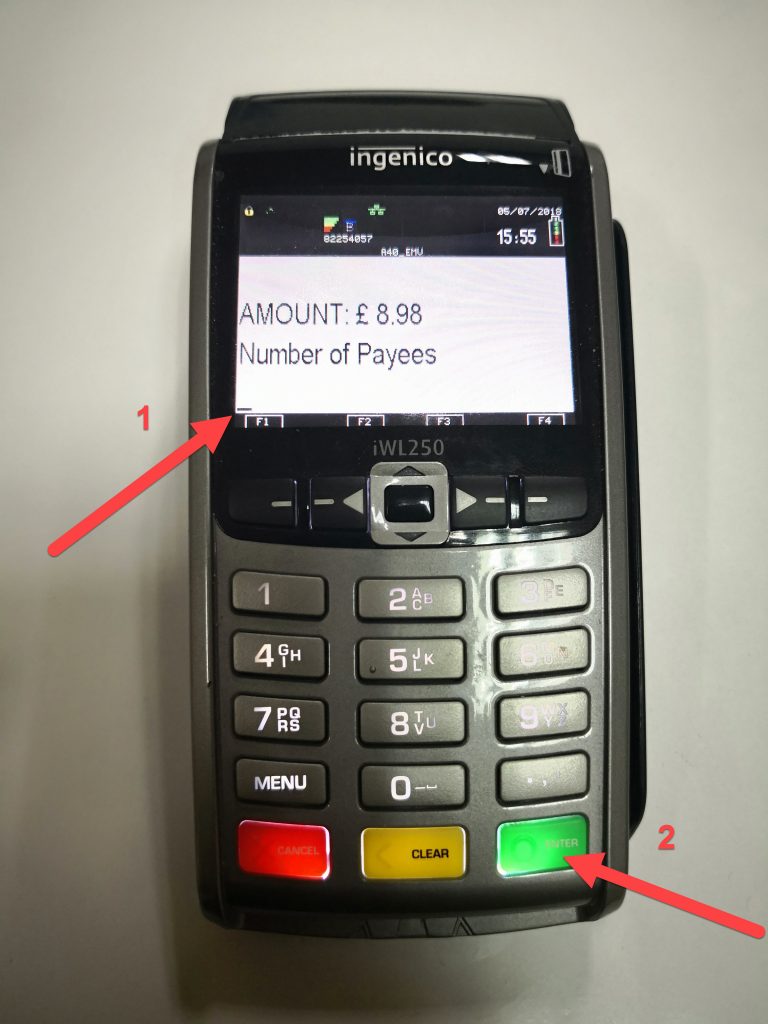
If you click on YES, it will ask for you to choose the number of payees which means that how many people will be paying the ticket. After typing the number of payees, press on Green Enter Button.
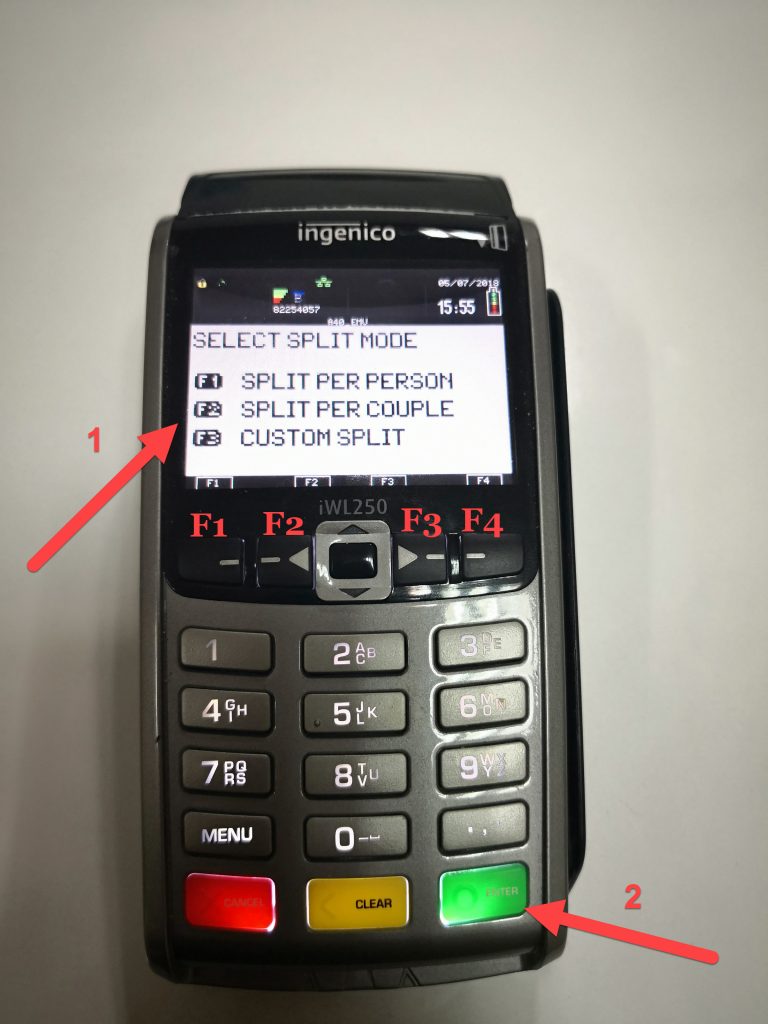
In here, you will be asked how you want to split the payment. Press on F1 for Split Per Person, F2 for Split Per Couple, F3 for Custom Split.
If you press on F1; it will divide ticket amount to payee person count for ticket.
If you press on F2; it will divide ticket amount to payee couple count for ticket.
If you press on F3; it will give you the opportunity to customize the splitting process.
If you press on F3 button, it will ask for to select payment method for each payee of the ticket. These payment methods are determined while configuring the Payment Sense Pay At Table program settings.
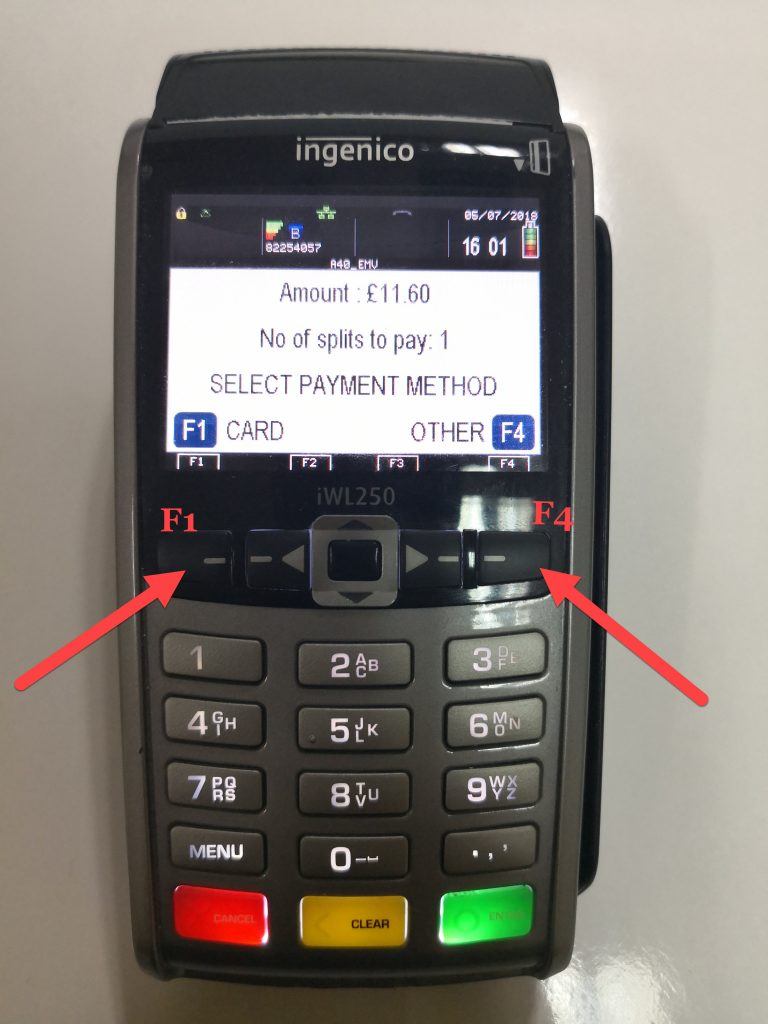
If you want to select Card as payment method, press on F1 button and then you will see a screen like below;
If you want to make the payment by Other Payment Method, press on F4 button, in this case you will see a confirmation screen like in the image below. First, press on F1 button and then Green Enter Button.
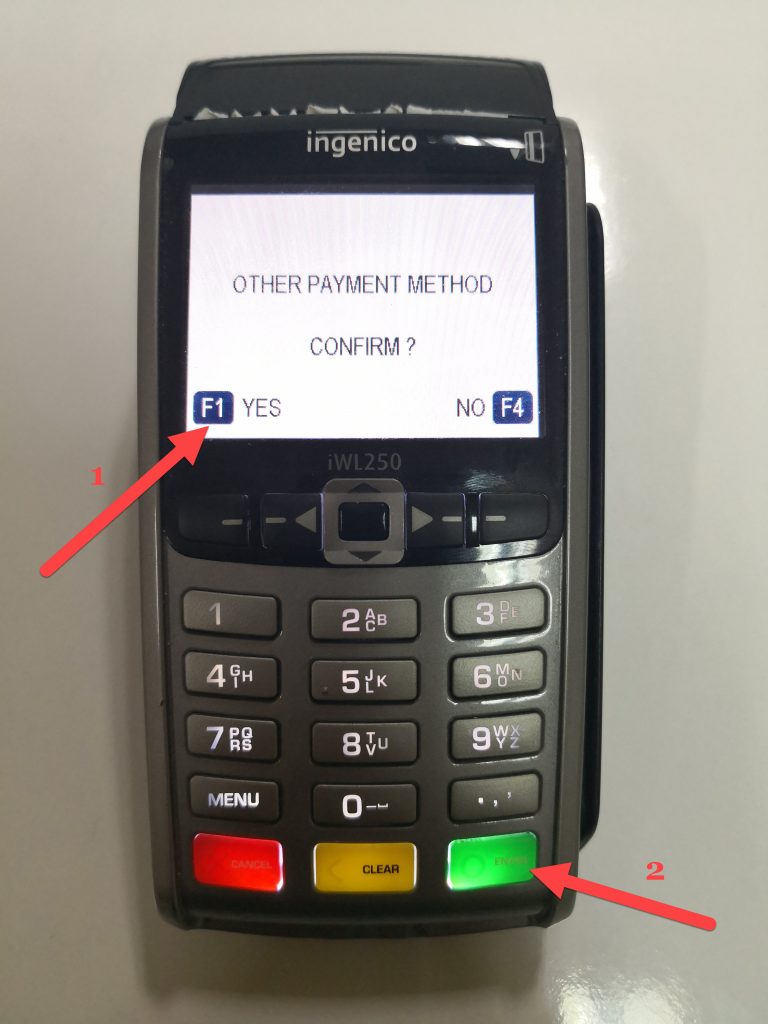
So that the splitted payment process of the ticket will be finished.