4.6. How to Manage Staff Salaries?
By using SambaPOS Account System, you can manage salaries of the staff.
1- Adding Salary Account Type
Go to Manage > Accounts > Account Types from here click on Add Account Type link.
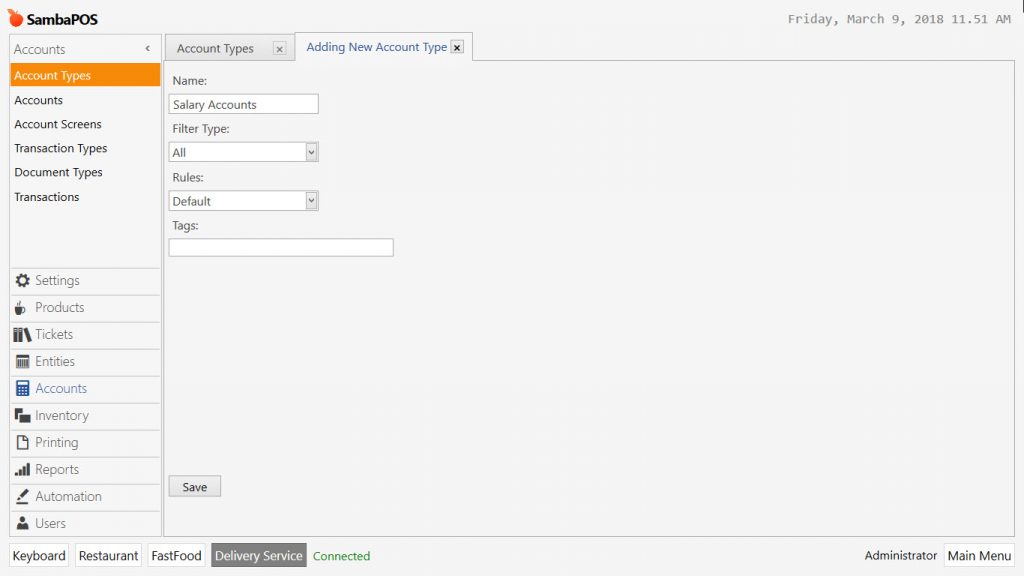
- Name: Field to write name of account template. (For example; Salary Accounts)
- Filter Type: Select All option.
- Rules: Select Default option.
After completing necessary fields, click on Save button.
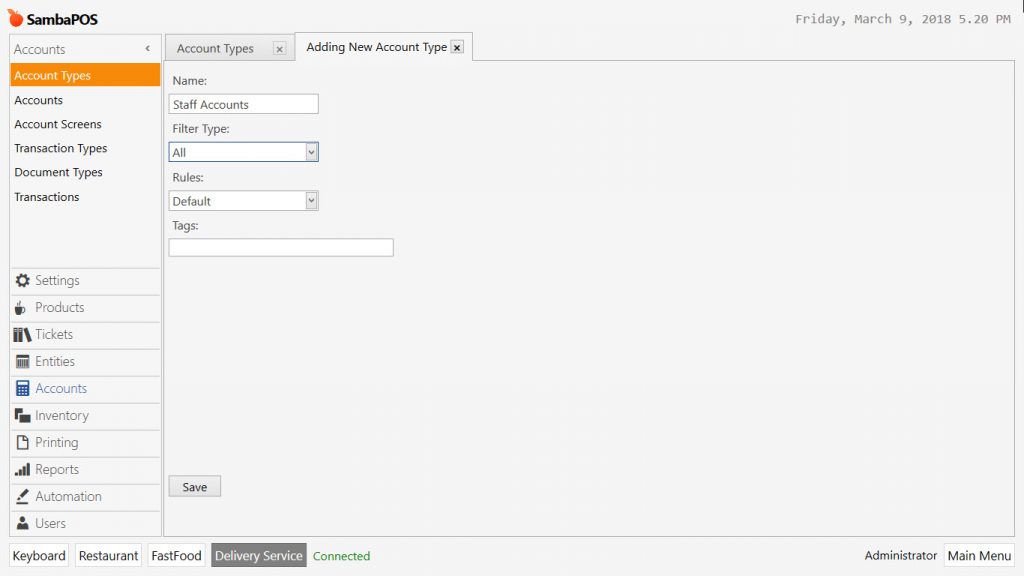
2- Adding Staff Account Type
Go to Manage > Accounts > Account Types from here click on Add Account Type link.
-
Name: Field to write name of account template. (For example; Staff Accounts)
-
Filter Type: Select one of the options according to your need.
-
Rules: Select Default option.
After completing necessary fields, click on Save button.
3- Sub Accounts of Salary Account Type
Go to Manage > Accounts > Accounts from here click on Add Account link.
3-1- Adding Salaries to Be Paid Account

-
Account Name: Field to write the name of account. (For example; Salaries to Be Paid)
-
Account Template: Select Salary Accounts template.
After completing necessary fields, click on Save button.
3-2- Adding Paid Salaries Account
Go to Manage > Accounts > Accounts from here click on Add Account link.

- Account Name: Field to write the name of account. (for example; Paid Salaries)
- Account Template: Select Salary Account template.
After completing necessary fields, click on Save button.
3-3- Adding Account for Staff
It is necessary to create an account for each staff to track their accounts separately. Go to Manage > Accounts > Accounts from here click on Add Account link.

-
Account Name: Field to write name/surname and role of the staff.
-
Account Template: Select Staff Accounts template.
After completing necessary fields, click on Save button. Repeat the same process for all staffs.
Once you finished with all the process, accounts screen will be like in the image below.
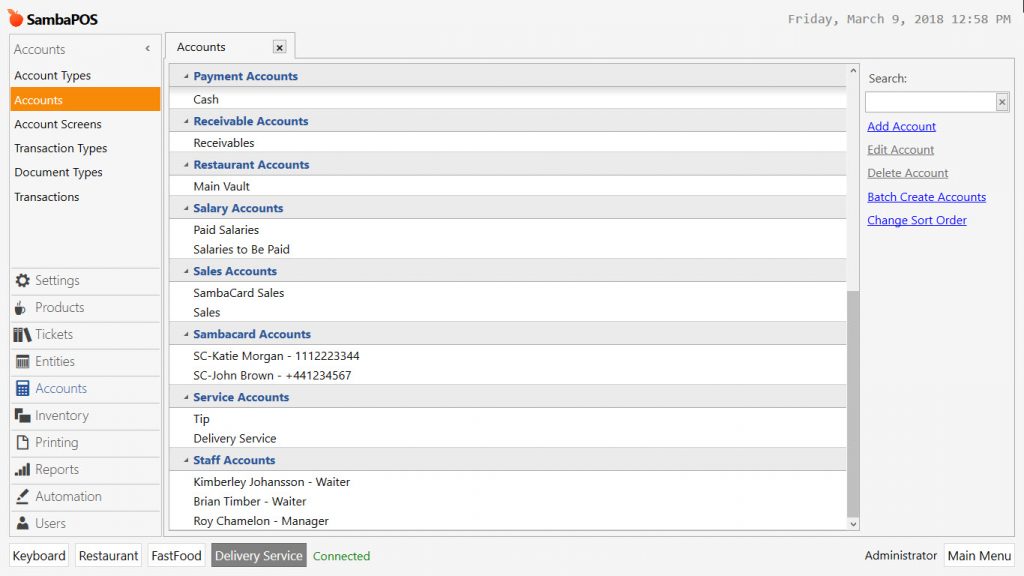
Note: Don’t delete the account of resigned staffs. You might need a report from the past about staff payments. This is why you shouldn’t delete any of the created accounts.
4- Adding Account Transactions
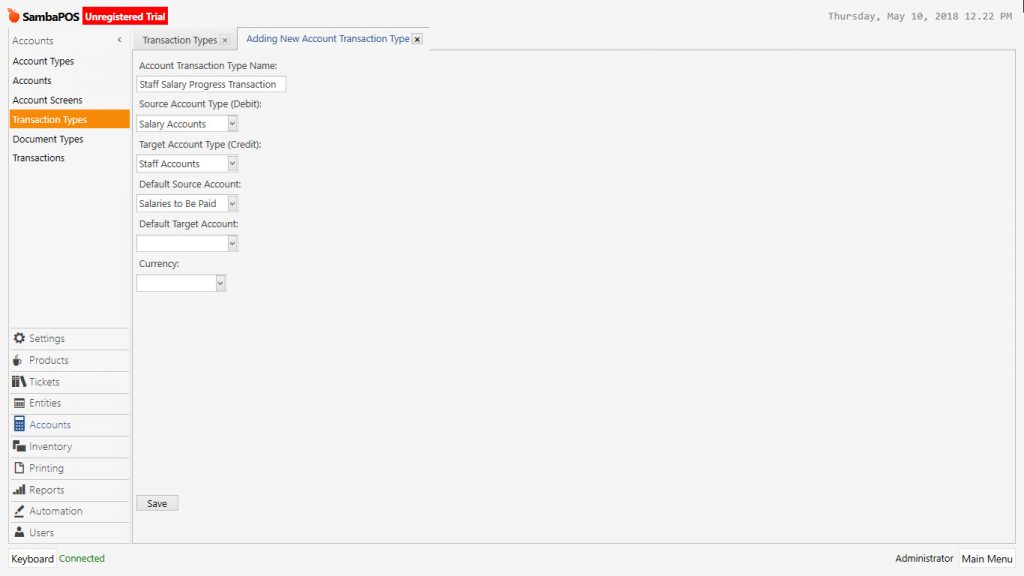
4-1- Adding Staff Salary Progress Account Transaction
Go to Manage > Accounts > Transaction Types from here click on Add Account Transaction Type link.
-
Account Transaction Type Name: Field to write name of account transaction type. (For example; Staff Salary Progress Transaction)
-
Source Account (Debit): Select Salary Accounts template.
-
Target Account Type (Credit): Select Staff Accounts template.
-
Default Source Account: Select Salaries to Be Paid template.
After completing necessary fields, click on Save button.
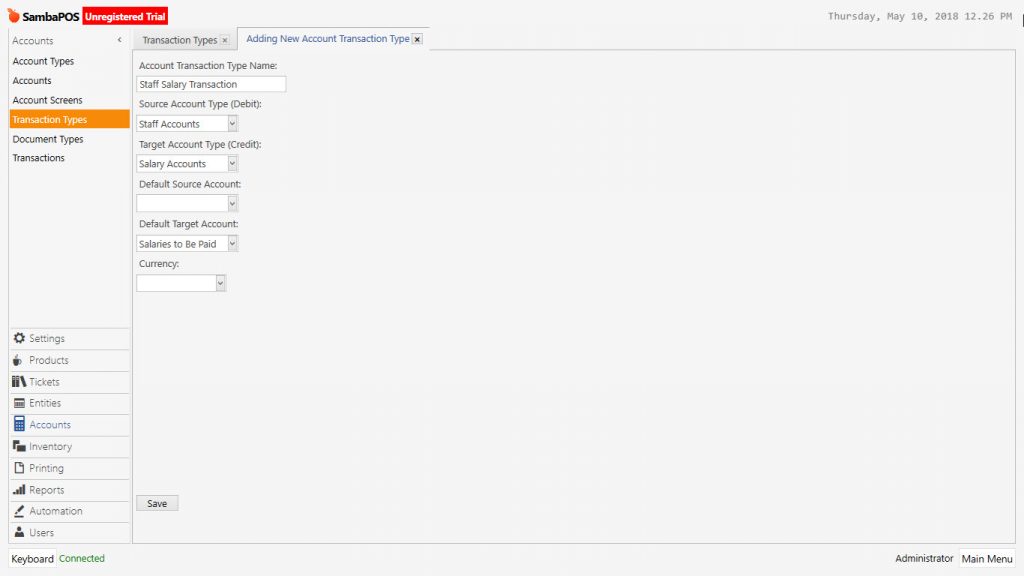
4-2- Adding Staff Salary Account Transaction
Go to Manage > Accounts > Transaction Types from here click on Add Account Transaction Type link.
-
Account Transaction Type Name: Field to write name of account transaction type. (For example; Staff Salary Transaction)
-
Source Account (Debit): Select Staff Accounts template.
-
Target Account Type (Credit): Select Salary Accounts template.
-
Default Target Account: Select Salaries to Be Paid template.
After completing necessary fields, click on Save button.
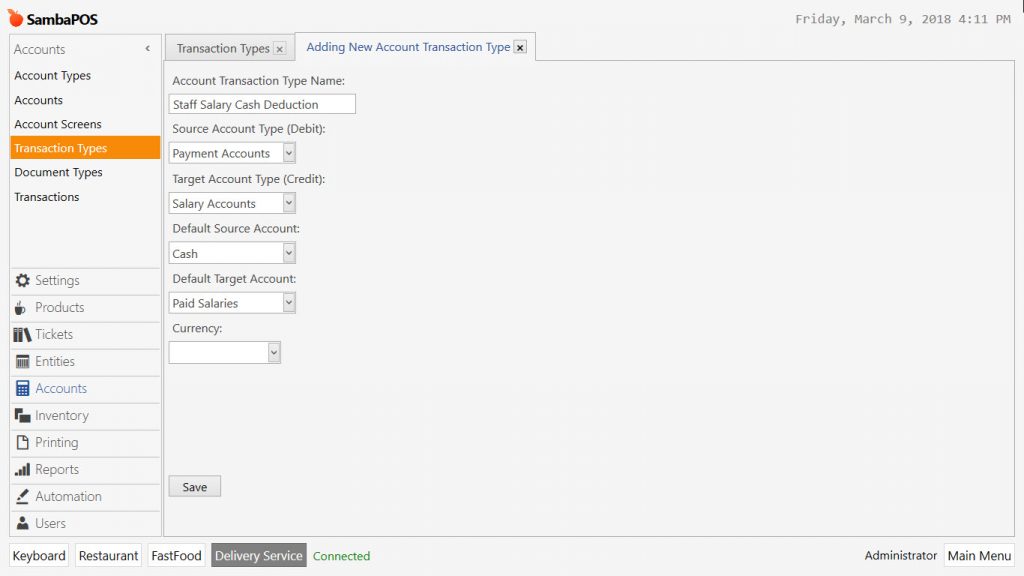
4-3- Adding Transaction Type for Deducting Staff Salary from Cash
It is necessary to deduct staff salary payments from cash account. Go to Manage > Accounts > Transaction Types from here click on Add Account Transaction Type link.
-
Account Transaction Type Name: Field to write name of account transaction type. (For example; Staff Salary Cash Deduction)
-
Source Account Type (Debit): Select Payment Accounts template.
-
Target Account Type (Credit): Select Salary Accounts template.
-
Default Source Account: Select Cash Account.
-
Default Target Account: Select Paid Salaries template.
After completing necessary fields, click on Save button.
5- Adding Document Types
5-1- Adding Salary Progress Document
Go to Manage > Accounts > Document Types from here click on Add Document Type link.
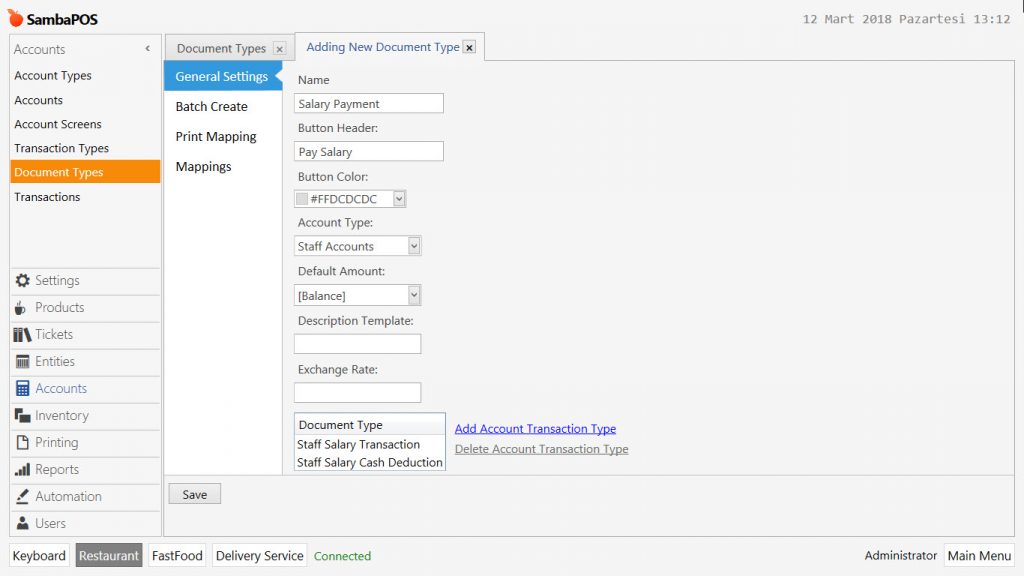
General Settings Section;

-
Name: Field to write name of document. (For example; Progress)
-
Button Header: Field to write the name that is desired to be seen on button. (For example; Progress)
-
Account Template: Select Staff Accounts template.
-
Document Type: Select Staff Salary Progress title from Add Account Transaction Type link.
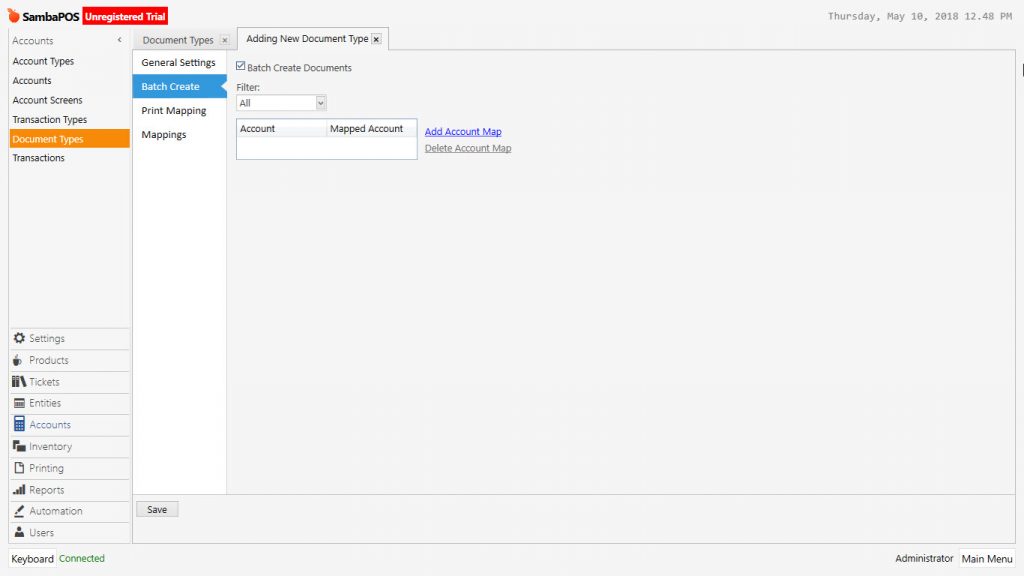
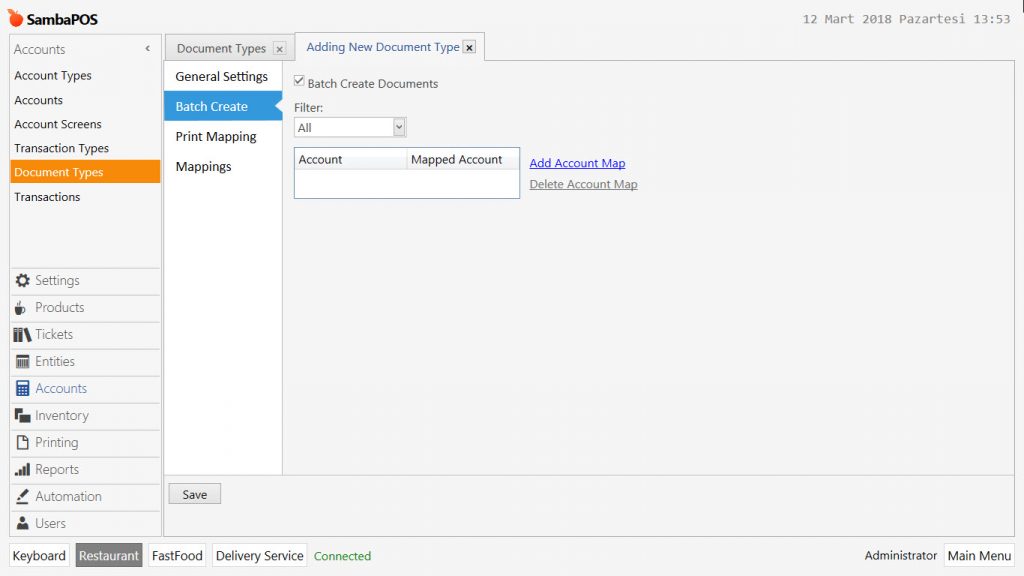
Batch Create Section;
Select Batch Create box and leave filter field as all.
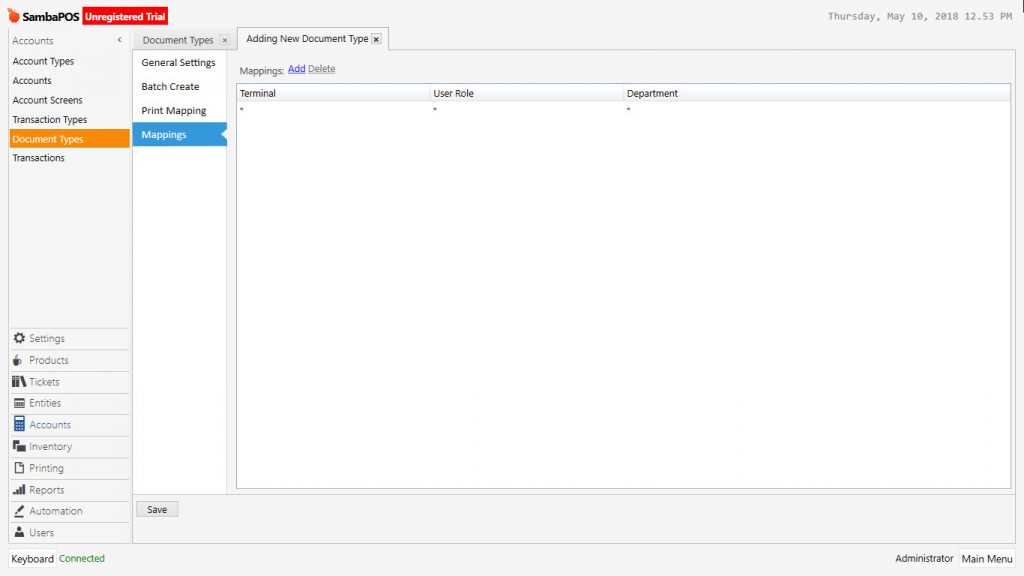
Mappings Section;
Determine terminal, role and department to see and use the payment document by adding at least one line. In case of it is desired to restrict access to this document by staff then select user role as Admin.
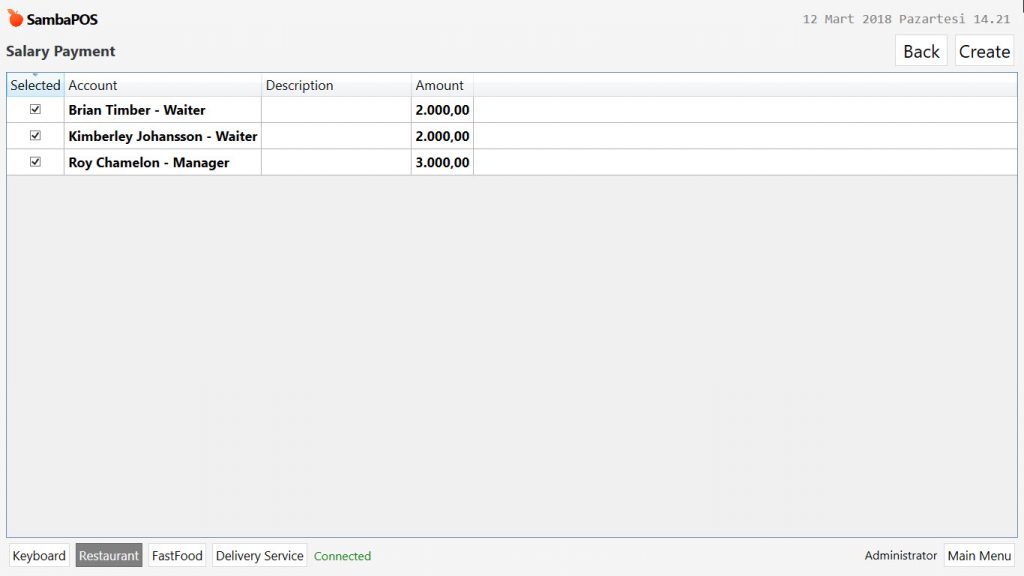
5-2- Adding Salary Payment Document
Go to Manage > Accounts > Document Types from here click on Add Document Type link.
General Settings Section;
-
Name: Field to write name of document. (For example; Salary Payment)
-
Button Header: Field to write the name that is desired to be seen on button. (For example; Pay Salary)
-
Account Template: Select Staff Accounts template.
-
Default Amount: Select [Balance] in this field.
-
Document Type: Select Staff Salary Transaction and Staff Salary Cash Deduction titles from Add Account Transaction Type link.
Batch Create Section;
Select Batch Create box and leave filter field as all.
Mappings Section;
Determine terminal, role and department to see and use the payment document by adding at least one line. In case of it is desired to restrict access to this document by staff then select user role as Admin.

After completing necessary fields, click on Save button.
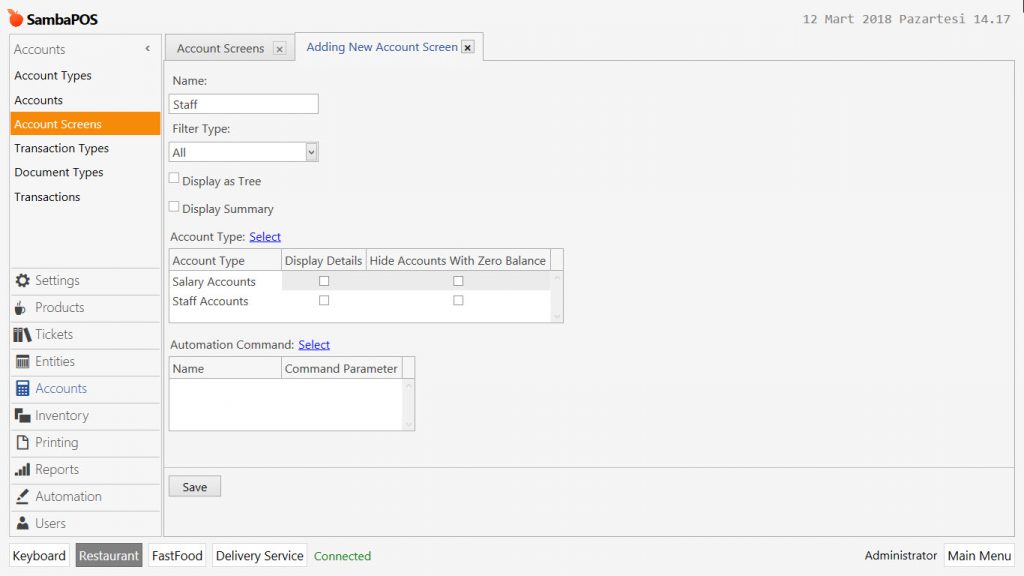
6- Adding Staff Account Screen
Go to Manage > Accounts > Account Screens from here click on Add Account Screen link.
-
Name: Field to write the name of account screen. (For example; Staff)
-
Filter Type: Select according to need.
-
Account Template: Select Salary Accounts and Staff Accounts by clicking on select account template link.
After completing necessary fields, click on Save button.
Once you finished with all the process, it will be possible to see salary details of staff from Accounts menu on the navigation screen.