4.48. Defining Multiple Delivery Addresses for Customers
In this document it will be explianed how to define multiple delivery addresses for customers.
How it Works;
1. Editing Customers Entity Type
Main Menu > Manage > Entities > Entity Types > Customers > Custom Fileds > Here, click on Add Custom Field and add as many new custom fields as customer’s address quantity.
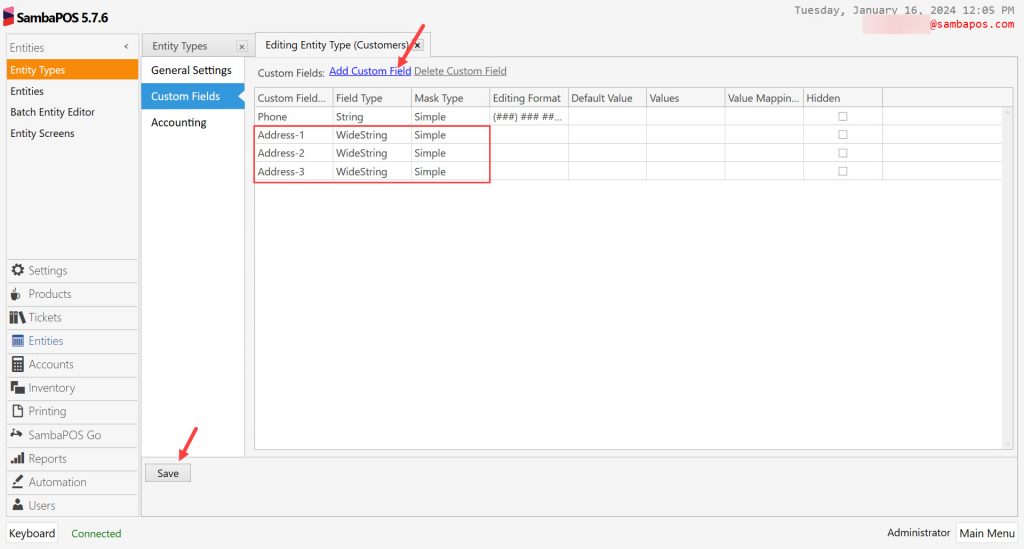
After completing necessary editings, click on Save button.
2. Adding Ticket Tag
Main Menu > Manage > Tickets > Ticket Tags > Here, click on Add Ticket Tag.
General Settings Section;
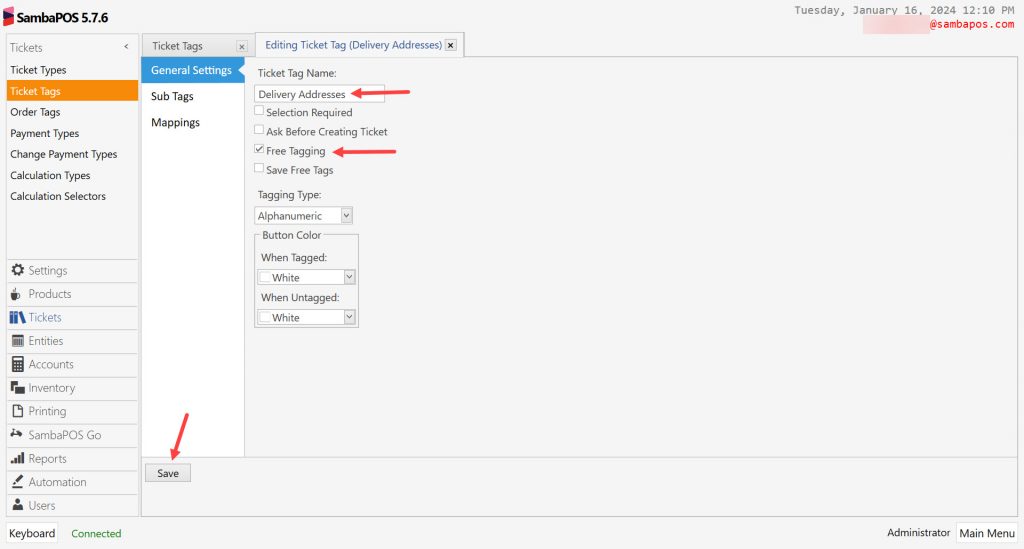
Ticket Tag Name: Delivery Addresses
Free Tagging: Must be selected
Mappings Section;
You can leave this field blank.
After completing necessary editings, click on Save button.
3. Editing Ticket Template
Main Menu > Manage > Printing > Printer Templates Ticket Template > Here, copy the below code group and paste it under the [ENTITIES:Customer] as shown in the image.
<J11>Address:{TICKET TAG:Delivery Addresses}
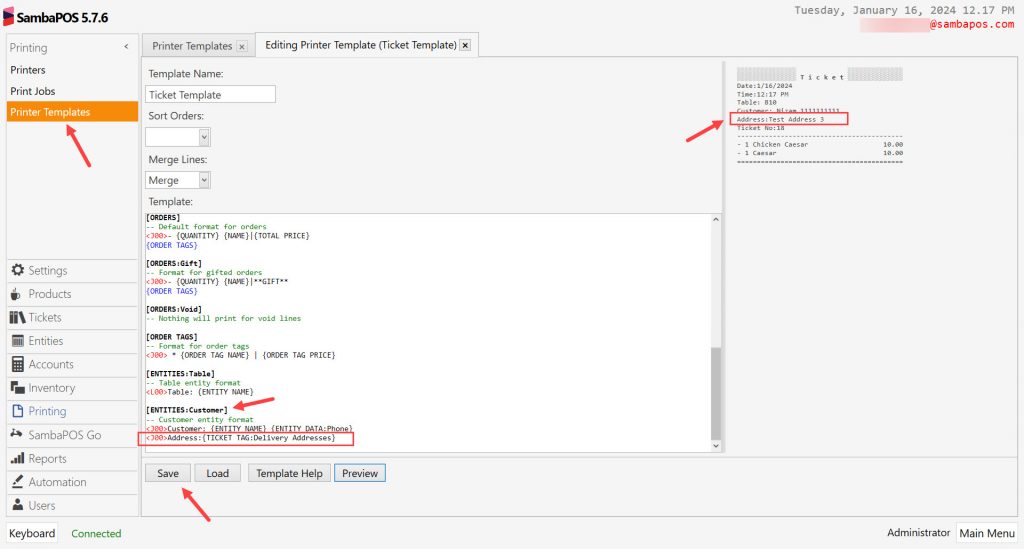
After completing necessary editings, click on Save button.
4. Adding Actions
4.1. Adding MA-Update Ticket Tag Action
Main Menu > Manage > Automation > Actions > Here, click on Add Action.
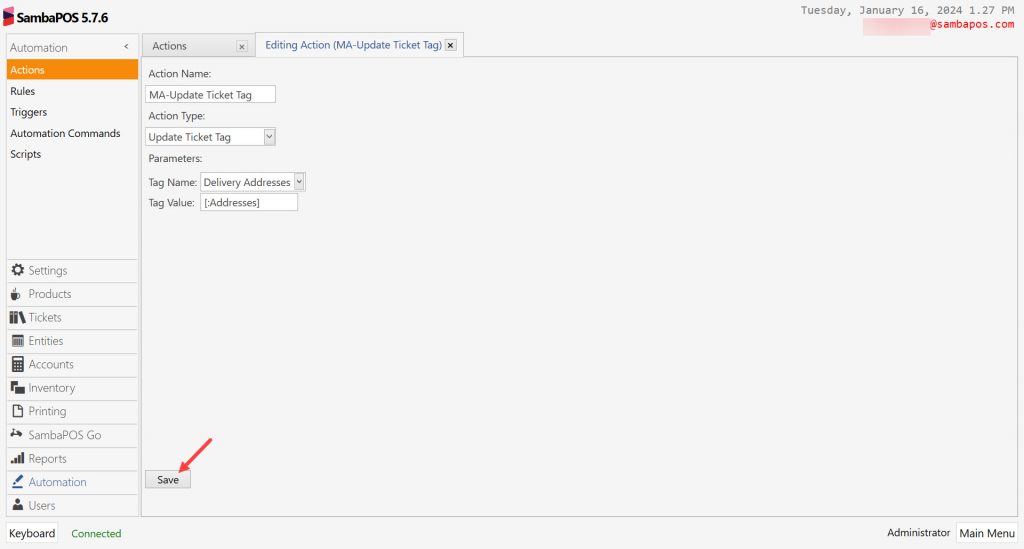
Action Name: MA-Update Ticket Tag
Action Type: Update Ticket Tag
Parameters:
Tag Name: Delivery Addresses
Tag Value: [:Addresses]
After completing necessary editings, click on Save button.
4.2. Adding MA-Show Message Action
Main Menu > Manage > Automation > Actions > Here, click on Add Action.
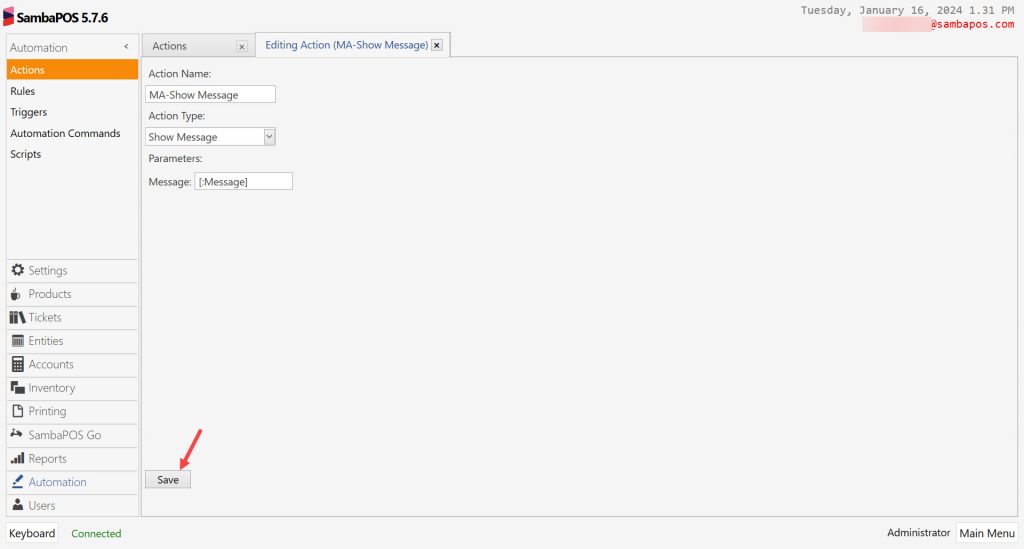
Action Name: MA-Show Message
Action Type: Show Message
Parameters:
Message: [:Message]
After completing necessary editings, click on Save button.
4.3. Adding MA-Update Entity Note Action
Main Menu > Manage > Automation > Actions > Here, click on Add Action.

Action Name: MA-Update Entity Note
Action Type: Update Entity Note
Parameters:
Entity Name: [:Customer Name]
Entity Type: Customers
Name: [:AddressName]
Note: [:Addresses]
Color: [:Color]
Display Once: True
Automation Command: MA-Set Delivery Addresses
Automation Command Value: [:AddressNumbers]
After completing necessary editings, click on Save button.
4.4. Adding MA-Update Entity Data Action
Main Menu > Manage > Automation > Actions > Here, click on Add Action.

Action Name: MA-Update Entity Data
Action Type: Update Entity Data
Parameters:
Entity Type Name: Customers
Entity Name: [:Customer Name]
Field Name: Delivery Addresses
Field Value: [:Delivery Addresses]
After completing necessary editings, click on Save button.
5.Adding Rules
5.1. Adding MA-Set Address Notes Rule
Main Menu > Manage > Automation > Rules > Here, click on Add Rule.
General Settings Section;
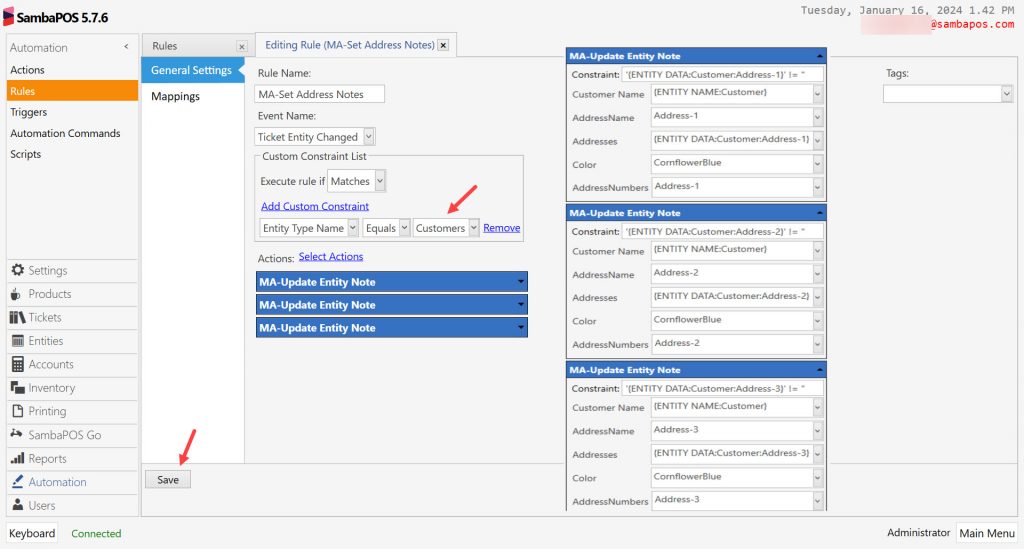
Rule Name: MA-Set Address Notes
Event Name: Ticket Entity Changed
Execute Rule if: Matches
Add Custom Constraint
Entity Type Name|Equals|Customers
Select Action:
Action-1: MA-Update Entity Note
Constraint: '{ENTITY DATA:Customer:Address-1}' != "
Customer Name: {ENTITY NAME:Customer}
AdressName: Address-1
Addresses: {ENTITY DATA:Customer:Address-1}
Color: CornflowerBlue
AddressNumbers: Address-1
On the Action Adding Screen right click on mouse and select Display All Values so you can add the same action multiple times.
Action-2: MA-Update Entity Note
Constraint: '{ENTITY DATA:Customer:Address-2}' != "
Customer Name: {ENTITY NAME:Customer}
AdressName: Address-2
Addresses: {ENTITY DATA:Customer:Address-2}
Color: CornflowerBlue
AddressNumbers: Address-2
On the Action Adding Screen right click on mouse and select Display All Values so you can add the same action multiple times.
Action-3: MA-Update Entity Note
Constraint: '{ENTITY DATA:Customer:Address-3}' != "
Customer Name: {ENTITY NAME:Customer}
AdressName: Address-3
Addresses: {ENTITY DATA:Customer:Address-3}
Color: CornflowerBlue
AddressNumbers: Address-3
Mappings Section;
Here, add a line by clicking on Add button and determine Ticket Type according to your Delivery Ticket Type name (in the example it’s Delivery Ticket). So that this configuration will only work for Delivery Orders not for Table/Dine In orders.
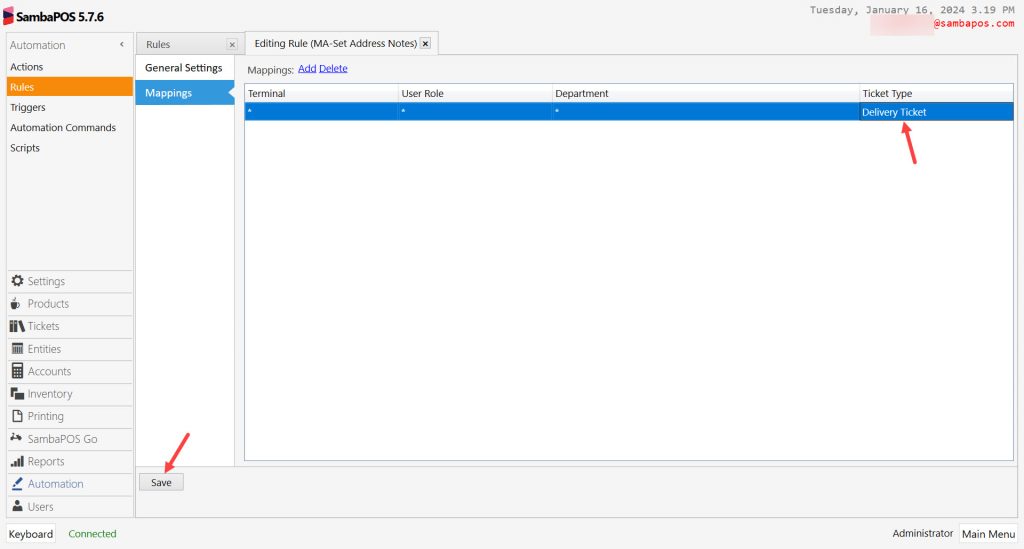
After completing necessary editings, click on Save button.
5.2. Adding MA-Set Delivery Addresses Rule
Main Menu > Manage > Automation > Rules > Here, click on Add Rule.
General Settings Section;
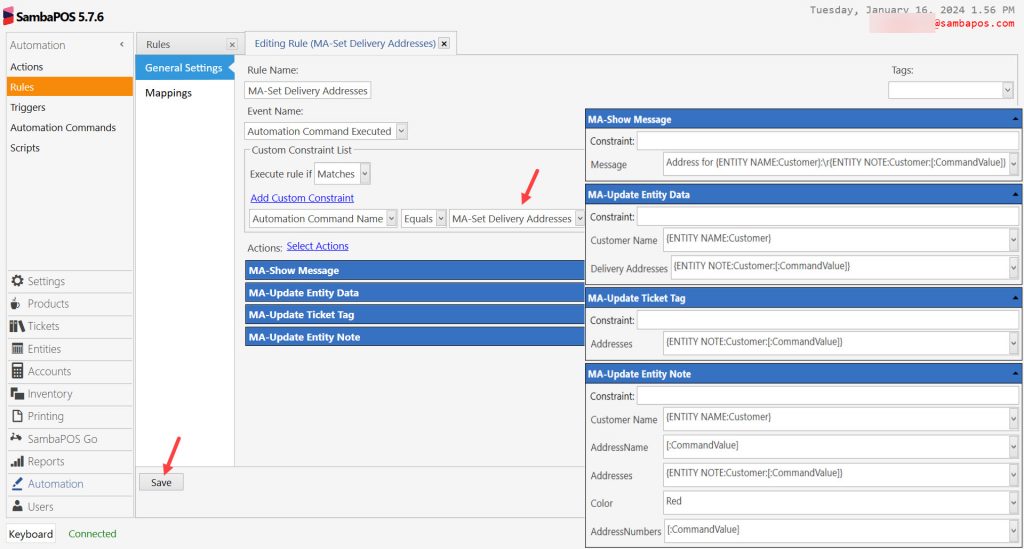
Rule Name: MA-Set Delivery Addresses
Event Name: Automation Command Executed
Execute Rule if: Matches
Add Custom Constraint
Automation Command Name|Equals|MA-Set Delivery Addresses
Select Action:
Action-1: MA-Show Message
Message: Address for {ENTITY NAME:Customer}:\r{ENTITY NOTE:Customer:[:CommandValue]}
Action-2: MA-Update Entity Data
Customer Name: {ENTITY NAME:Customer}
Delivery Adresses: {ENTITY NOTE:Customer:[:CommandValue]}
Addresses: {ENTITY DATA:Customer:Address-2}
Action-3: MA-Update Ticket Tag
Addresses: {ENTITY NOTE:Customer:[:CommandValue]}
Action-4: MA-Update Entity Note
Customer Name: {ENTITY NAME:Customer}
AddressName: [:CommandValue]
Addresses: {ENTITY NOTE:Customer:[:CommandValue]}
Color: Red
AddressNumbers: [:CommandValue]
Mappings Section;
Here, add a line by clicking on Add button and determine Ticket Type according to your Delivery Ticket Type name (in the example it’s Delivery Ticket). So that this configuration will only work for Delivery Orders not for Table/Dine In orders.

After completing necessary editings, click on Save button.