4.35. How to Apply SMS Sending Implementation on SambaPOS?
In this document, it will be explained how to setup SMS Sending Implementation for SambaPOS.
1. Setup of the API URL
Edit the URL that was provided by the Operator, according to below line.
http://api.center.com/v1/send-sms/get/?username=username&password=password&text=@message@&receipents=@number@&sender=Company Name
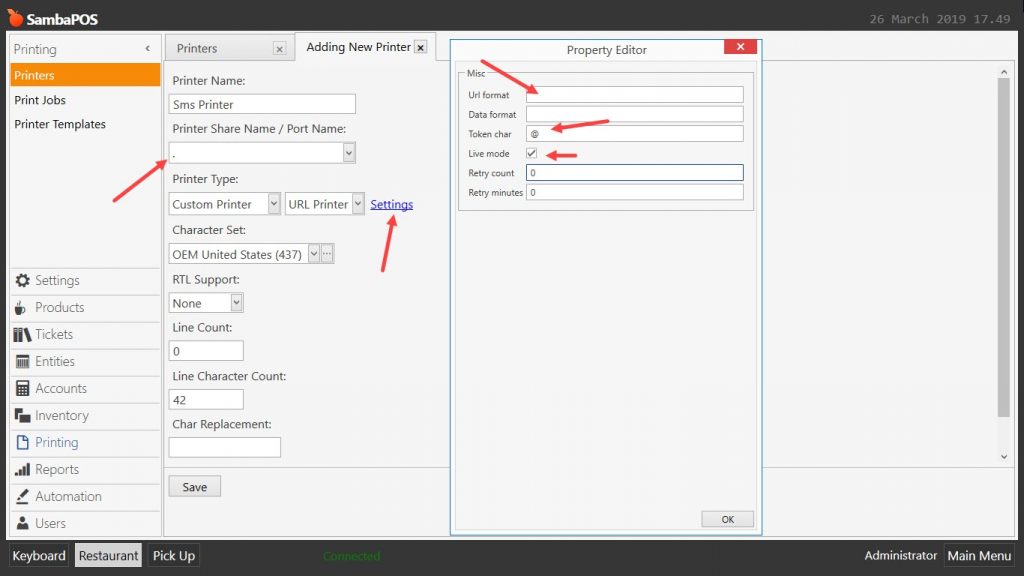
2. Adding Printer
Main Menu > Manage > Printing > Printers > here click on Add Printer.
Printer Name: Sms Printer
Printer Share Name / Port Name: . (Period)
Printer Type: Custom Printer / URL Printer Click on Settings and configure the settings according to above image.
URL Format: Enter the URL that was provided by operator.
Data Format: Blank
Token Char: @
Live Mode: Must be selected.
Retry Count: 0 (Zero)
Retry Minutes: 0 (Zero)
After completing necessary editings, click on Save button.
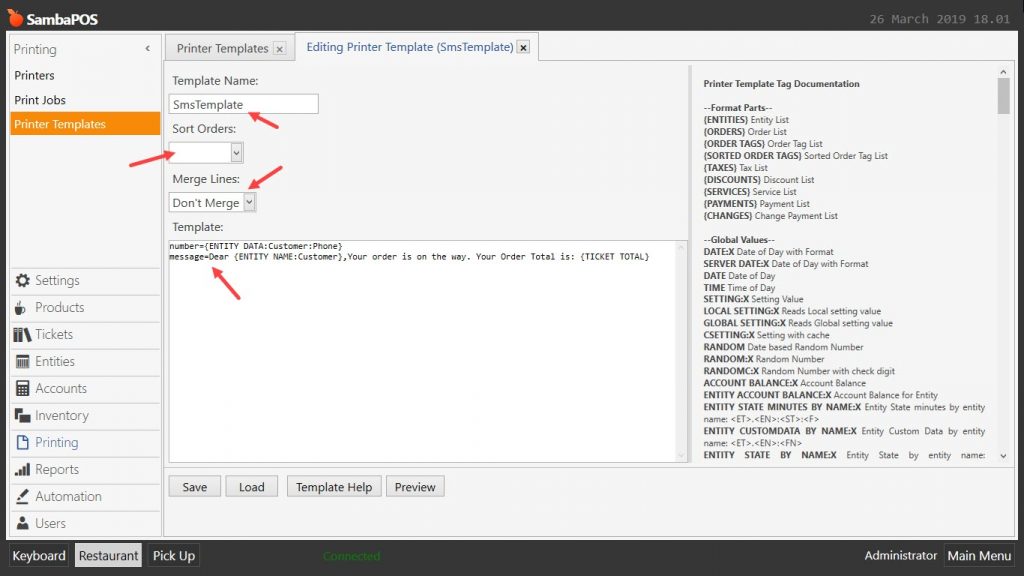
3. Adding Printer Template
Main Menu > Manage > Printing > Printer Templates > here click on Add Printer Template.
Template Name: SmsTemplate
Sort Orders: Blank
Merge Lines: Don’t Merge
Template:
Copy below code group and paste into Template field;
number={ENTITY DATA:Customer:Phone}

message=Dear {ENTITY NAME:Customer},Your order is on the way. Your Order Total is: {TICKET TOTAL}
After completing necessary editings, click on Save button.
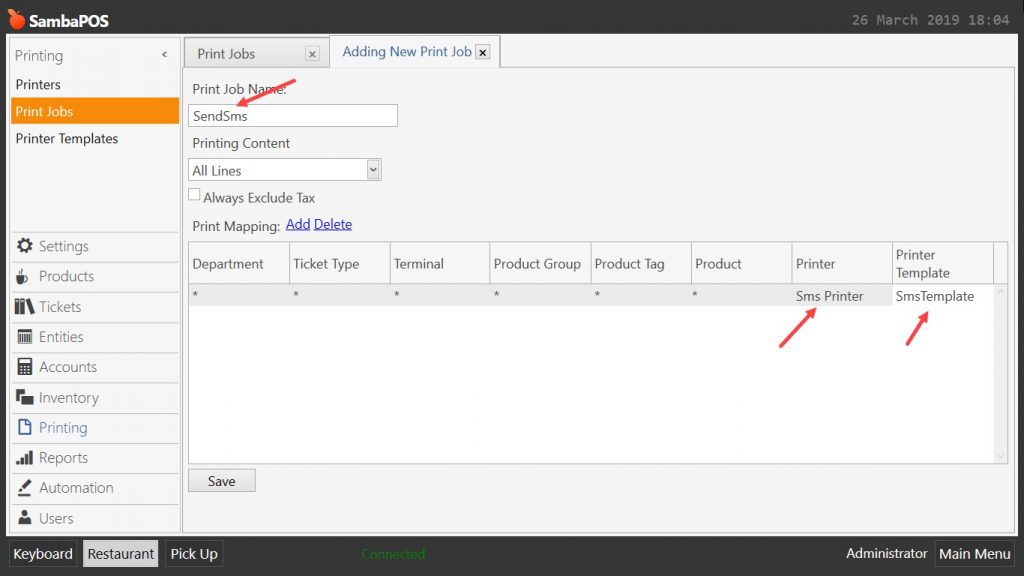
4. Adding Print Job
Main Menu > Manage > Printing > Print Jobs > here click on Add Print Job.
Pring Job Name: SendSms
Printing Content: All Lines
Add a row by clicking on Add button and select Sms Printer in the Printer column, select SmsTemplate in Printing Template column.
After completing necessary editings, click on Save button.
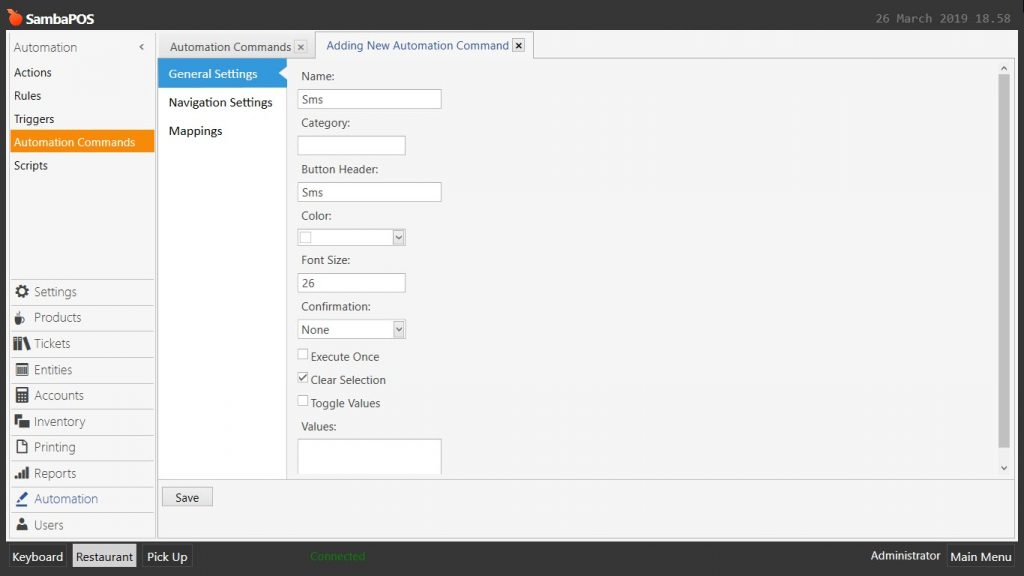
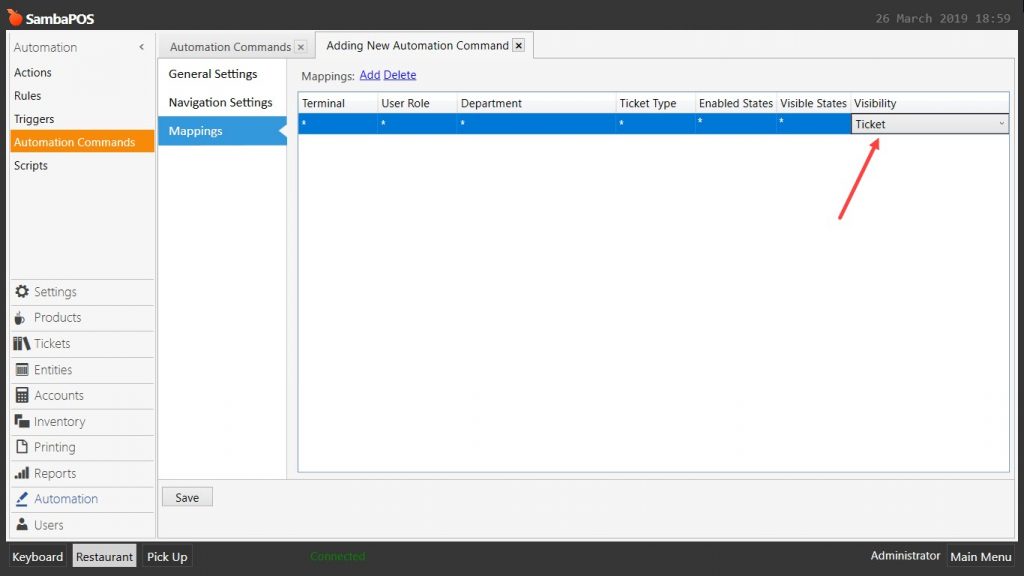
5. Adding Automation Command
Main Menu > Manage > Automation > Automation Commands > here click on Add Automation Command.
General Settings Section;
Automation Comand Name: Sms
Button Header: Sms
Mappings Section;
Here, add a row by clicking on Add button.
After completing necessary editings, click on Save button.
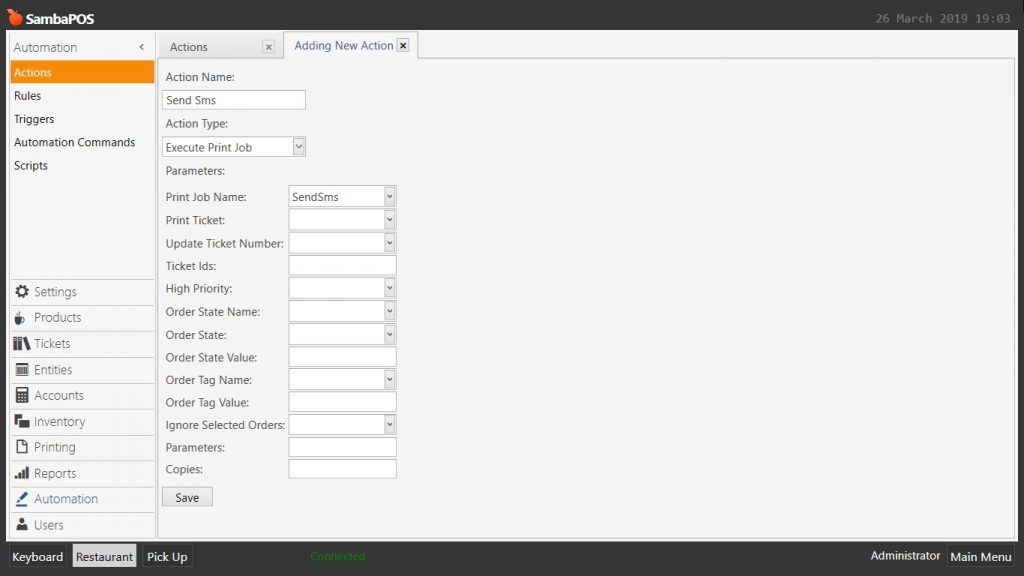
6. Adding Action
Main Menu > Manage > Automation > Actions > here click on Add Action.
Action Name: Send Sms
Action Type: Execute Print Job
Print Job Name: SendSms
After completing necessary editings, click on Save button.
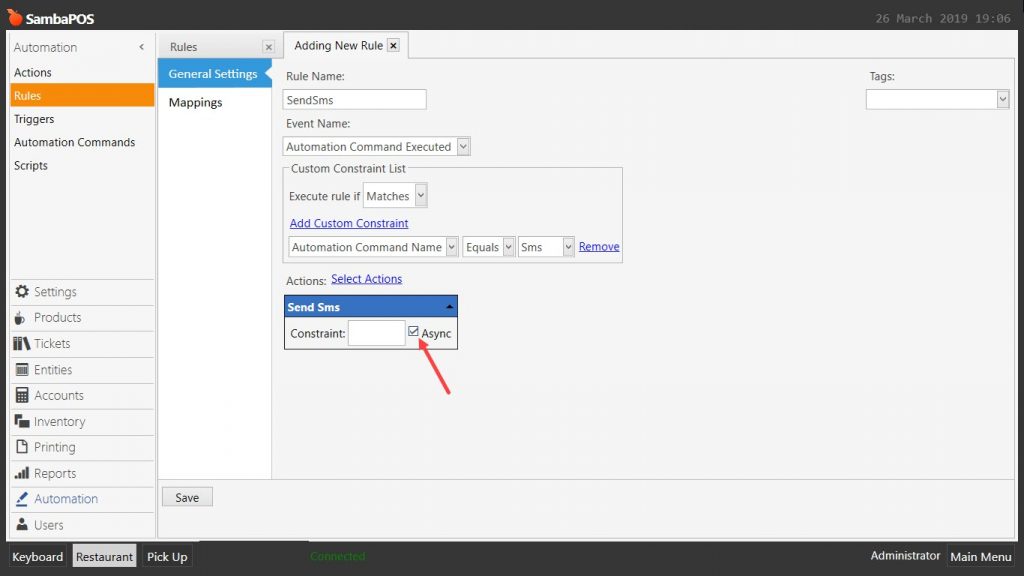
7. Adding Rule
Main Menu > Manage > Automation > Rules > here click on Add Rule.
Rule Name: SendSms
Event Name: Automation Command Executed
Execute Rule If: Matches
Add Custom Constraint:
Automation Command Name|Equals|Sms
Select Action:
Action: Send Sms
Constraint: Blank
Async: Must be selected.
After completing necessary editings, click on Save button.

