4.13. How to Generate Kitchen Display?
By this document you can track preparation process of taken orders from kitchen screen. Prepared orders will be displayed on customer screen when they are confirmed. Sale, order, production and delivery process of item will be completed on customer screen by delivering the product to customer.
Document Index
1. Adding and Designing of Entity Screens
1.1. Kitchen Track Entity Screen
1.2. Customer Track Entity Screen
2. Adding Automation Commands
2.1. Name: Order Ready
2.2. Name: Order Delivered
3. Adding Actions
3.1. Action Name: Load Ticket
3.2. Action Name: Update Ticket Kitchen State
3.3. Action Name: Change Program Setting Keep Ticket No
4. Editing / Adding Rules
4.1. Rules Need to be Edited;
4.1.1. Rule Name: Adding New Order (Needs to be Edited)
4.1.2. Rule Name: Ticket Paid Control (Needs to be Edited)
4.1.3. Rule Name: Creating New Ticket Rule (Needs to be Edited)
4.2. Rules Need to be Added;
4.2.1. Rule Name: CKT-Ticket Paid Control (Needs to be Added)
4.2.2. Rule Name: CKT-Make State Ready When Ticket Selected From Kitchen Screen (Needs to be Added)
4.2.3. Rule Name: CKT-Make State Delivered When Ticket Selected From Customer Delivery Screen (Needs to be Added)
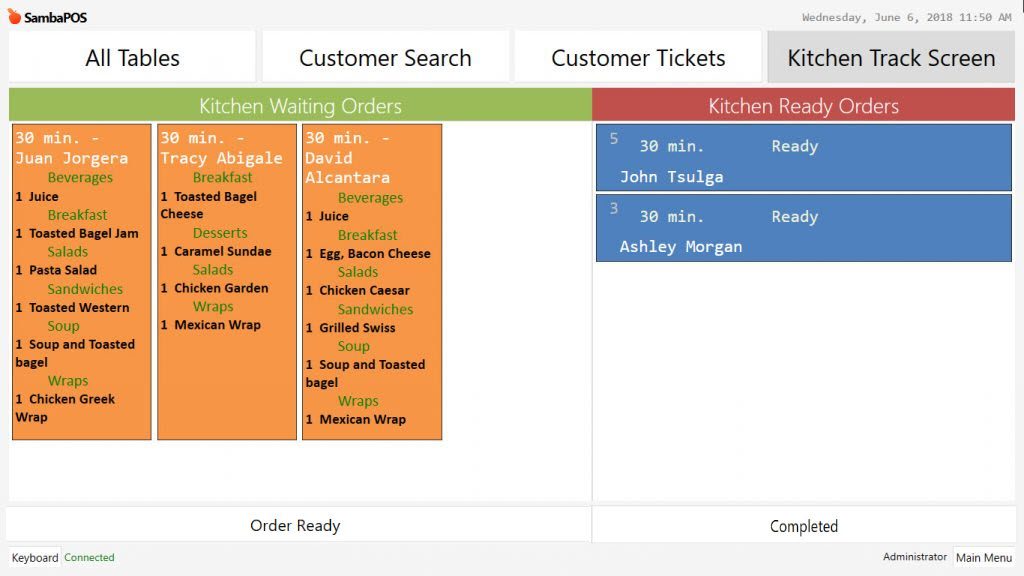
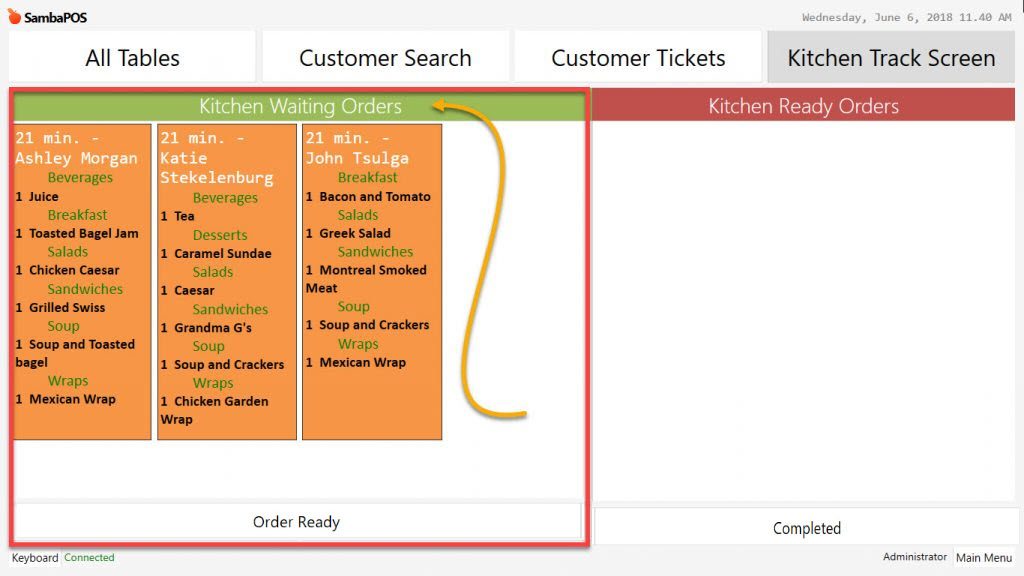
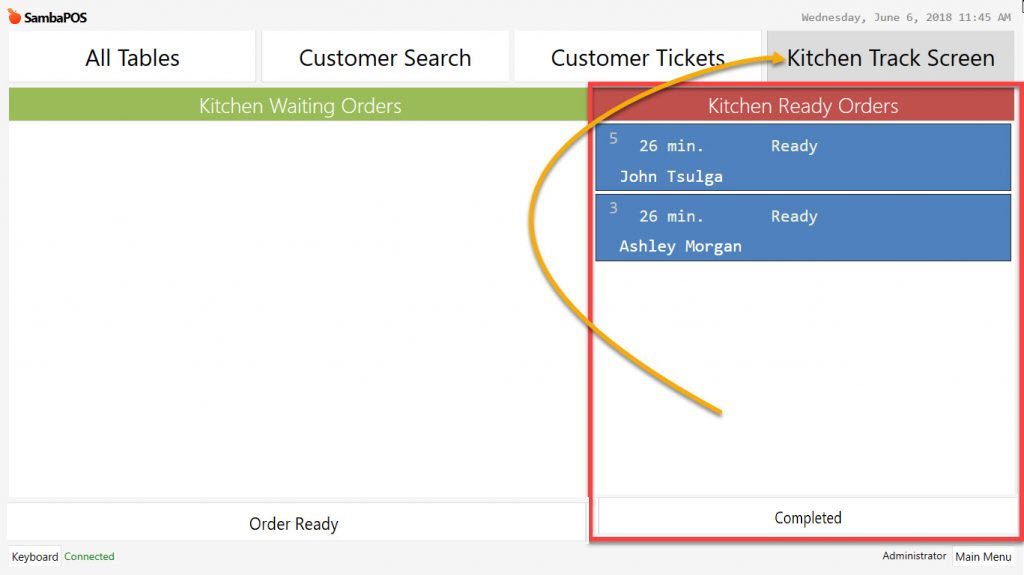
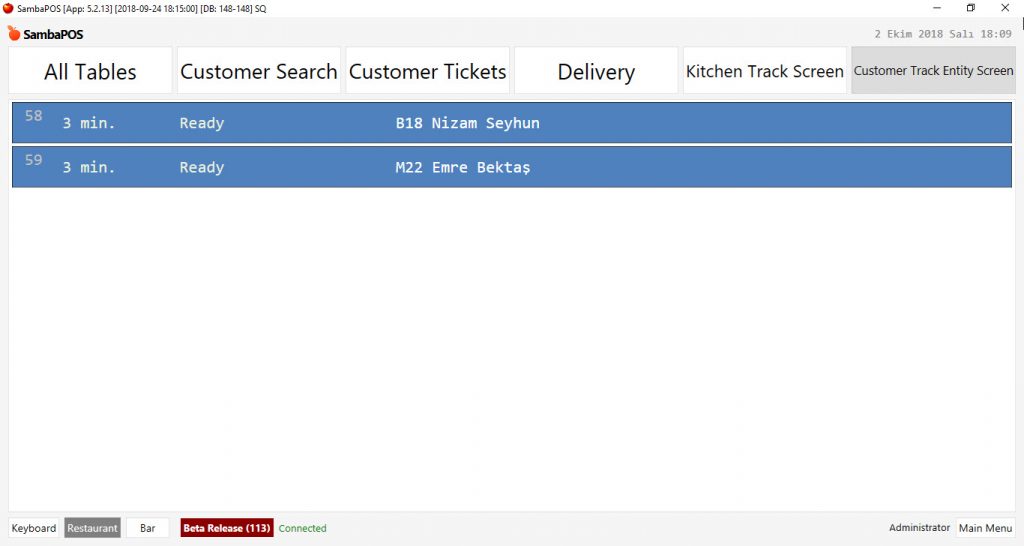
View of Kitchen Track Screen
1. Adding and Designing of Entity Screens
1.1. Kitchen Track Entity Screen
Go to Main Menu > Manage > Entities > Entity Screens > from here click on Add Entity Screen link.
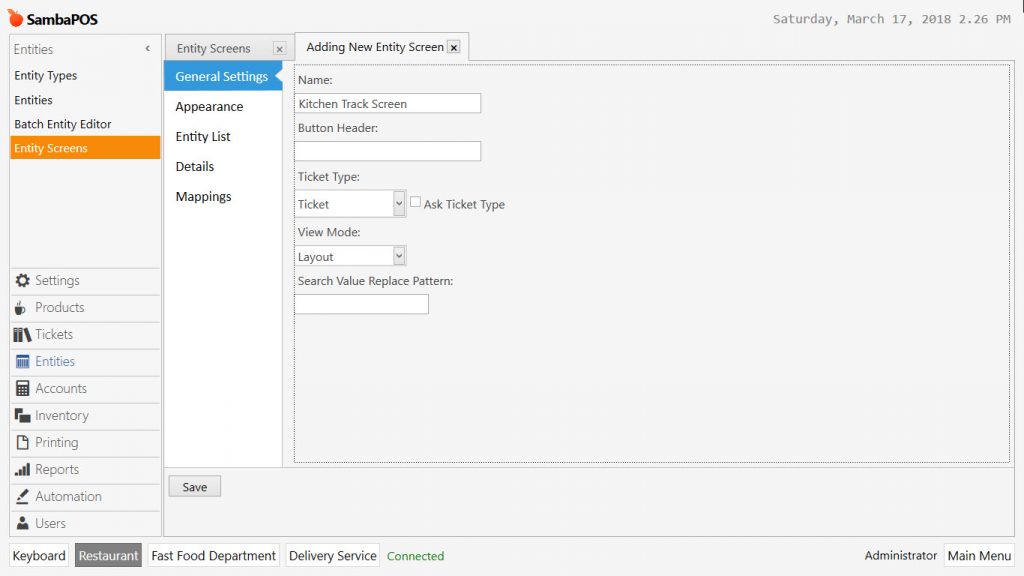
General Settings Section;
Name: Kitchen Track Screen
Ticket Type: Ticket
View Mode: Layout
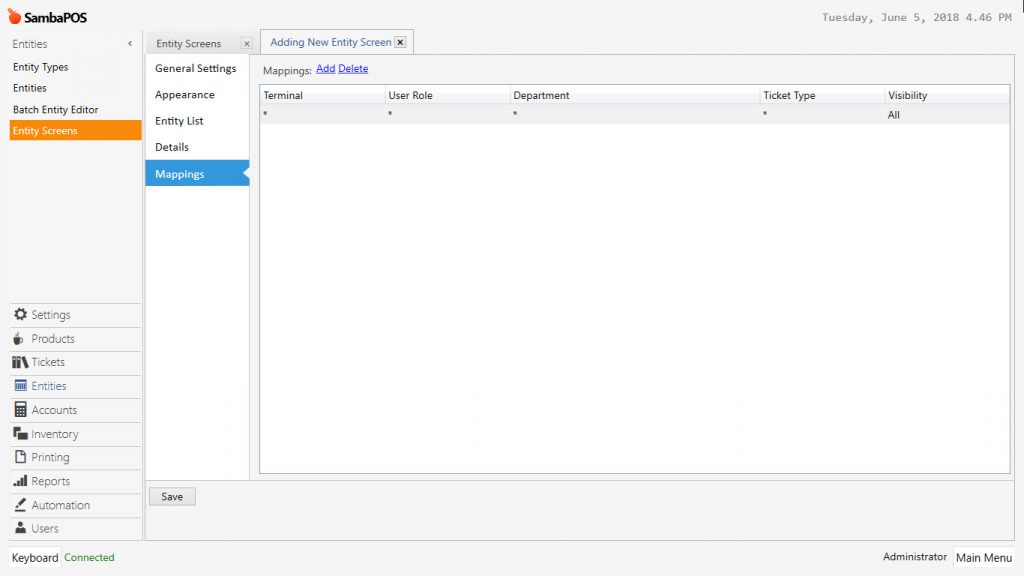
Mappings Section;
In here add a row by clicking on Add link.
Kitchen Waiting Orders Section
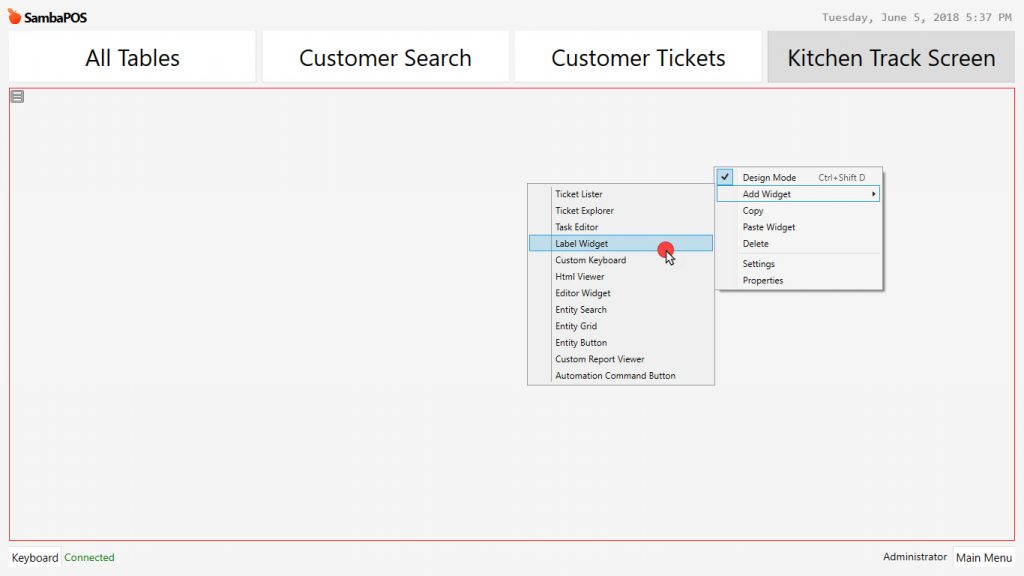
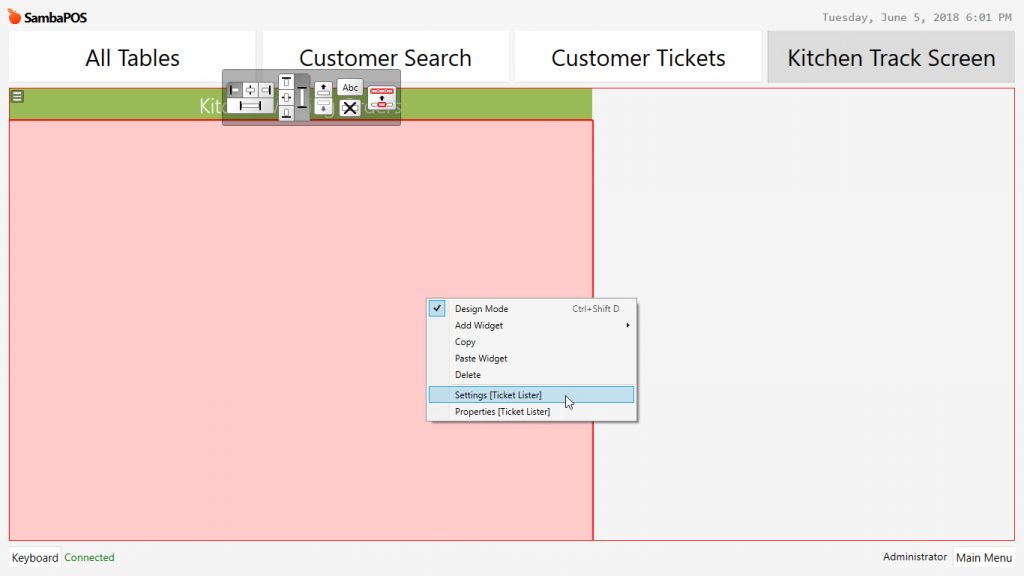
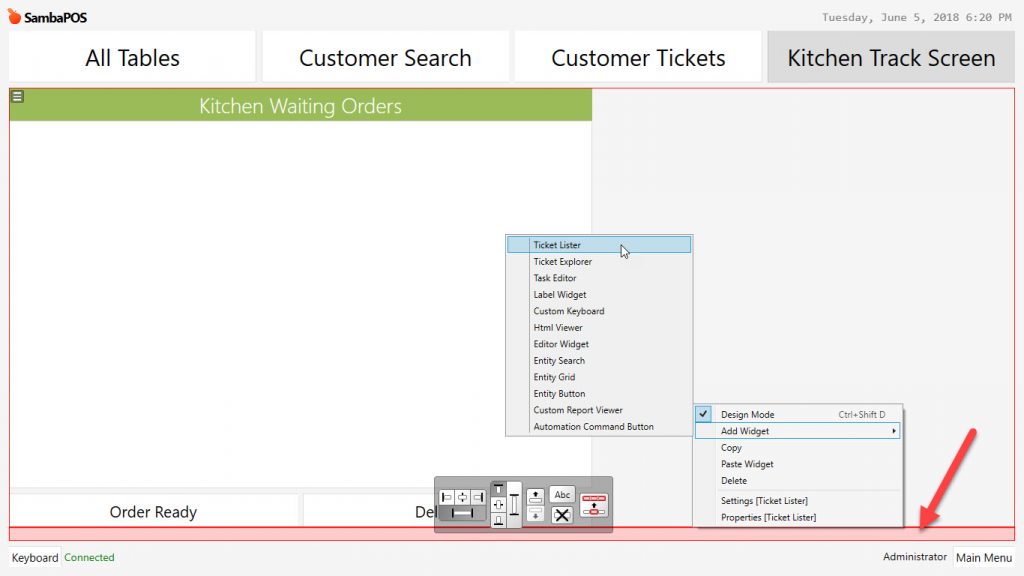
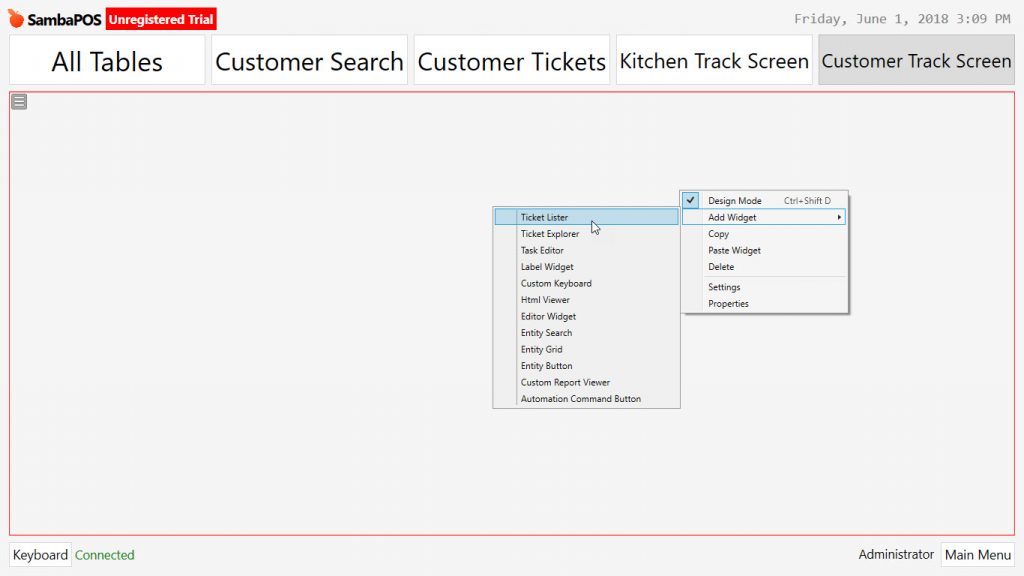
Go to Kitchen Track Screen and activate design mode by right clicking of mouse. Red line of the frame indicates that design mode is activated.
After activating design mode, click on Add Widget > Label Widget title. Position the label widget on the screen by using mouse and editing tool.
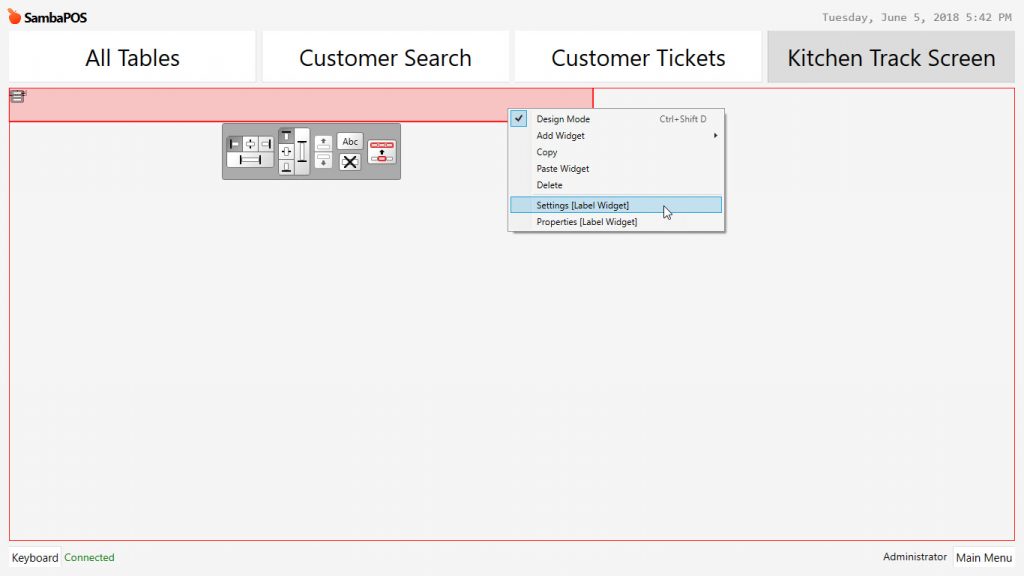
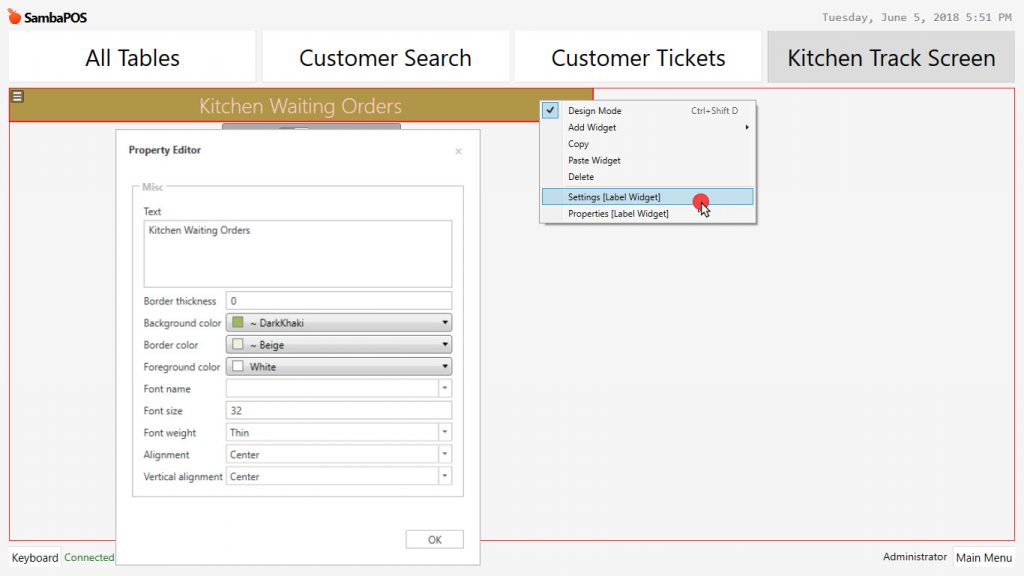
While Design Mode is active, right click on Label Widget and select Settings – Label Widget link and configure the settings for Property Editor according to image below;
After activating design mode, click on Add Widget > Ticket Lister title. Position the ticket lister on the screen by using mouse and editing tool.
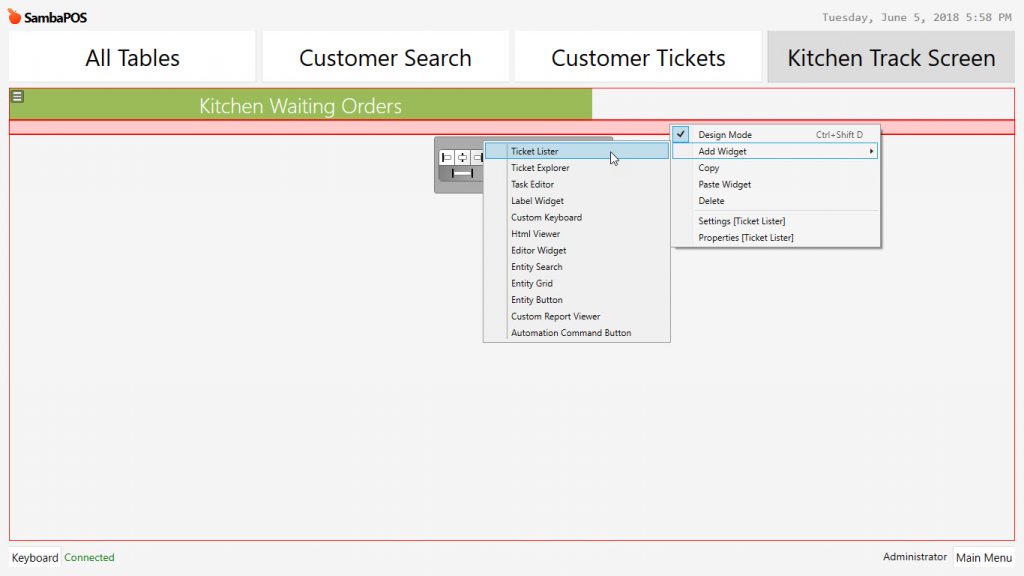
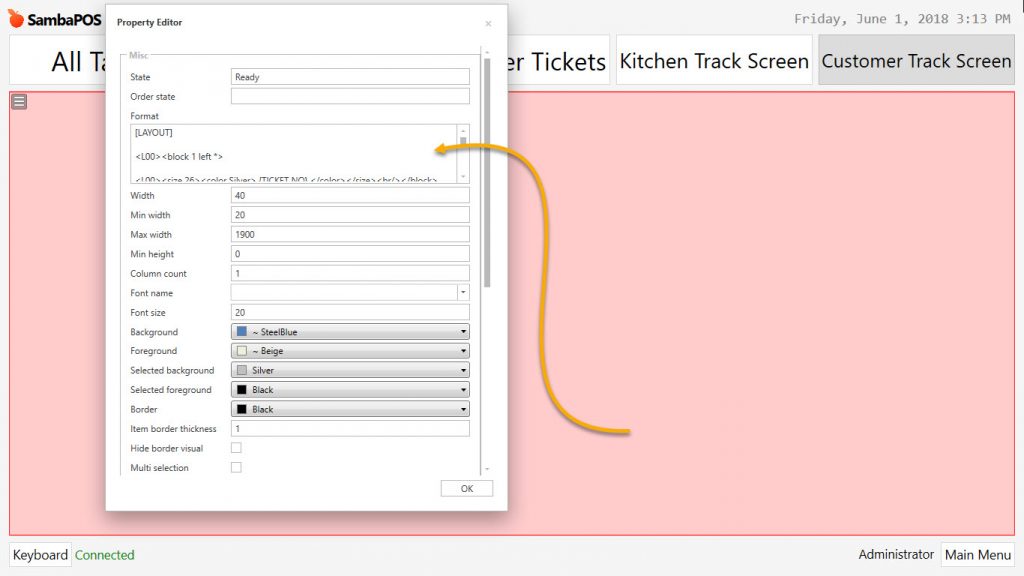
While Design Mode is active, right click on mouse and select Settings – Ticket Lister option, copy and paste below code group into Format section of window.
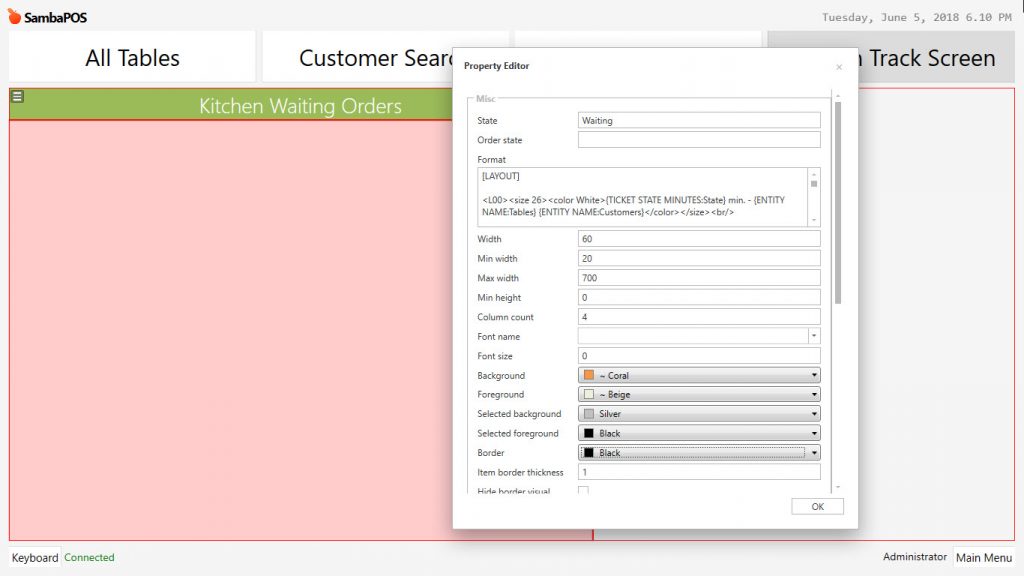
[LAYOUT]
|
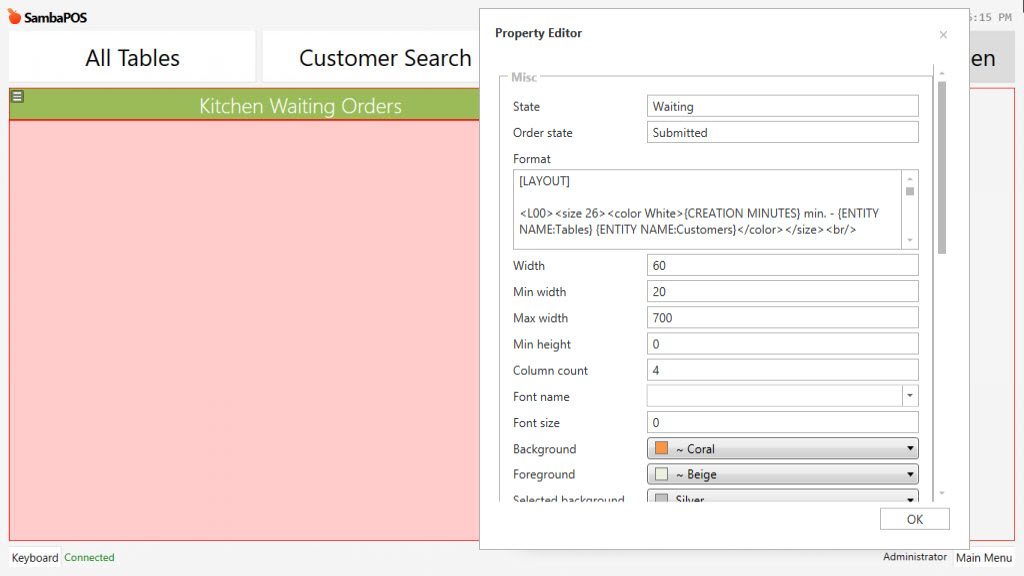
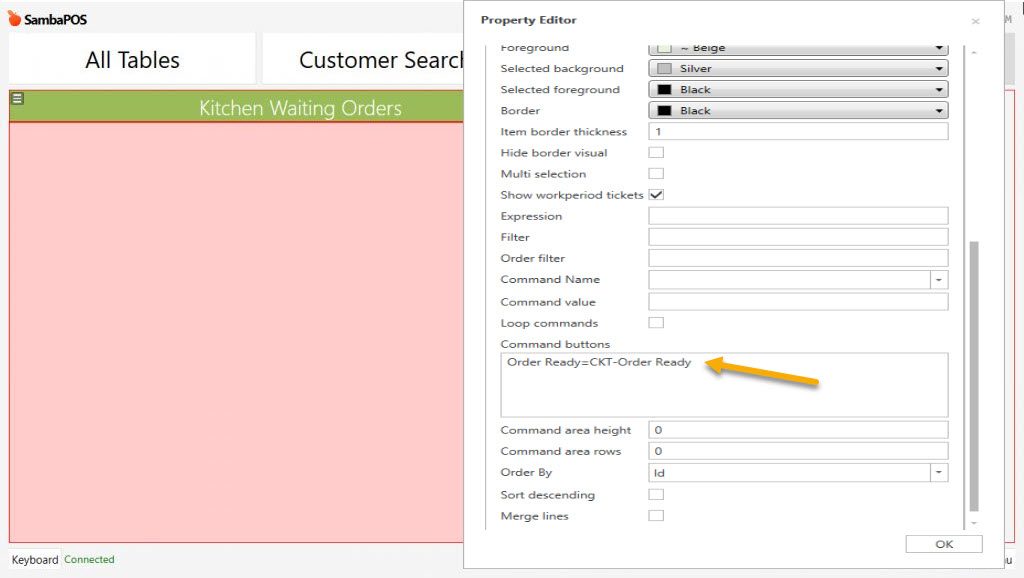
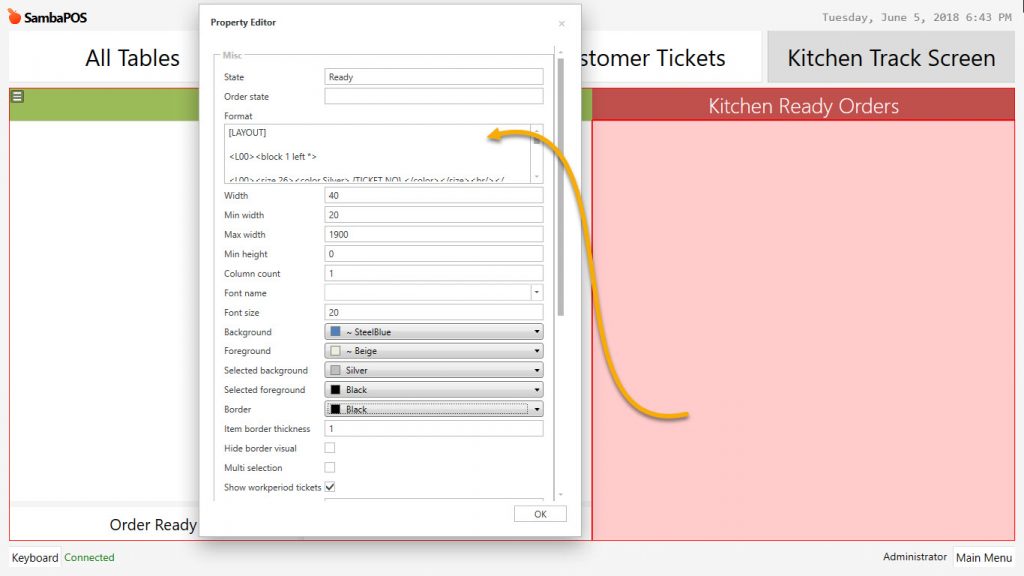
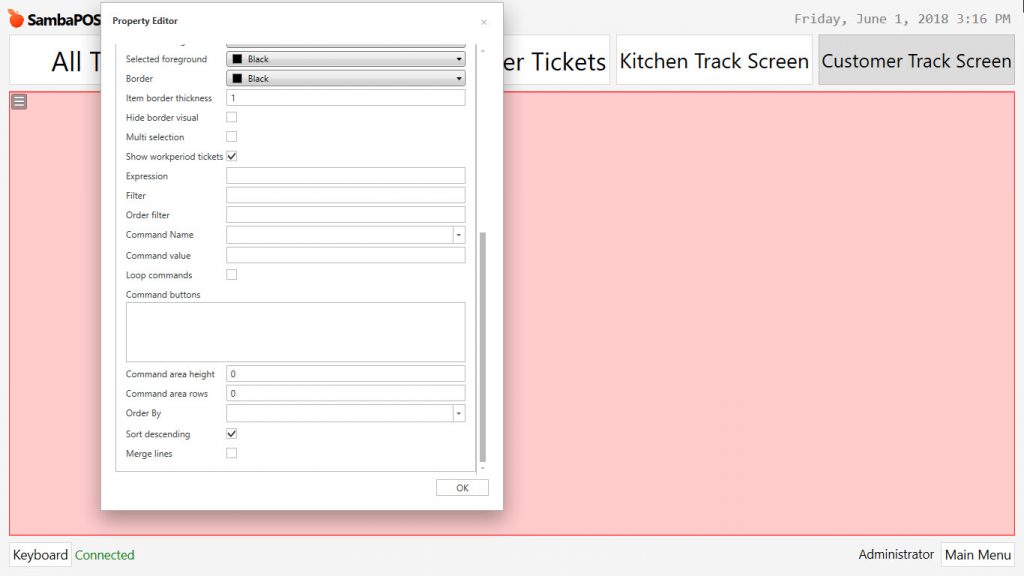
Configure the other settings of Property Editor according to images below;
View of Kitchen Waiting Orders Section
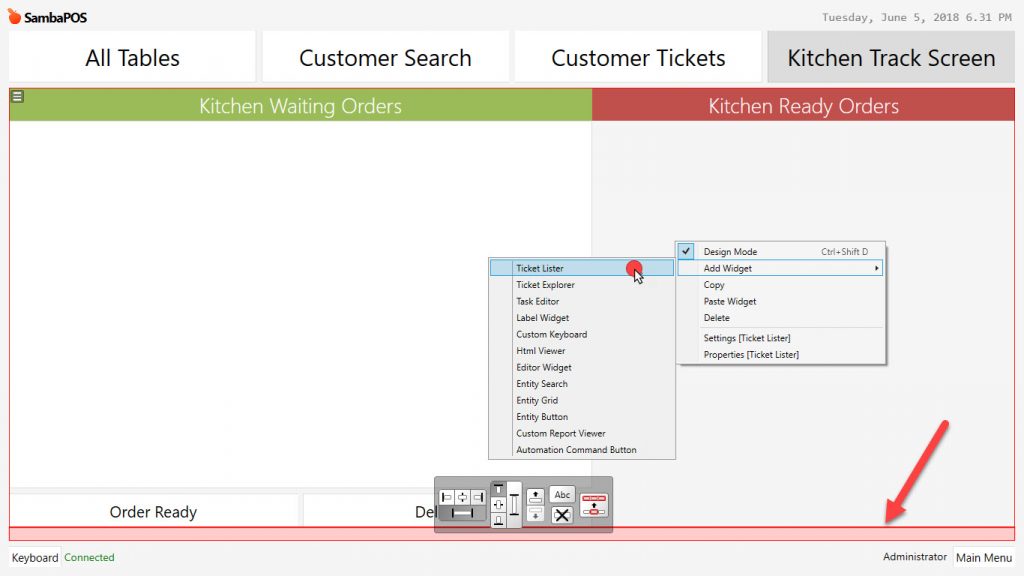
Kitchen Ready Orders Section
After activating design mode, click on Add Widget > Label Widget title. Position the label widget on the screen by using mouse and editing tool.
While Design Mode is active, right click on Label Widget and select Settings – Label Widget link and configure the settings for Property Editor according to image below;

After activating design mode, click on Add Widget > Ticket Lister title. Position the ticket lister on the screen by using mouse and editing tool.
While Design Mode is active, right click on mouse and select Settings – Ticket Lister option, copy and paste below code group into Format section of window.
[LAYOUT]
|
Configure the other settings of Property Editor according to images below;
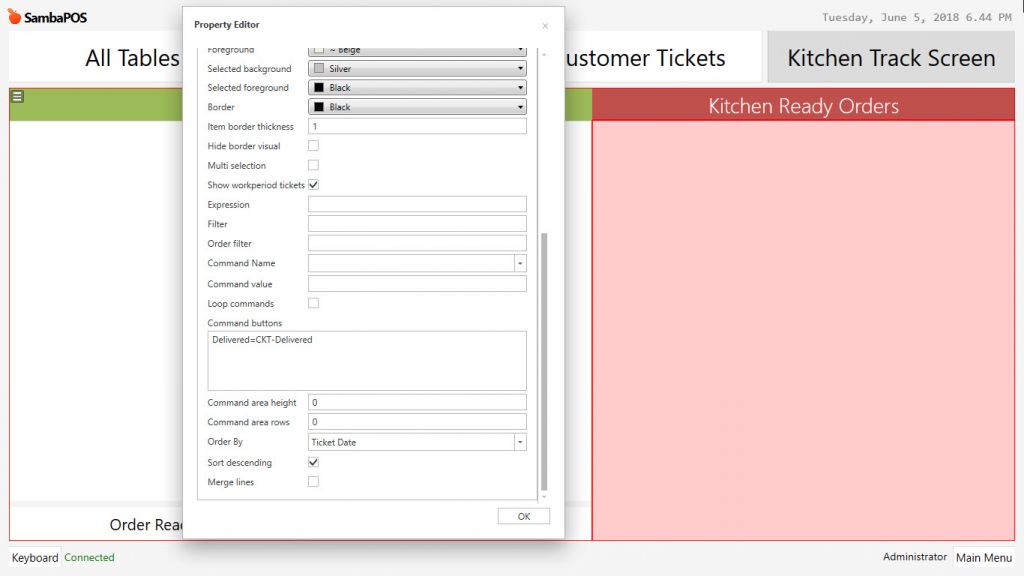
View of Kitchen Ready Orders Section
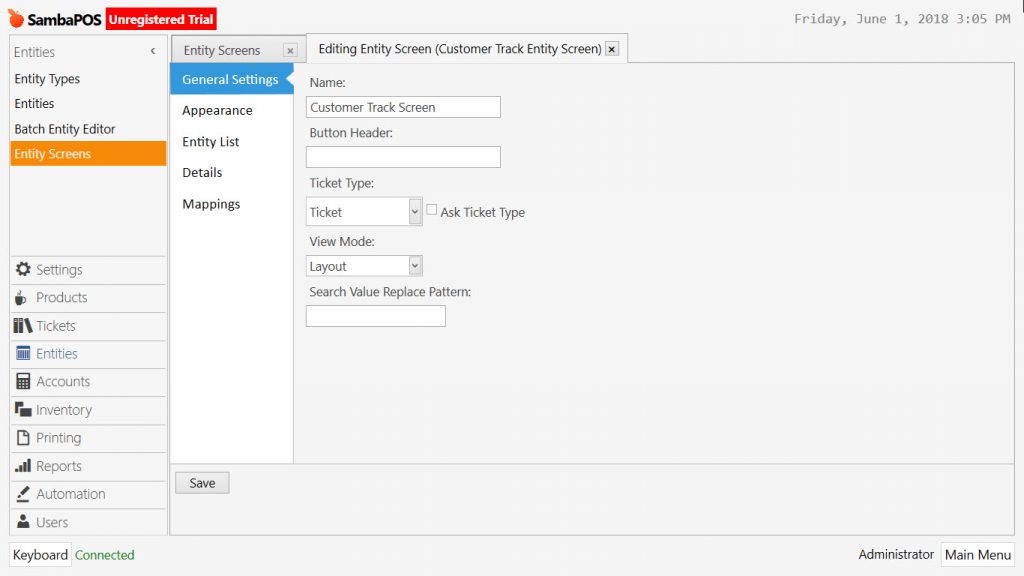
1.2. Customer Track Entity Screen
The screen that allows the customers to track their orders.
[LAYOUT]
|
View of Customer Track Screen
2. Adding Automation Commands
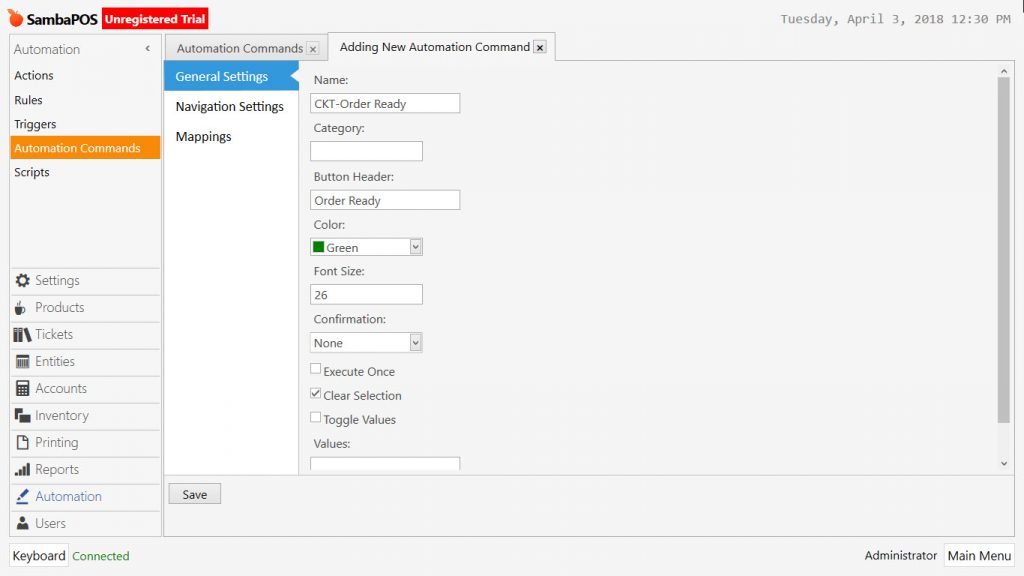
Manage > Automation > Automation Commands > Add Automation Command
2.1. Name: CKT-Order Ready
Button Header: Order Ready
Mappings: Blank
Manage > Automation > Automation Commands > Add Automation Command
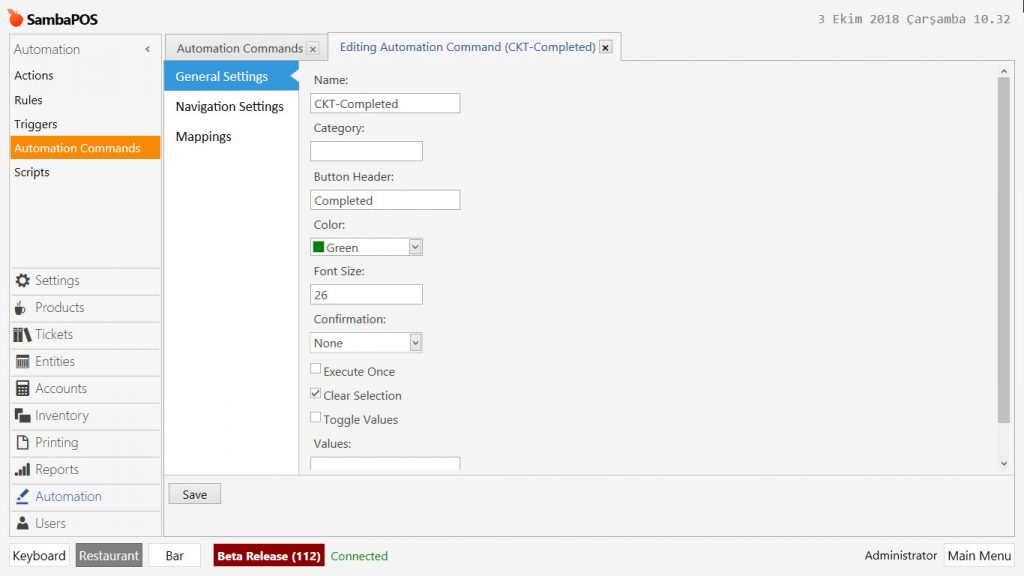
2.2. Name: CKT-Completed
Button Header: Completed
Mappings: Blank
3. Adding Actions
Manage > Automation > Actions > Add Action
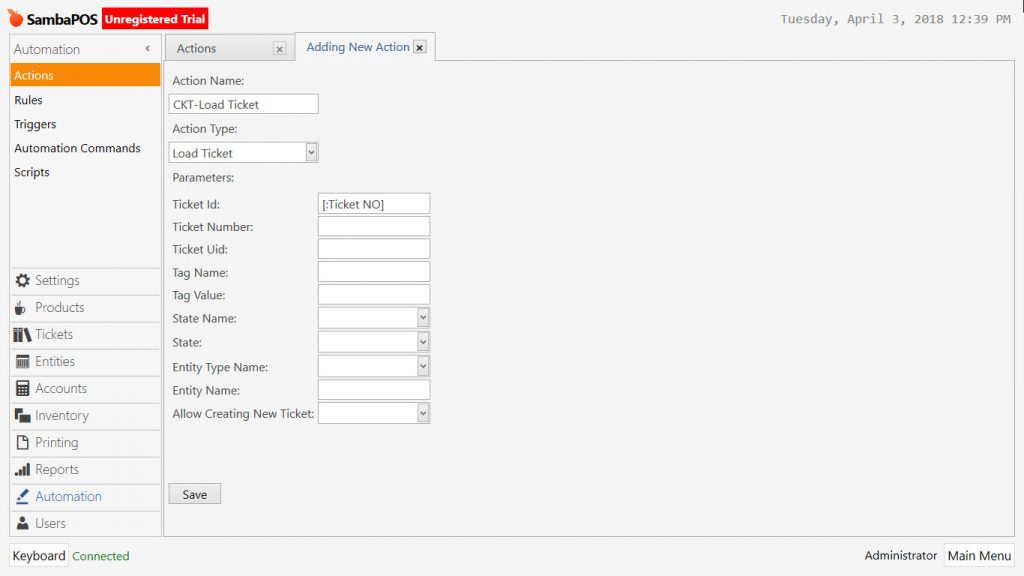
3.1. Action Name: CKT-Load Ticket
Action Type: Load Ticket
Ticket Id: [:Ticket NO]
Manage > Automation > Actions > Add Action
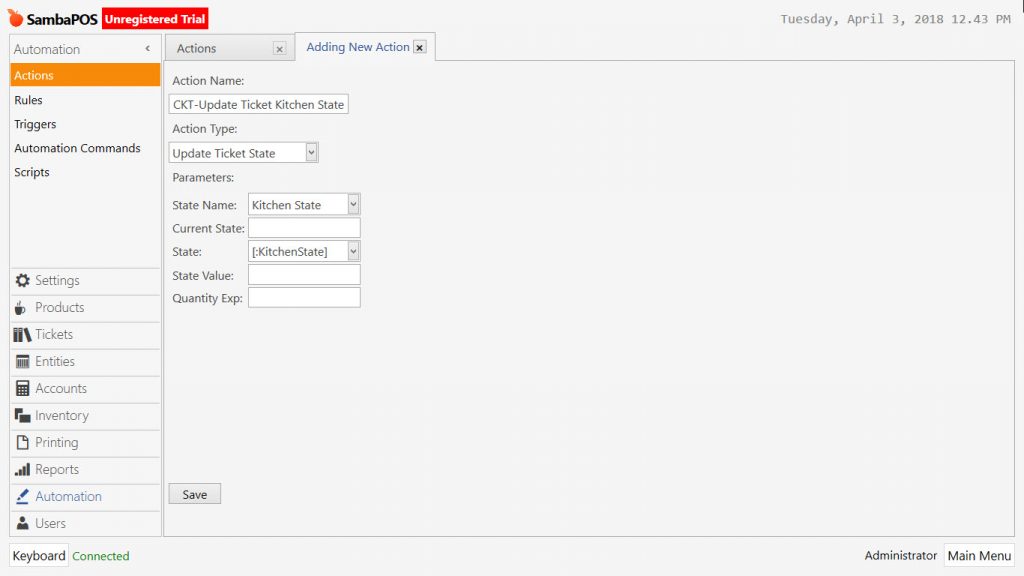
3.2. Action Name: CKT-Update Ticket Kitchen State
Action Type: Update Ticket State
State Name: Kitchen State
State: [:KitchenState]
Manage > Automation > Actions > Add Action
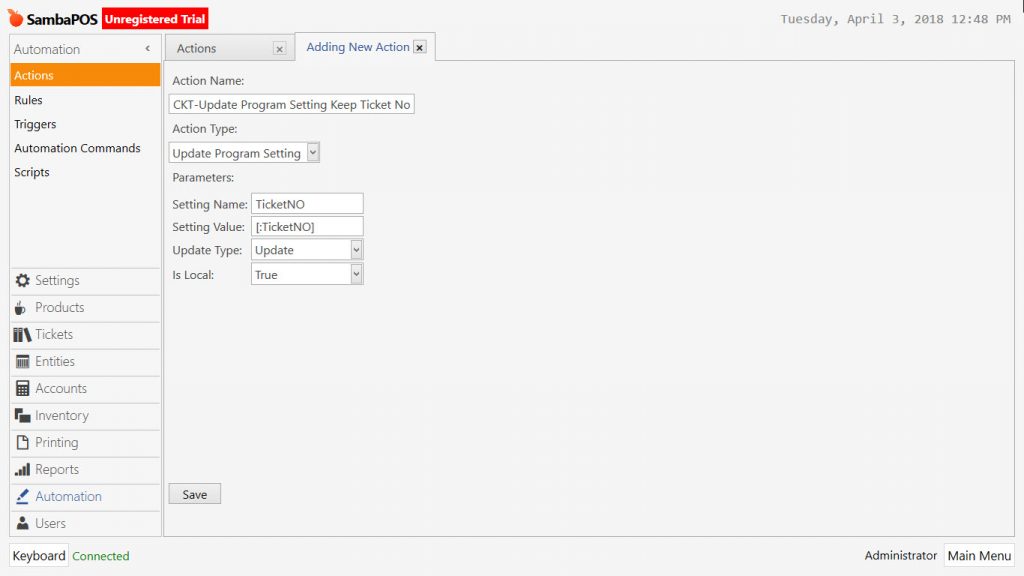
3.3. Action Name: CKT-Update Program Setting Keep Ticket No
Action Type: Update Program Setting
Setting Name: TicketNO
Setting Value: [:TicketNO]
Update Type: Update
Is Local: True
4. Editing / Adding Rules
4.1. Rules to be Edited;
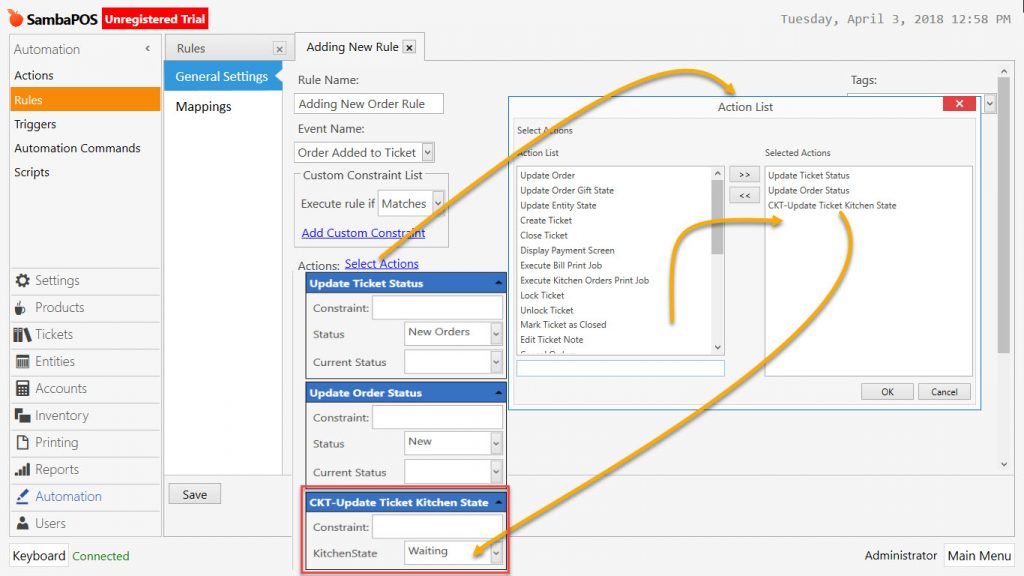
4.1.1. Rule Name: Adding New Order Rule (Needs to be Edited)
Manage > Automation > Rules > Adding New Order Rule > This Rule Needs to be Edited
Event Name: Order Added to Ticket
Select Action: Update Ticket State
Status: New Orders
Select Action: Update Order Status
Status: New
Select Action: CKT-Update Ticket Kitchen State
KitchenState: Waiting
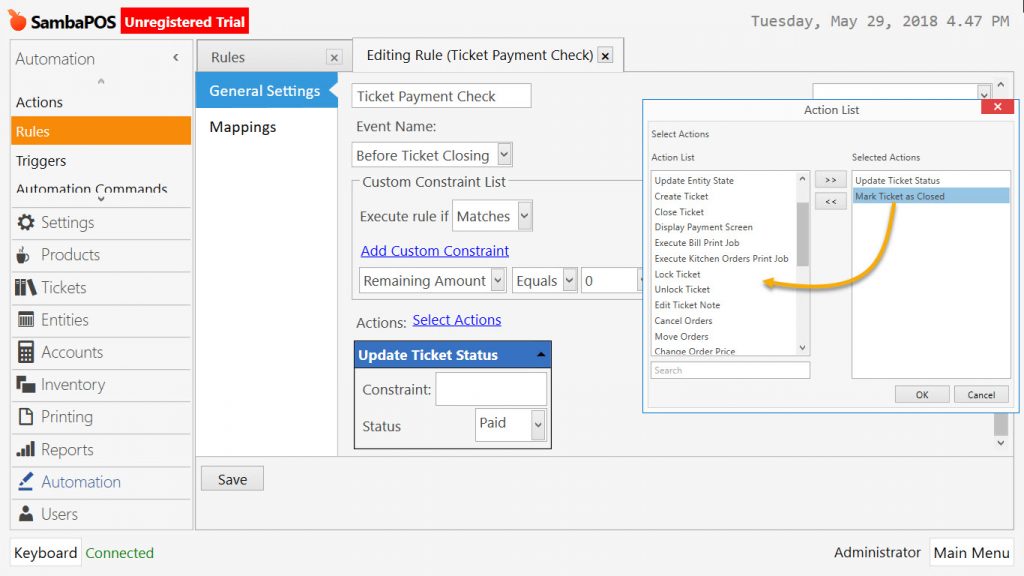
4.1.2. Rule Name: Ticket Payment Check (This Rule Needs to be Edited)
Manage > Automation > Rules > Ticket Payment Check > This Rule Needs to be Edited
“Mark Ticket As Closed” action has to be REMOVED
Event Name: Before Ticket Closing
Custom Constraint: Remaining Amount | Equals | 0
Select Action: Update Ticket State
Status: Paid
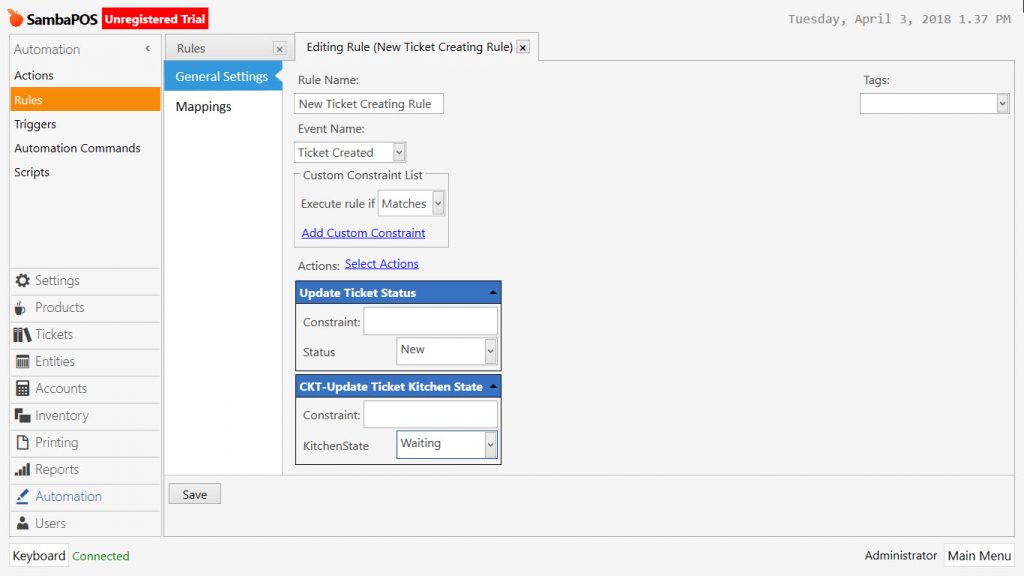
4.1.3. Rule Name: New Ticket Creating Rule (This Rule Needs to be Edited)
Manage > Automation > Rules > New Ticket Creating Rule > This Rule Needs to be Edited
Event Name: Ticket Created
Select Action: Update Ticket Status
Status: New
Select Action: CKT-Update Ticket Kitchen State
KitchenState: Waiting
4.2. Rules to be Added;
Manage > Automation > Rules > Add New Rule
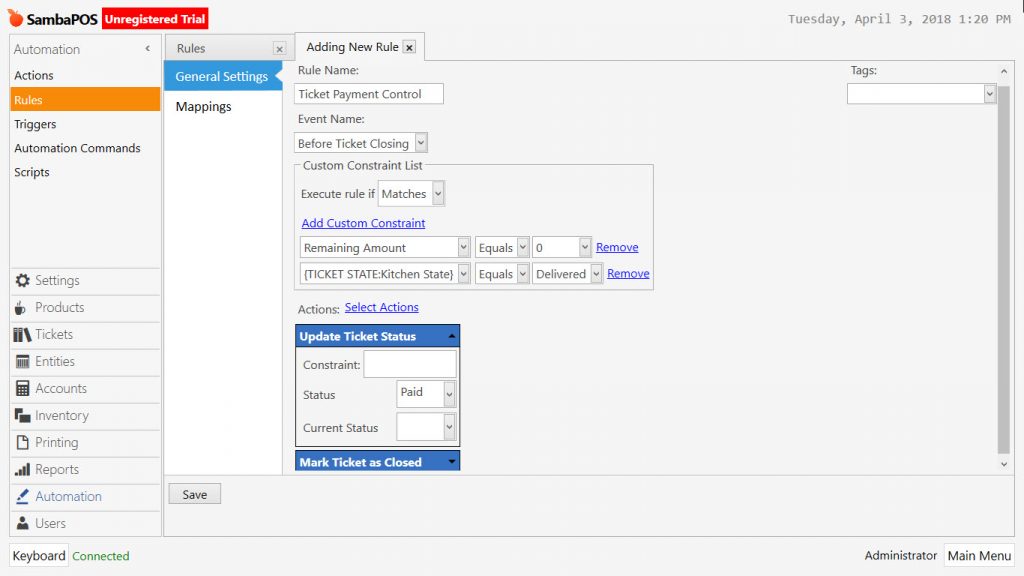
4.2.1. Rule Name: CKT-Ticket Payment Check
Event Name: Before Ticket Closing
Custom Constraint:
Remaining Amount | Equals | 0
{TICKET STATE:Kitchen State} | Equals | Delivered
Select Action: Update Ticket Status
Status: Paid
Select Action: Mark Ticket As Closed
Manage > Automation > Rules > Add New Rule
4.2.2. Rule Name: CKT-When Ticket Selected From Kitchen Screen Make Status Ready
Event Name: Automation Command Executed
Add Custom Constraint: Automation Command Name| Equals | CKT-Order Ready
Select Action: CKT-Update Program Setting Keep Ticket No
Ticket NO: [:CommandValue]
Select Action: CKT-Load Ticket
Ticket NO: [:CommandValue]
Select Action: CKT-Update Ticket Kitchen Status
KitchenState: Ready
Select Action: Update Order State
Status: Ready
Select Action: Close Ticket

Manage > Automation > Rules > Add New Rule
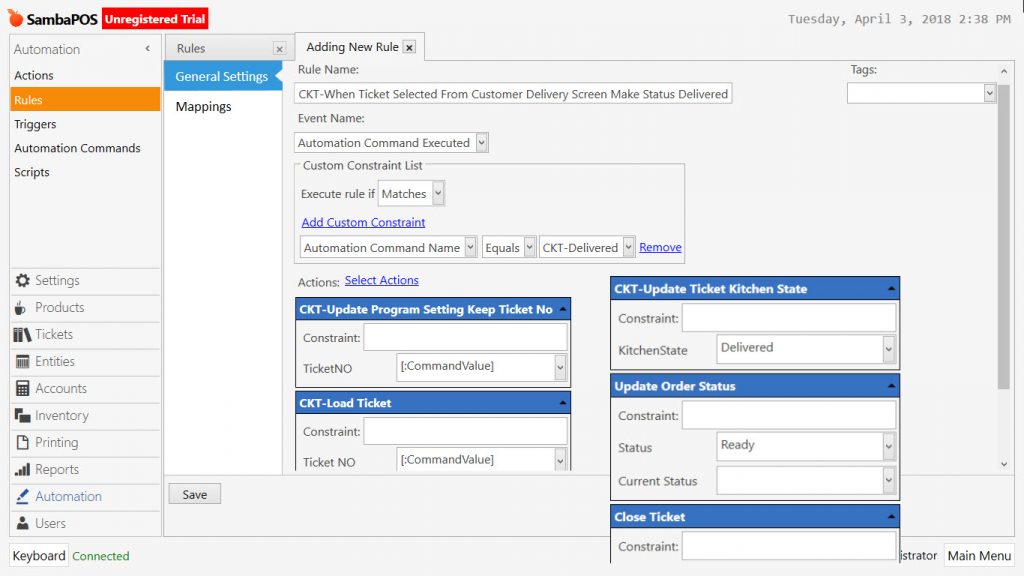
4.2.3. Rule Name: CKT-When Ticket Selected From Customer Delivery Screen Make Status Delivered
Event Name: Automaiton Command Executed
Custom Constraint: Automation Command Name| Equals | CKT-Delivered
Select Action: CKT-Update Program Setting Keep Ticket No
Ticket NO: [:CommandValue]
Select Action: CKT-Load Ticket
Ticket NO: [:CommandValue]
Select Action: CKT-Update Ticket Kitchen Status
KitchenState: Delivered
Select Action: Update Order Status
Status: Ready
Select Action: Close Ticket