3.7. How to Setup Pole Display / Customer Display VFD?
Pole Display / Customer Display/ VFD
Document Index:
1. Adding Display to Windows and Hardware Features
2. Adding SambaPOS Printers and Setup
2.1 Pole Port Printer
2.2 Pole Banner Template
2.3 Pole Items Template
2.4 Pole Total Template
3. Print Jobs
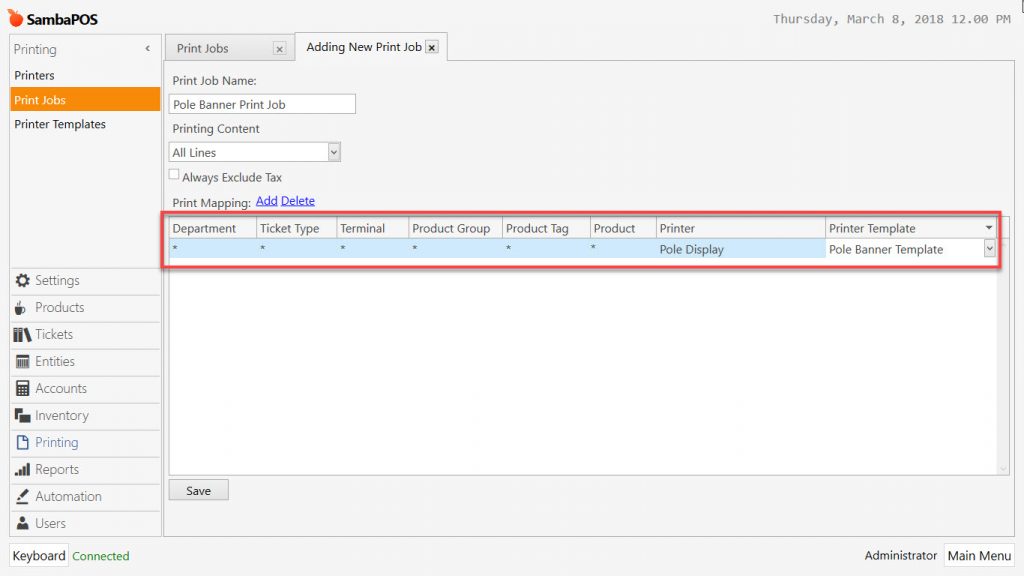
3.1 Pole Banner Print Job
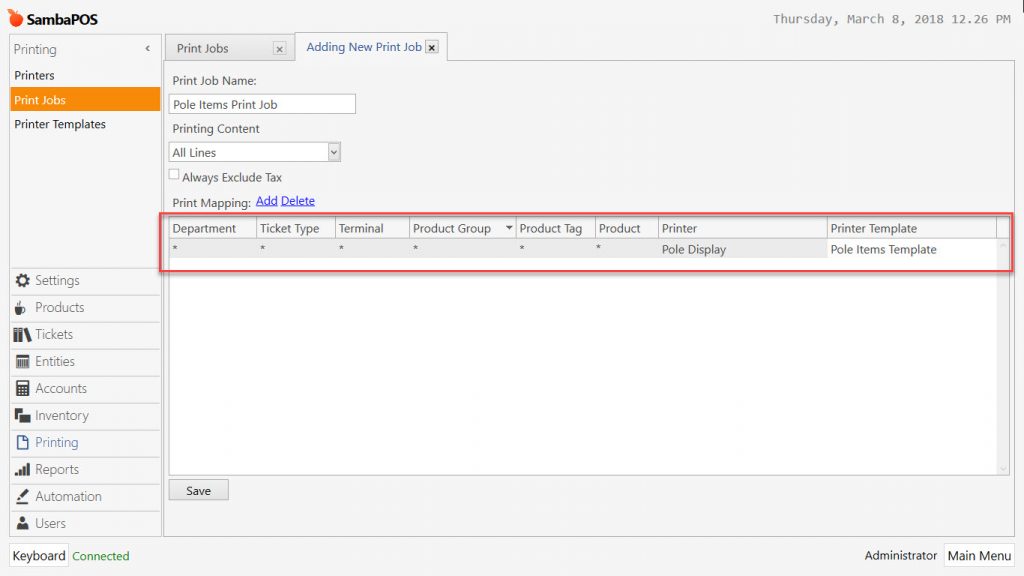
3.2 Pole Item Print Job
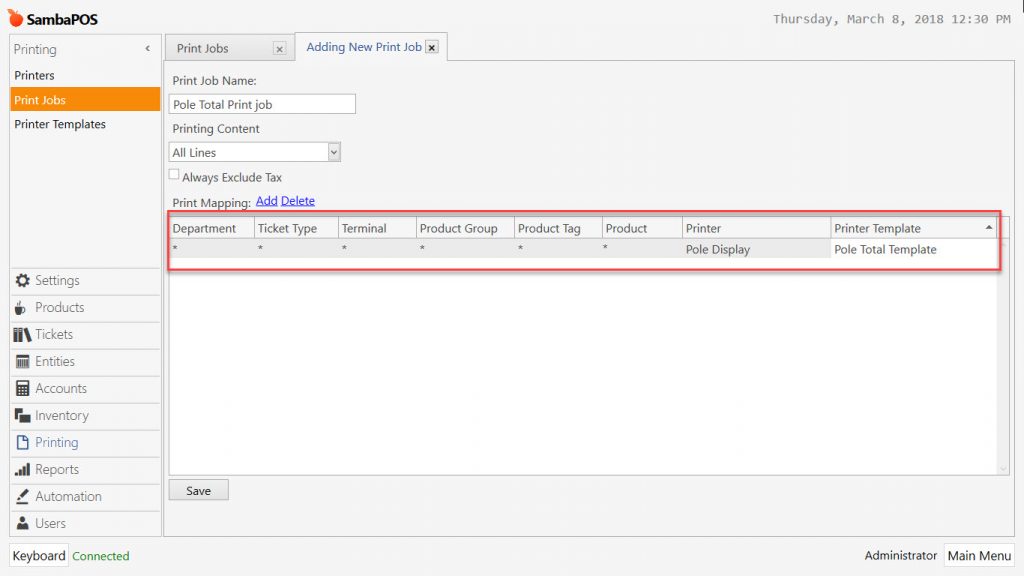
3.3 Pole Total Print Job
4. Actions
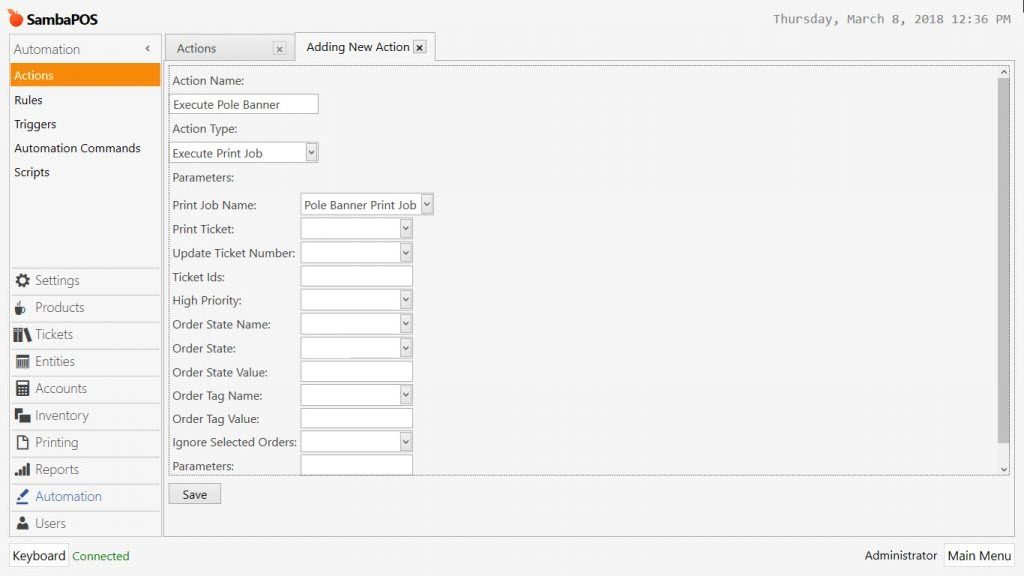
4.1 Pole Banner Action
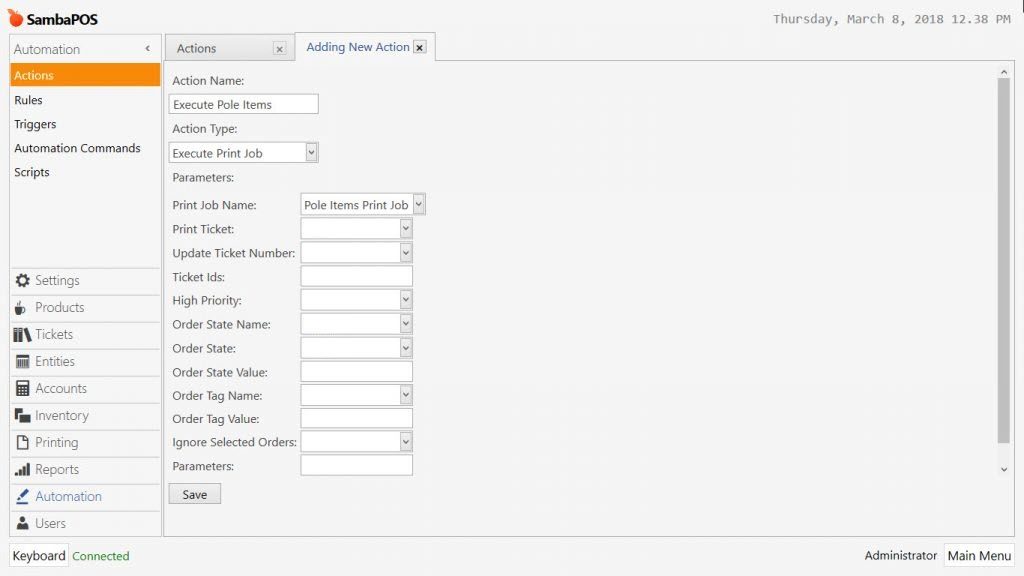
4.2 Pole Items Action
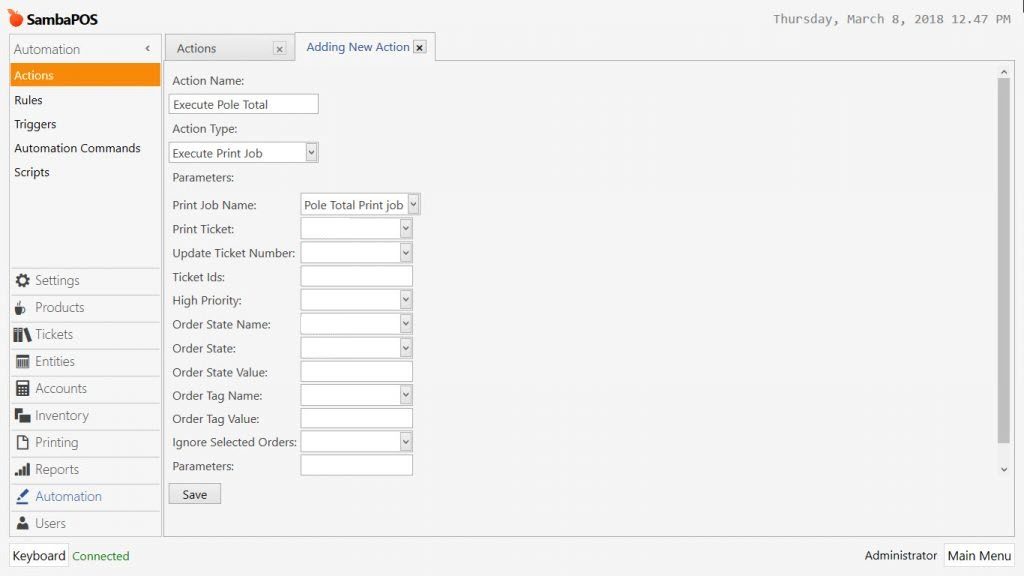
4.3 Pole Total Action
5.Rules
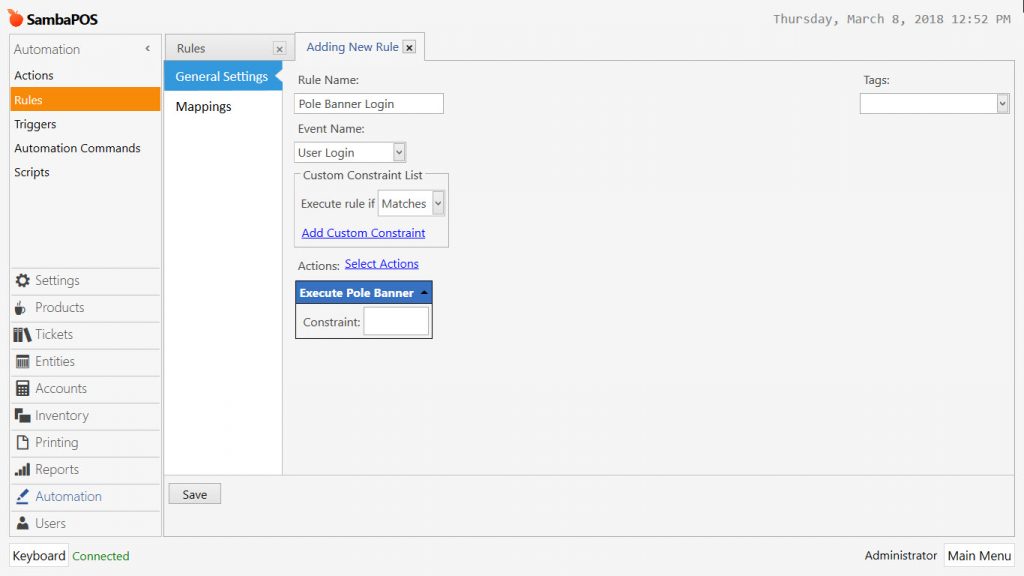
5.1 Pole Banner Login Rule
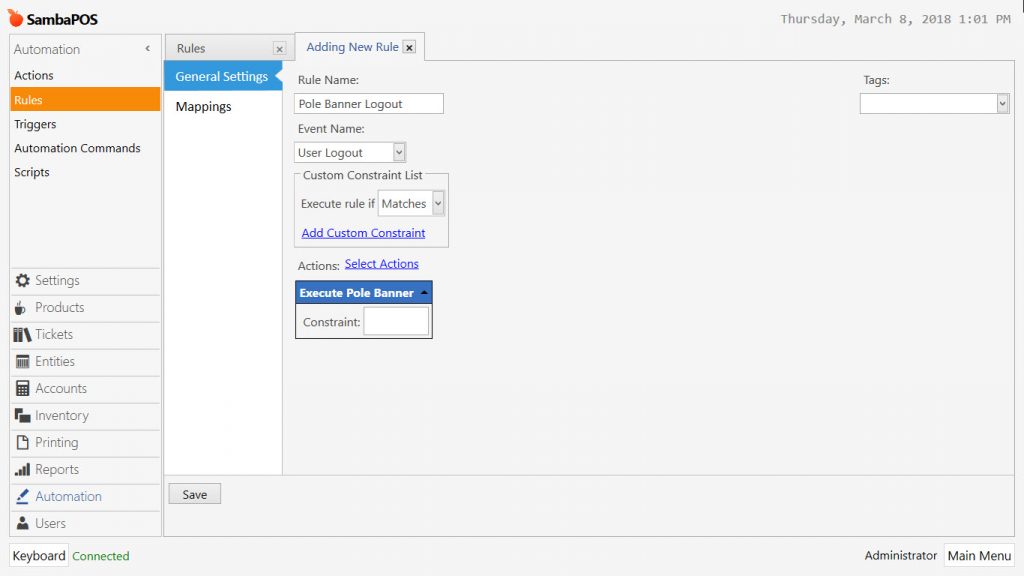
5.2 Pole Banner Logout Rule
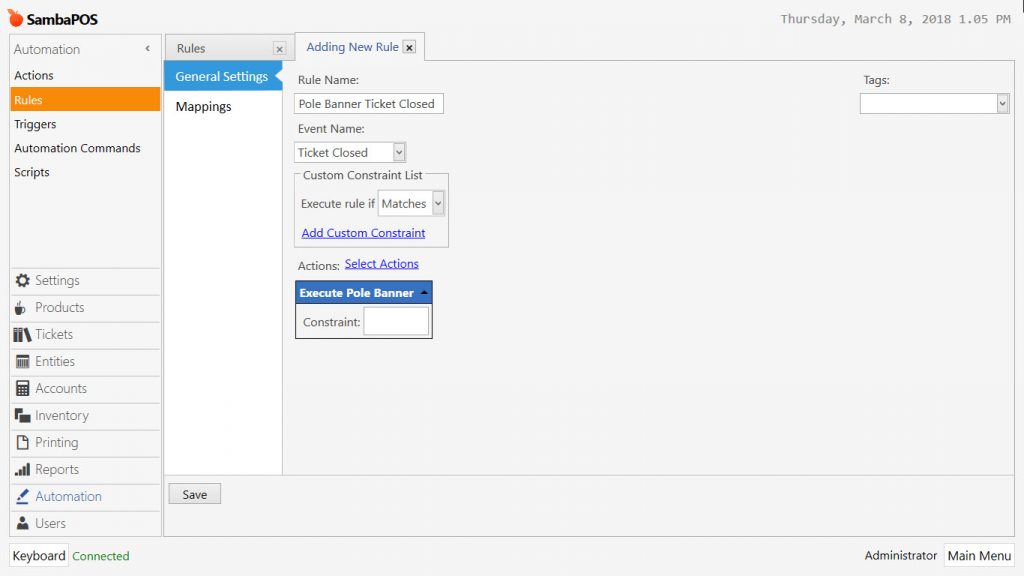
5.3 Pole Banner Ticket Closed Rule
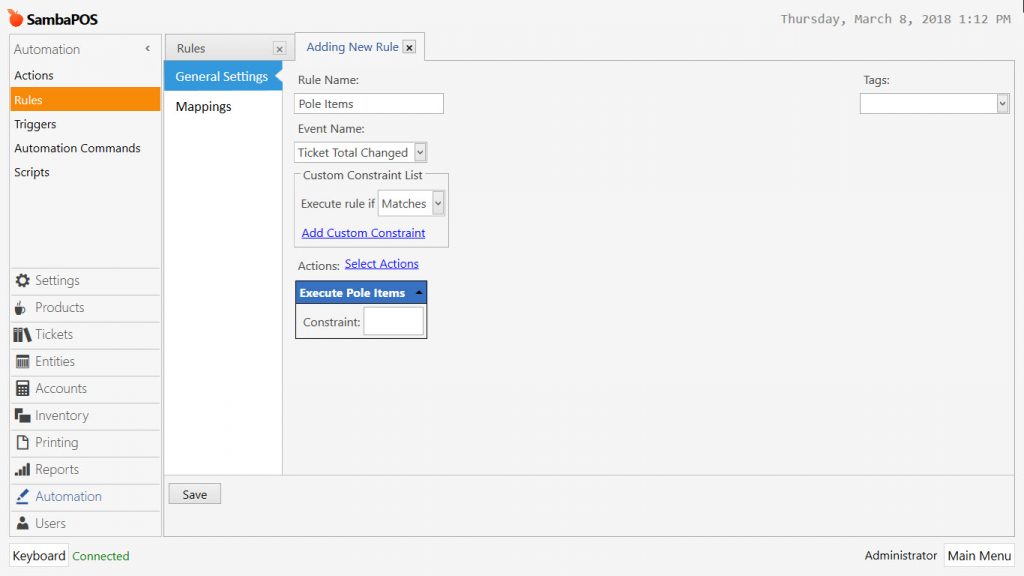
5.4 Ticket Total Changed Rule
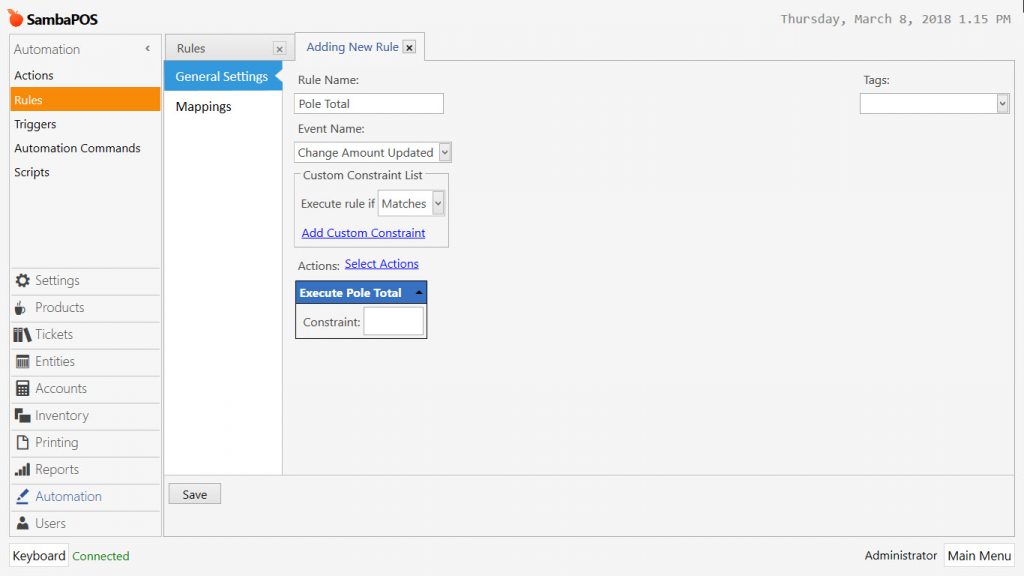
5.5 Change Amount Updated Rule
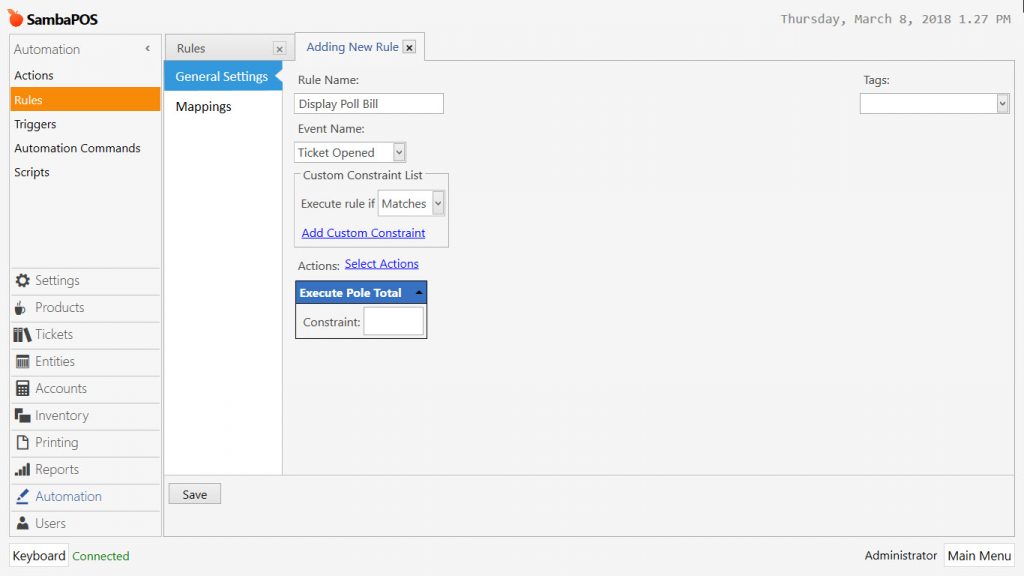
5.6 Ticket Opened Rule
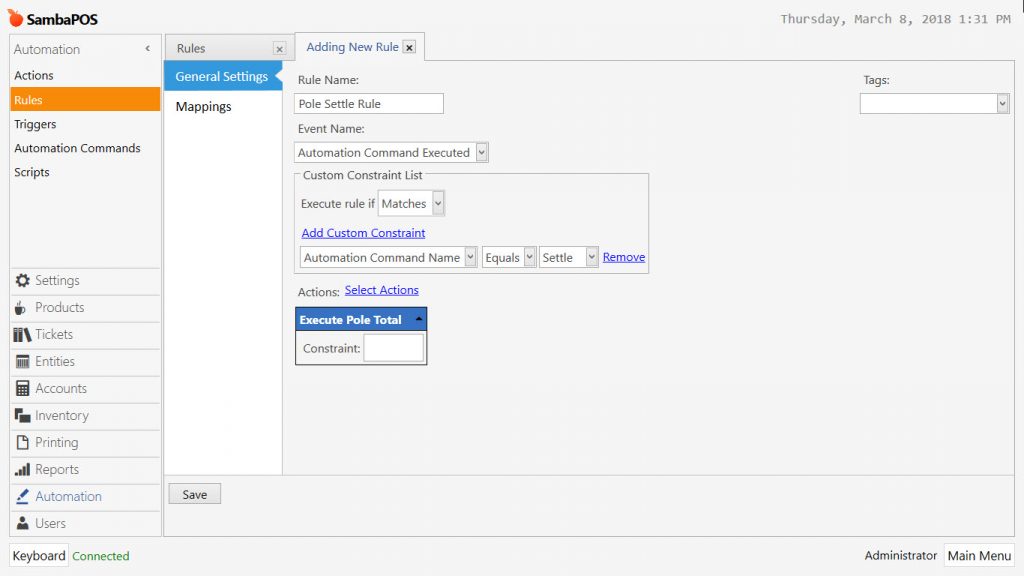
5.7 Settle Rule
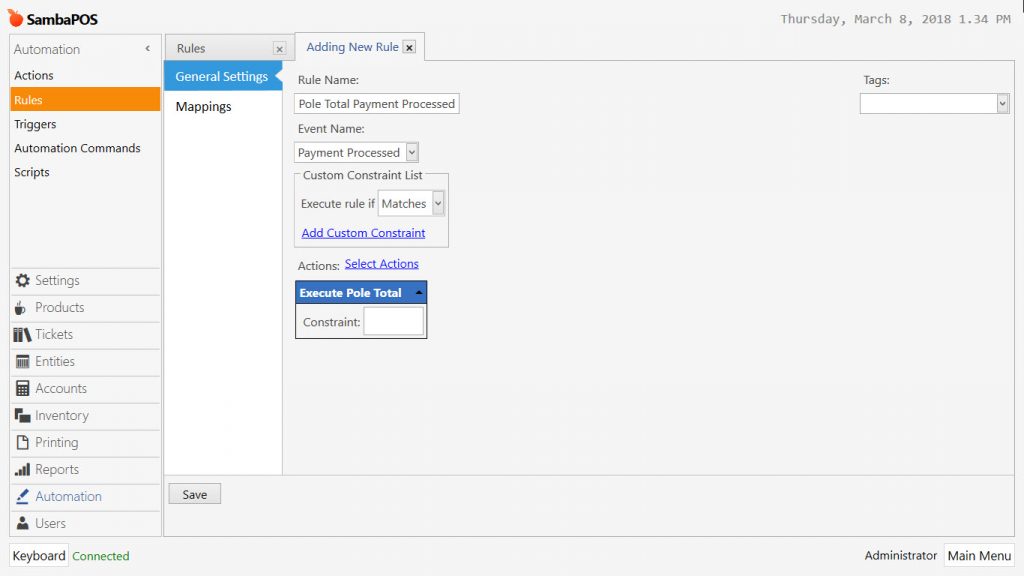
5.8 Payment Processed Rule
1. Adding Display to Windows and Hardware Features
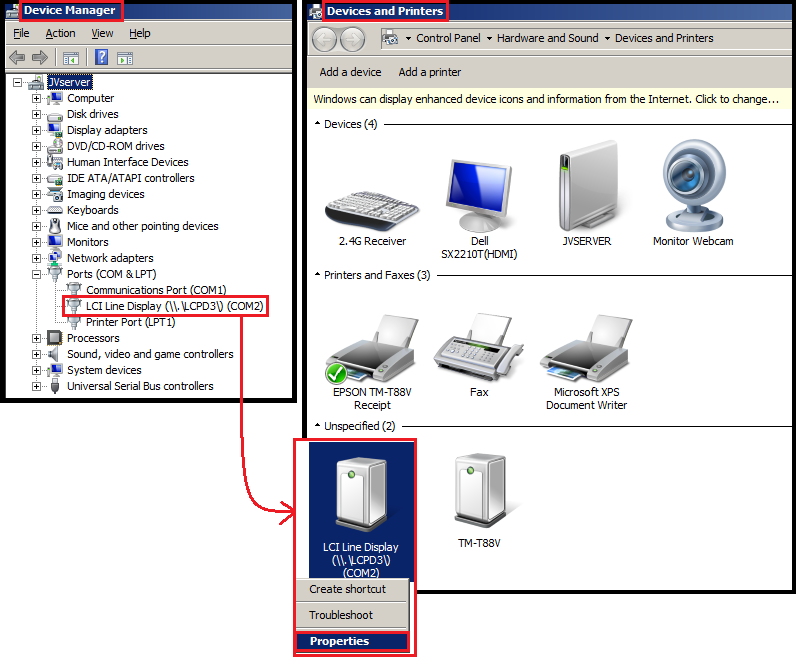
First of all, you need to determine how your Display is connected to the computer, and how it communicates. If you cannot figure out this information, it will be very difficult to get your Display working with SambaPOS. There are many types of Displays, though most of them will communicate in a serial fashion via a serial port or COM emulation via USB.
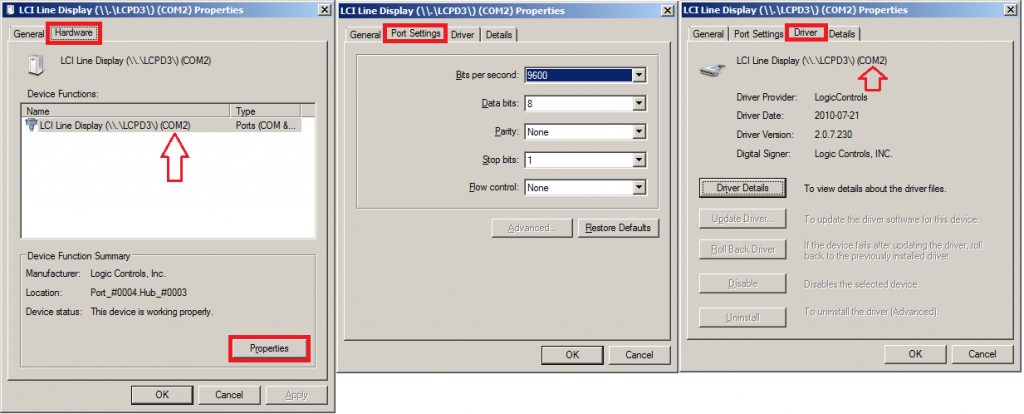
The following images show a Display connected via USB, that the Driver emulates as a serial port on COM2. This Display requires a driver in order to do port redirection/emulation.
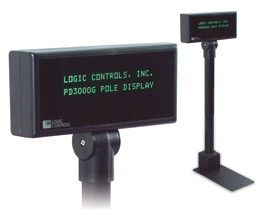
Logic Controls PD3000 USB Pole Display:
It is possible to use Putty program (http://www.putty.org) to test Com Port communication.
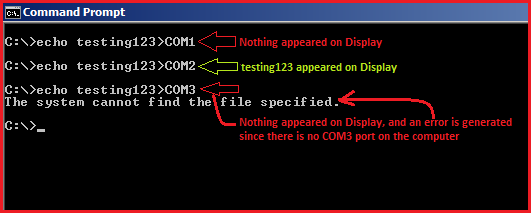
You can test communication with your display by opening a Command Prompt and issuing an echo statement toward the correct COM port:
Once you have successfully produced a test message on your Display, you can continue to set up SambaPOS to use the Display. If you are unable to produce a test message, following the rest of this Tutorial probably will NOT work for you!
2. Adding SambaPOS Printers and Setup
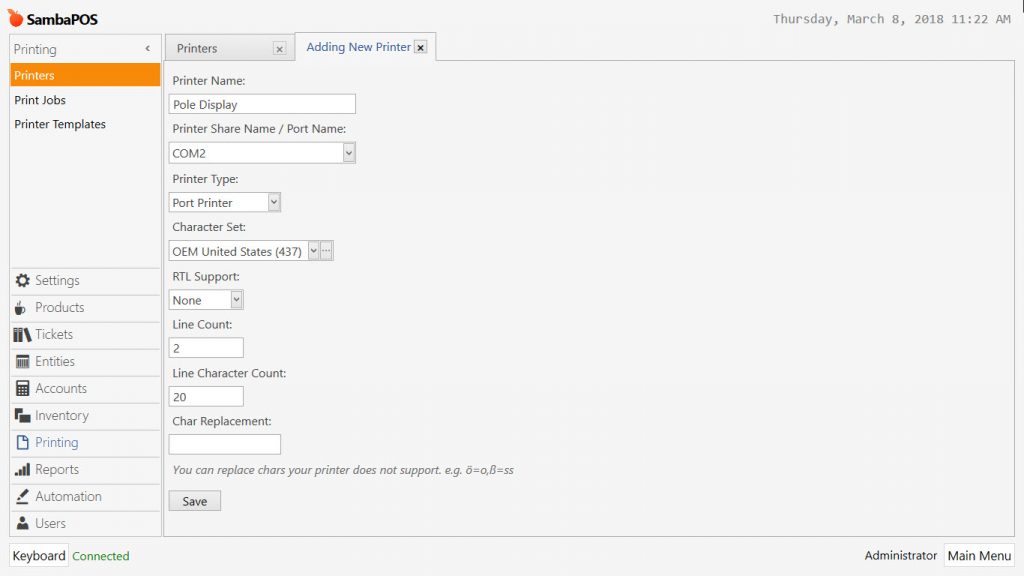
2.1 Pole Display Port Printer
Printer Name: Pole Display
Printer Share Name/ Port Name: COM2
Printer Type: Port Printer
Character Set 437
Line Count: 2
Line Character Count: 20
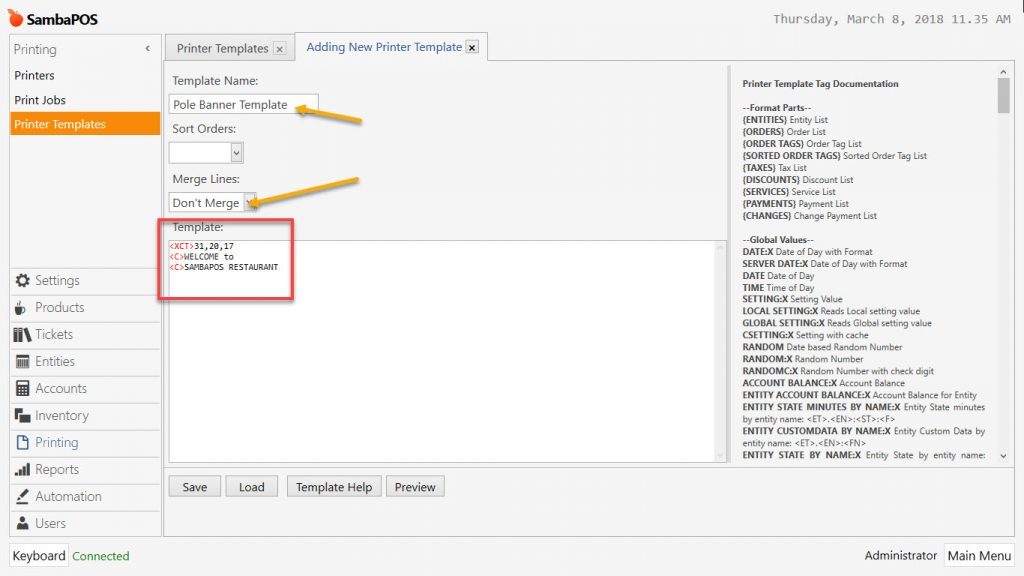
2.2 Banner Template for Display
Template Name: Pole Banner
Sort Orders: –
Merge Lines: Don’t Merge
Template:
<XCT>31,20,17
<C>WELCOME to
<C>SAMBAPOS RESTAURANT
The Banner template is designed to display a welcome message.
The <XCT> command shown may be different for your display; in this case, the command is meant to clear the display, and set the printer to obey line feeds.
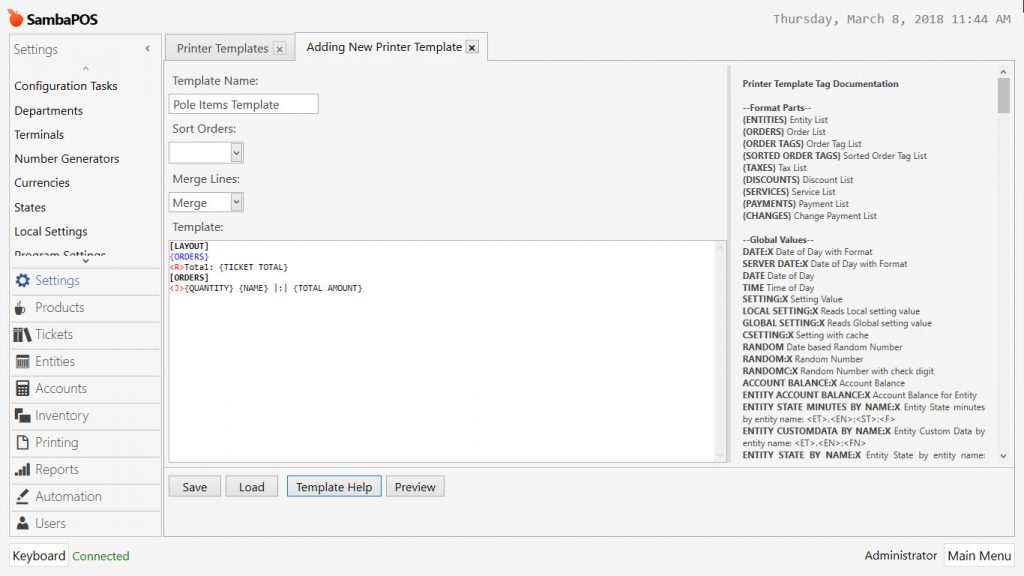
2.3 Pole Printer Item Template
Template Name: Pole Items Template
Sort Orders: –
Merge Lines: Merge
Template:
[LAYOUT]
{ORDERS}
<R>Total: {TICKET TOTAL}
[ORDERS]
<J>{QUANTITY} {NAME} |:| {TOTAL AMOUNT}
The Pole Items template is designed to display menu items as they are entered, as well as the Ticket Total.
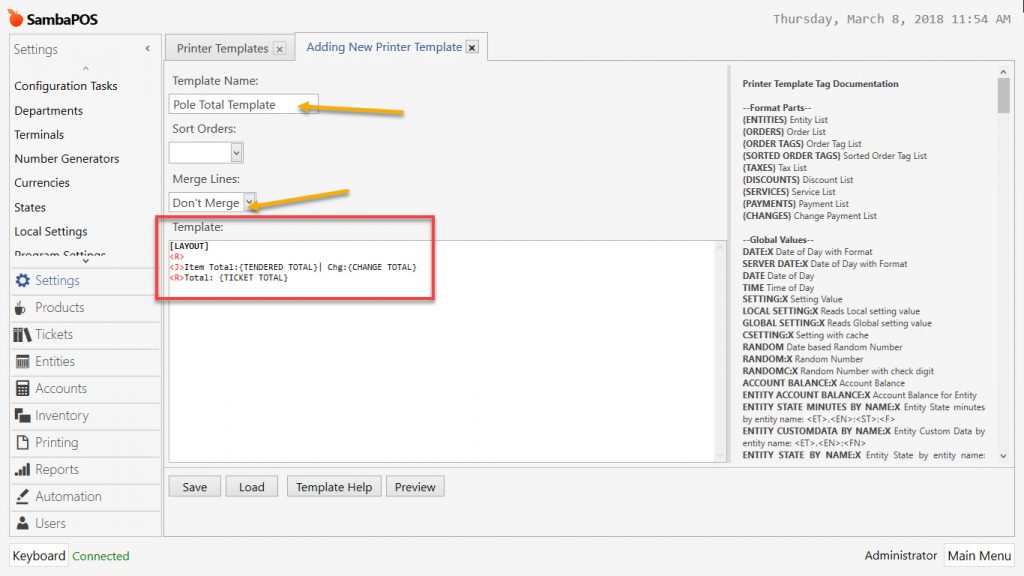
2.4 Pole Total Template
Template Name: Pole Total Template
Sort Orders: –
Merge Lines: Don’t Merge
Şablon:
[LAYOUT]
<R>
<J>Item Total:{TENDERED TOTAL}| Chg:{CHANGE TOTAL}
<R>Total: {TICKET TOTAL}
The Pole Total template is designed to display the Ticket Total, as well as any Payments made, and the Change Due.
3. Print Jobs
3.1 Pole Banner Print Job
3.2 Pole Items Print Job
3.3 Pole Total Print Job
4. Actions
4.1 Pole Banner Action
4.2 Pole Items Action
4.3 Pole Total Action
5. Rules
5.1 Pole Banner Login Rule
5.2 Pole Banner Logout Rule
5.3 Pole Banner Ticket Closed Rule
5.4 Ticket Total Changed Rule
5.5 Change Amount Updated Rule
5.6 Ticket Opened Rule
5.7 Pole Settle Rule
5.8 Payment Processed Rule

