3.6. Caller ID Setup and Configurations
1. CallerID Settings, Hardware, Connection and Testing
1.1. CIDShow Brand CallerID
1.2. Hugin Brand CallerID
2. SambaPOS Settings
2.1. Caller ID Module Installation
2.2. Adding CID as Device on Local Settings
2.3. Creeating Widget on Entity Screen
2.4. Creating Action for CID POP Up
2.5. Creating Rule for CID POP Up
3. Sample Screens
1. CallerID Settings, Hardware, Connection and Testing
1.1. CIDShow Brand CallerID
Plug Caller Id box into USB Port of computer. Configure Incoming Line and phone cable according to image below.
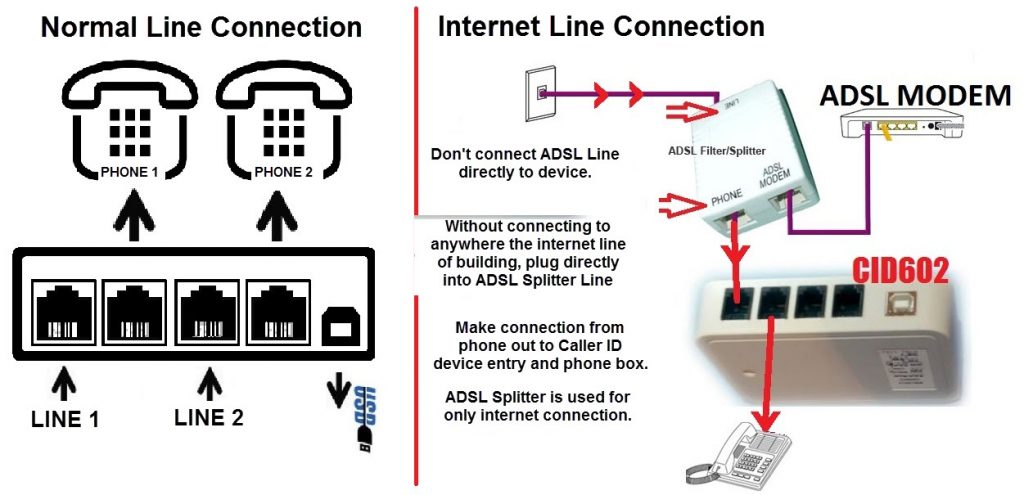
Plug incoming line cable into CID line entry.
Make connection between phone exit of CID device and line entry of the phone.
Install the Driver which was provided by manufacturer. Install CID Testing Tool program to computer.
When the testing program runs you will see the serial number and model of device. Also you will have signal on line indicator.
Attention! While Testing Program is running, SambaPOS won’t work at the same time, you have to close the program after testing.
2. SambaPOS Settings
2.1. Caller ID Module Installation
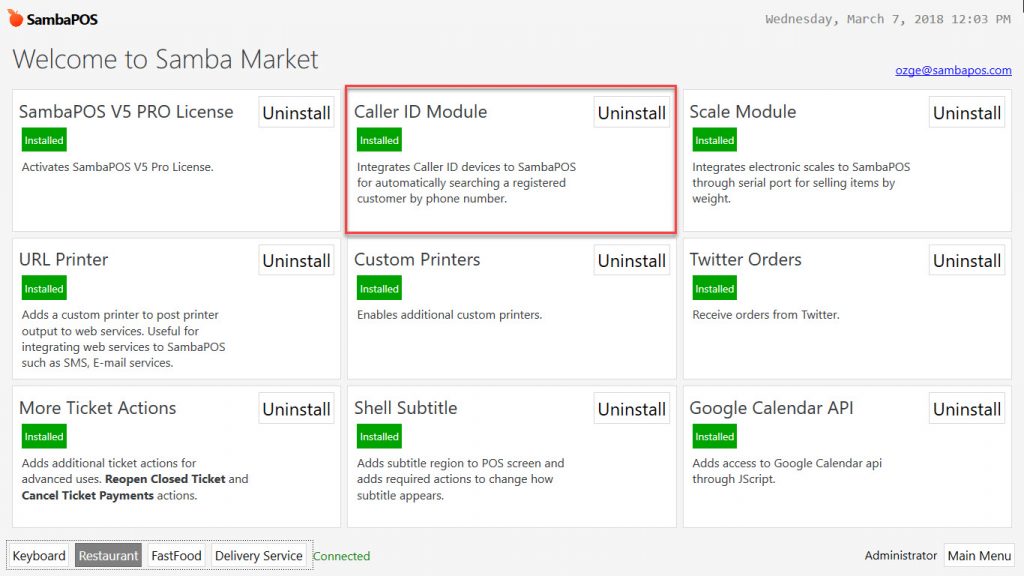
Navigation > SambaMarket > Caller Id Module
Install Caller Id Module if it is not already installed, after installation logout and login SambaPOS.
2.2. Adding CID as Device on Local Settings
Manage > Settings > Local Settings > Devices from here click on Add link. From devices field select CIDShow device.
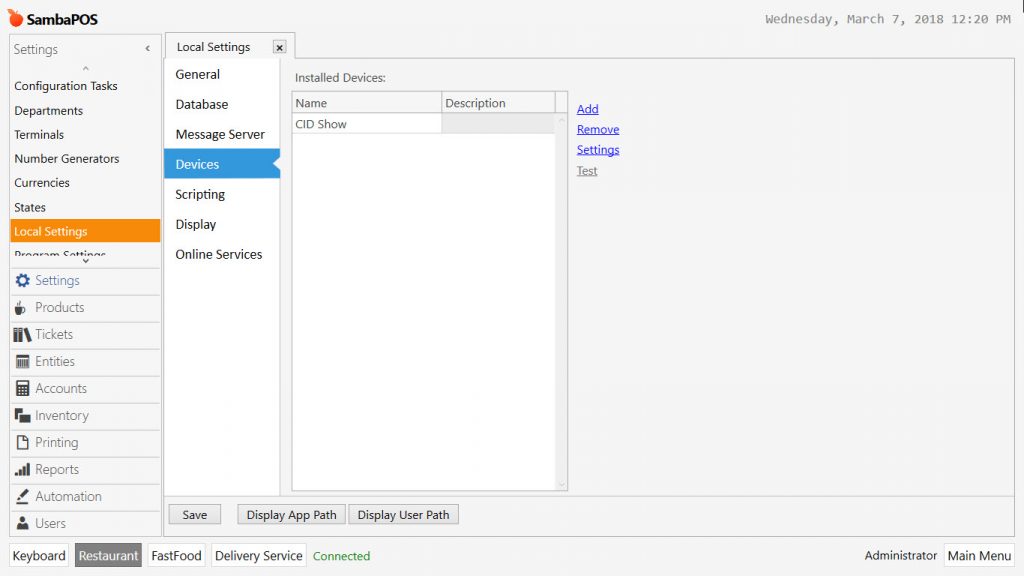
After selection, click on Settings link, from Property Editor perform the POP-Up info configurations for receiving call on Caller Id.
Popup Name: CIDPOPUP
Popup Color:
Inactivity Timeout:
Entity Type Name: Customers
Department Name: Restaurant
Entity Screen Name: Delivery Service
Hide Entity Screen Header:
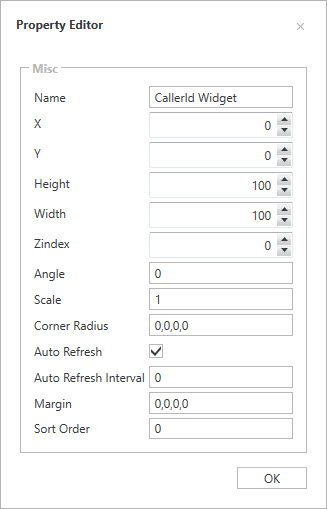
Widget Name: Callerid Widget
Trim Chars:
Search Format:
Detail Format: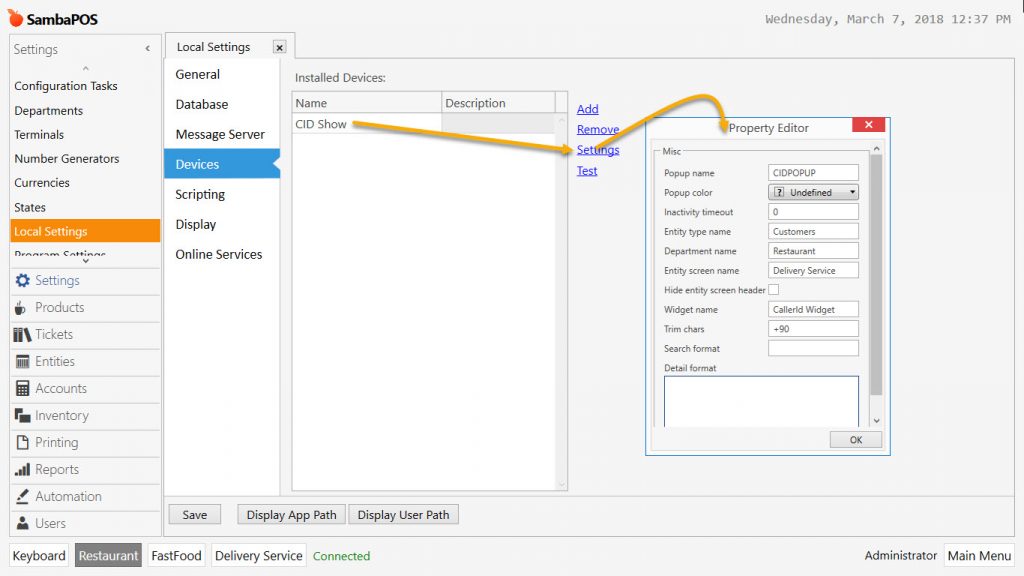
2.3. Creating Widget on Entity Screen
It is necesssary to configure that on which entity screen and which window it should be displayed in case of receiving a call from Caller Id.
Right click of mouse on related screen and see the editing mode, select Entity Search Widget and right click again and then click on Properties [Entity Search] title.
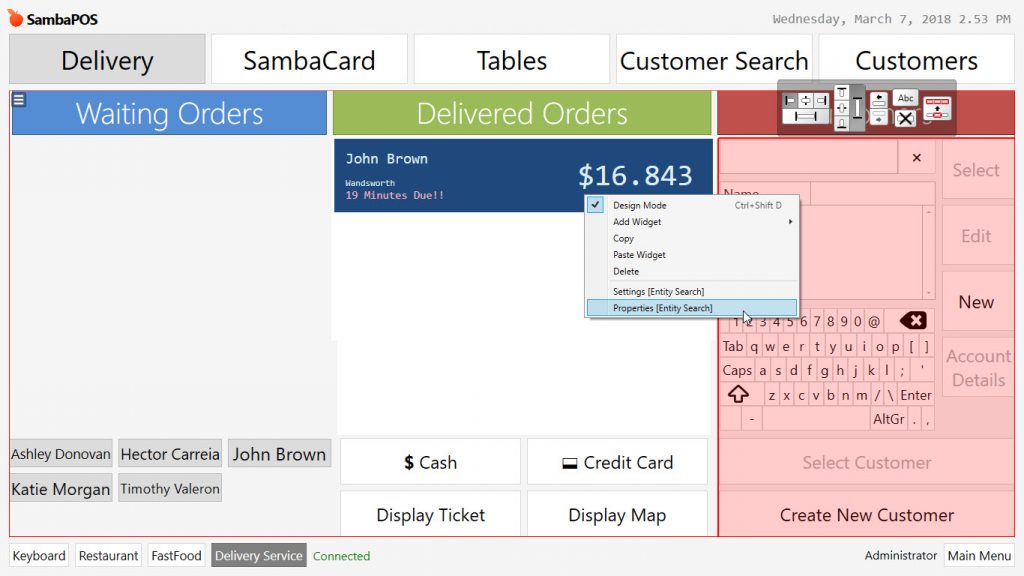
In the Property Editor write Callerid Widget into the name field.
Attention!
It is important to write the name correctly becuase you will use the same widget name for Actions / Rules which you will create on further steps.
2.4. Creating Action for CID POP Up
Go to Manage > Automation > Actions from here click on Add Action link.
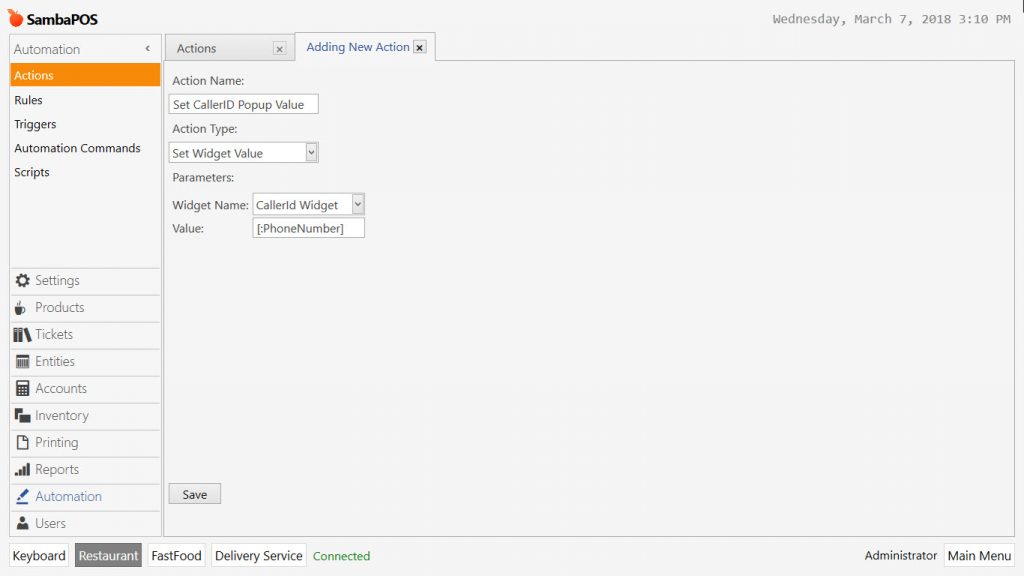
- Action Name: Write a proper name for action. (In the example; Set CallerID Popup Value)
- Action Type: Set Widget Value
- Widget Name: CallerId Widget
- Value: [:PhoneNumber]
After comleting necessary fields, click on Save button.
2.5. Creating Rule for CID POP Up
Go to Manage > Automation > Rules from here click on Add Rule link.
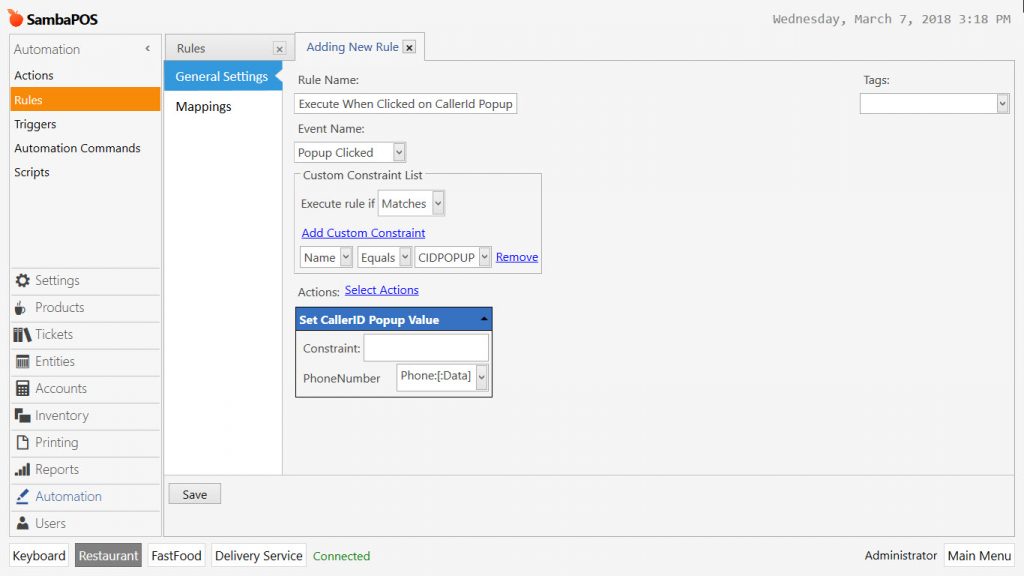
- Rule Name: Execute When Clicked on CallerId Popup
- Event Name: Popup clicked
- Add Custom Constraint: Name | Equals | CIDPOPUP
- Actions > Select Action: Set CallerID Popup Value
- -> PhoneNumber: Phone:[:Data]
3. Examples
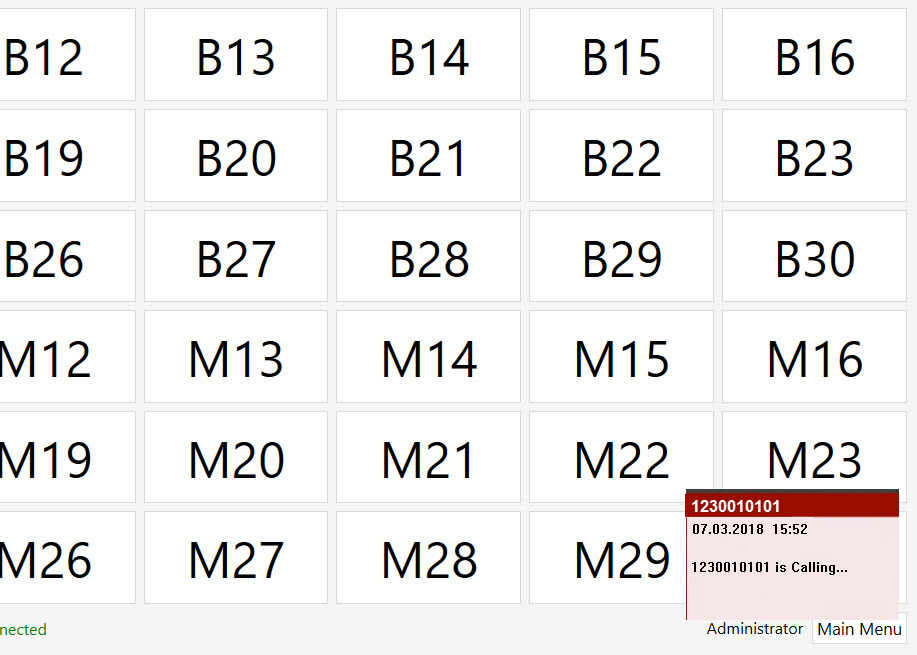
When received call from unsaved customer on the Caller ID, at the bottom right corner it shows phone number of the calling person, date and time info.
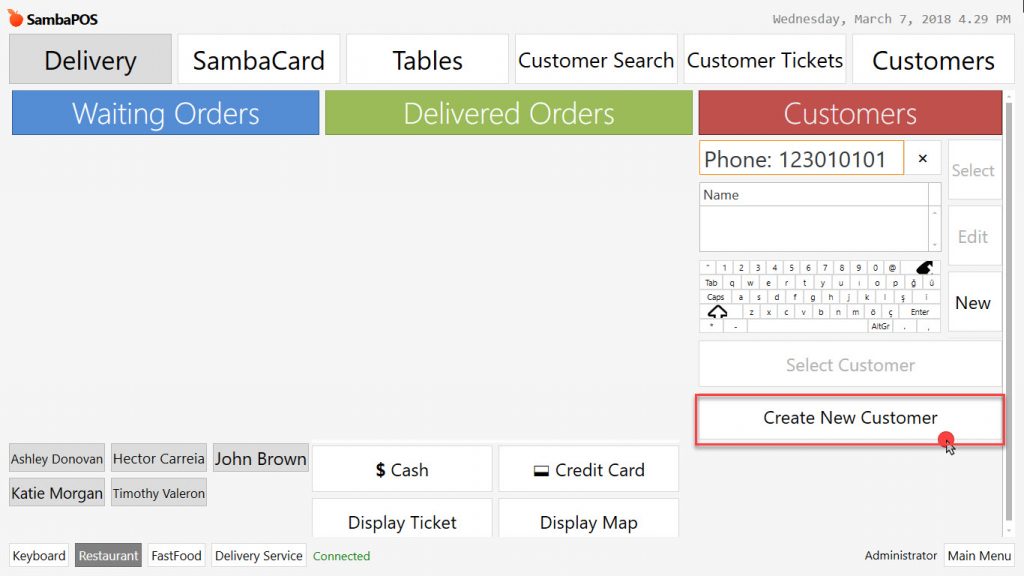
When clicked on Popup, it redirects you to entity screen. Click on Create New Customer link here.
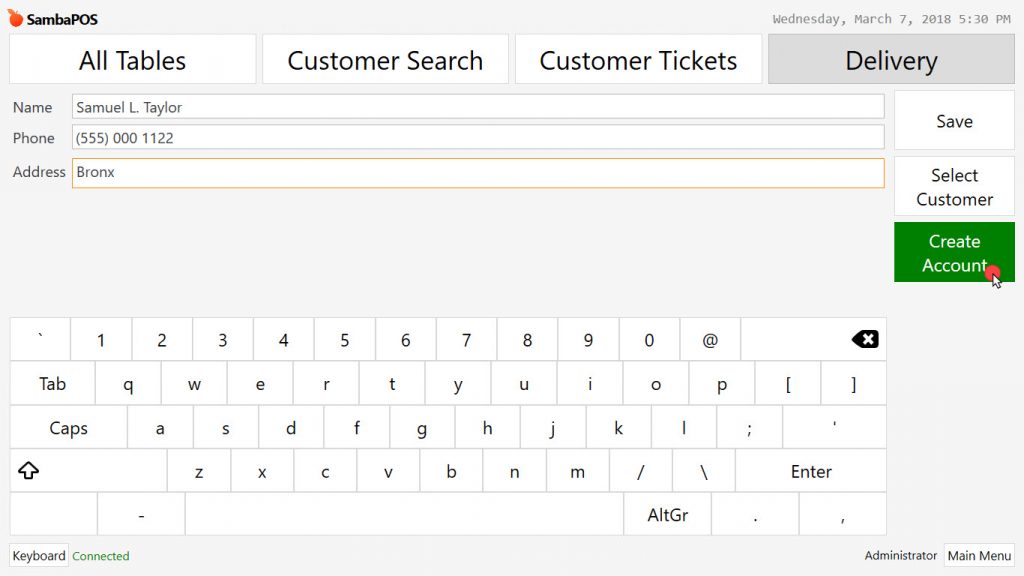
In the window after filling customer information fields, first click on save button and then Create Account button to add a current account for the customer.
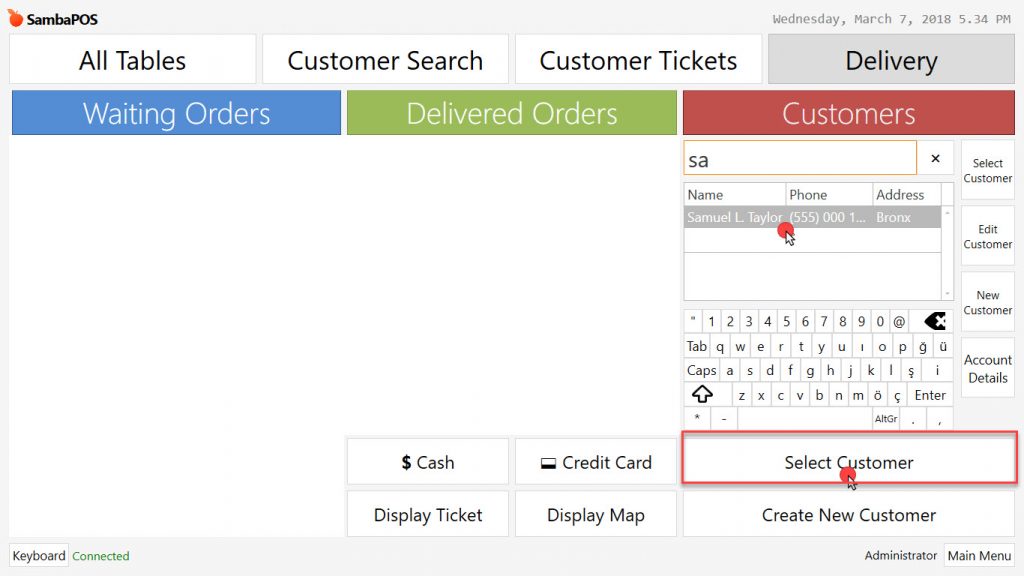
After creating account process for the customer, click on Select Customer button.
After taking customer orders on the ticket, click on Close button.
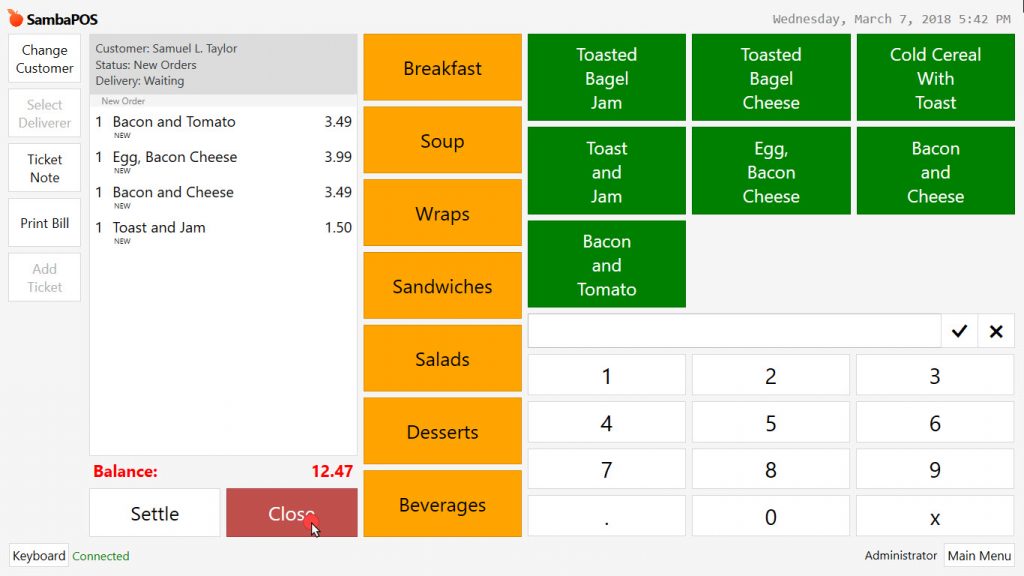
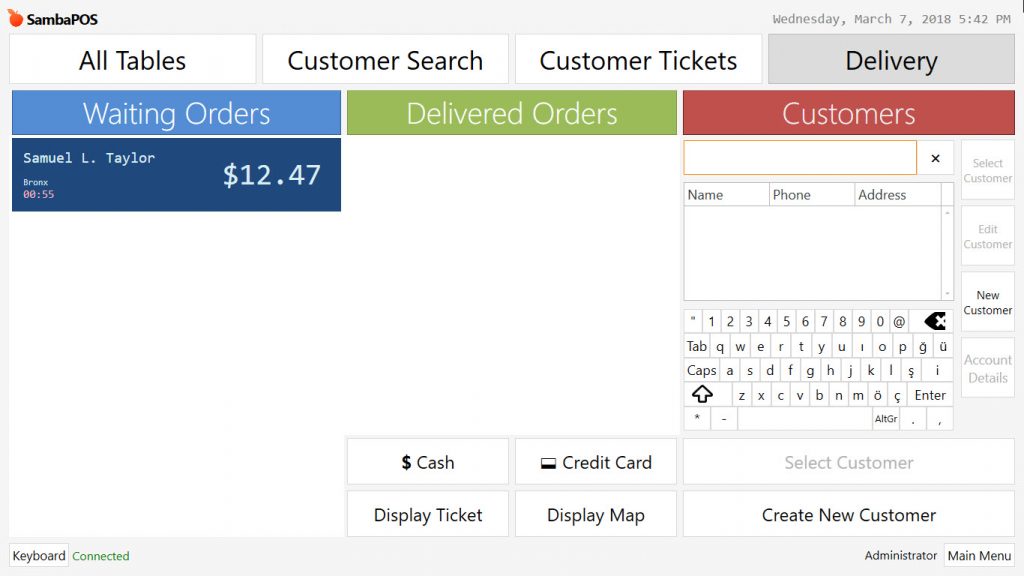
So that orders of newly created customer will be displayed on the waiting orders column.
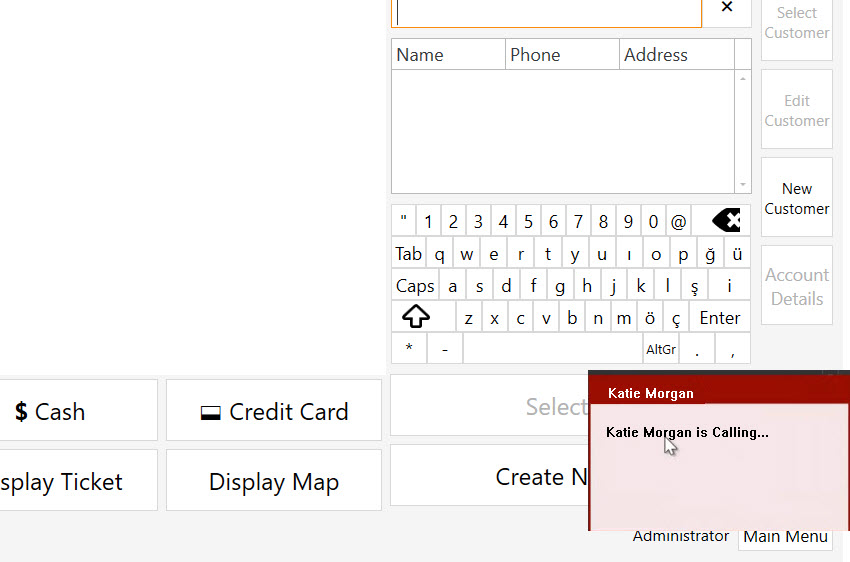
When a Saved Customer calling on CallerID, it shows name of the customer on the bottom right corner.
When you clicked on Popup, Select Customer button becomes active.
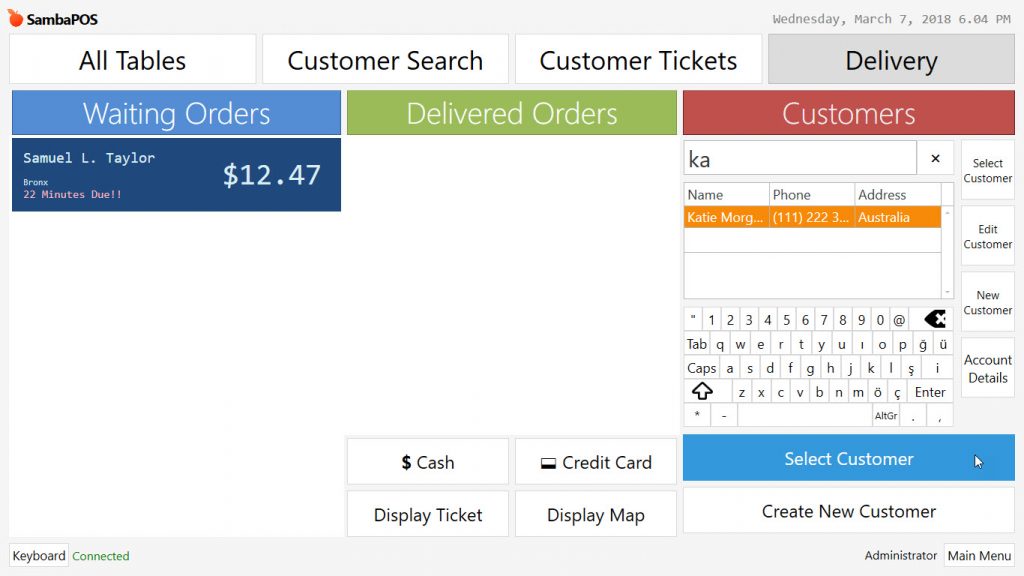
It is possible to take order from ticket by clicking on Select Customer button.