2.4.7.a How to Create Fixed or Customized Discount Specially for Product?
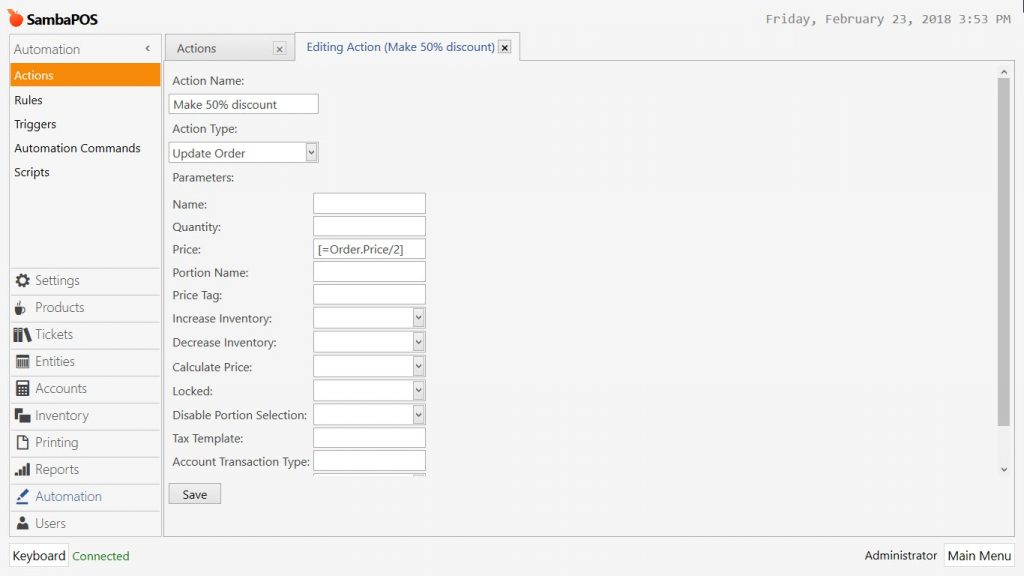
1- Making Discount Action
Go to Manage > Automation > Actions from here click on Add Action link.
In the example it will be shown how to make 50% discount.
-
Action Name: Field to write name of the action. (For example; Make 50% discount)
-
Action Type: Select Update Order template here.
-
Price: In this field write [=Order.Price/2] formula. This formula is written for the 50% discount value.
After completing necessary fields, click on Save button.
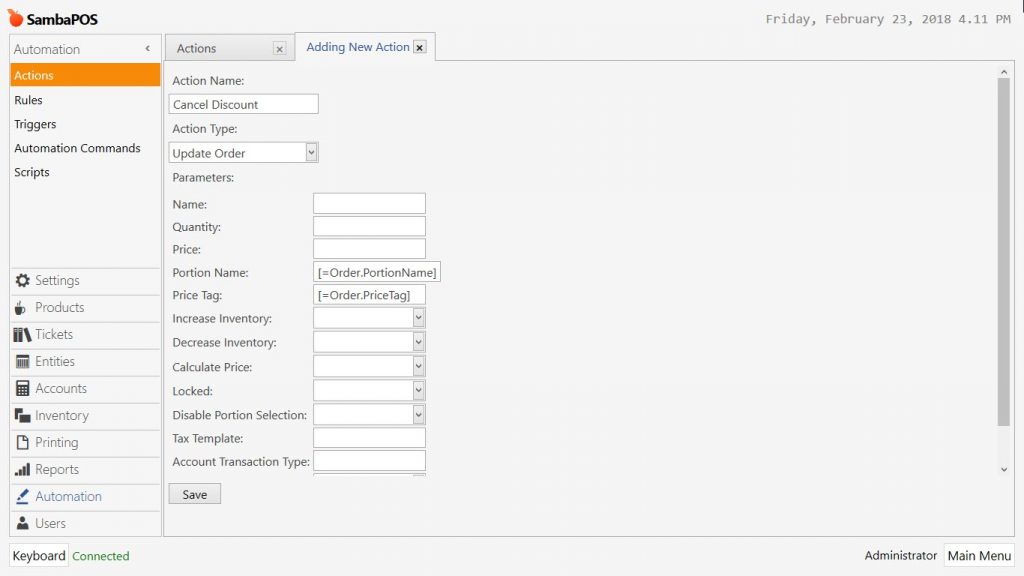
2- Cancel Discount Action
Go to Manage > Automation > Actions from here click on Add Action link.
-
Action Name: Field to write name of the action. (For example; Cancel Discount)
-
Action Type: Select Update Order template here.
-
Portion Name: In this field write [=Order.PortionName] formula.
-
Price Tag: In this field write [=Order.PriceTag] formula.
After completing necessary fields, click on Save button.
3- Update Discount Status
Go to Manage > Automation > Actions from here click on Add Action link.
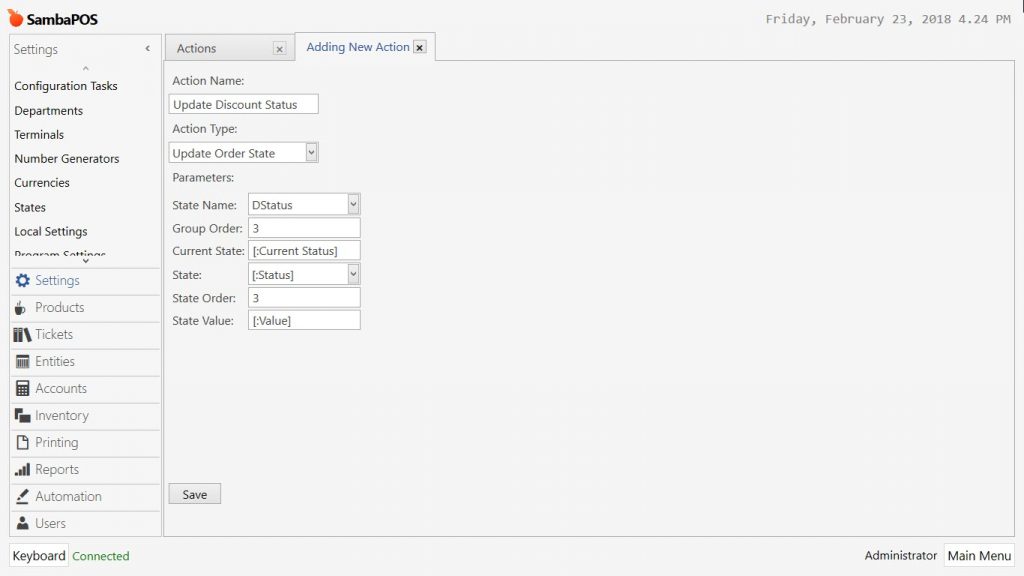
- Action Name: Field to write name of the action. (For example; Update Discount Status)
- Action Type: Select Update Order State template.
- State Name: Write DStatus here.
- Group Order: Give value 3 to this field.
- Current State: Write [:Current Status] formula in this field.
- State: Write [:Status] formula in this field.
- State Order: Give value 3 to this field.
- State Value: Write [:Value] formula in this field.
After completing necessary fields, click on Save button.
4- Discount Button
Go to Manage > Automation > Automation Commands from here click on Add Automation Command link.
General Settings Section;
In this section configure name of automation command, button header name and button color.

Mappings Section;
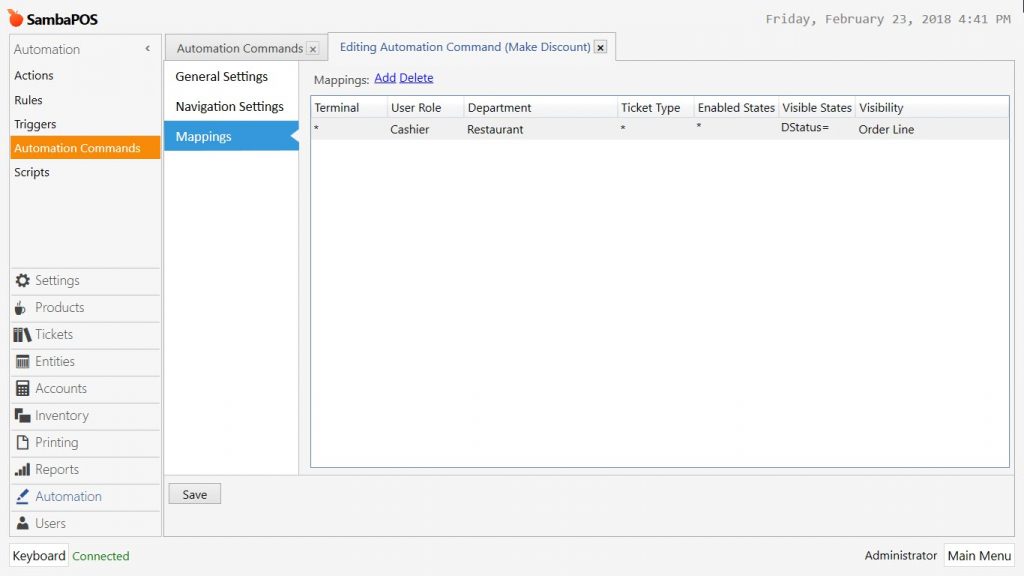
-
Role Line: Determine the role to use that command.
-
Visible States: Write DStatus= formula in this field.
-
Visibility: Select Order Line template in this field.
After completing necessary fields, click on Save button. So that the button will be created for usage of cashier.
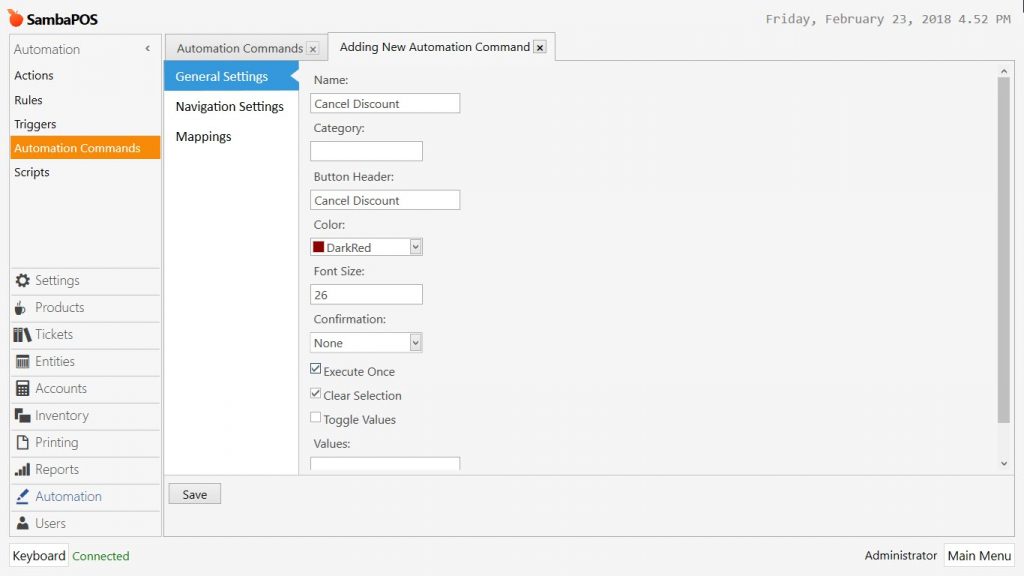
5- Cancel Discount Button
Go to Manage > Automation > Automation Commands from here click on Add Automation Command link.
General Settings Section;
In this section configure name of automation command, button header name and button color.
Mappings Section;

-
Role: Determine the role to use that command.
-
Visible States: In the example it is given 50% discount for this field. Also this 50% discount will be value of order tag which will be used for lines.
-
Visibility: Select Order Line template in this field.
After completing necessary fields, click on Save button.
6- Adding Discount Rule
It is necessary to create a rule that will be activated when the automation command executed.
Go to Manage > Automation > Rules from here click on Add Rule link.
General Settings Section;
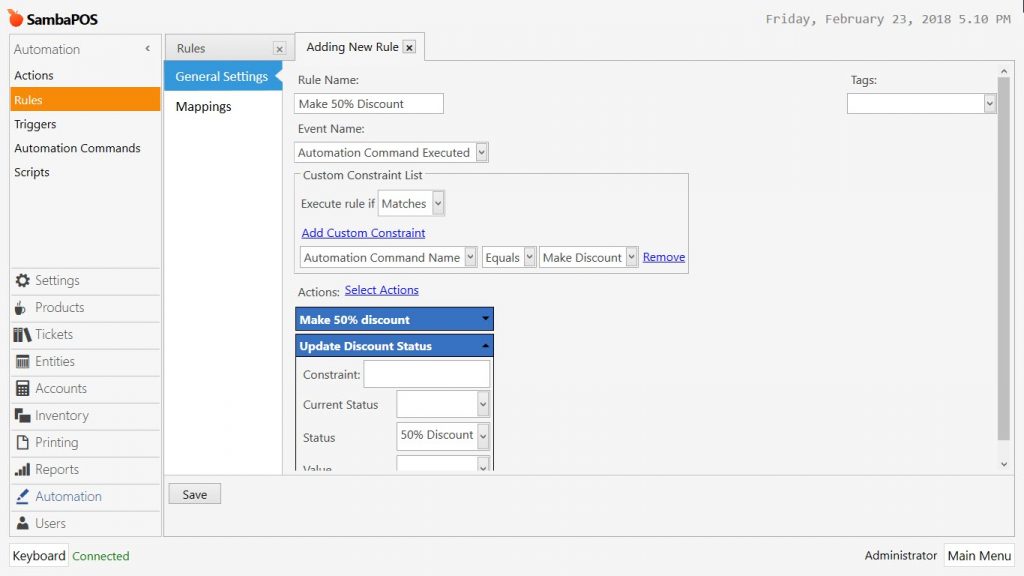
- Rule Name: Write name of rule here. (For example; Make 50% Discount)
- Event Name: Select Automation Command Executed template.
- Add Custom Constraint: Add one custom constraint.
- Automation Command Name | Equals | Make Discount
- Actions > Select Action: Select two actions from here.
- Select Make Discount action.
- Select Update Discount Status action and write 50% Discount into Status field.
In the Mappings Section, configure the settings of line as desired and then click on Save button.
7- Cancel Discount Rule
Go to Manage > Automation > Rules from here click on Add Rule link.
General Settings Section;
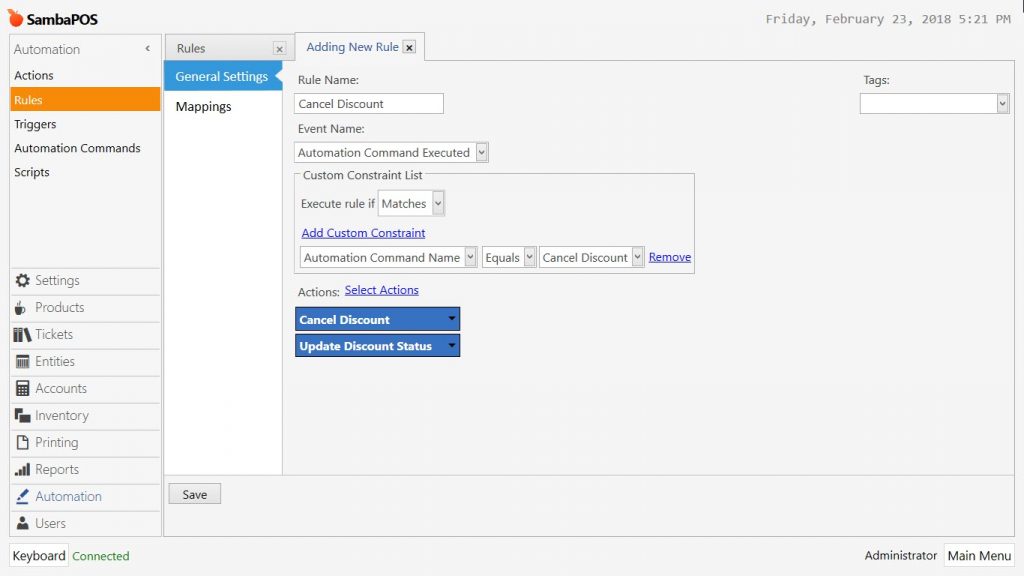
- Rule Name: Write name of rule here. (For example; Cancel Discount)
- Event Name: Select Automation Command Executed template.
- Add Custom Constraint: Add one custom constraint.
- Automation Command Name | Equals | Cancel Discount
- Actions > Select Action: Select two actions from here.
- Select Cancel Discount action.
- Select Update Discount Status action.
In the Mappings Section configure the settings of line as desired and then click on Save button.
8- Authorization Constraint from Gift Button
It is possible to restrict the authorizations of Gift button. Go to Manage > Automation > Automation Commands in here click on Gift and Cancel Gift lines. From Mappings section, select Admin as User Role and click on Save button.
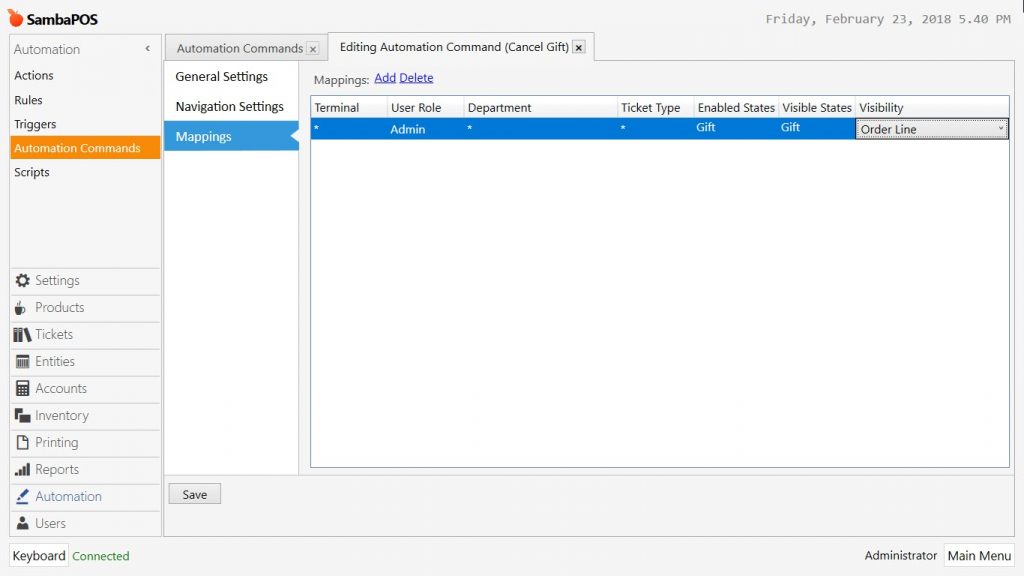
In case of there are multiple roles to use Gift Button then it is possible to configure the authorization by adding new lines in mappings section.
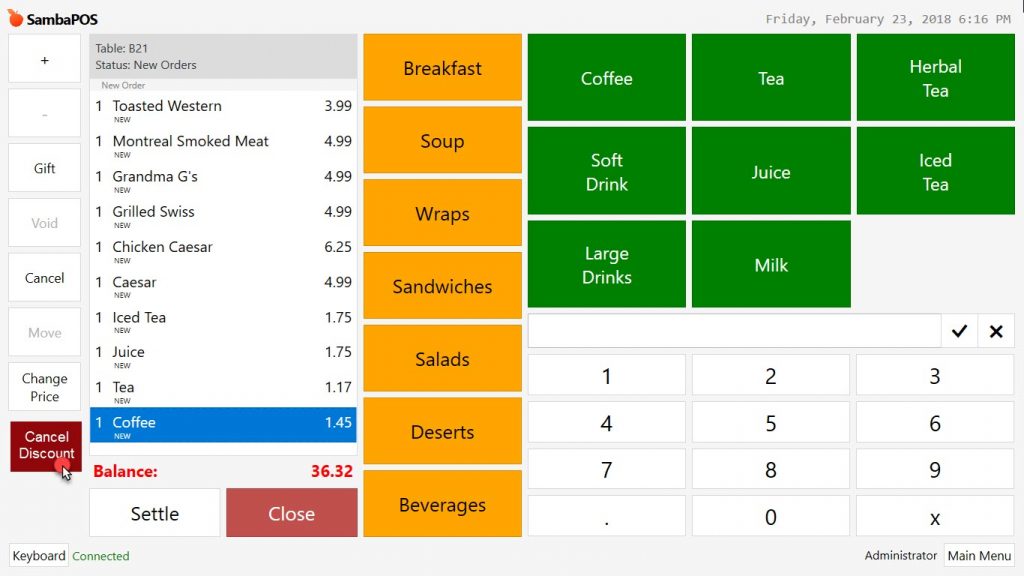
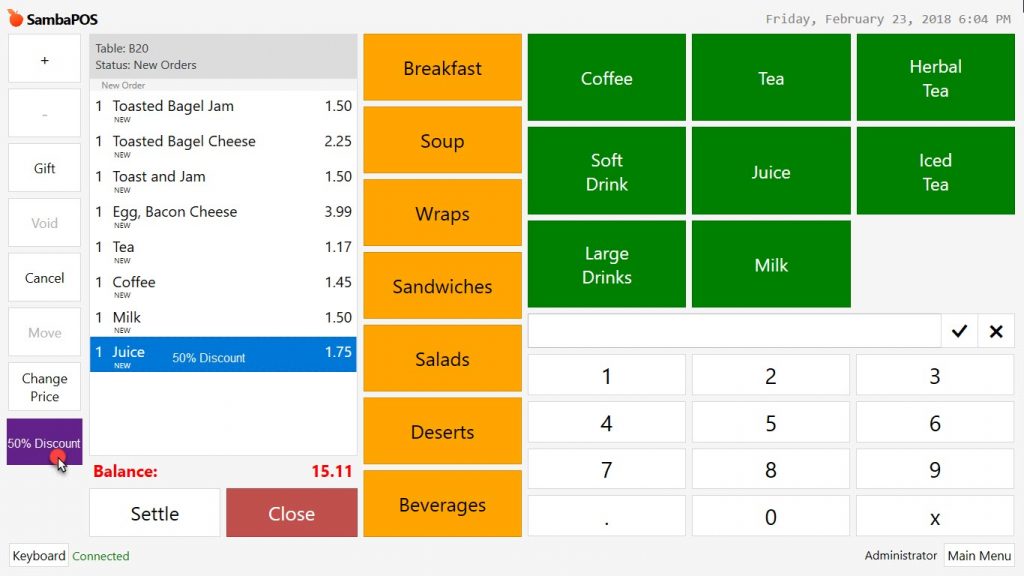
Make Discount Sample;
Cancel Discount Sample;