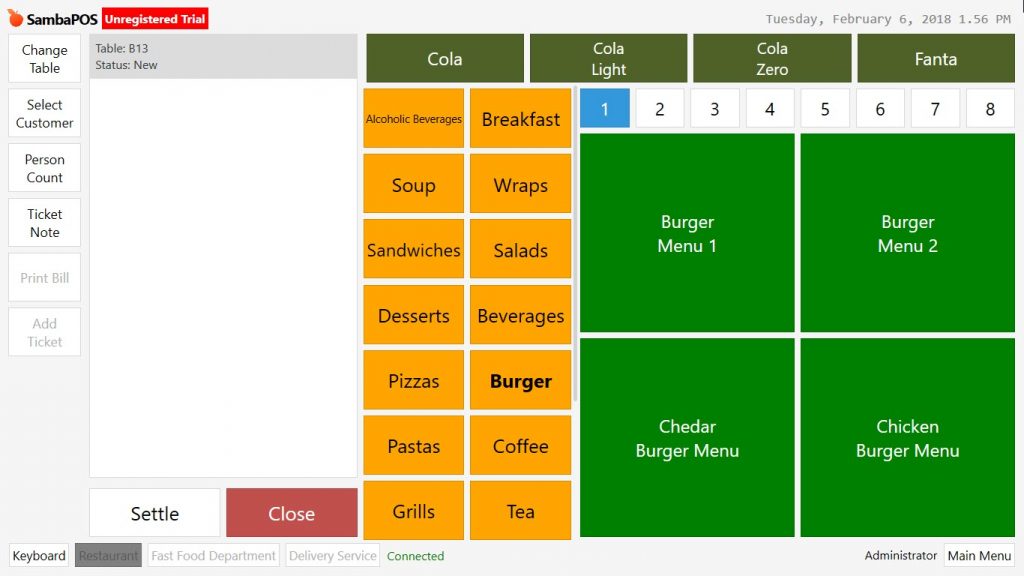
2.3.8.a. How to Design Detailed Menu?
In here it will be explained that how to use menu designing more effectively by creating an example menu which consisting of various categories and long named products.

What is Menu?
Menu, consist of categories which are used to receive order and products that existing in these categories. It is possible to create unlimited menu in SambaPOS. For example a restaurant which has more than one department (fast food- restaurant) can create different menus or it is possible to create different menus for special occasions (new year’s eve, birthday).
What is Menu Category?
Categories are the groups which making easier to find the products on POS screen.
How to Make the Categories Column Double?
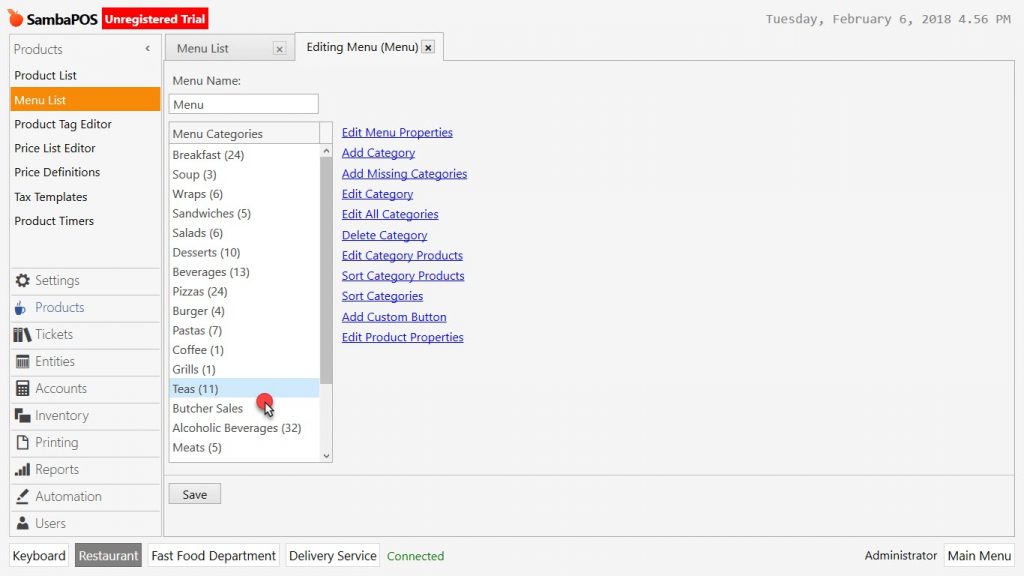
It is possible to make the category column double in case of there are too many categories, to do this go to Manage > Products > Menu List from here select the related menu and click on Edit Menu Properties link.
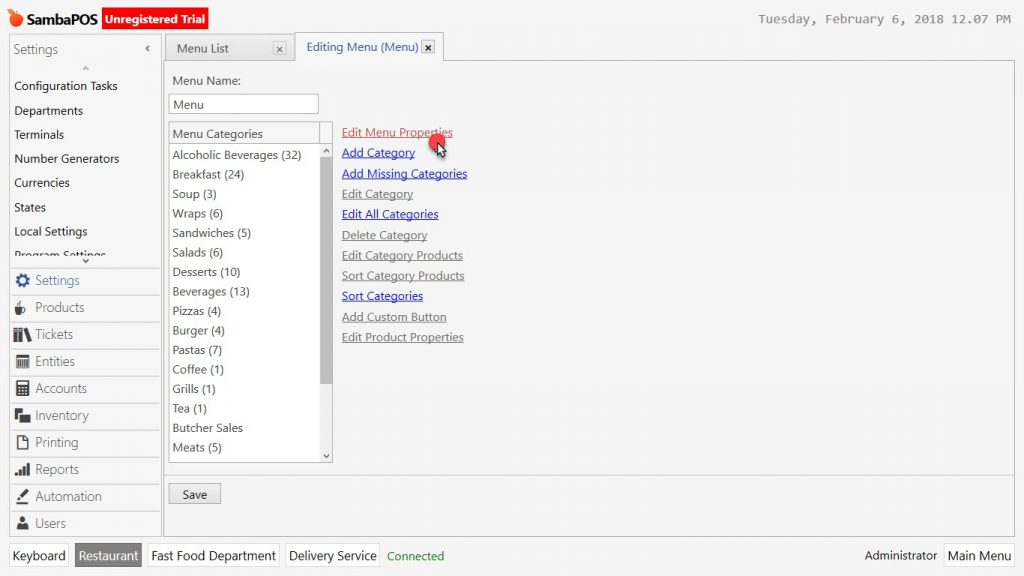
In the window into Category Column Count field, write the desired column count and first click on Ok then Save button.
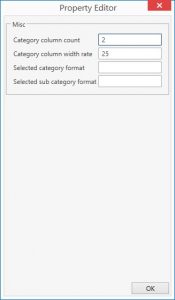
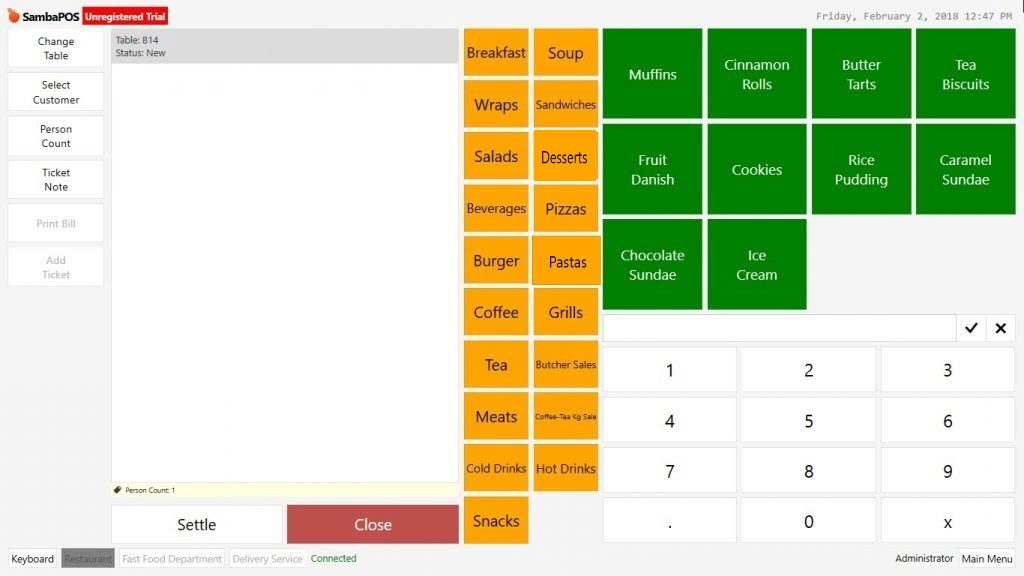
In the example it is written 2 as column count so that categories became two columns.
How to Configure Menu and Category Width?
To configure menu and category width go to Manage > Products > Menu List select related menu and click on Edit Menu Properties.
In here Category Column Width Rate field is percentage expression of category width.
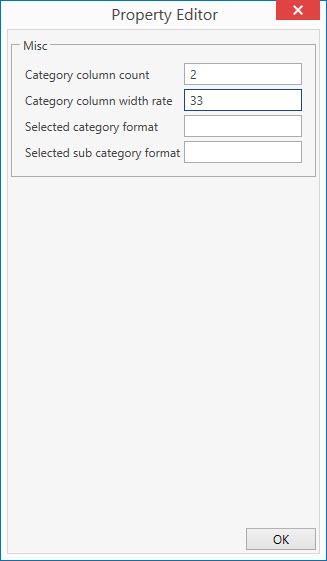
In the example it is given 33 as value for “Category Column Width Rate” field. So that after the ticket field ended, 33% of menu screen will be reserved for categories.
To configure the width of Ticket field go to Manage > Local Settings > Display section and click on Ticket Size This value can be different depending on the resolution of computer.

In the example this value given as 35% to make narrower the ticket field.

How to Make More Visible Selected Category and Sub Category?
Go to Manage > Products > Menu List from here click on Menu and then click on Edit Menu Properties link.
In the window write html tags into Selected category format and Selected sub category format fields to make them more visible.

It is possible to configure selected category and selected sub category font as bold and it will contain the product names by typing <b>{0}</b> html tag.
How to Create Fast Menu?
Although menus consist of variety of categories and many products in these categories, in fact some specific products are sold more oftenly. In SambaPOS for that kind of situations there is a menu structure that will be fixed on top of menu screen. It is called fast menu.
In the example it will be shown that how to create fast menu, how to add / eject category and product into this menu.
How to Add Category in the Menu?
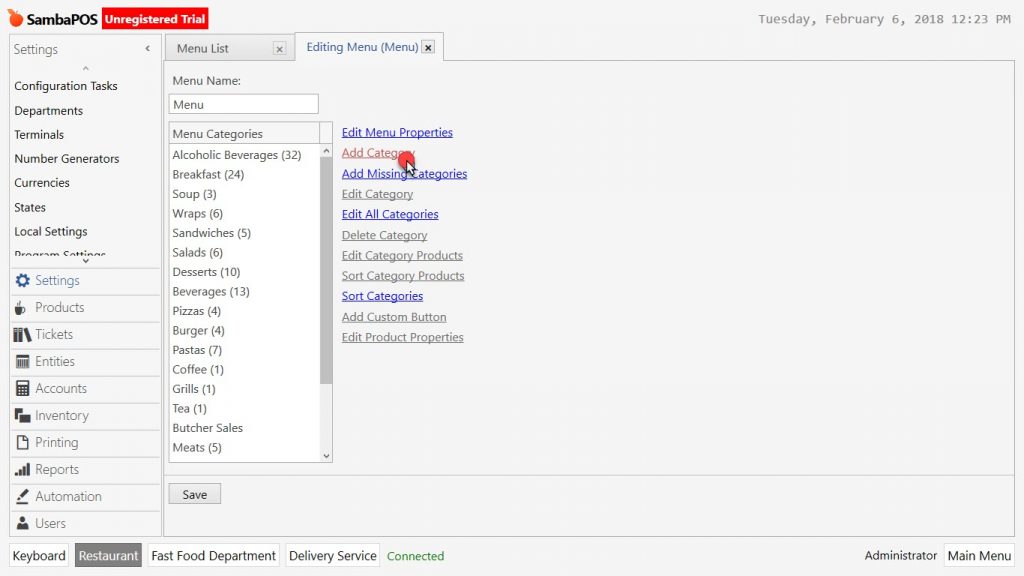
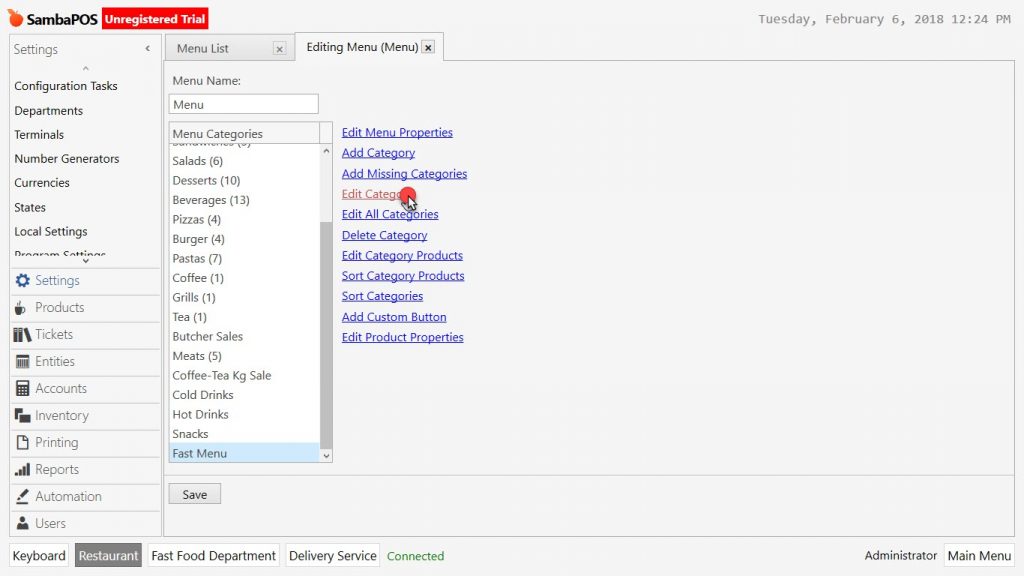
Go to Manage > Products > Menu List click on related menu, open configuration section and click on Add Category button.
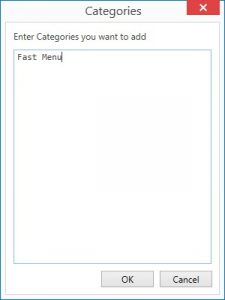
Click on Ok button after writing the category name.
Click Yes for message panel window so that new menu category will be added into menu. If clicked on Save button, this menu will be displayed among other categories. To make it fast menu click on Edit Category link.
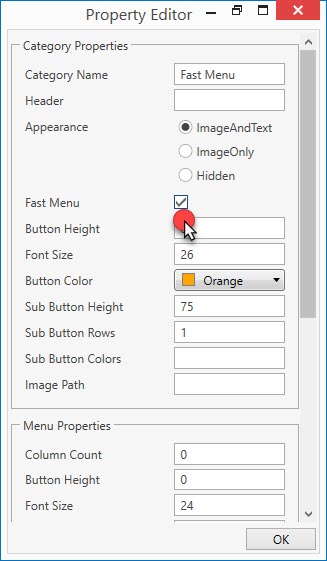
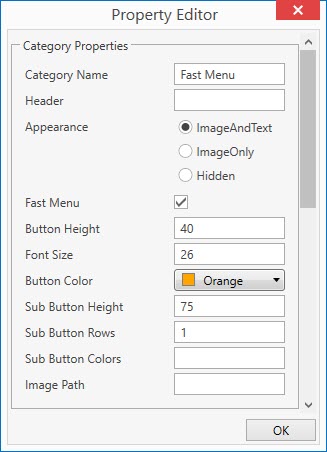
In the window select the Fast Menu box and click on Ok button.
How to Add Product into Category?
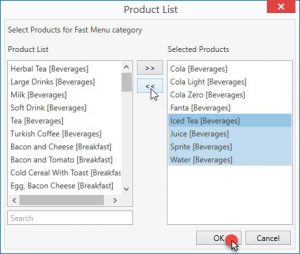
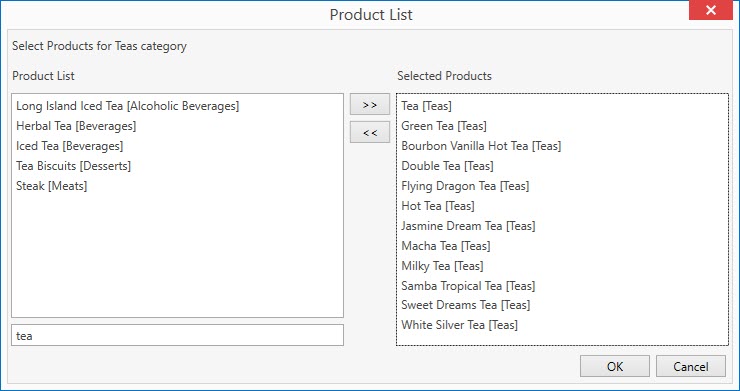
To add product into a category, double click on it. On the left side of window from Product List select the products that should be added into category and move them to Selected Products field.
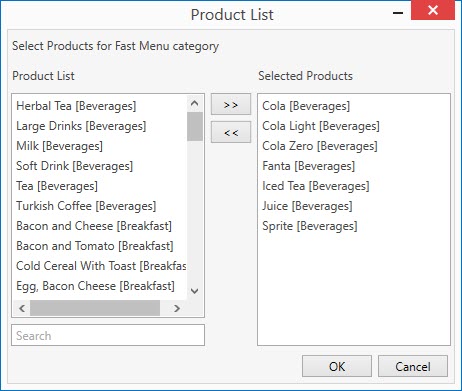
- It is possible to find product that will be added by writing its name into search field.
- To select more than one product at the same time, keep pressed Ctrl button select the products and transfer the them at once.
After product selection finished, click on Ok button so that products will be added into category. Complete the process by clicking on Save button.
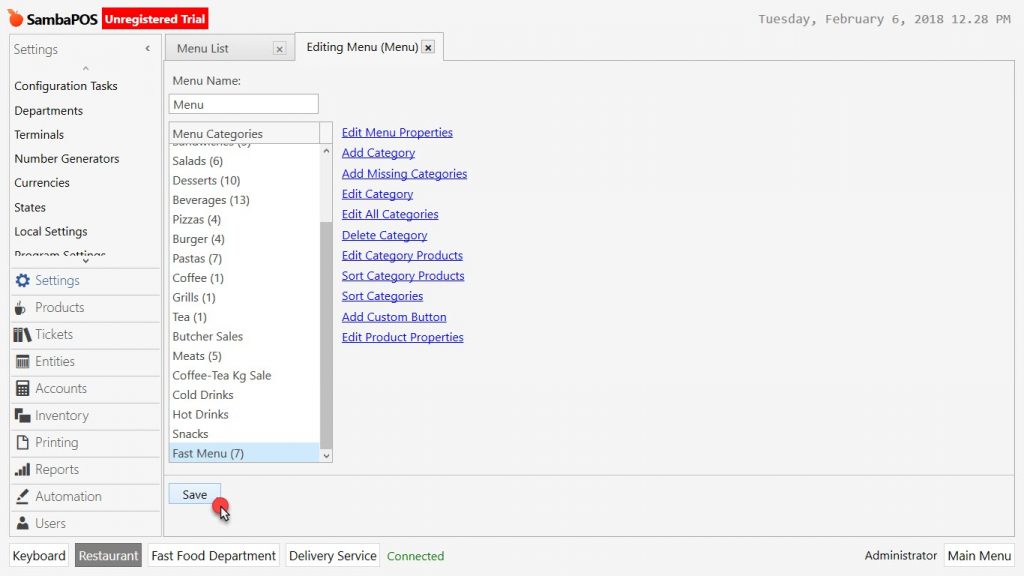
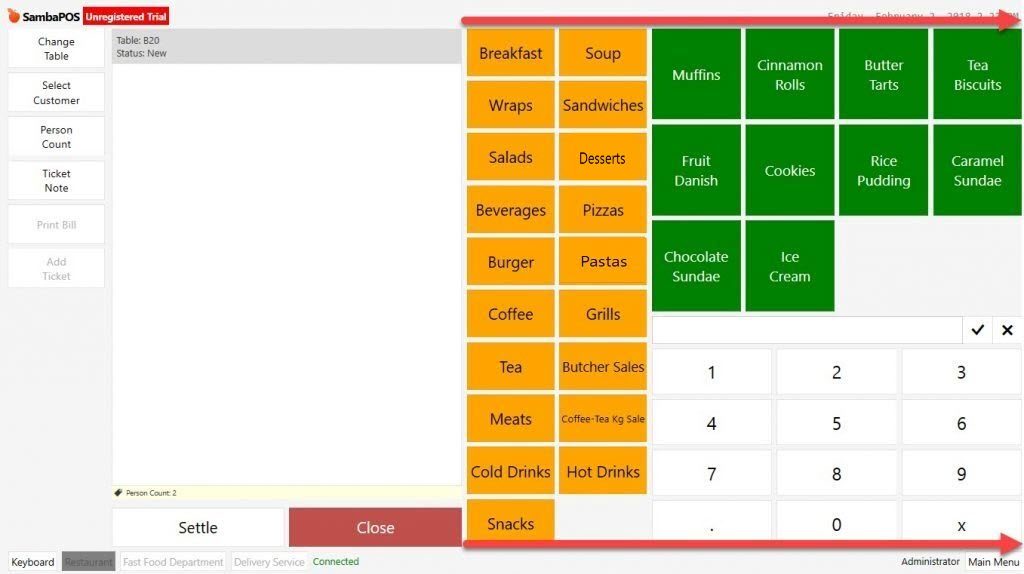
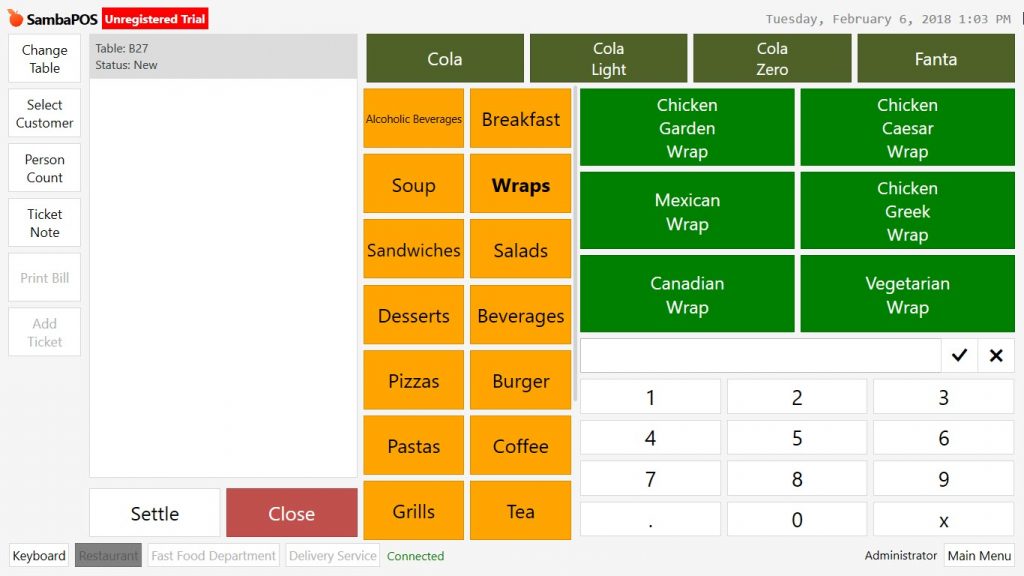
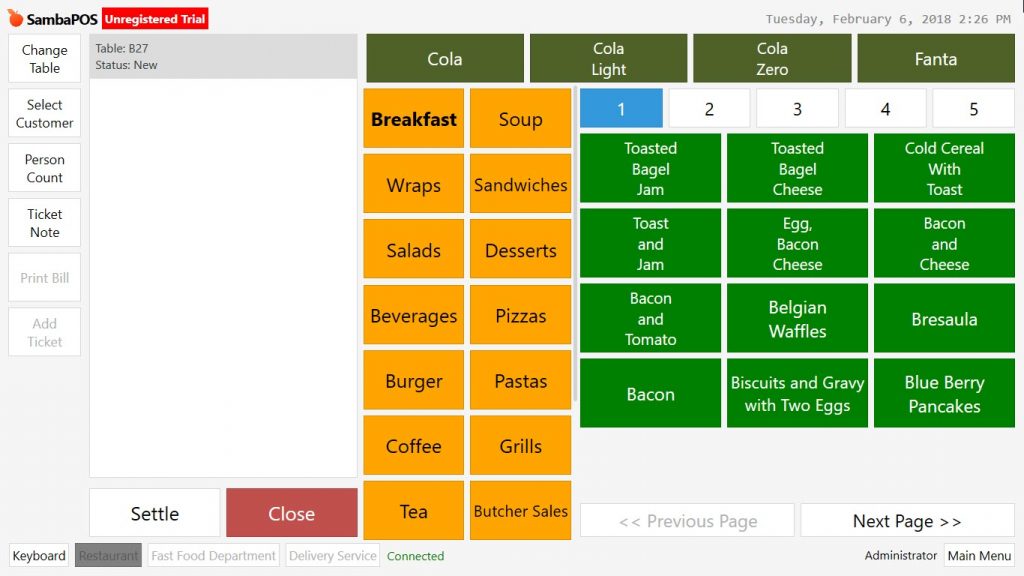
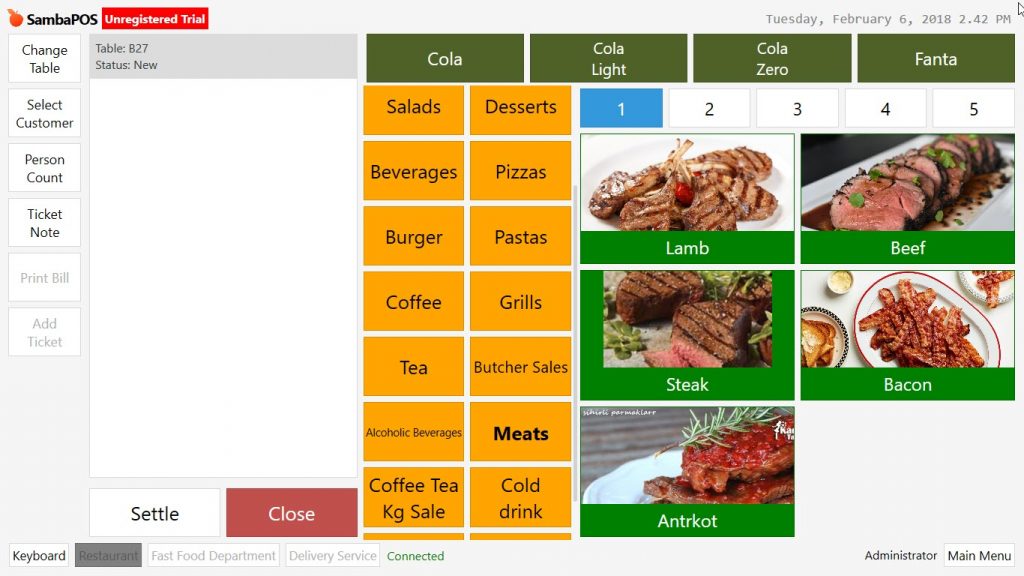
As it is seen in the example selected products fixed to right top corner of the screen.
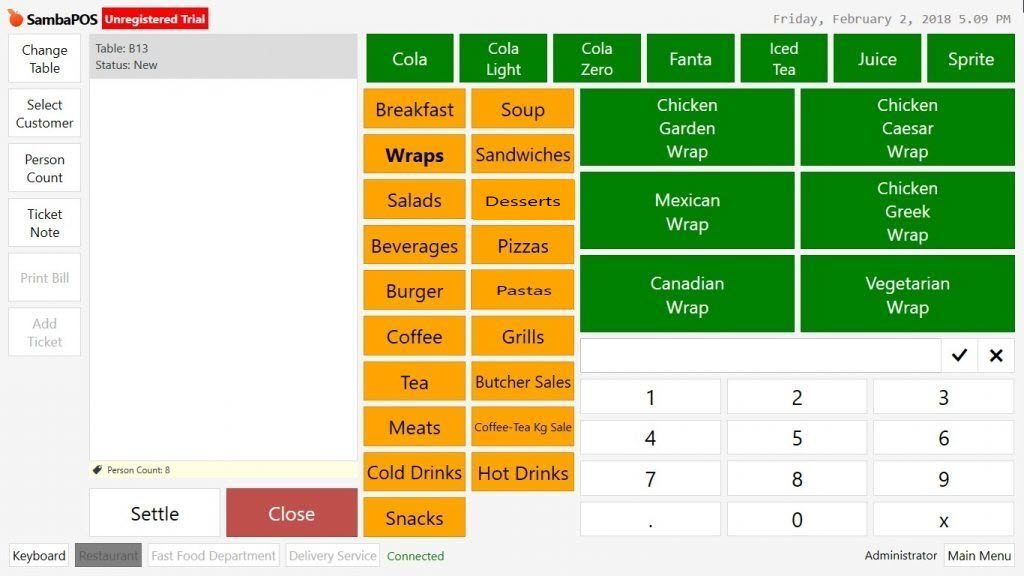
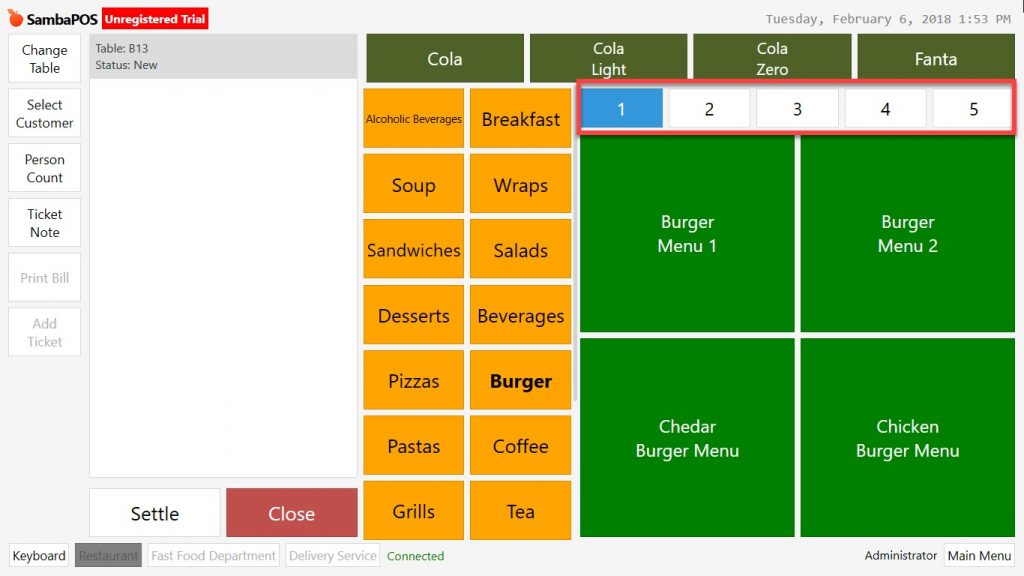
Column Settings
In order to built fast menu row as two pieces of columns go to Manage > Products > Menu List double click on menu, select category and click on Edit Category link.
In the window, Column Count and Button Height comes “0” as default. In case of button height zero SambaPOS gives the values automatically.
To make fast menu area as 5 columns, write 5 into column field, click Ok and then Save button.

Button Height
To configure fast menu button heights go to Manage > Products > Menu List double click on Menu, select the category and click on Edit Category link.
In the window give value for button height click on Ok and then Save button.
For button height “40” value was given in the example.
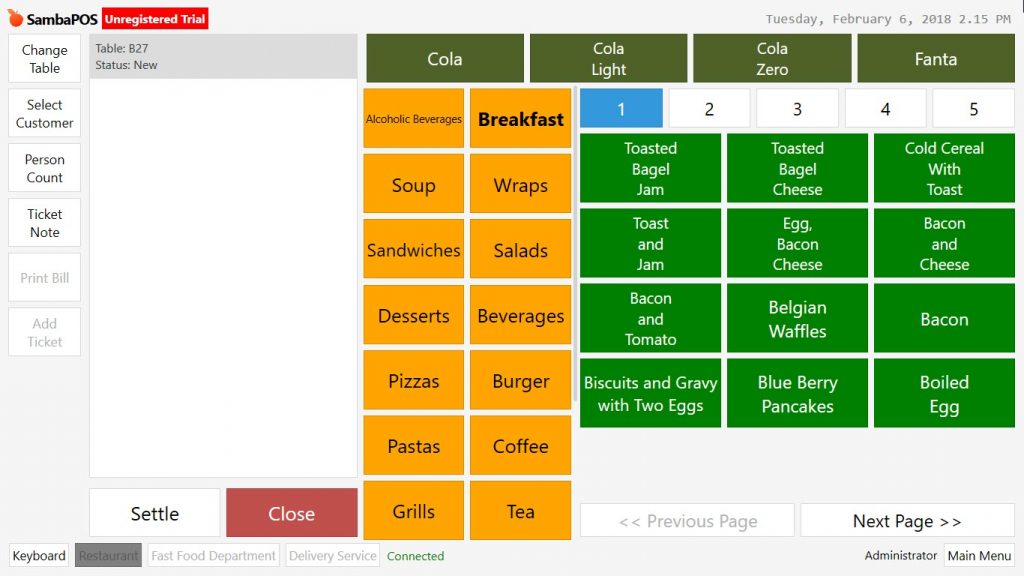
In the example it is desired to deisgn the fast menu as single row so that some of products will be ejected from menu.
Ejecting Product from Category
To eject product from a menu it is necessary to do just the opposite of adding product process. Go to Manage > Products > Menu List double click on Menu and then click on related category.
Select the products that will be ejected from Selected Products field, drag them to Product List field click Ok and then Save button.
In this way 4 products will be added into fast menu and it will seen as single row.
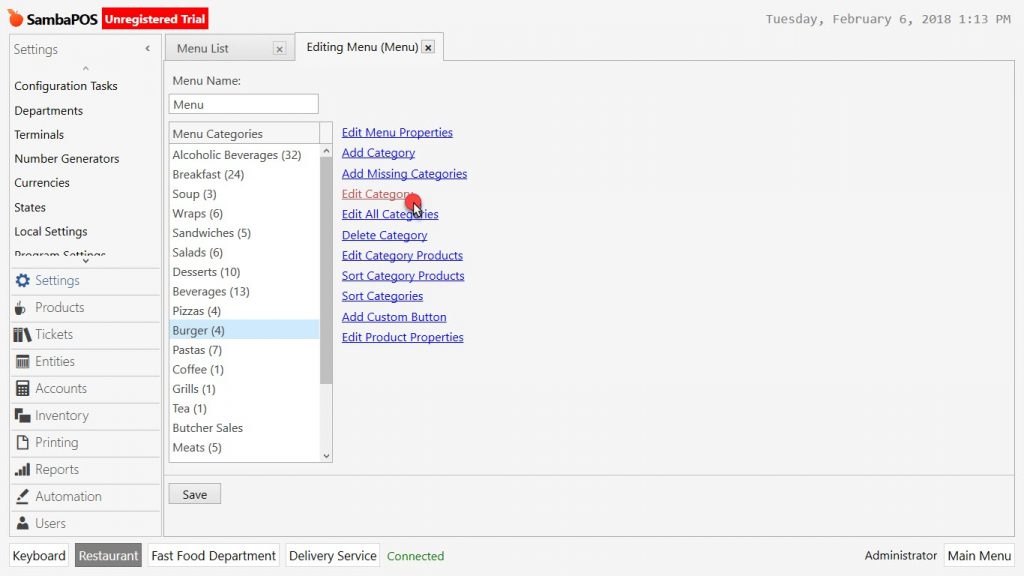
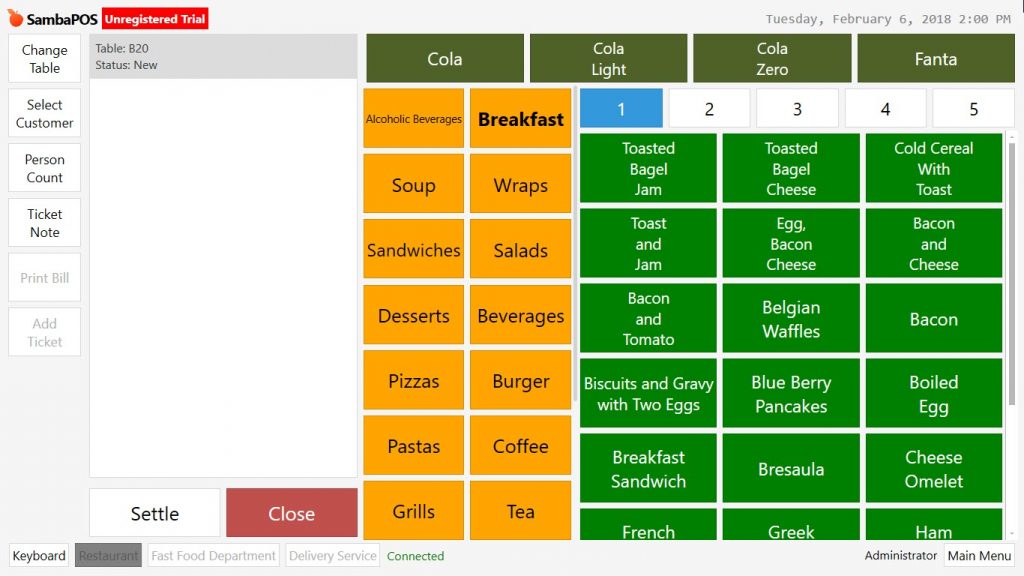
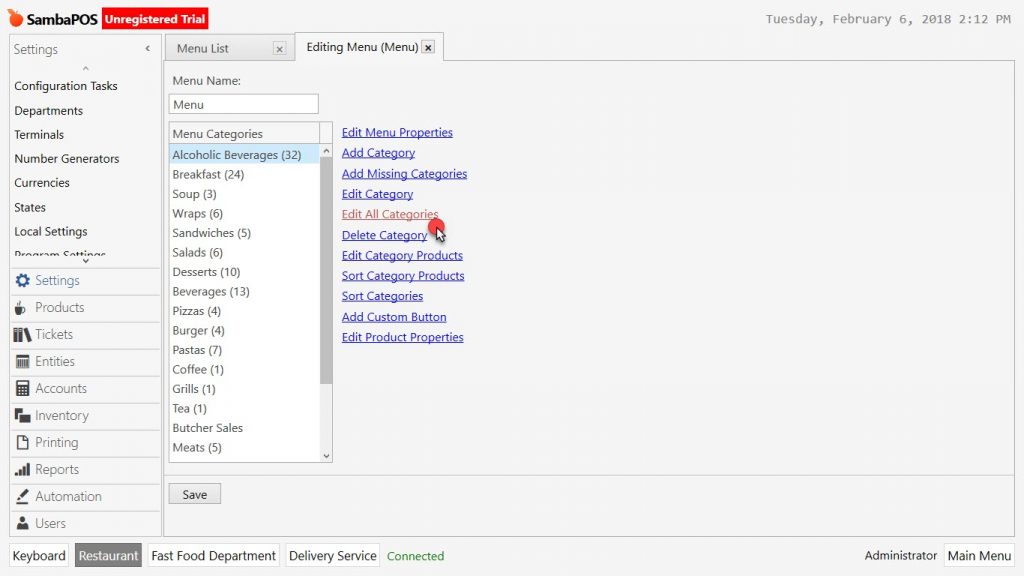
How to Write Category Names as 2 Rows?
It is possible to write long named categories as two rows to make them read easier. To do this go to Manage > Products > Menu List from here double click on Menu and then click on Edit All Categories link.
 .
.
In the window there are category names and header column. Write the category names that desired to be shown as two rows into the header field. Write <br/> to between the words that separation is needed.
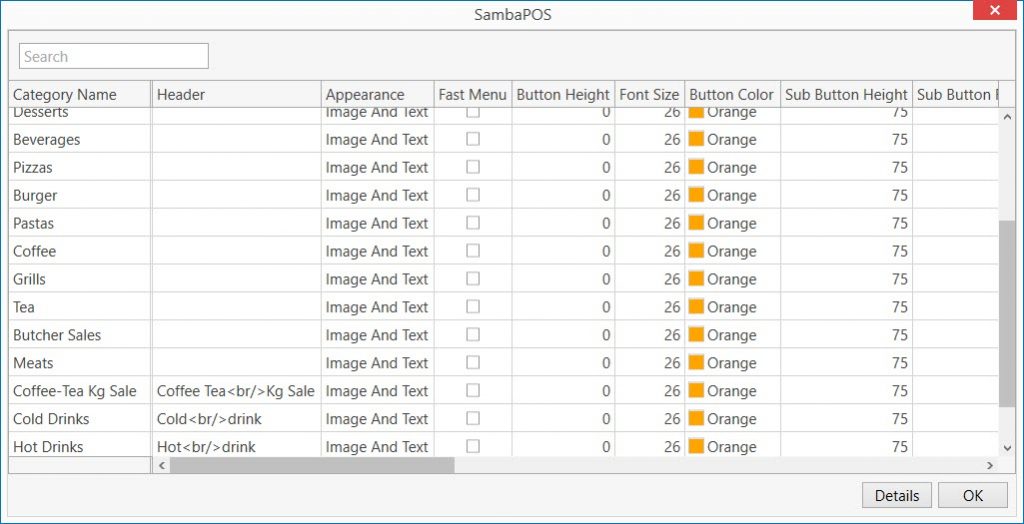
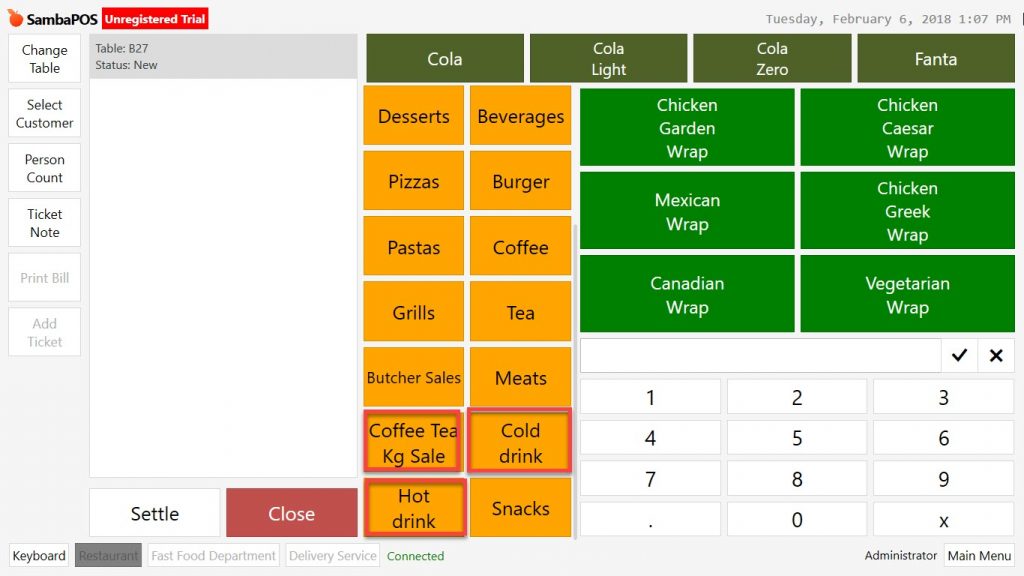
Leave header column blank for the products that not necessary to make change. After configurations completed first click on Ok and then Save button.
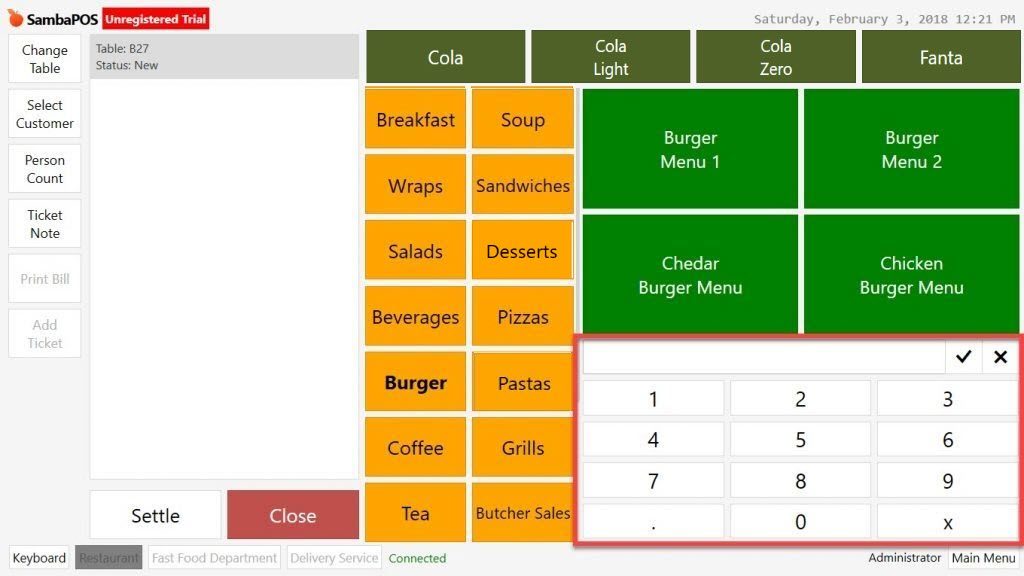
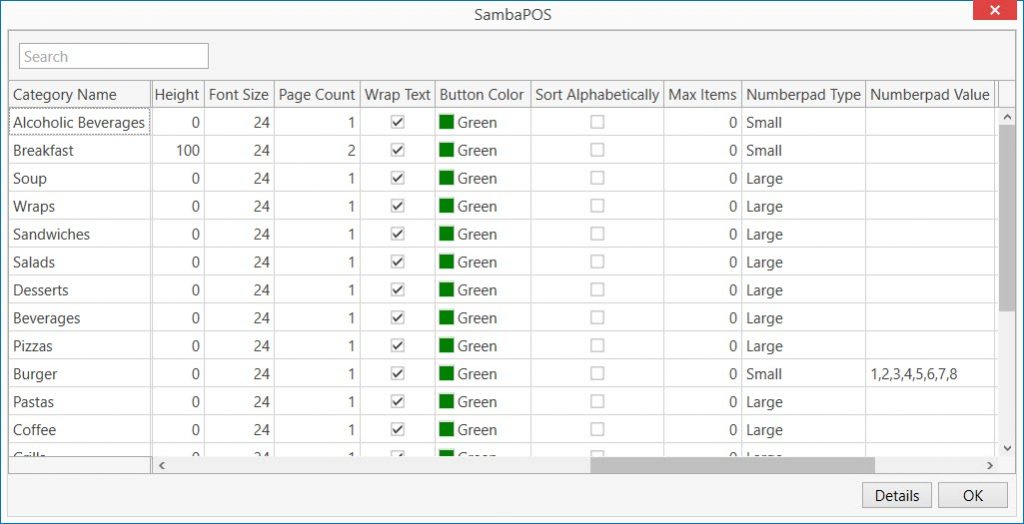
How to Activate Small Numberpad?
Inside of each category there is a numberpad on the right down part of SambaPOS menu screen. This numberpad can be resized according to categories or can be used in a different form.
Go to Manage > Products > Menu List double click on Menu and open the editing section. In here click on category which its numberpad desired to be changed and then click on Edit Category link.
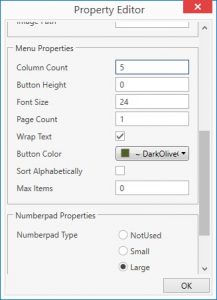
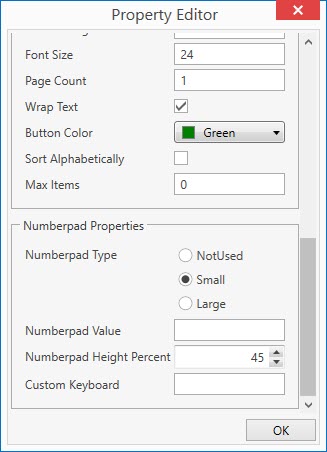
In the window find the Numberpad Properties Section
- NotUsed: If it is selected, in this category will not have numberpad.
- Small: If small selected, numberpad will become smaller.
- Large: If selected, numberpad will stay as default view.
After configuring related selection, click on Ok and then Save button.
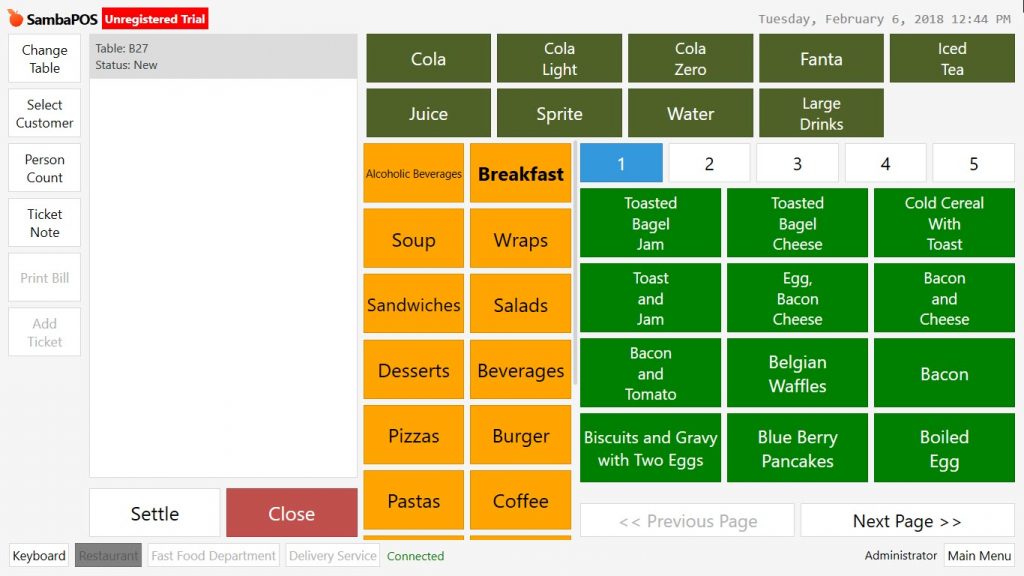
In the example numberpad will be selected as small.
As it is seen in the example, numberpad appeared on the top as small in related category.
In case of first five numbers not enough, it is possible to increase the digit count. Type desired digits by putting commas between them into Numberpad Value field which is found in Category Editing > Numberpad Properties menu.

After completing related editings, first click on Ok and then Save button so that the values will be added into category.
How to Set Product Column Count?
To set column count go to Manage > Products > Menu List double click on Menu and then open the related category in here click on Edit Category link.
In the window find the Menu Properties section. Column count field comes “0” as default which means it will be selected automatically. It is possible to configure the column count by giving desired value into this field.
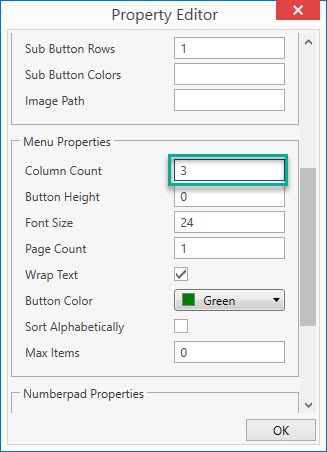
After giving desired value to column count field click on Ok and then Save button.
In the example it was given 3 for column count field. As it is seen after configuration, product list became more practical to use.
How to Write Product Names as 2 Rows by Wrapping the Text?
It is possible to write the product names as row in order to read them easier. Go to Manage > Products > Menu List double click on Menu and then open the related category in here click on Edit Category link.

In the Properties Editor screen select the Wrap Text box from Menu Properties field to make the products read better. If it is selected, SambaPOS makes two rows the long named products from the ideal place.

In the example to make the products read better, Wrap Text box is activated and Column Count selected as “4”.
How to Set Product Button Height?
To set button height, go to Manage > Products > Menu List double click Menu, select related category and click on Edit Category link.
Give value to button height from Menu Properties section which is found in Property Editor.
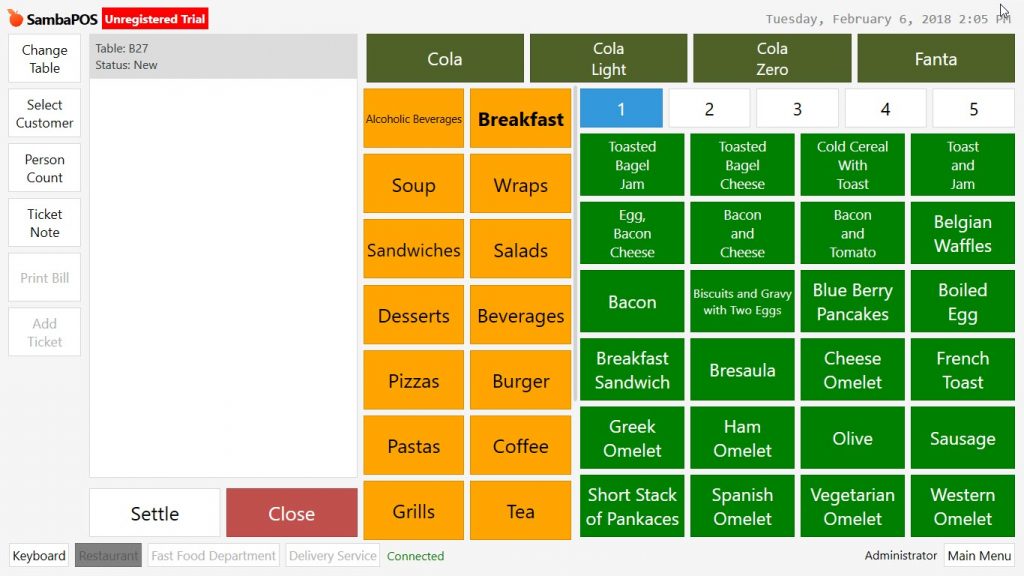
In the example 180 was given for button height value and from Numberpad Properties section Small was selected as numberpad type.
After completing the process first click on Ok and then Save button.
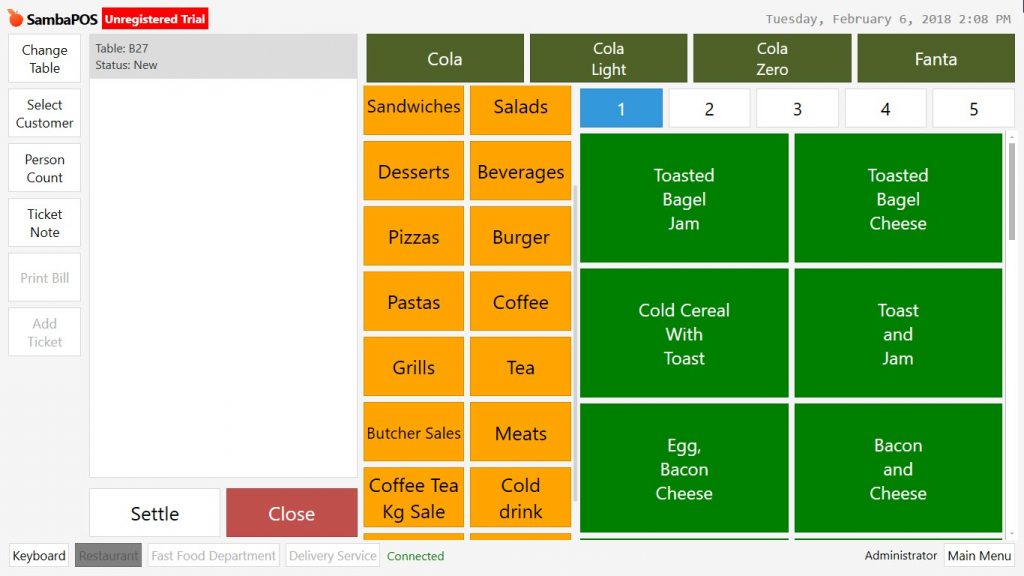
As it is seen in the example button heights increased and a sliding downward screen has occured. This screen can be scrolled down with finger just like on touchscreen devices.
After configuring button heights instead of scrolling down to select the products, it is possible to paginate them in the related category.
How to Paginate the Category Products?
To paginate the products, go to Manage > Products > Menu List double click on Menu and then open the related category, in here click on Edit Category link.
Give a value for Page Count field from Menu Properties which is found in Property Editor.
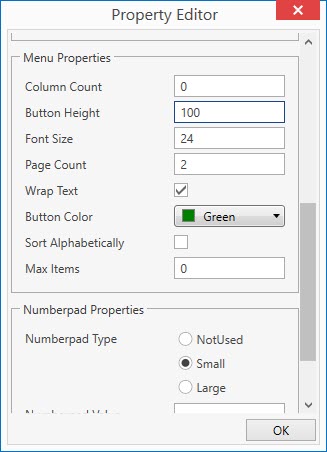
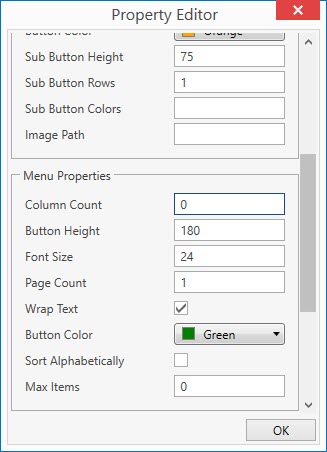
In the example, page count selected as “2”, button height selected as “100.”
After completing related process click on Ok and then Save button.
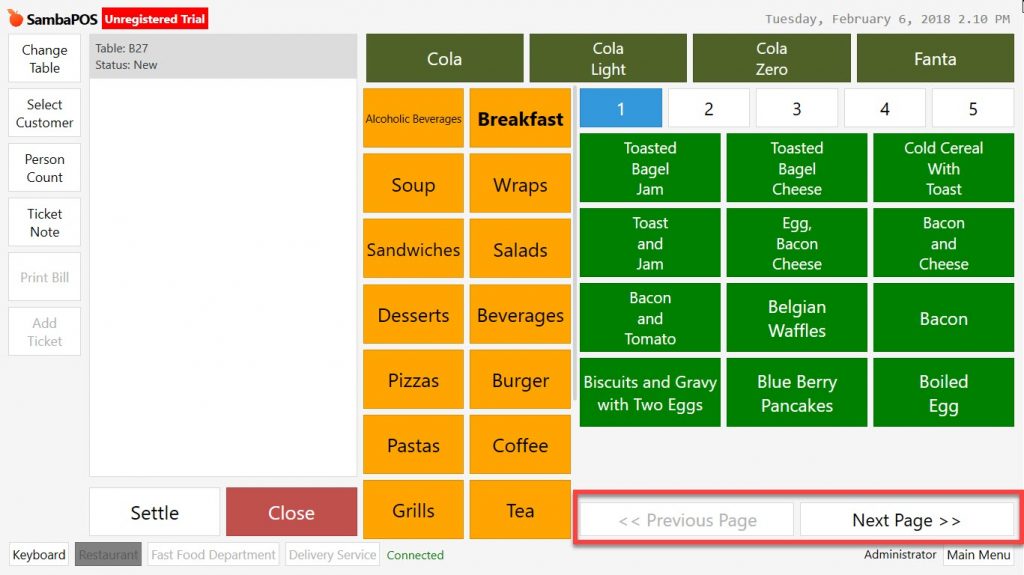
As it is seen in the example, pagination was added for product list that is found in related category.
How to Move All Products to Down Row and Use As 2 Rows by Wrap Text Feature?
To use this feature go to Manage > Products > Menu List double click on Menu in here click on Edit All Categories link.
In the window, find Wrap Text column by sliding right. Whichever wrap text box is selected, whole product names of that category will be divided into two pieces from the most proper point by SambaPOS.
In the example it is selected Wrap Text box for all the categories.
After configuring necessary editings, first click on Ok and then click on Save button.
So that SambaPOS will be showing as two rows the long named products which are found in selected categories.
How to Create Sub Category?
If there are sub category products for a category, it is possible to use the screen more effectively by collecting these products under that category.
In the example it will be shown how to create sub categories such as wines and cocktails for alcoholic beverages category. While Beers will be kept on the main screen separate sub categories will be created for wines and cocktails. As numberpad type Small is selected.
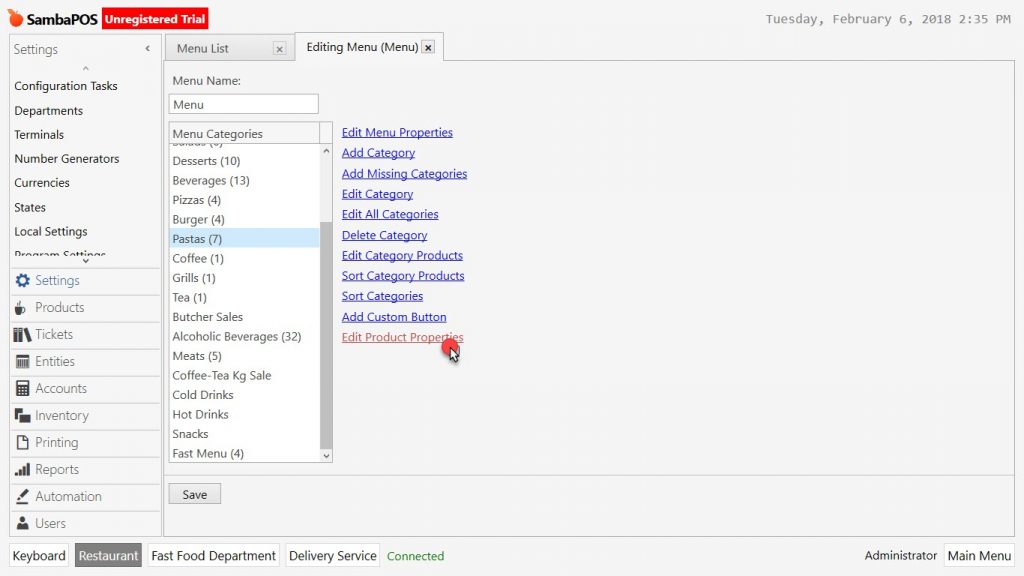
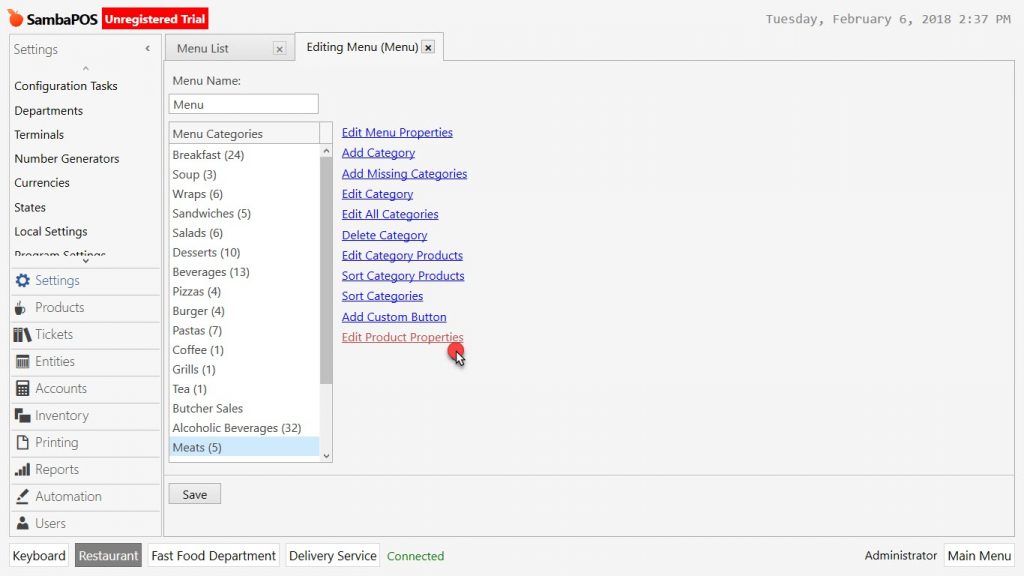
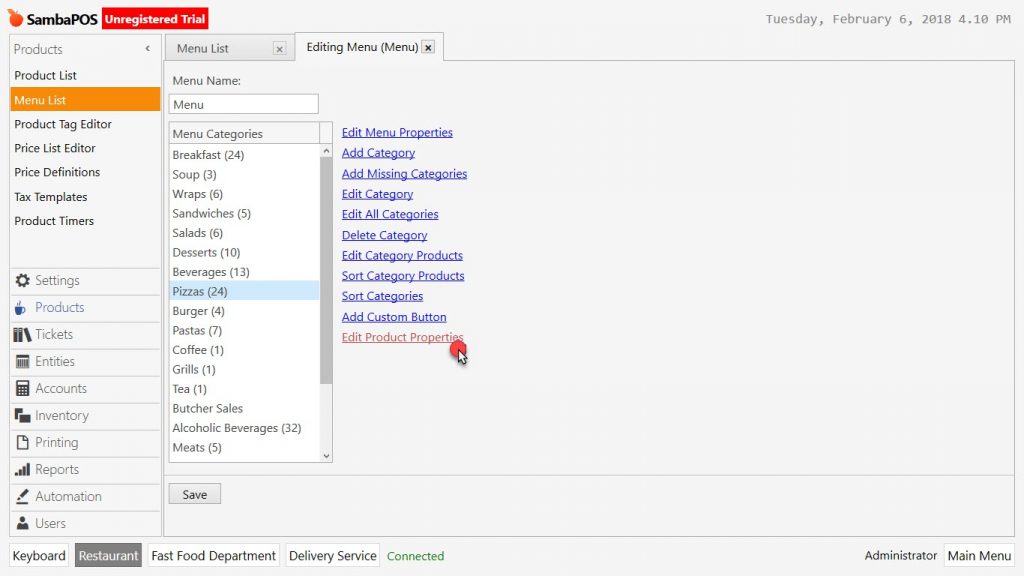
Go to Manage > Products > Menu List double click on Menu and then open the related category, in here click on Edit Product Properties link.
In the window slide to right and find Sub Menu Tags column. Type the names of sub categories into the row which including products.
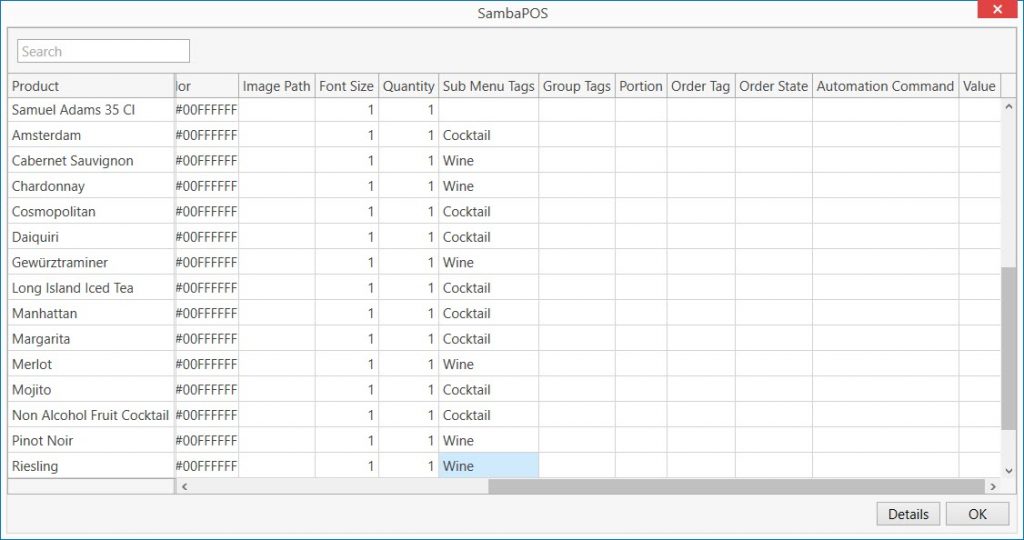
After configuring necessary editings, first click Ok and then Save button.
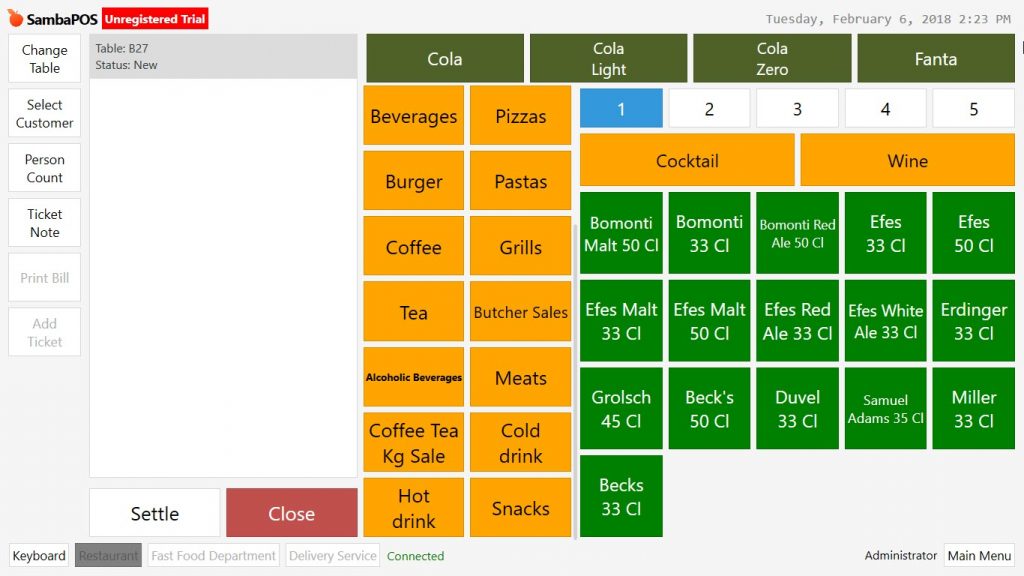
As it is seen in the example, when it is clicked on Alcoholic Beverages Category, beers will be shown on main category screen because of they weren’t put into a sub category. Sub Category Tags appeared as button on the screen, if clicked on them, it will be displaying the products which under these sub categories.

How to Set Sub Category Button Height?
To change sub category button height, go to Manage > Products > Menu List double click on Menu and then open the related category, in here click on Edit Category link.
Give value for Button Height field from Category Properties in the Property Editor window.
In the example, Button Height was shortened by giving 70 value.
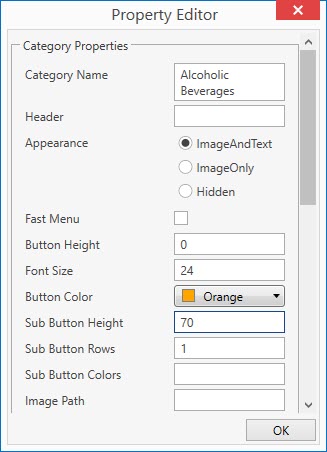
After configuring necessary editings, first click on Ok and then Save button.
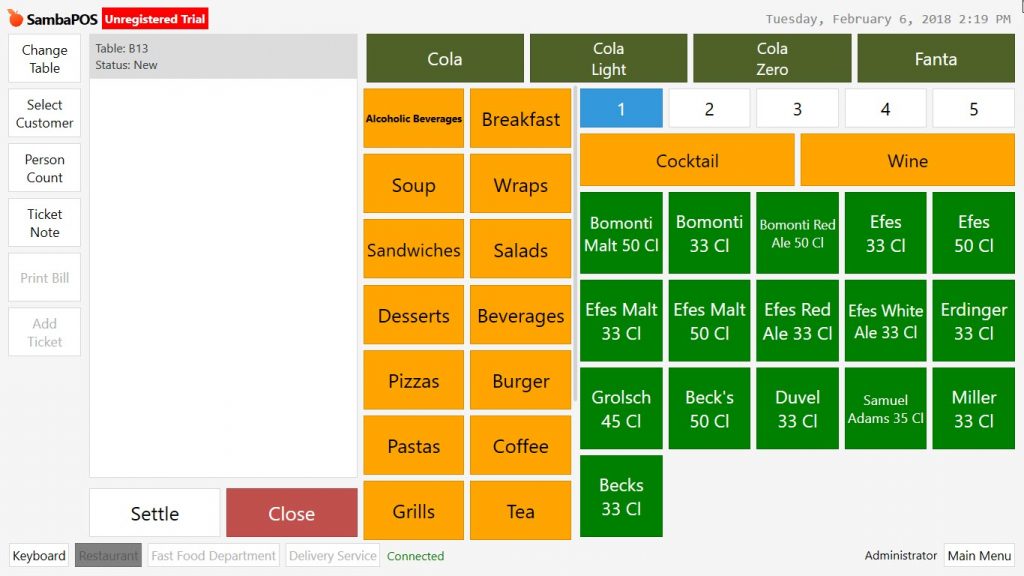
As it is seen in the example button height of Sub Category became shorter.
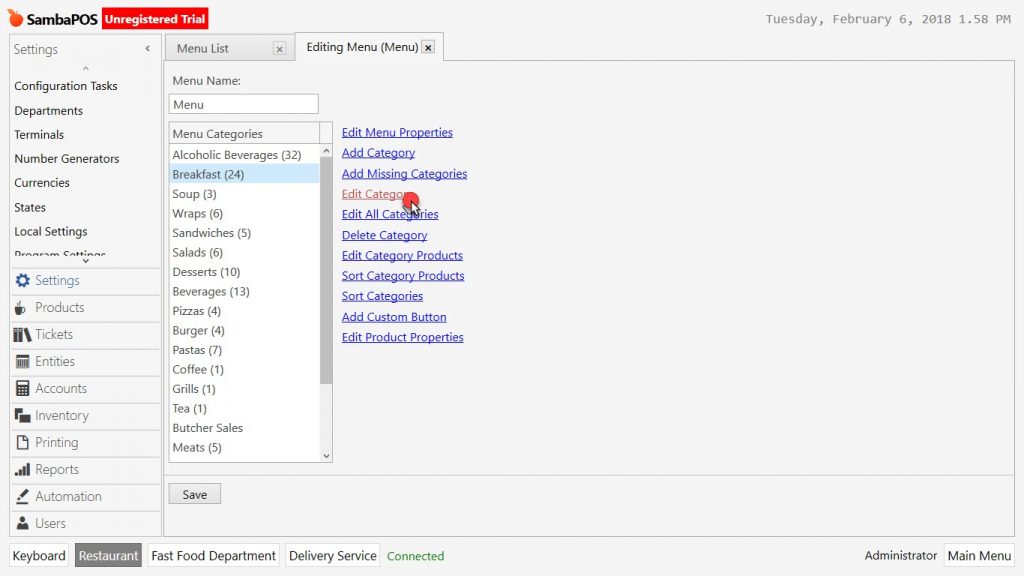
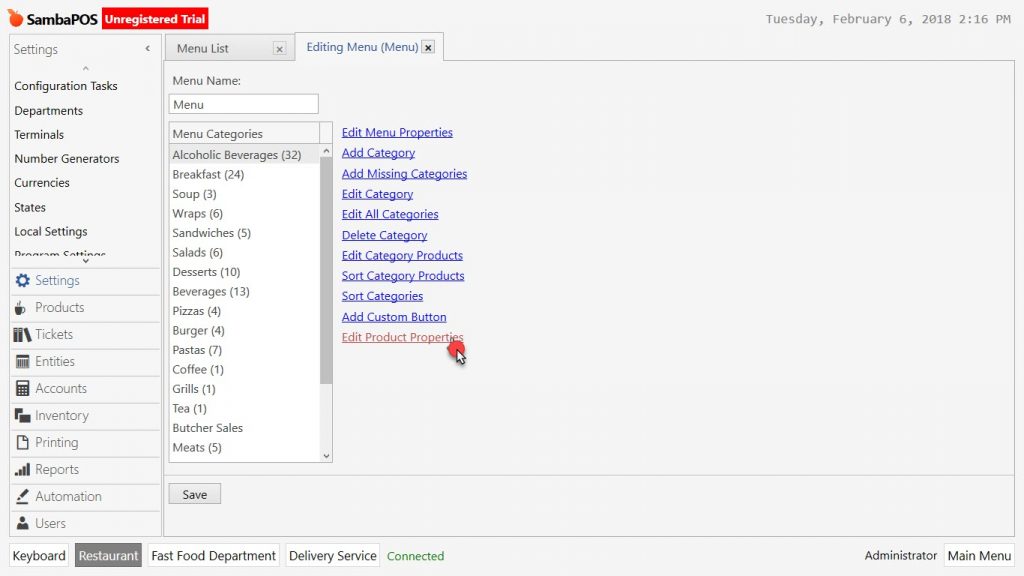
How to Sort Categories?
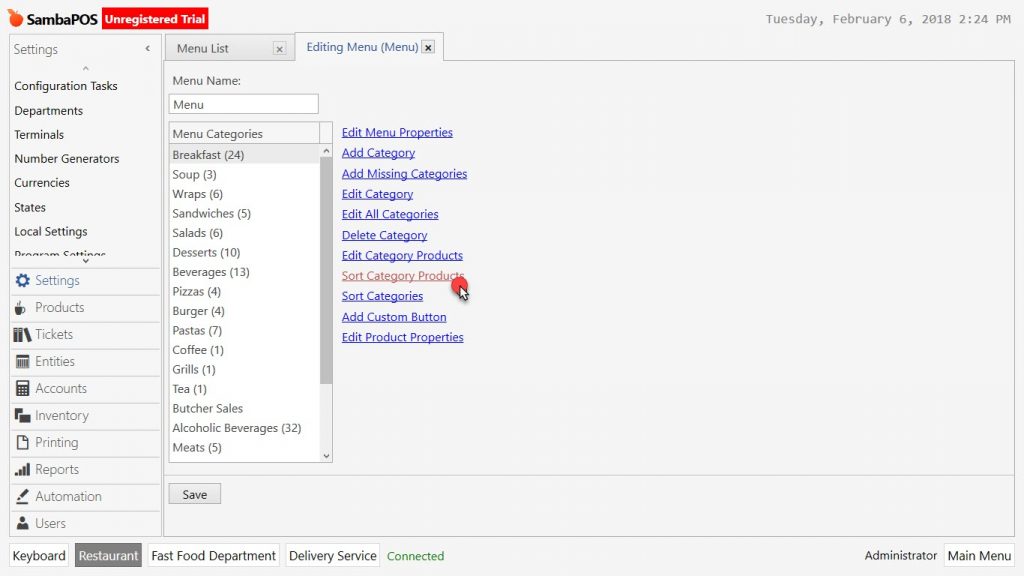
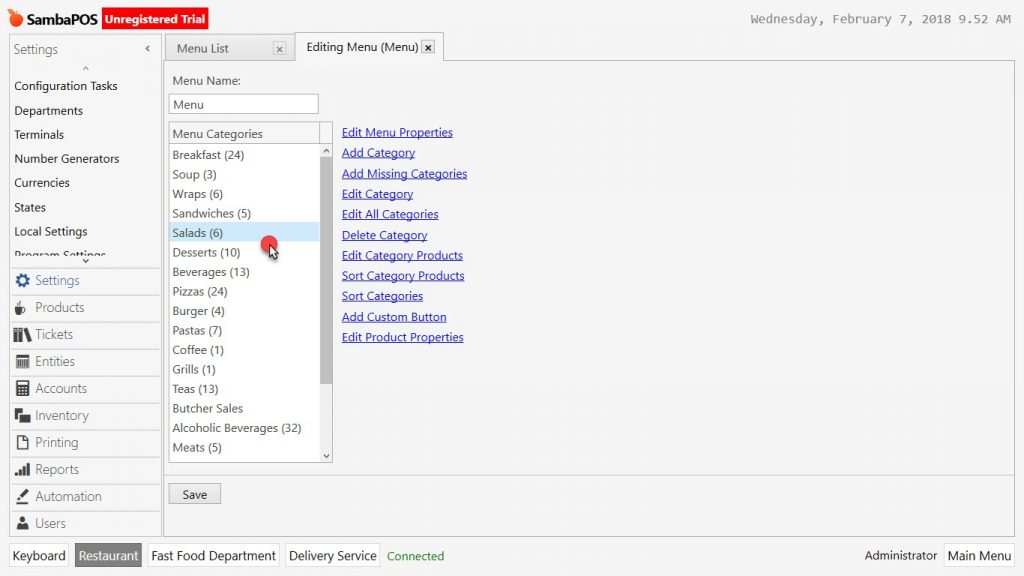
Go to Manage > Products > Menu List double click on Menu and then open the Editing Menu screen, in here click on Sort Categories link.

In the Sort Category window, select desired category and sort them by using drag and drop method.
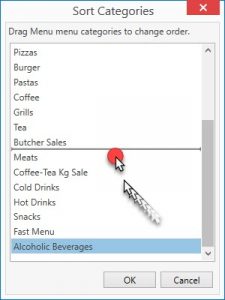
After completing the sorting process, first click on Ok and then Save button.
As it is seen in the example, category list appeared as desired.
How to Sort Products?
To sort products which under the categories, go to Manage > Products > Menu List double click on Menu and select related category, in here click on Sort Category Products link.
In the Sort Category Products window, select desired products and sort them by using drag and drop method.
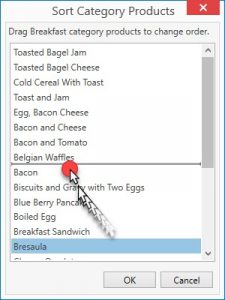
After completing sorting process first click on Ok and then Save button.
As it is seen in the example, the product list which in the category, appeared on screen as desired.
What is Auto Select Feature and in Which Cases It Should Be Used?
When receiving an order in SambaPOS, if a sub feature or portion will be selected for a product, first add this product to the ticket and then open sub feature or portion page by clicking on it through ticket.
In case of there is a selection required feature of the product which ordered, it is possible to add Auto Select feature to make the process faster.
How to Activate Auto Select?
To add Auto Select feature go to Manage > Products > Menu List double click on Menu and select related category, in here click on Edit Product Properties link.

In the window, find Auto Select column and select the boxes of products that desired to be auto selected. If you add these products to the ticket, sub feature or portion page will be opened automatically.
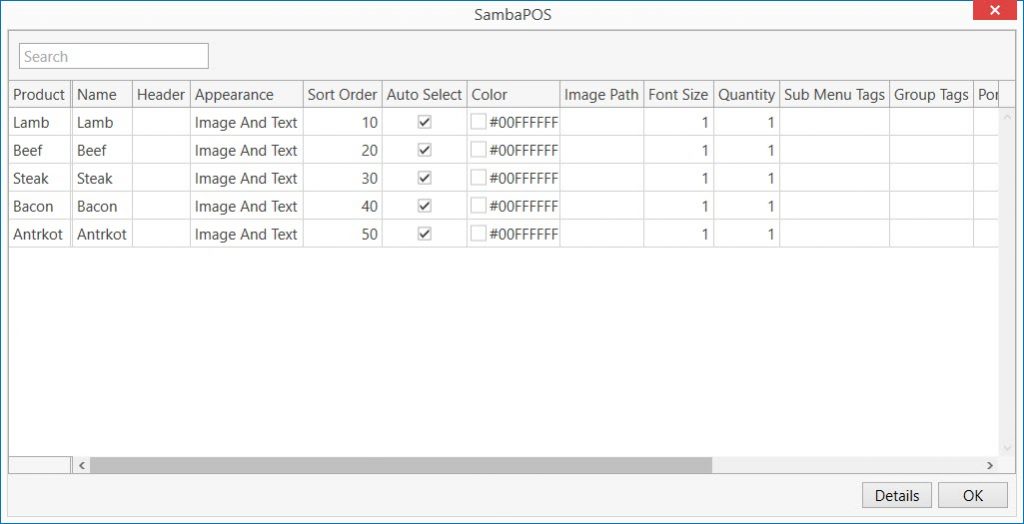
After completing selections first click on Ok and then Save button.
As it is seen in the example, when clicked on product feature, it opened automatically without clicking somewhere else.
How to Change Product Button Colors?
To change button color of a product, go to Manage > Products > Menu List double click on Menu and select related category, in here click on Edit Product Properties link.
In the window find Color column and make the selection for related product.
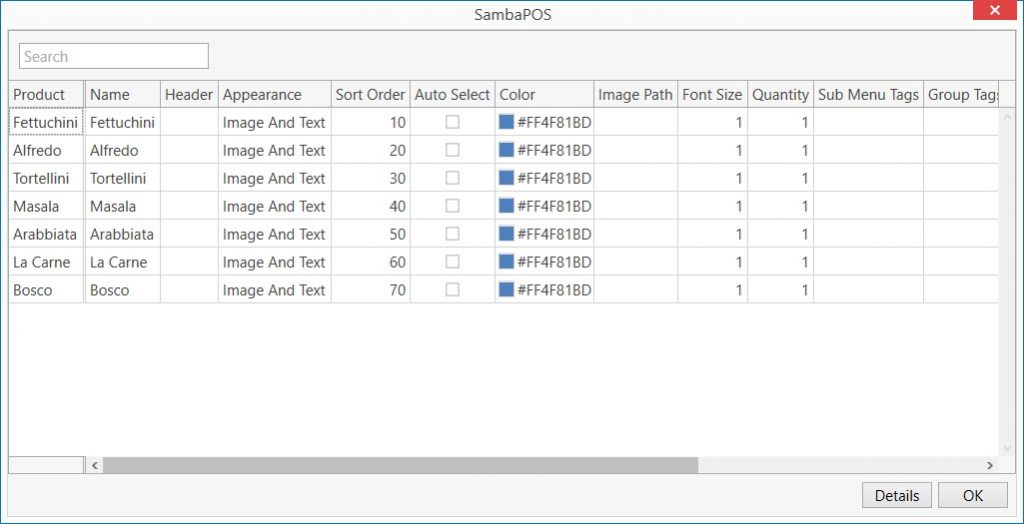
After completing color selection for product buttons first click on Ok and then Save button.
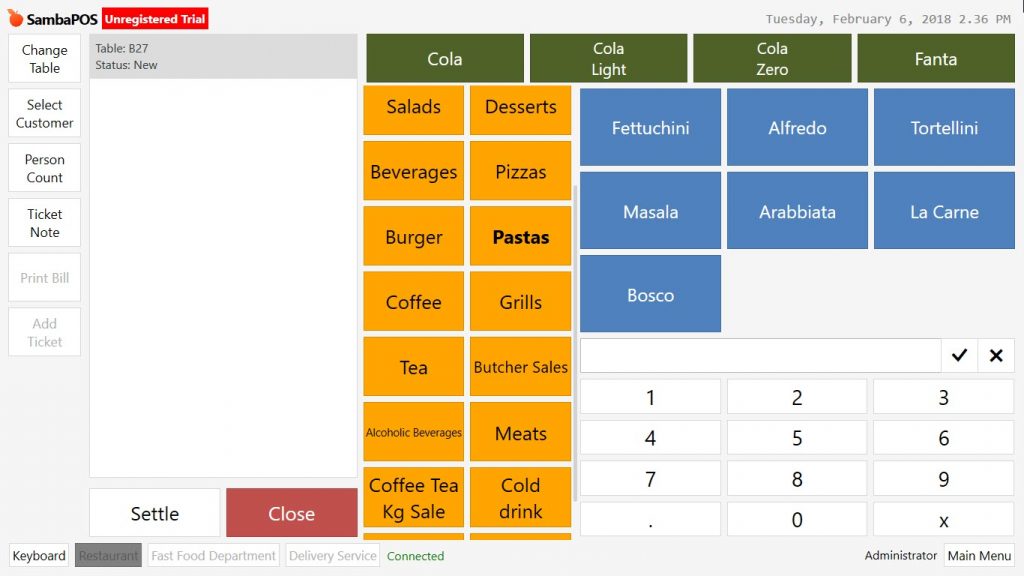
As it is seen in the example on POS screen when clicked on related category, the product button colors of that category will be appread as edited.
How to Add Image to Products?
To add image go to Manage > Products > Menu List double click on Menu and select related category, in here click on Edit Product Properties link.
In the window find the image path. Click on Image Path of related product row and add images from computer.
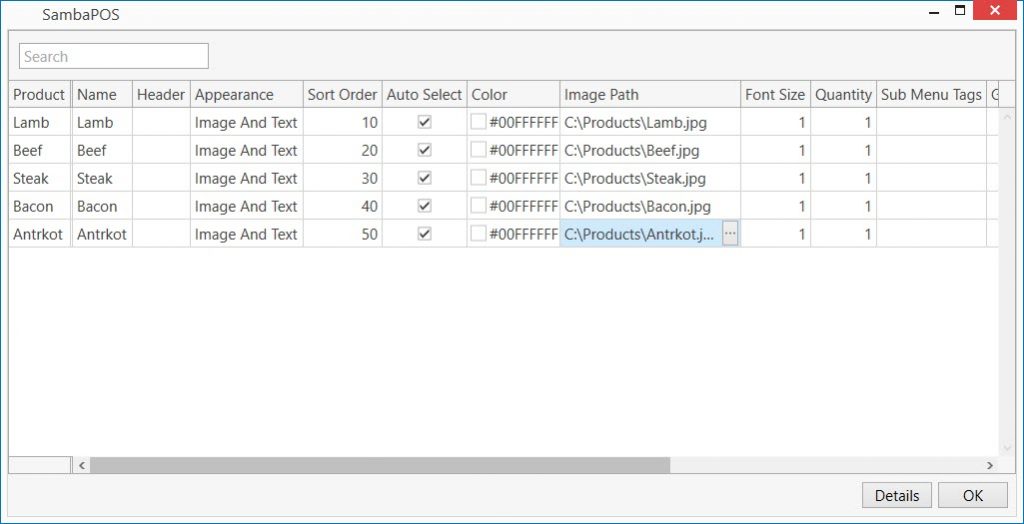
After adding images, first click on Ok and then Save button. In the example when it is clicked on related category products will be displayed with their pictures.
How to Automatically Add Order Tag to Product?
It is possible to add order tags to products for reminding ingredients of products to kitchen, to make them seen those details on kitchen receipt and on the ticket.
Go to Manage > Tickets > Order Tags menu and create an order tag for 4 Species Cheese pizza.
To add order tags to products go to Manage > Products > Menu List double click on Menu and select related category, in here click on Edit Product Properties link.
In the window write the desired features for product to be selected automatically when clicked on the product. Those features have to be written separating by comma and identically same way with previously created order tag names.
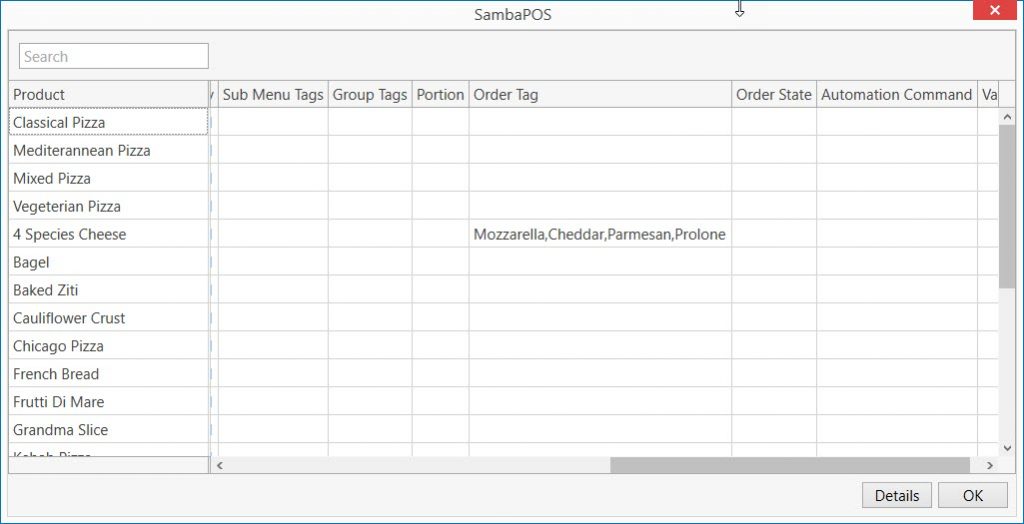
After completing necessary editings, first click on Ok and then Save button.
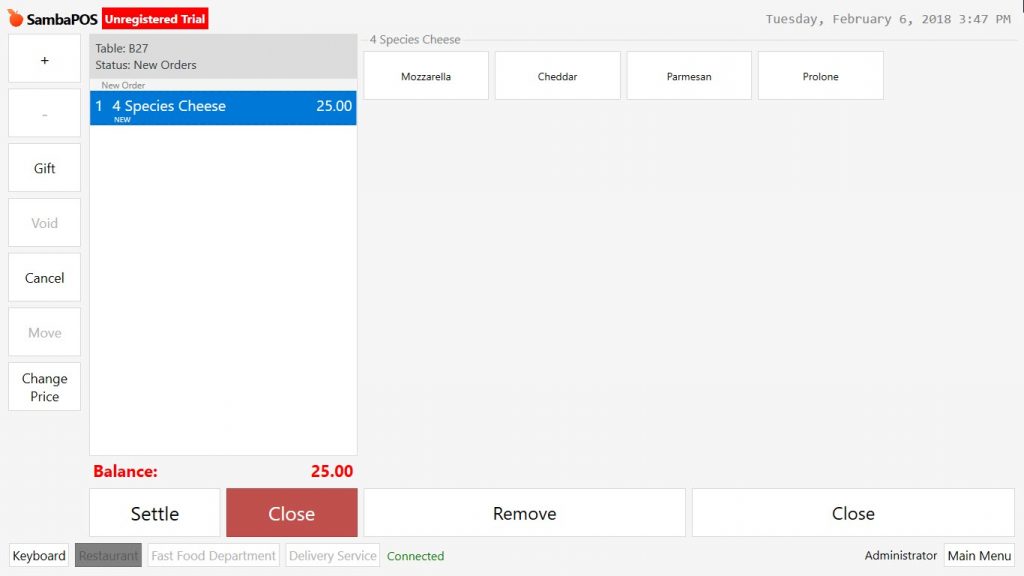
So that when clicked on related product, created order tags will be automatically seen on the ticket.
How to Add Gift Tea in the Menu?
If desired, it is possible to associate automation commands to product buttons in the menu. So that a task can be done automatically just by clicking on product.
In the example a new Gift Tea product will be created by associating an automation command.
Manage > Products > Menu List double click on Menu and select related category.
Tea product can’t be seen in product list because of it was already added into selected product list.
Right click of mouse on product list and select Display All Values feature.
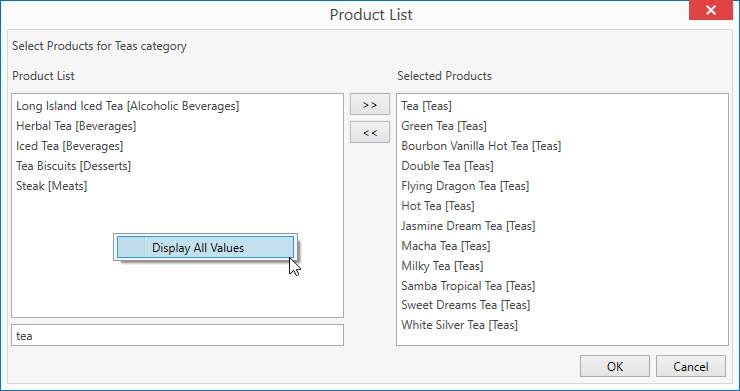
When clicked on Display All Values button, tea product will be visible again in the product list field. Double click on Tea product, move it to selected products and click on Ok button.

After completing this process select related category and click on Edit Product Properties link. In the window Tea is second added product at the bottom row.
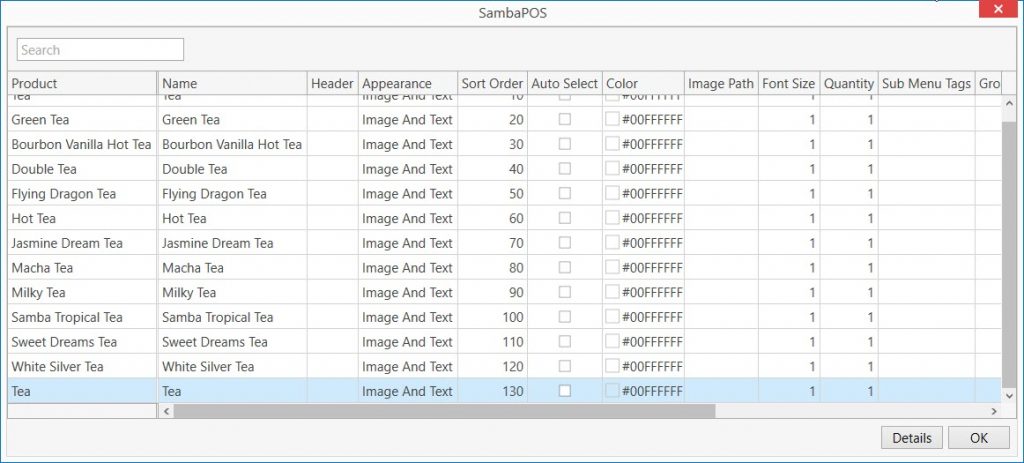
Write Gift Tea as header for this row and change the button color in order to differentiate this product from other.

How to Run Automation Command on Product Button?
In the same window find automation column write Gift command which is a predefined automation command in SambaPOS. First click on Ok and then Save button.
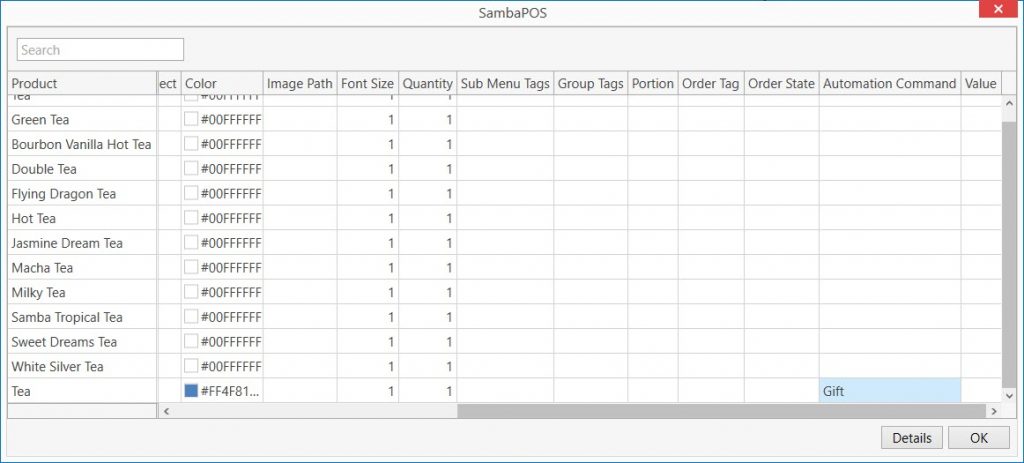
As it is seen in the example, Gift Tea product was added to screen with a different button color. If clicked on tea product, it will be added to ticket with its price. But when it is clicked on Gift Tea product, it shows gift as order tag, althought its price will be seen on the ticket it doesn’t change the ticket total.
How to Get Product Portion as Button?
To create different button for portions go to Manage > Products > Menu List double click on Menu and select related category. In the example it will be shown how to create portion buttons for salads.
Salads can’t be seen in product list because of they were already added into selected product list.
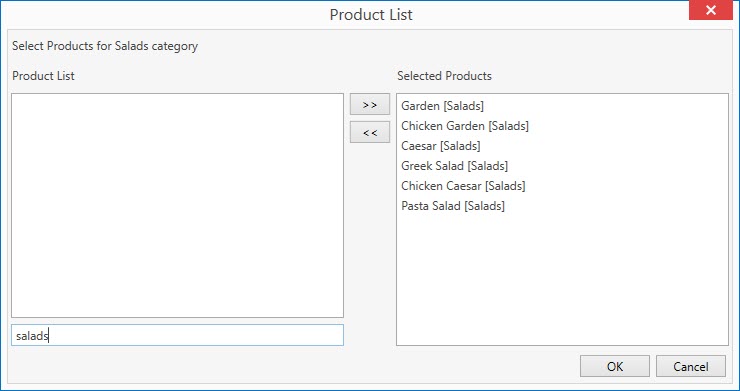
Right click of mouse and select Display All Values feature.
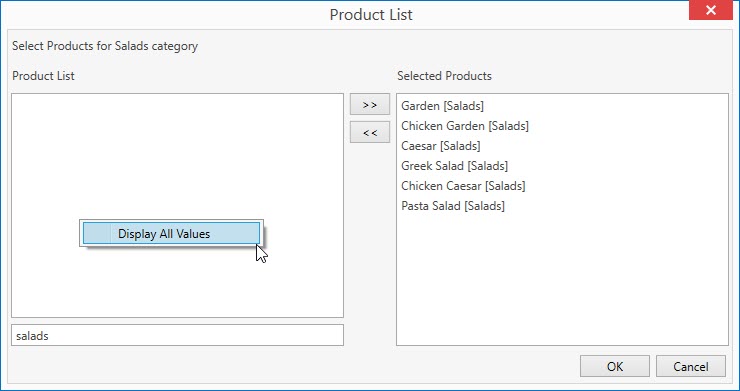
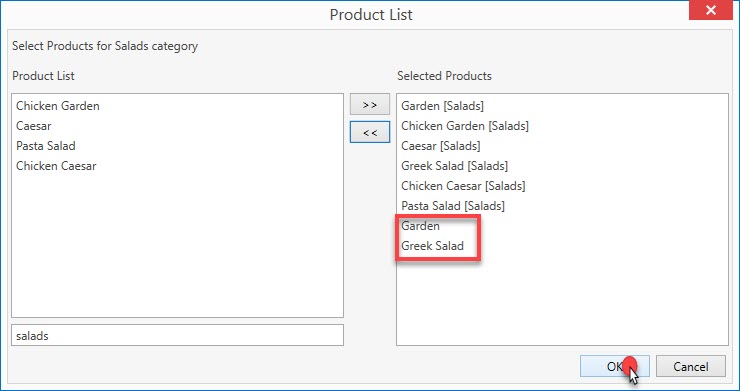
When clicked on Display All Values button, salads will be visible again on the product list field. Double click on related products and move them into selected products field second time and then click Ok button.
After completing this process select related category and click on Edit Product Properties link. In the window added products can be seen at the bottom row.
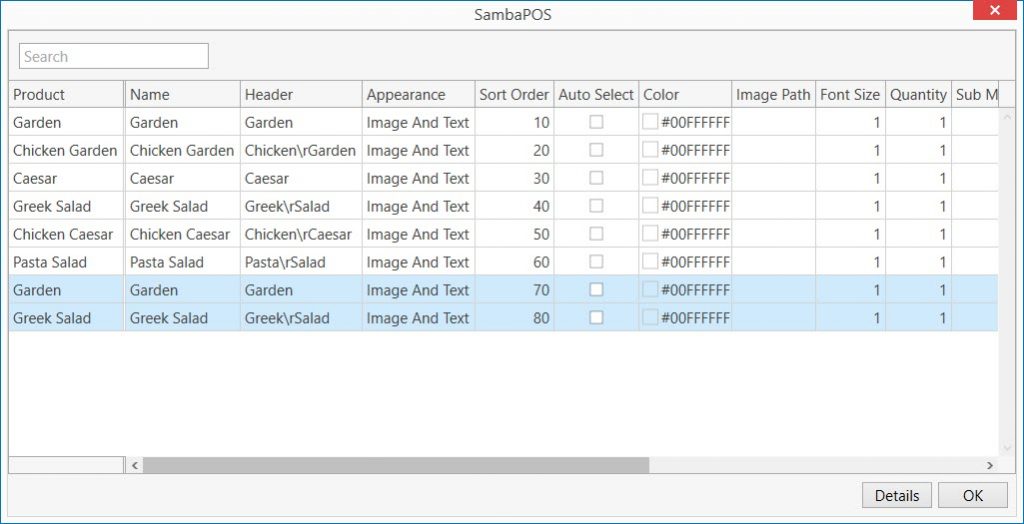
Write portion names as header for product row and change the button color in order to differentiate this product from other.
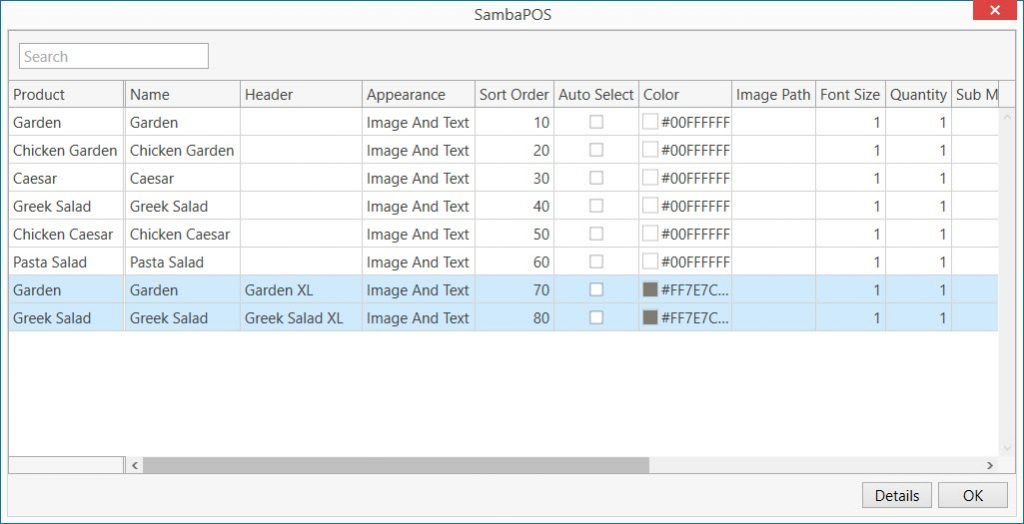
In the same window find portion column and write the portion name which is predefined in SambaPOS. This process indicates which portion will be selected automatically when it is clicked on the new button.
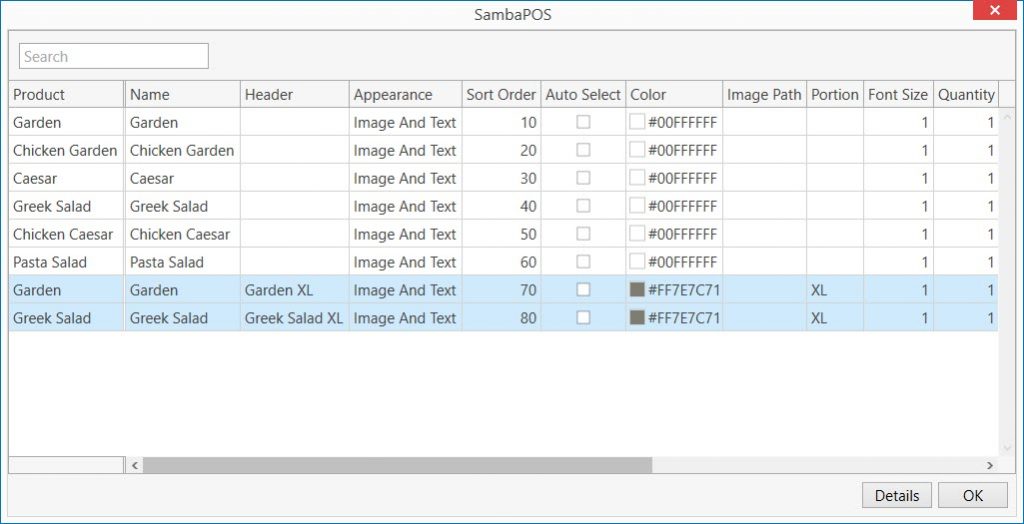
After completing necessary editings first click on Ok and then Save button.
As it is seen in the example, new products were added with their portion names and different button colors.
How to Find Products Faster from Menu by Using Keyboard?
In SambaPOS the way of adding product into a menu is selecting it from related category and clicking on it.
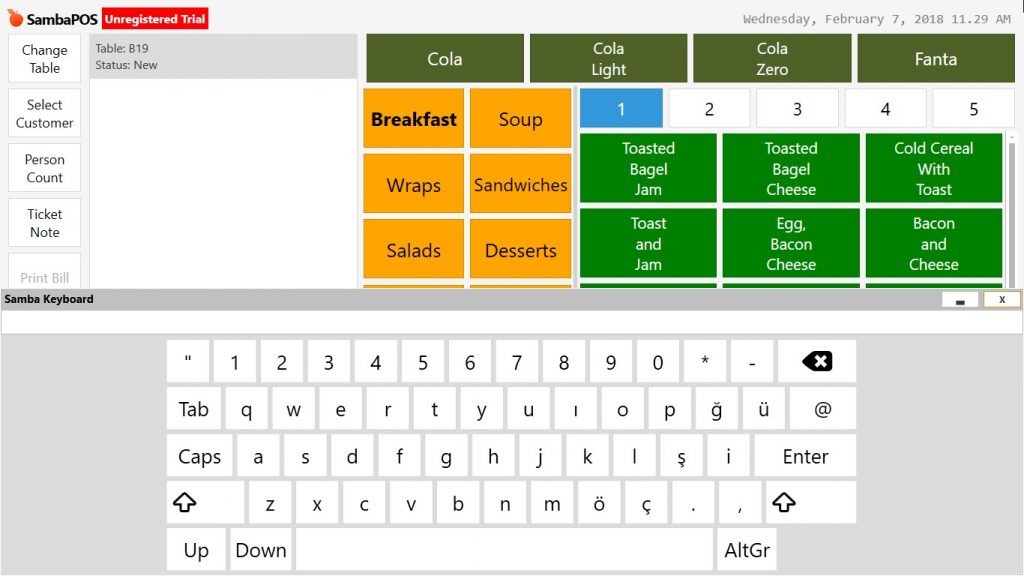
In case of there are too many products, use keyboard to search them. For this, from bottom left corner use the screen keyboard or use computer keyboard.
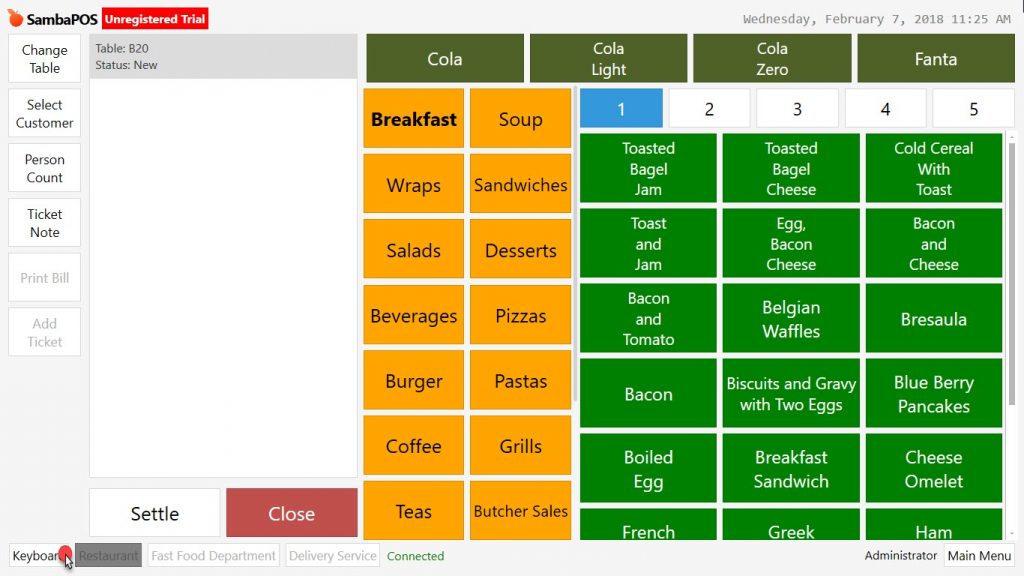
Find the products by writing their name, any word that exists in products or first letters of long named products. You can do this on whichever screen you are.
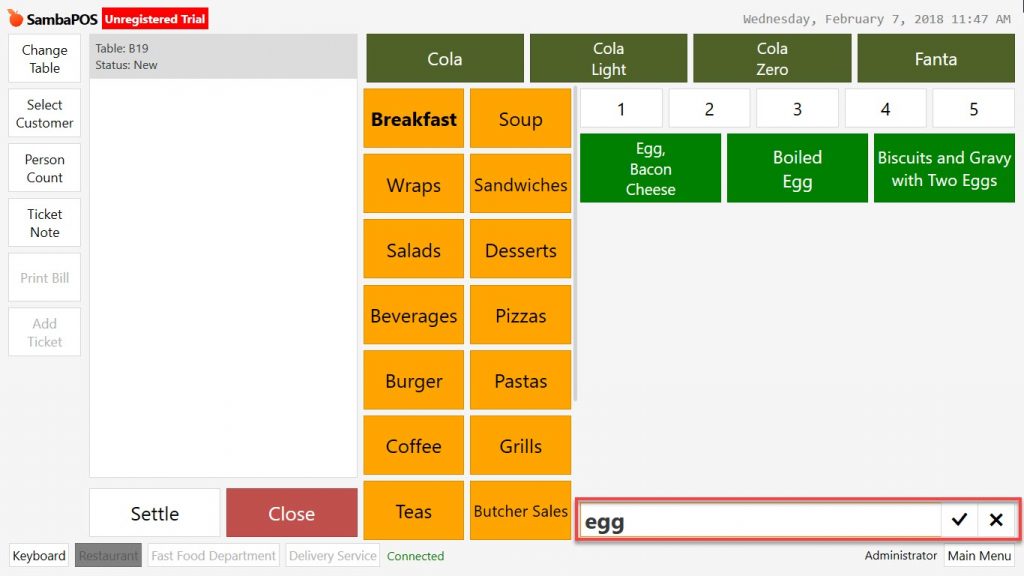
In the example;
- If you write name of a product by keyboard, all of other products which including that word will be shown.
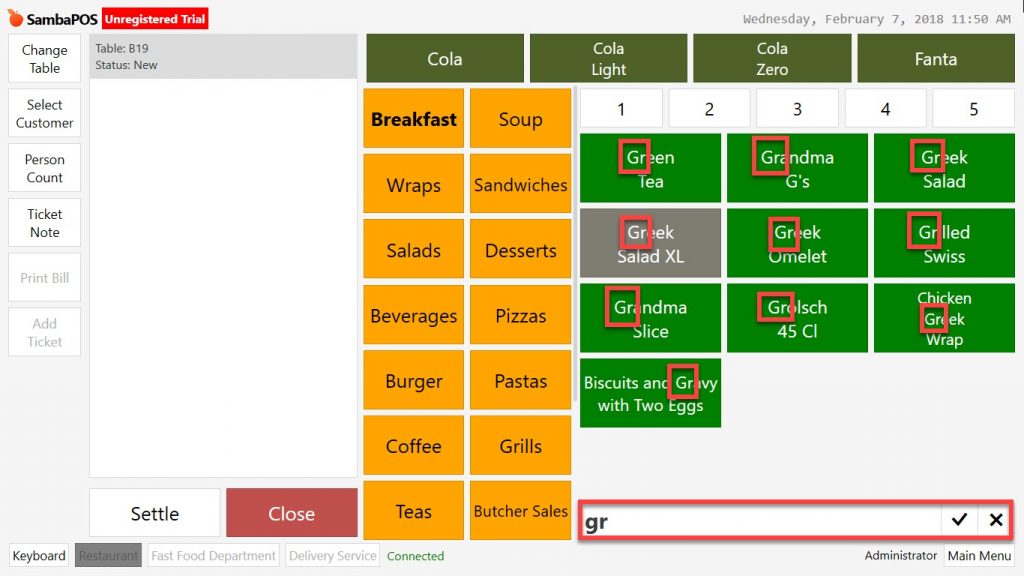
- If you write any letters from a product’s name, all of other products which including these letters will be shown on the screen.
- If you write first letters of a long named product, this product will be shown on the screen.
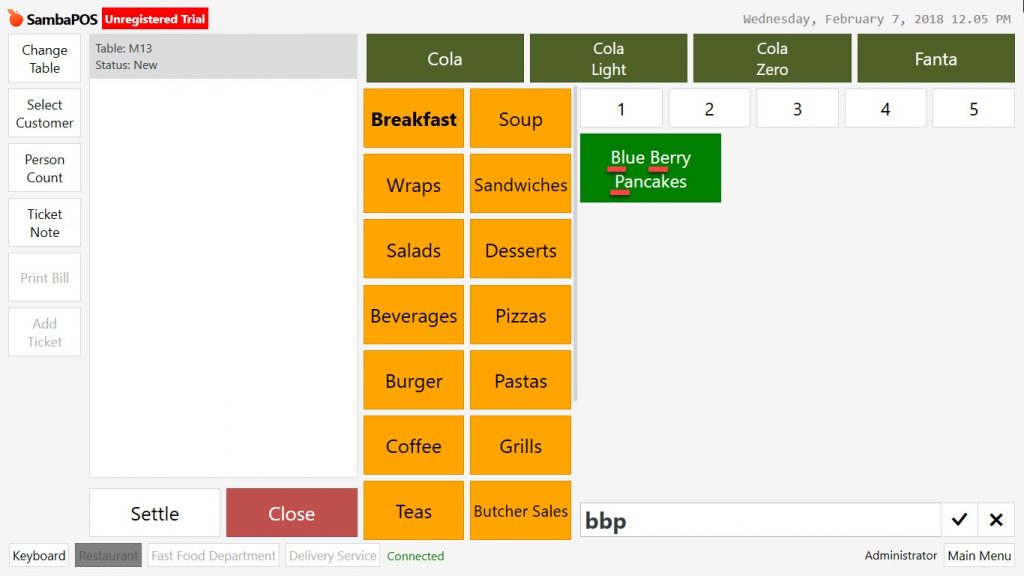
Add selected product into ticket after finding it by searching from keyboard.