10.2. How to Use SambaPOS Neptune?
This document will help with the answers of below qestions.
- How to add products to Neptune?
- How to add products to the Neptune Menu?
- How to add inventory in Neptune?
- How to add inventory semi product in Neptune?
- How to create order tags in Neptune?
- How to add a recipe in Neptune?
- How to add branches in Neptune?
- Sync on Neptune
- How to place an order on Neptune?
In this document, we will use a pizza Show as an example to explain Neptune. Our pizza shop has 4 pizzas, 4 menus, 5 drinks and 3 desserts. The content of our menus will be 1 pizza, 1 drink and 1 dessert. First, let’s add the products we will sell in the menu list.
1) How to Add Products to Neptune?
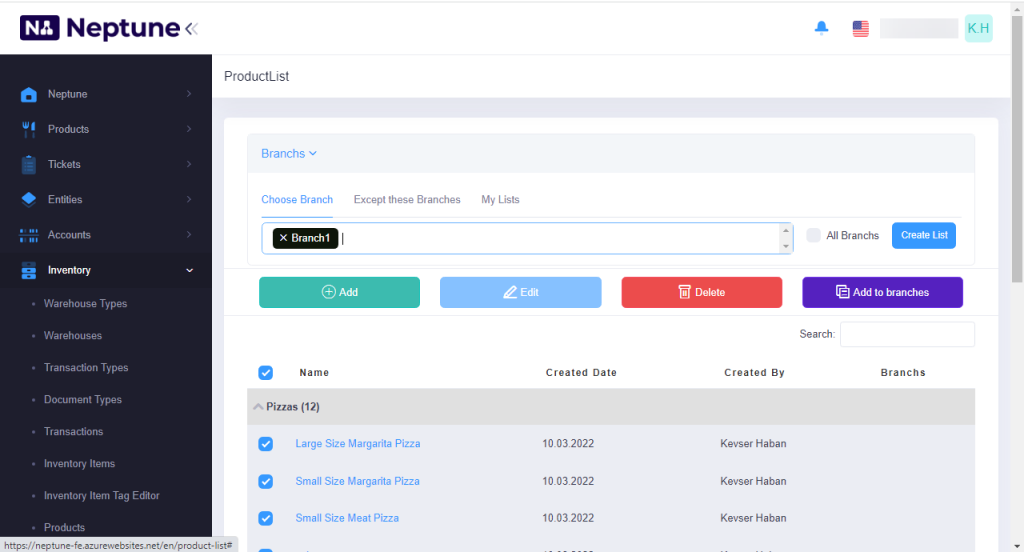
Manage Panel > Products > Product List
To add a product, click on the Products > Product List > Add button.
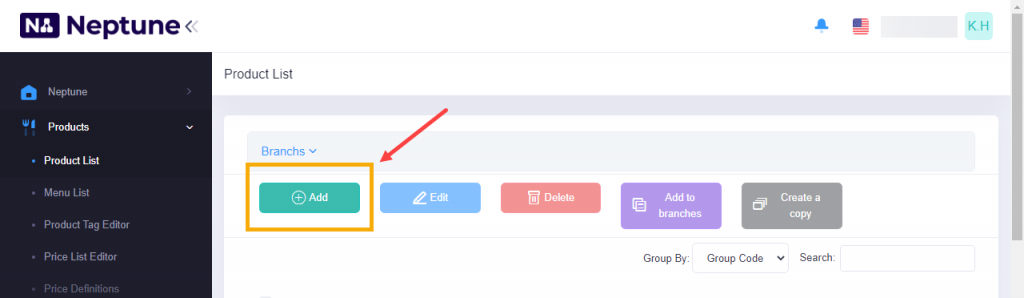
In the screen that is on the right hand side, enter the product information.
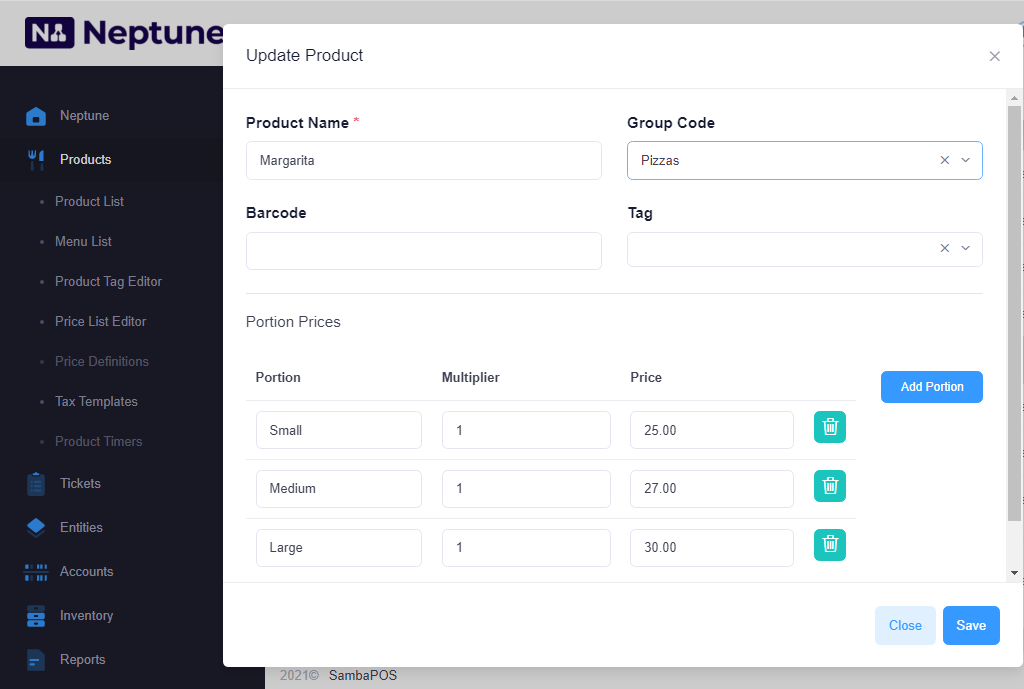
Product Name: Enter the name of the product.
Group Code: In which product group the product will be sold, the name is written manually first. For the second product, the system will automatically display the group code.
If the product has a barcode or label, it is entered.
Portion: Enter the pricing of the product according to the portions. A new portion is entered by clicking “Add Portion”.
After adding the product, click on Save button.
2) How to Add Products to the Neptune Menu?
After adding the products we will sell, we need to add them to the menu list.
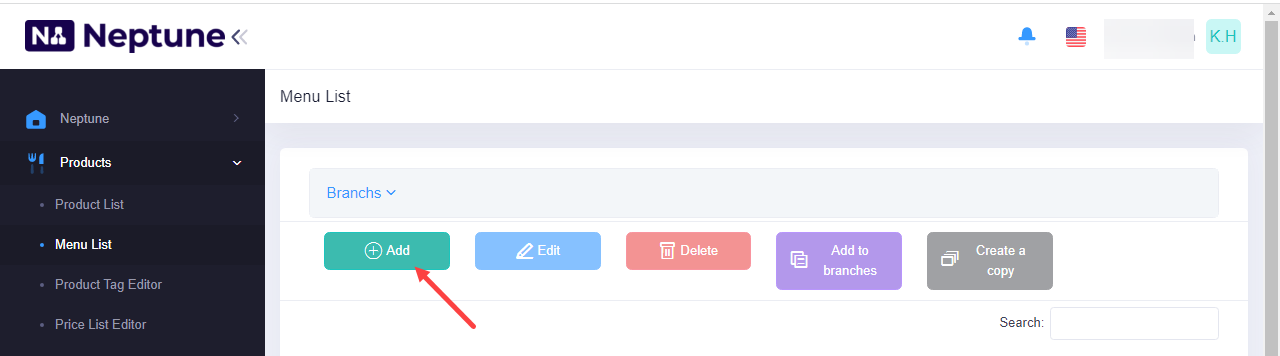
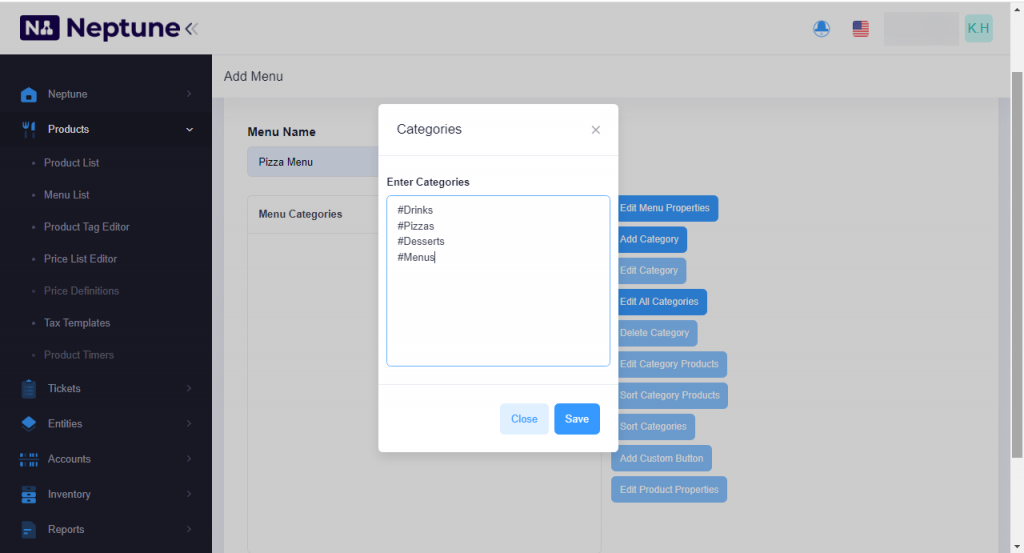
Management Panel > Products > Menu List
We can create the menu by clicking on Add button.
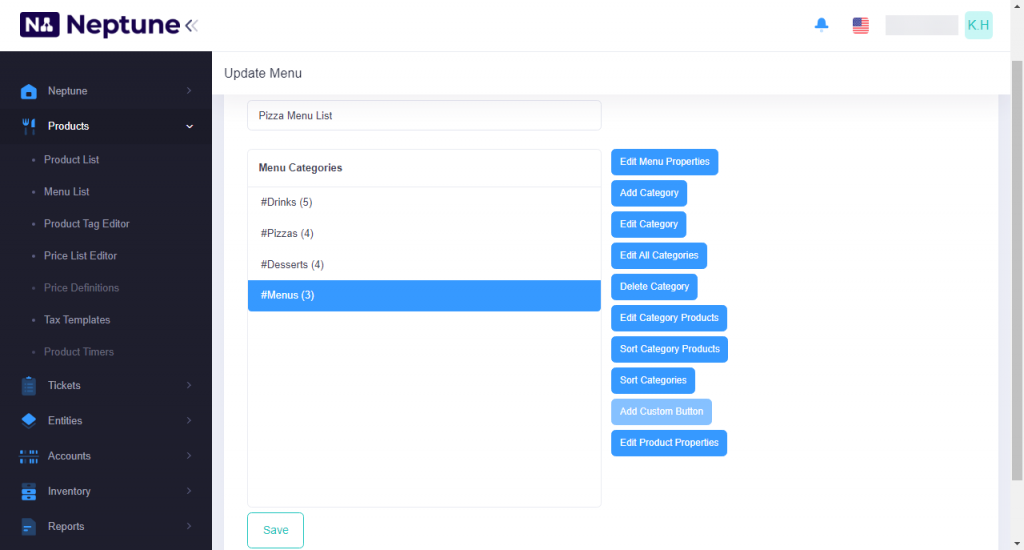
The menu name is written. Category names are entered with # by clicking the Add Category button. After completing the necessary editings click on the Save button.
Click “Edit Category Products” to add products to the categories. Related products for categories are selected from the left part. As an example, let’s select the products for the drinks category.
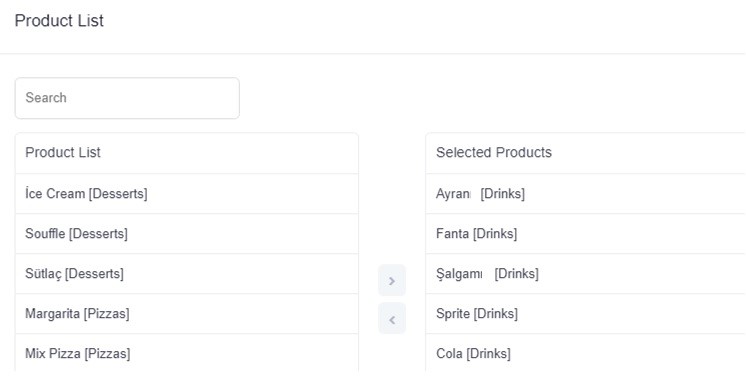
After the products are taken to the right side, click on the Save button.
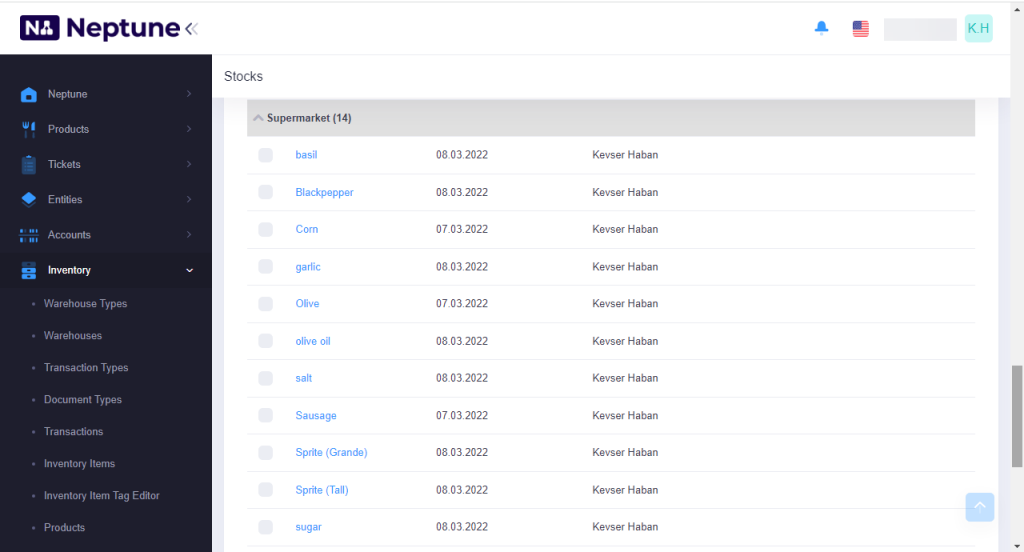
3) How to Add Inventory in Neptune?
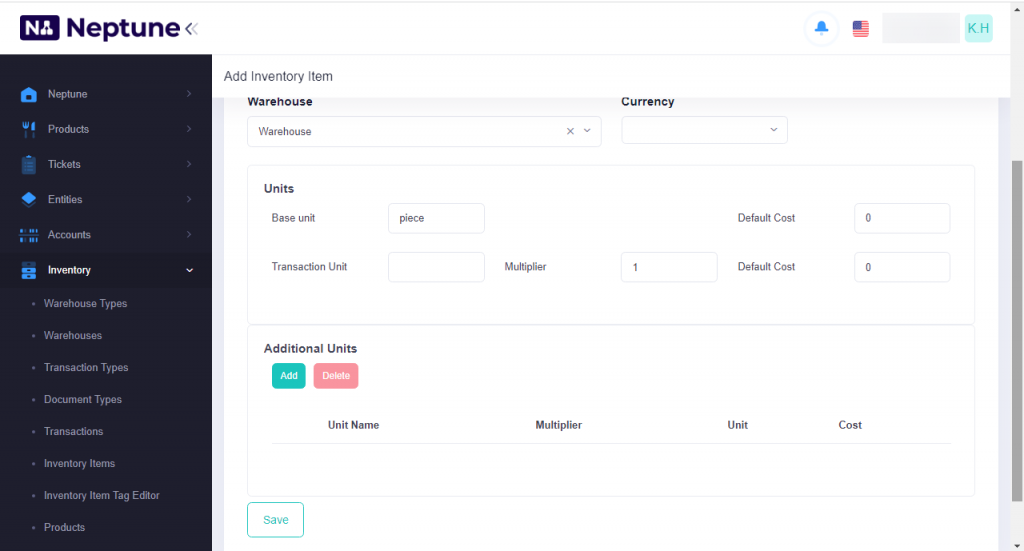
Management Panel > Inventory > Inventory Items
Inventory represents what ingredients we store in order to be able to sell the items on the menu. The materials we store are divided into two in the inventory.
If I buy and sell any product ready-made (for example, coke), I need to add that product to inventory.
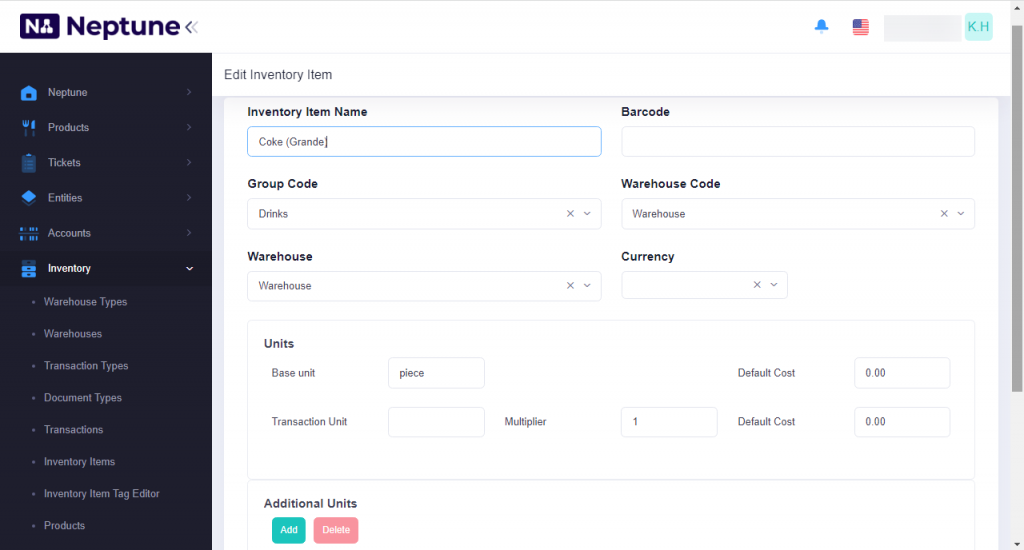
Adding Inventory Items
Inventory Item Name: Write the name of the inventory item that will be added.
Example Inventory Item Name;
- Tomato
- Calf Steak
- Coca Cola 330 ml Can
Group Name:
The field to determine that created inventory item will be placed into which group for both listing and reporting process. If there is no desired group code as default, create a new group according to need.
Group Code Example:
- Greengrocer
- Butcher Products
- Beverages
Warehouses:
If there are different warehouses, then create a new warehouse from Manage > Inventory > Warehouses > Add Warehouse link.
If different warehouses will not be used, then use default warehouse that comes in SambaPOS setup.
Units:
Base Unit:
The unit that will be working in recipes and all other processes of inventory item. When adding recipes it is necessary to use base unit.
Base Unit – Default Cost: Possible default cost of base unit. For example if it is necessary to pay transportation cost for each kg of tomato then it should be written into here.
Product Name and Base Unit
- Tomato / Gram
- Calf Steak / Gram
- Coca Cola 330 ml Can / Quantity
- Draft Beer / Cl
Transaction Unite:
It is the main unit which used on invoice.
Multiplier:
It is the quantity in base unit. For example if tomato paste is used by grams in recipes and purchased as 1 kg cans then it should be like this, multiplier base unit; gram, transaction unit; kg, multiplier; 1000.
At the same time, I can prepare and sell a product myself, then I need to buy some ingredients to prepare this product (For example: sausage, olive, corn and dough ingredients are needed for pizza.). We also enter these products to inventory in the same way.
In short, if we are going to buy that product from a supplier and sell it on our own menu or if we are going to prepare it ourselves, we need to purchase the necessary materials for preparation from a supplier.
*The inventories of all beverages, pizza ingredients, pizza dough ingredients, tomato sauce ingredients, desserts required to sell the products in the menu list should be added.
4) How to Add Inventory Semi Product in Neptune?
We also said that we can buy and sell a product, as well as prepare it in advance. The products that we prepare beforehand in SambaPOS are called inventory semi products. If we use the unit name as “piece” for the inventory semi product, it will help us when preparing a recipe later. Because we use one “piece” of thin small size dough for one thin small size pizza.
*As we enter all the inventories, we also create the inventory semi products that we have prepared beforehand by entering the unit of “piece”. (Management Panel > Inventory > Products > Add)
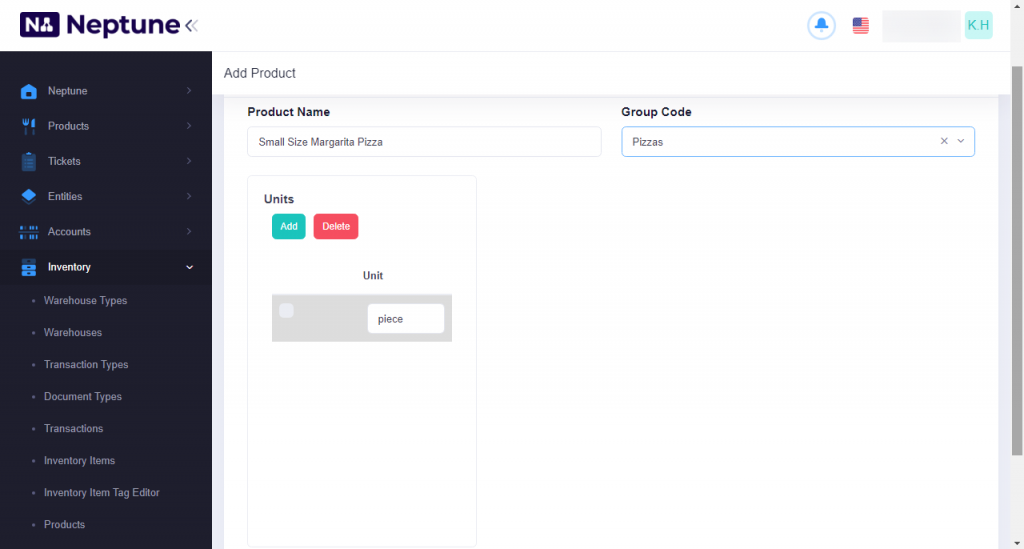
Product Name: Field to write the name of product.
Group Code: It makes possible to separate the products on the reportings. Select an existing group or create according to need.
Unit: It is necessary to produce the same product in different amounts and with different ingredients. Such as for pizza unit should be determined to create different recipes for different sized doughs.
*** Inventory semi product should not be confused with the products in the menu list. Menu products are the products that we sell in the business and that customers can see on the menu, while inventory semi products are the products that we prepare ourselves from the products on the menu.
***We should not confuse the concepts of inventory and inventroy semi product in the same way. Inventory represents what ingredients we store in order to be able to sell the items on the menu. Inventory, which is the subtitle of the inventory, represents all the materials we buy from the supplier for the products we will sell on the menu.
5) How to Create Order Tags in Neptune?
Management Panel > Tickets > Order Tags > Add
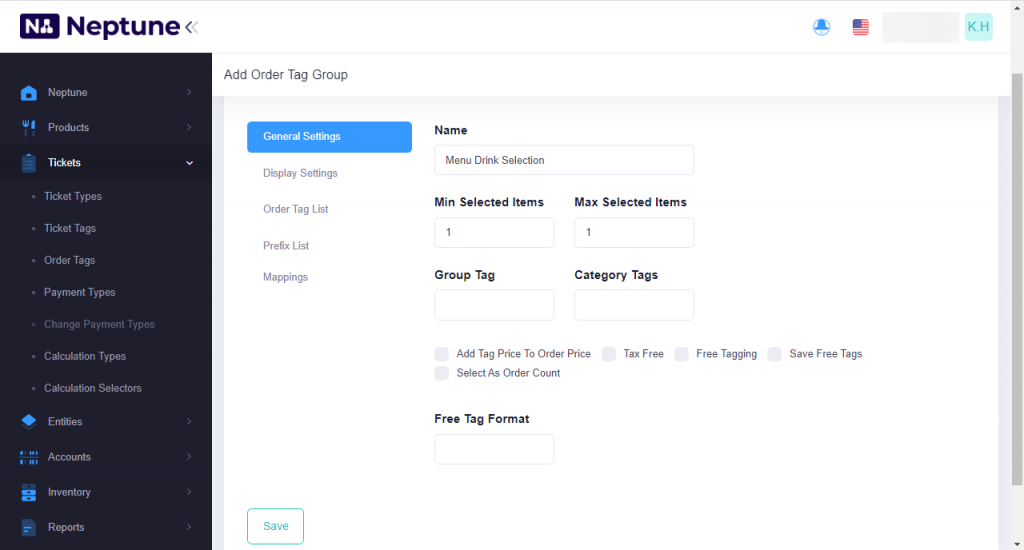
Before moving on to the recipes, let’s create the order tags for the pizza thicknesses we entered in the inventory. We have two options, thin and thick. By tagging them to the products, we not only make it easier for the waiters to take orders, but also make it easier for the kitchen department to understand the order, and we can also track how much the products are deducted from the warehouse.
There are a few points we need to pay attention to when creating order tags. One of them is selection numbers. I need to use one dough option, for this, by typing 1 in the minimum and maximum selection boxes, I both make the dough option mandatory and make the order more understandable. Otherwise, it can cause confusion in the kitchen part.
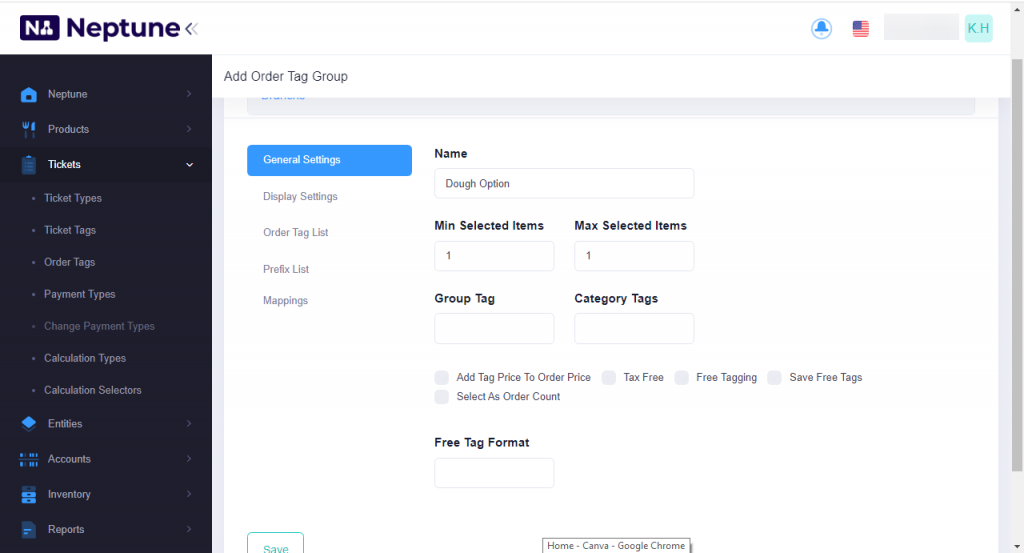
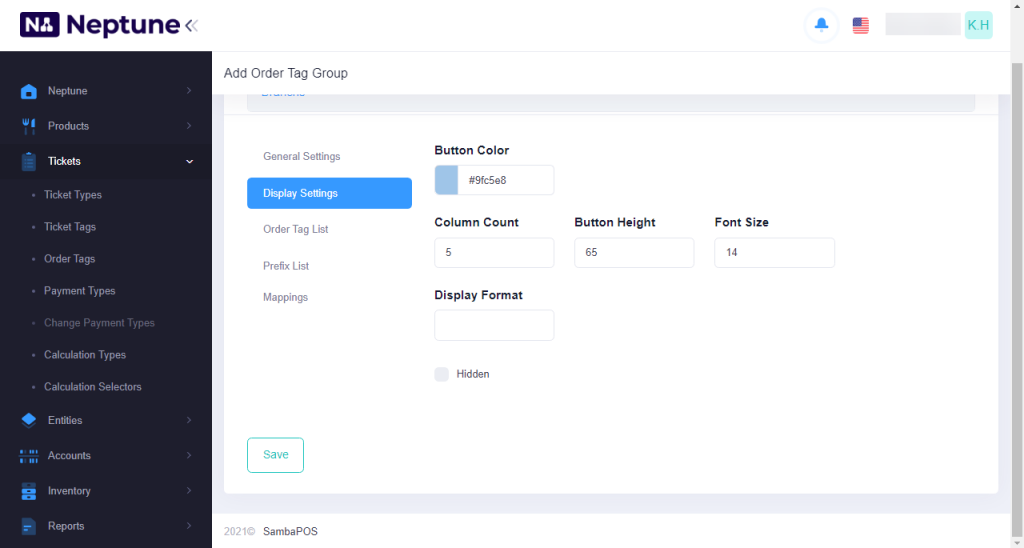
The other thing we need to pay attention to is to take care of coloring. This makes it easier for waiters to take orders. You can make any selection from the button color in the display settings section.
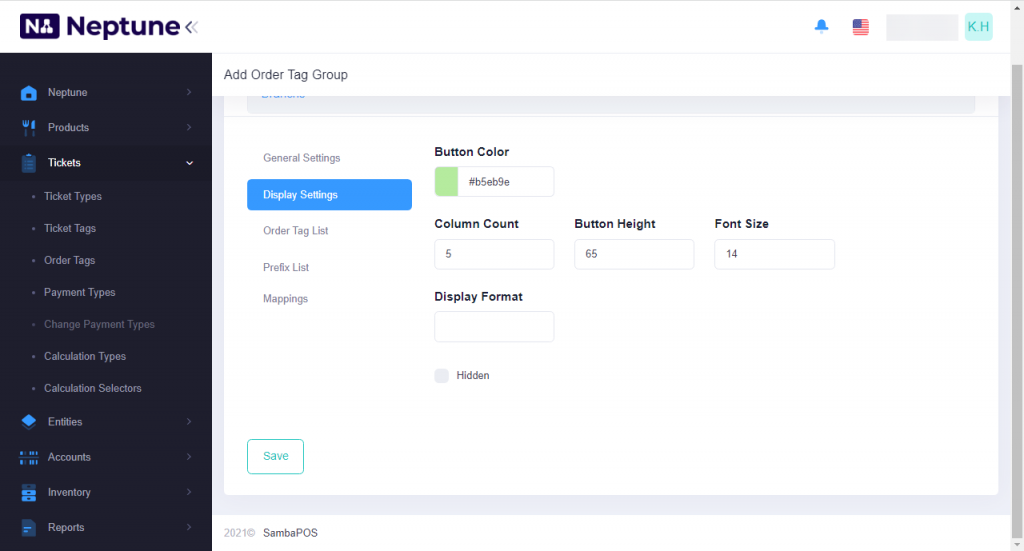
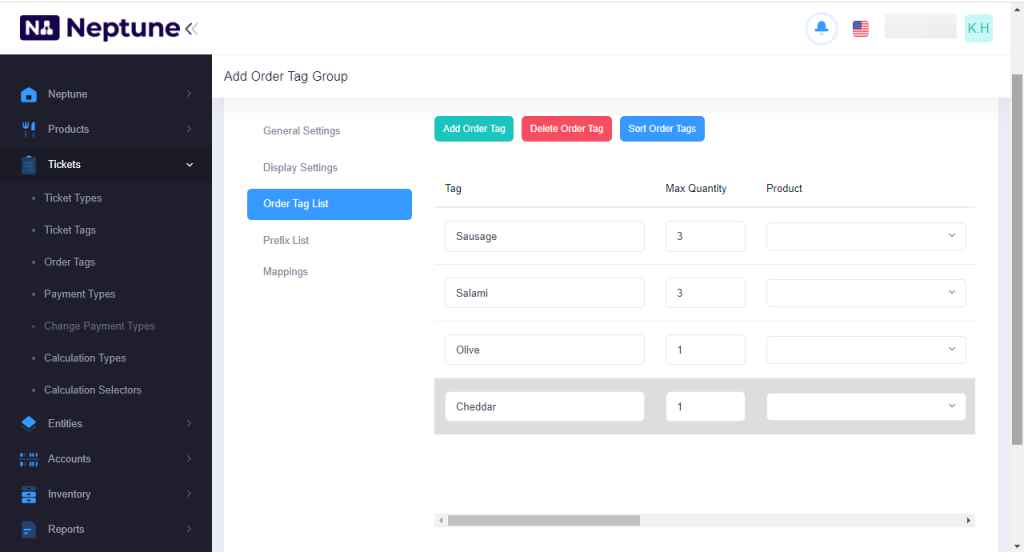
You can make special pricing when creating order tags in Order Tag List section. When we write 0 next to the thin dough, the pizza price will be entered according to what we entered in our menu items at the beginning, there will be no change when selected. But if we write 4 next to the thick dough, it will add 4 to the default price.

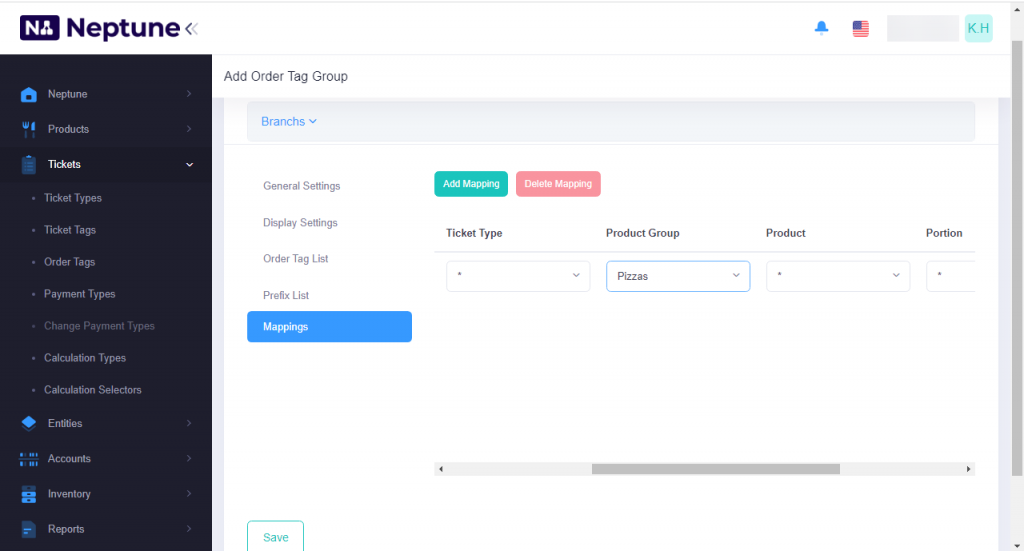
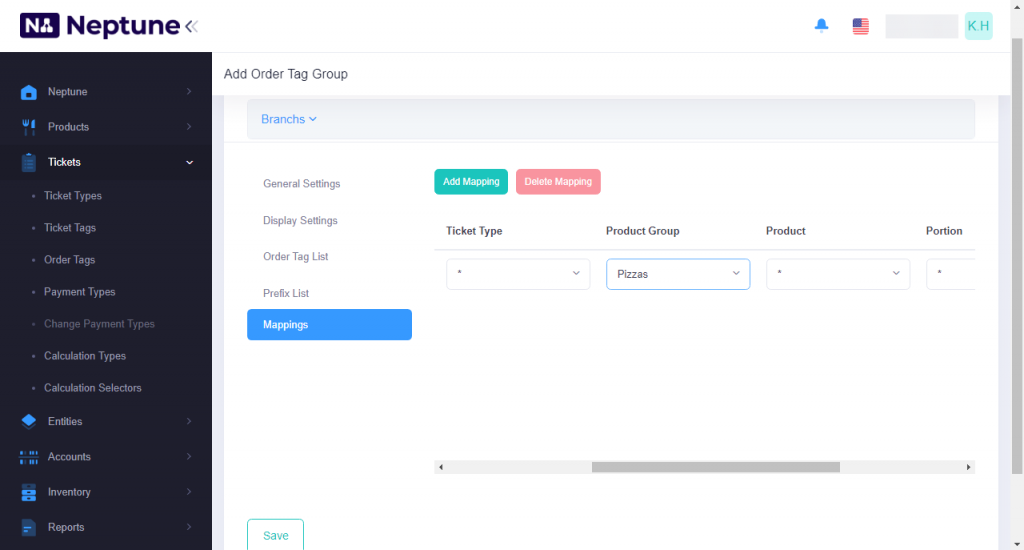
Finally, we decide on which products we want the tags to appear on by clicking on “add mapping” in the mappings section.
Likewise, this time, let’s create the order tags of the ingredient options for the meat pizza. This time we will not touch the minimum and maximum selection parts, because the customer may request one or more ingredients.

We are doing the color change for pizza ingredient options. As we did for the dough thickness.
We tag the products that we have in inventory in the ingredient options. The important part here is to enter the order tag according to the type of pizza. Because every pizza is made from different ingredients. Also, the default product of each pizza type is different and it is not necessary to enter a price for the default products.
(If we set the maximum quantity as 3 in the order tags section, it also allows us to order 3 more of that ingredient.)
We add the product group to the mappings according to which products we want it to be valid for.
It is important that we limit the choices when preparing order tags for menu drinks and desserts, otherwise it will cause the menu to lose its menu feature and cause many free drinks to be deducted from the warehouse.
Also, since it is a menu, we do not write additional prices for the labels. It deducts from the default price of the menu.

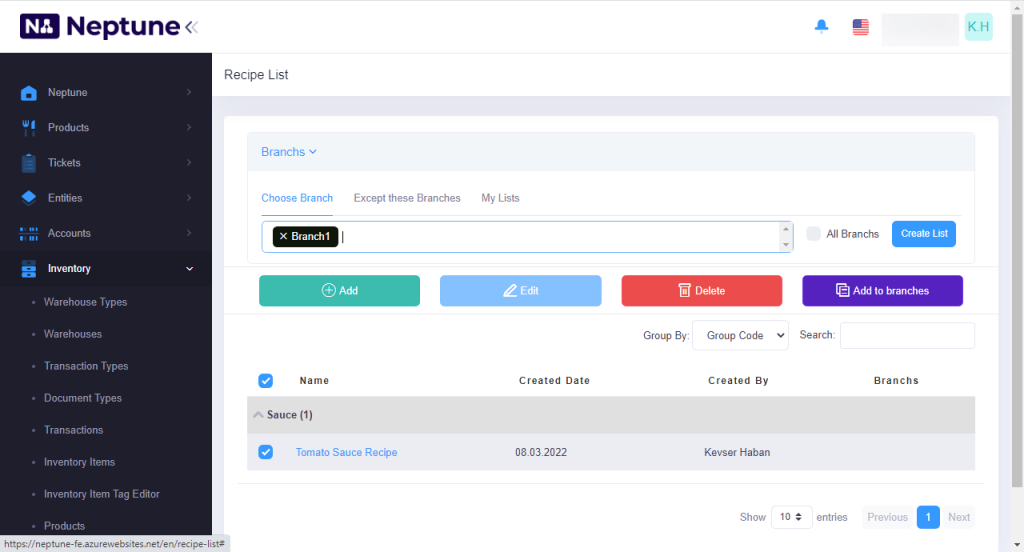
6)How to Add Recipes in Neptune?
The recipe shows what ingredients a product contains and deducts it drop from the warehouse accordingly. Therefore, it is very important to enter semi products and inventories in the recipe, otherwise you may get wrong information from the warehouse and have difficulty in controlling the profit and loss situations.
Let’s create the recipes of the drinks.
Management Panel > Inventory > Recipes
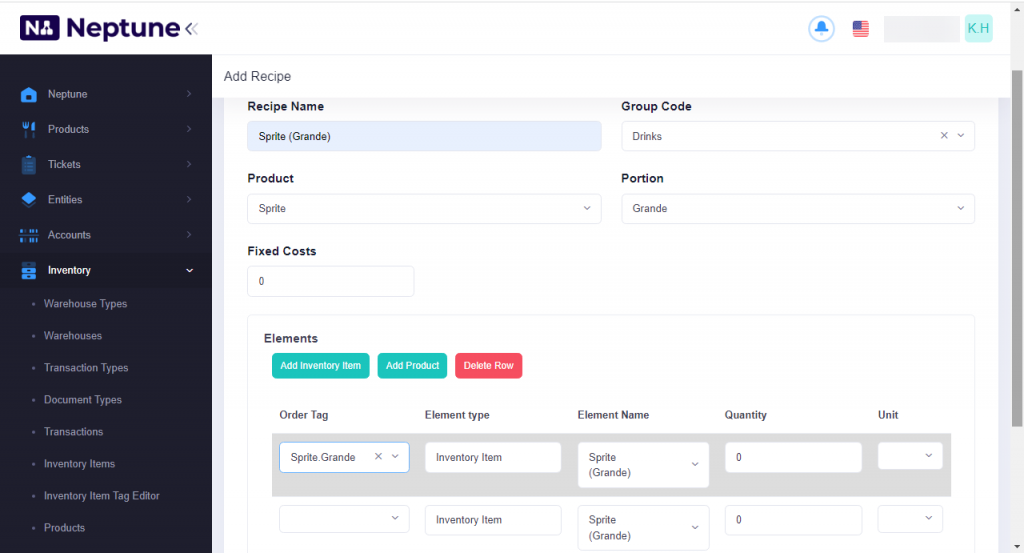
Since sprite is a product we buy directly from a supplier, we already put it in inventory. That’s why we click on Add Inventory Item and add it to the recipe. Do not forget to write the order tag at the beginning of the first (grande) inventory item of sprite because this tag will deduct from the warehouse when we select a grande portion of sprite from the menu. The second sprite (grande) inventory will deduct when we click on the sprite from our drinks group.
- Recipe Name: Give any name in this field. It can be written name and portion of the product to make future changes or editings easier.
- Group Code: Use it in order to make separation in reportings. Select an existing code or create a new one.
- Product: Select related product from the list.
- Portion: Select a portion for related product.
- Fixed Cost: Product cost of created recipe will be calculated automatically. Calculated cost is only raw cost of the product. It is possible to add other costs onto this cost e.g. general costs.
Items
Field to write all inventory items to be used in recipe including side products.
- Add Inventory: Use it to add inventory line into recipe.
- Add Product: Use it to add product line into recipe.
- Delete Line: Use to delete inventory or product line that added into recipe.
- Item Type: Field that shows type of added material.
- Item Name: Field to select the material.
- Quantity: Field that amount of added material is selected.
- Unit: Field that shows the unit of added product.
- Order Tag: Product sub features which created as order tags can be used in recipes so that it will be possible to deduct them only when that feature was selected. To do this firstly find related order tag from order tag column and then determine which product will be deducted when its selected.
After completing adding materials for related product click on Save button. So that adding recipe process for related product will be finished.
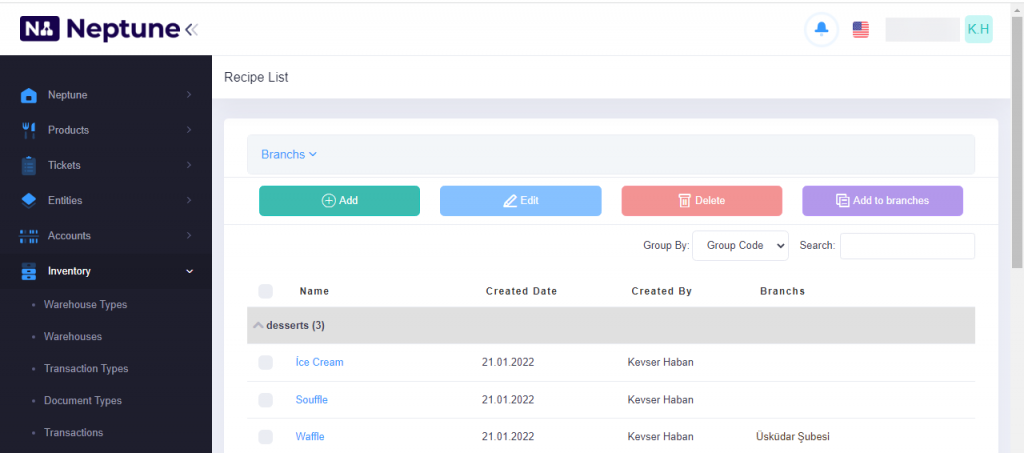
You need to create recipes for desserts as we did for drinks.
We already completed beverage and dessert recipes only by selecting inventory items. But tomato sauce recipe, pizza recipes, menu recipes and dough recipes will be different. Each of them will have different materials, named inventory items and/or inventory semi products.
Let’s start with the tomato sauce recipe for pizza.
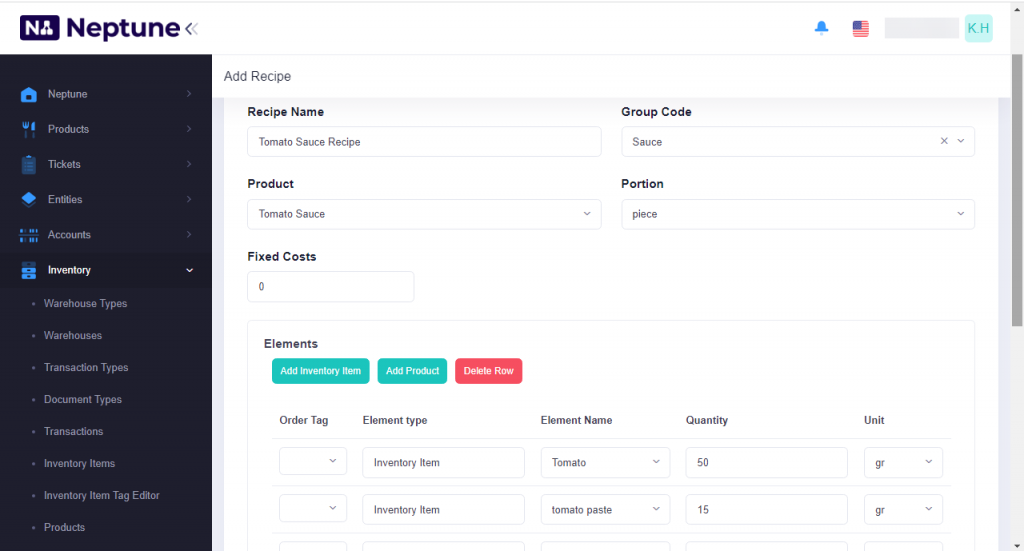
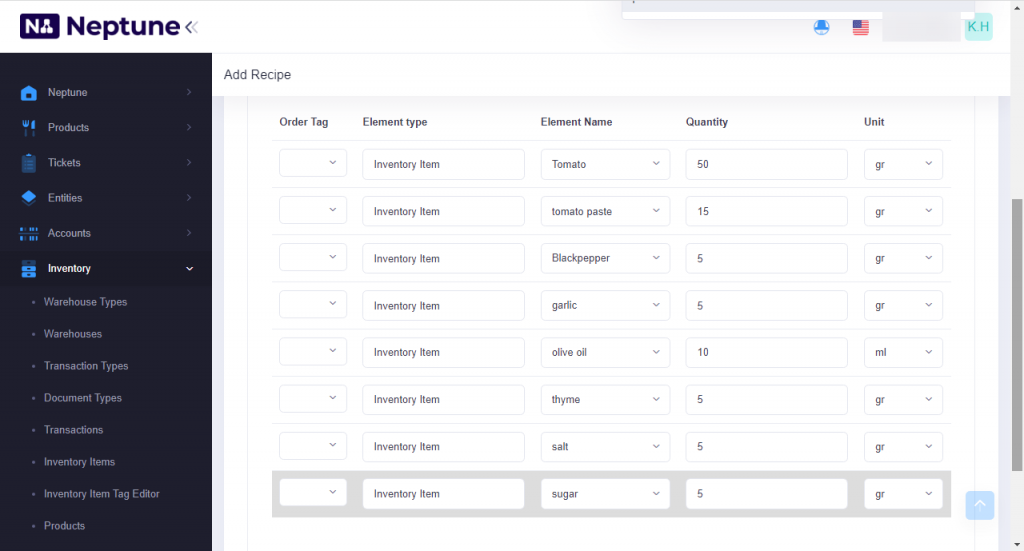
When adding tomato sauce as an inventory product, we add its unit as a piece. While we were adding the recipe, portions come automatically. In the recipe of tomato sauce, we need to add the ingredients that we will use while making the sauce, together with their weights. According to the weights, the products will be deducted at the same amount from the warehouse.
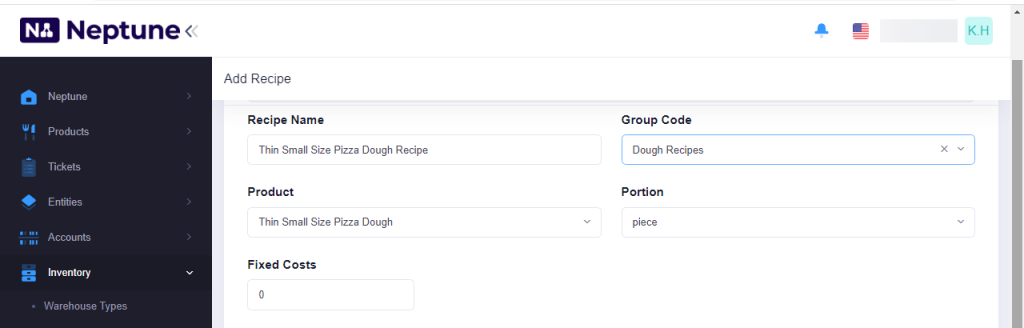
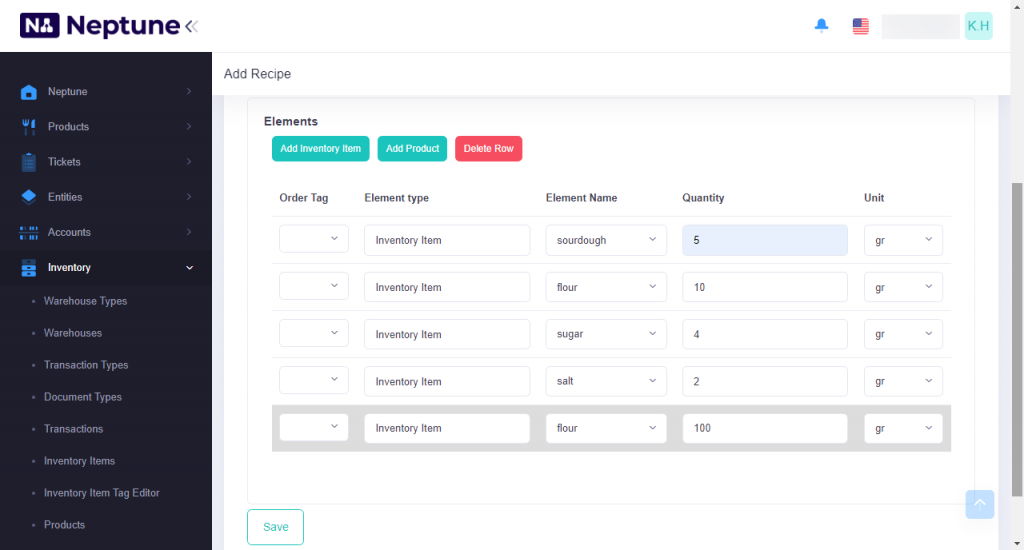
Let’s continue with the dough recipes for pizza. Dough recipes must be created separately according to thin-thick and portions. Because the ingredients will be used at the same amount for each pizza size and thickness of the dough.
Recipes of pizzas and menus should be added accordingly.
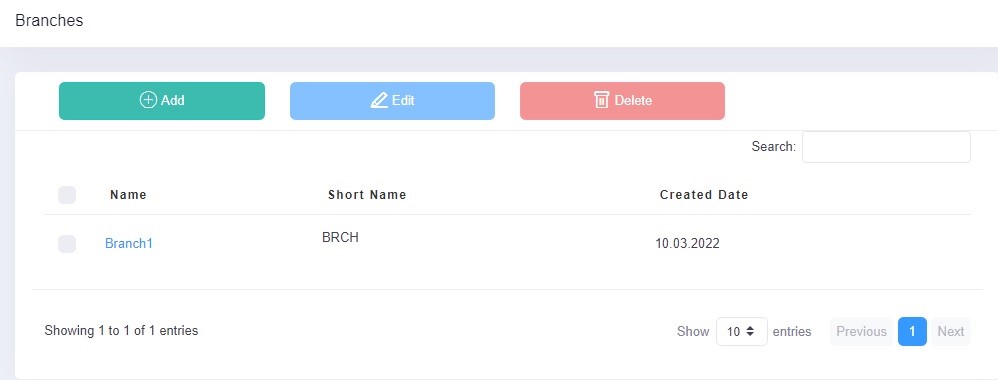
7. How to Add Branch on Neptune?
Management Panel > Neptune > Branches > Add
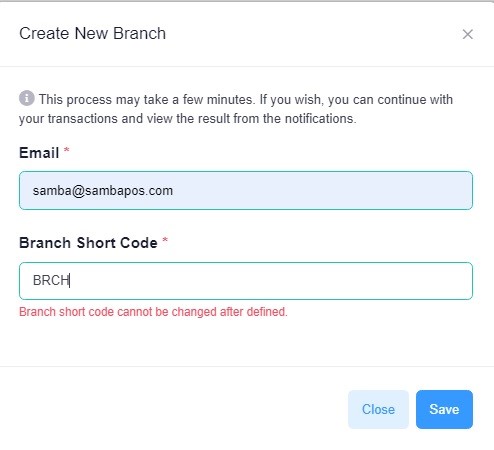
You can add as many branches as you want to Neptune.
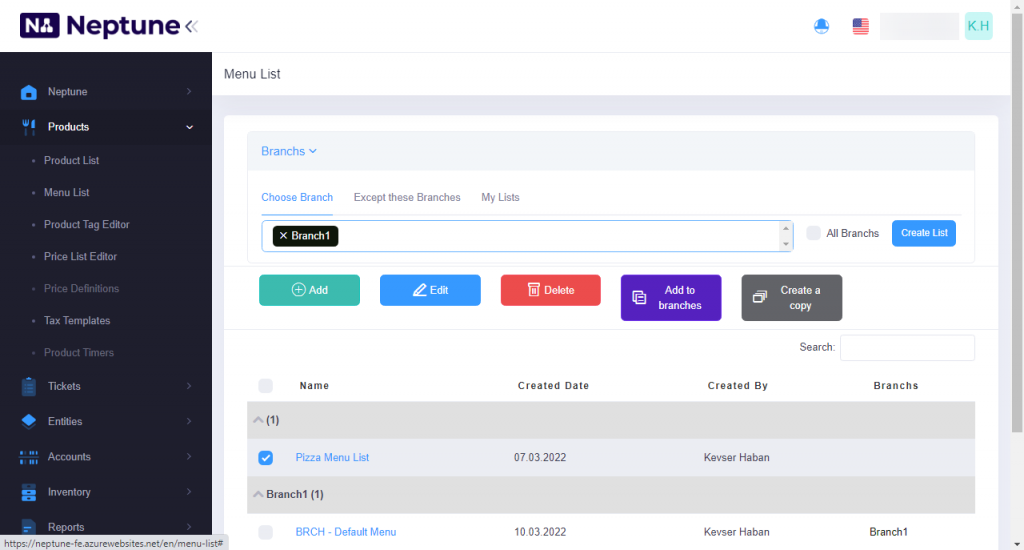
After the branches are created, branches are defined for products, menu, stocks and recipes.
In the Products section, click on the boxes on the left, which products you want to send to the branch.
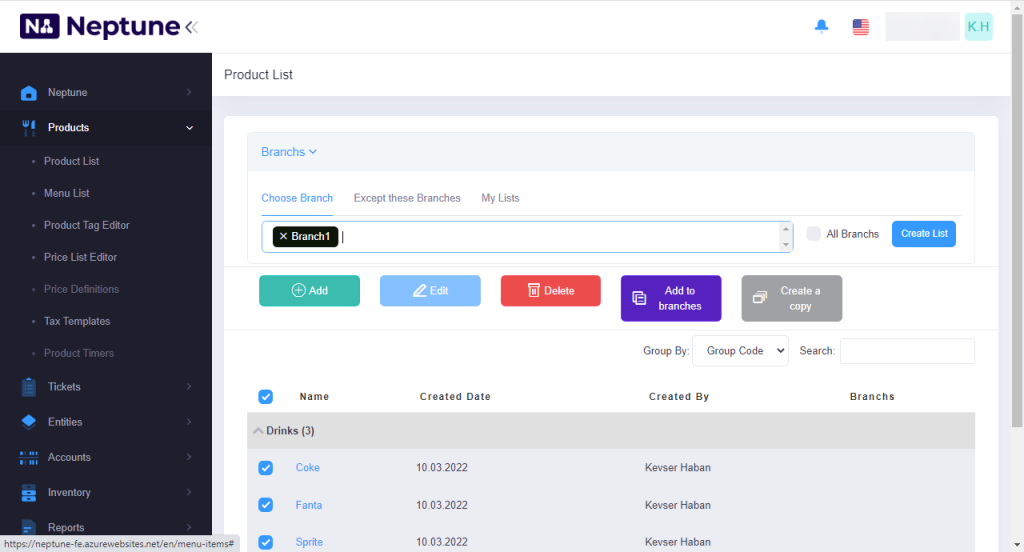
After selecting the branch, click Add to Branches.
The same is done for inventory items.

Repeat the same process for inventory semi products.
Finally, do the same for the recipes.
8) Sync on Neptune
Management Panel > Sync

After the branches are selected, click on Complete Setup and then the Sync button.
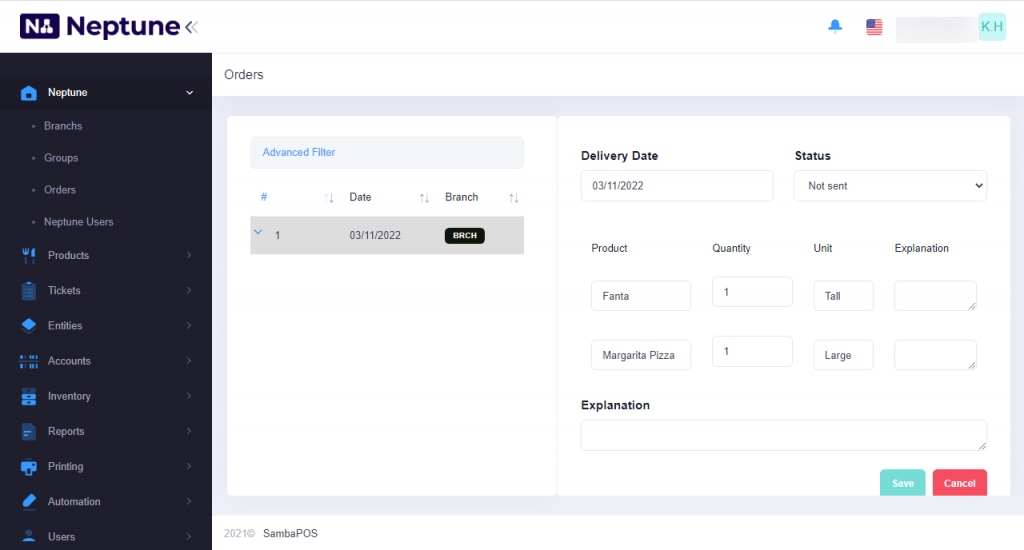
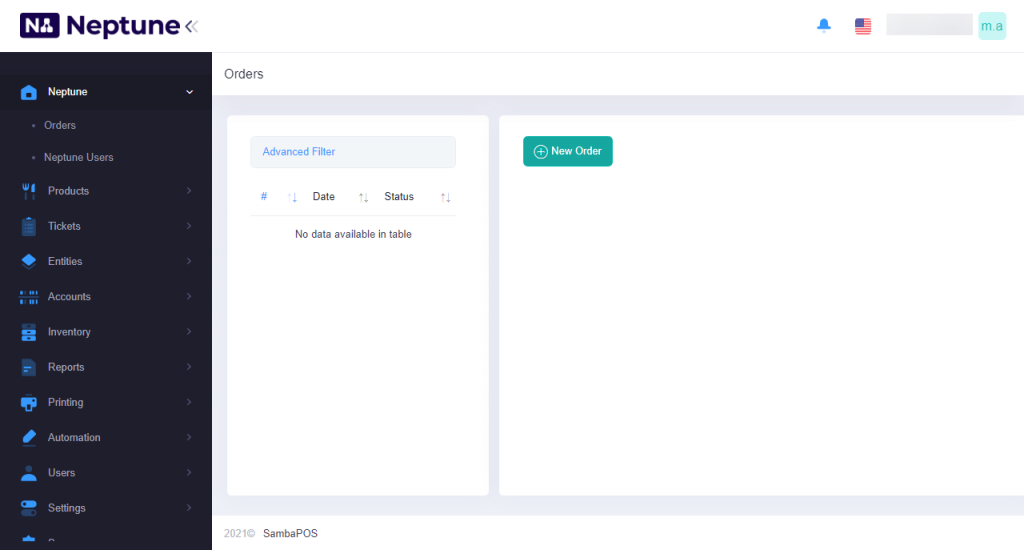
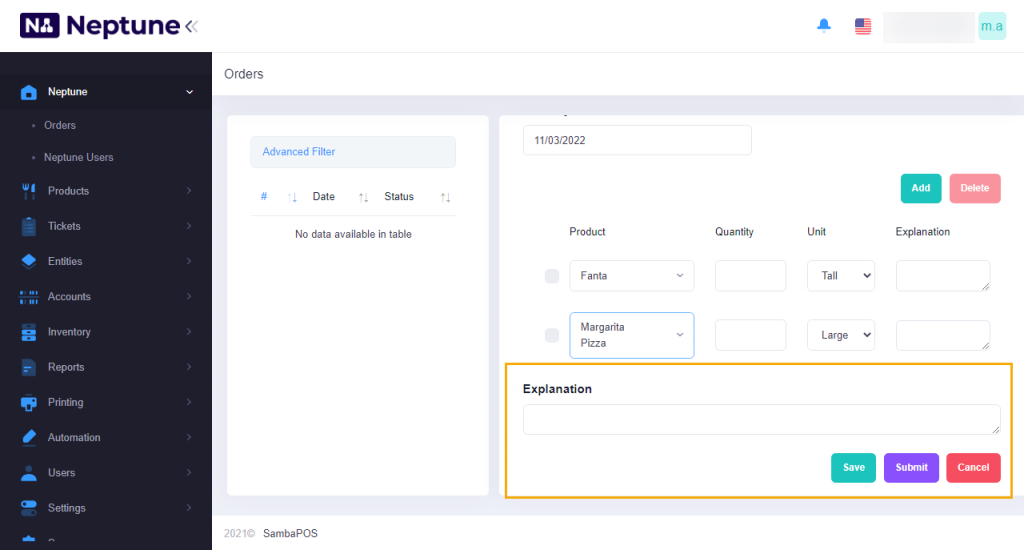
9)How to Place an Order on Neptune?
Management Panel > Neptune > Orders
Click “New Order” on the Orders screen.
In the new window that opens, enter the order products by pressing the Add button. After entering the quantity and unit, if there is an order explanation –for example, can you please send it fast- enter it and press the save button.
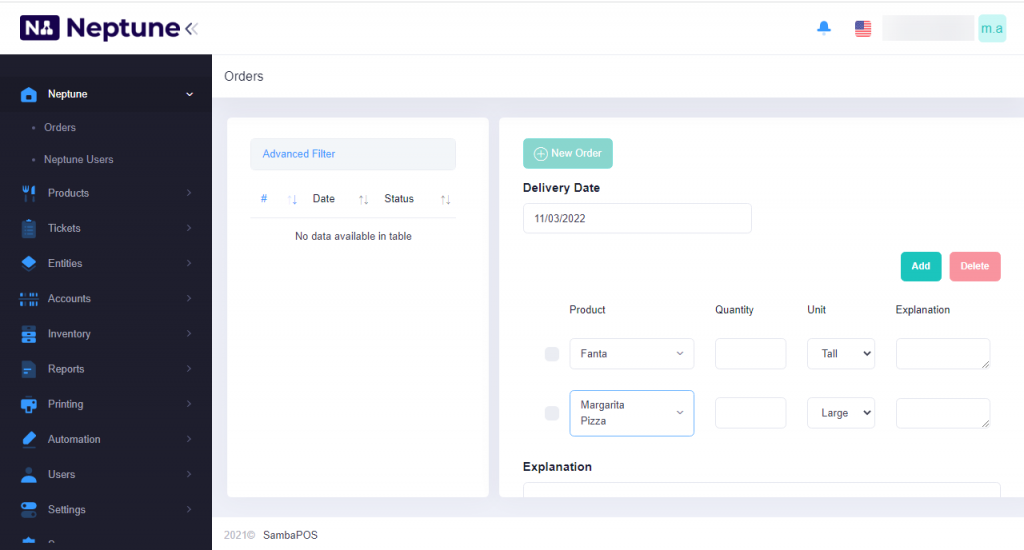
The order we placed will be displayed on the left side of the screen.
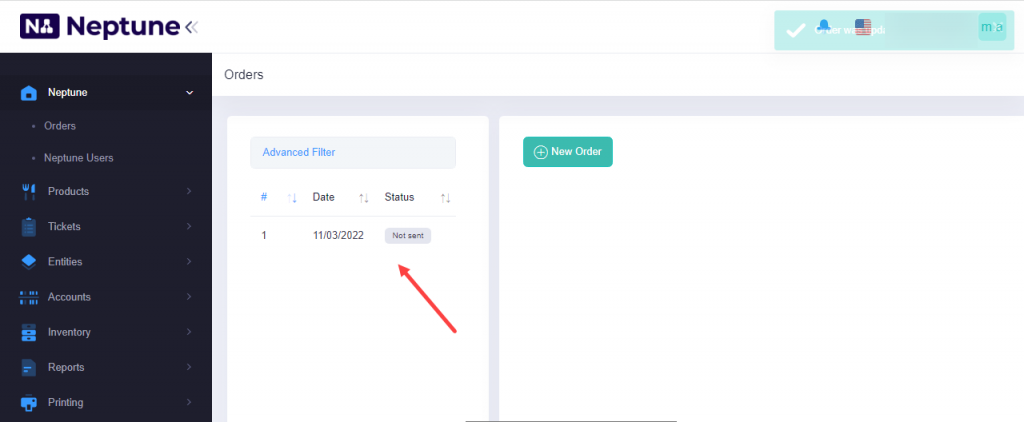
You can send the order at any time by clicking the Submit button.
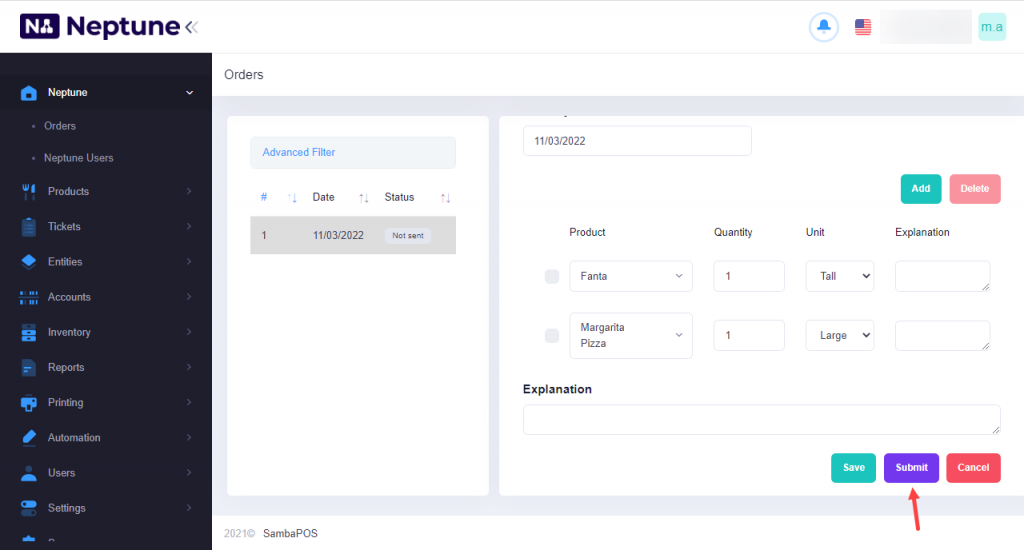
When you log in to the Neptune page of the branch where the order is placed, you can check the order from the Management Panel > Neptune > Orders.