6.26. Worldline TIM Integration (Switzerland)
In this document, it will be explained how to apply Worldline Integration for SambaPOS V5 Pro.
IMPORTANT NOTE:
In order to use this integration your SambaPOS version must be 5.7.14 or above.
How It Works;
1. Providing Worldline Device
You need to get in touch with Worldline company to get the device and the TIM software must be installed on that device.
2. Worldline TIM Integration License Purchase
You need to purchase the Worldline TIM Integration License from cp.sambapos.com.
3. Moving and Editing Necessary Files
3.1. Moving the DLL Files
Navigate to This PC > Local Disk (C:) > Program Files (x86) > SambaPOS5 > Payment Controller.
Copy the following files:
TimApi.dll
Samba.Modules.WorldlineTIMController.dll
Samba.Modules.WorldlineTIMPaymentOperations.dll
Paste them into This PC > Local Disk (C:) > Program Files (x86) > SambaPOS5.
3.2. Editing and Moving TimApi.cfg File
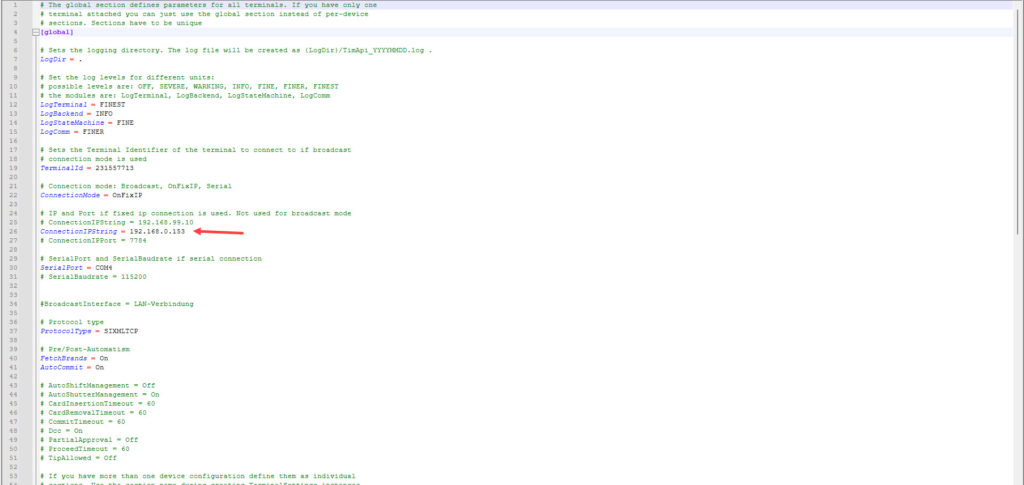
You should also obtain the file named TimApi.cfg from where you purchased your Worldline device and open it with Notepad while SambaPOS is completely closed, type the IP of your Worldline device where it says ConnectionIPString, save the file and move it to the main folder where SambaPOS is installed.
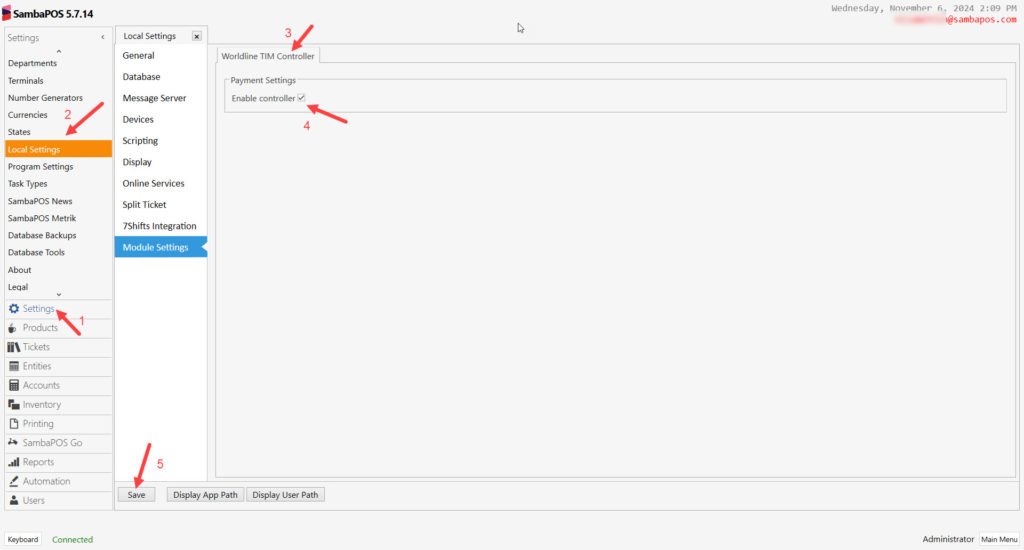
3.3. Local Settings Module Settings
Main Menu > Manage > Settings > Local Settings > Module Settings > Worldline TIM Controller
Enable Controller: This must be selected.
After completing necessary editings click on Save.
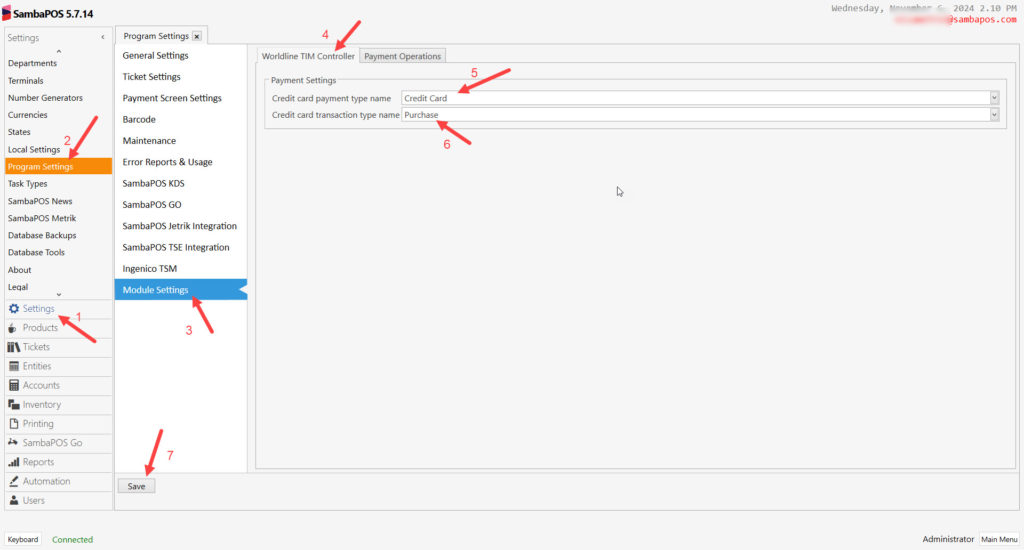
3.4. Program Settings Module Settings
Main Menu > Manage > Settings > Program Settings > Module Settings > Worldline TIM Controller
Payment Settings:
Credit Card Payment Type Name: Credit Card
Credit Card Transaction Type Name: Purchase
After completing necessary editings click on Save.
4. SambaPOS License Activation
You need to have Worldline TIM Integration and SambaPOS V5 Pro license in the same cp.sambapos.comaccount.
After purchasing the Wordline TIM Integration License from your cp.sambapos.comaccount’s Store Section you ned to handle the licensing process of your SambaPOS by manually running the Licensing.exe file which is found in the main folder that SambaPOS is installed and restart the SambaPOS Messagin Server.
You can find the SambaPOS license activation document here.
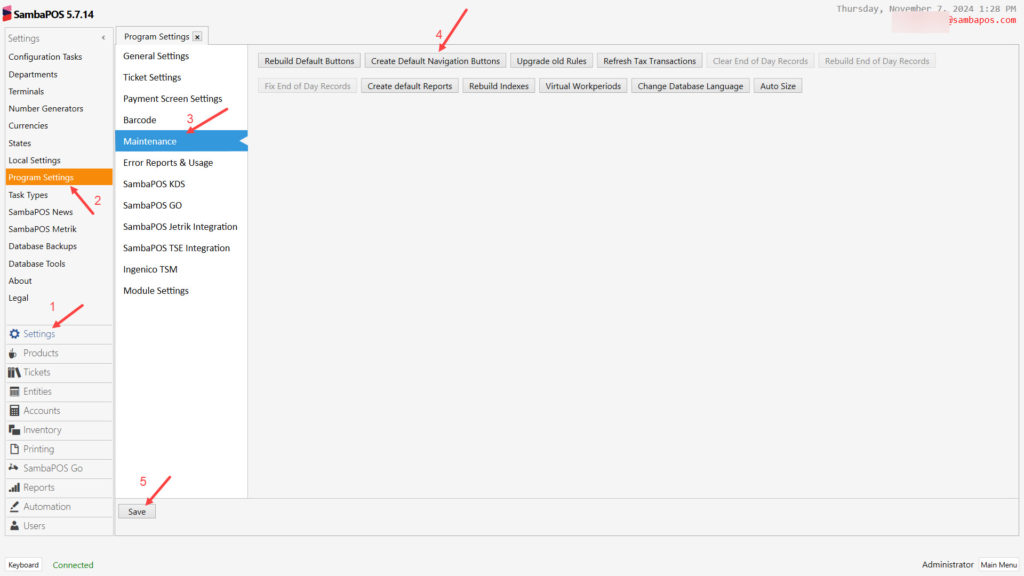
5. Configuring Custom Navigation Screen For Payment Operations
Main Menu > Manage > Settings > Program Settings > Maintenance > here, create custom navigation screen buttons by clicking on Create Default Navigation Buttons.
After completing necessary editings, click on Save buton.
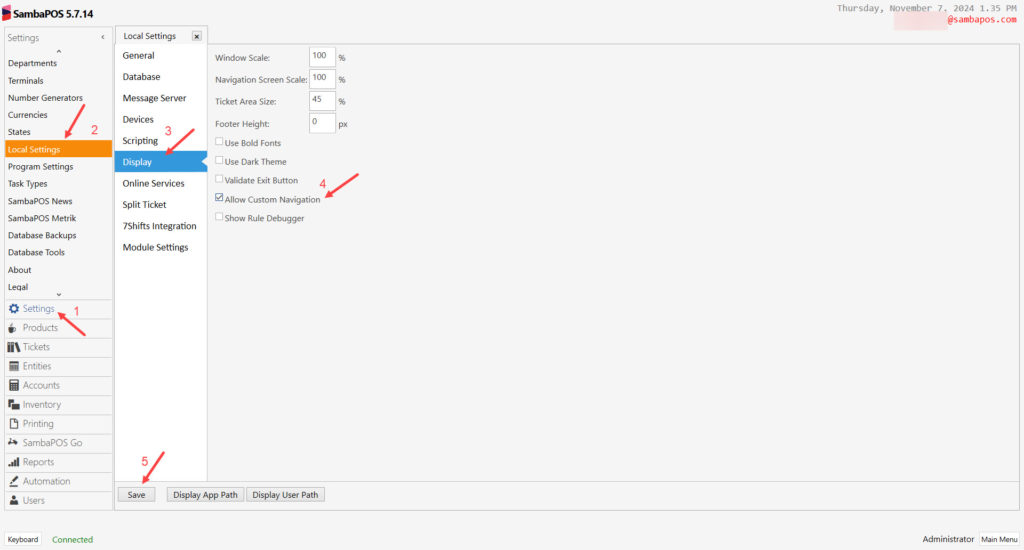
After creating buttons, go to Main Menu > Manage > Settings > Local Settings > Display > here, click on Allow Custom Navigation.
Display:
Allow Custom Navigation: Must be selected
After completing necessary editings, click on Save buton.
6. Adding Automation Command
Main Menu > Manage > Automation > Automation Commands > here click on Add Automation Command.
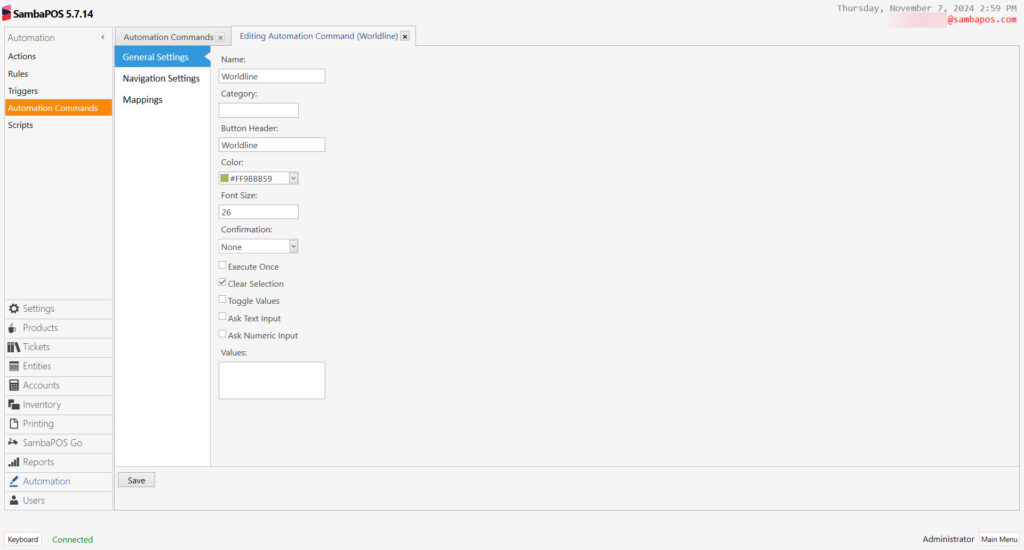
General Settings Section;
Name: Worldline
Button Header: Worldline
Clear Selection: Must be selected.
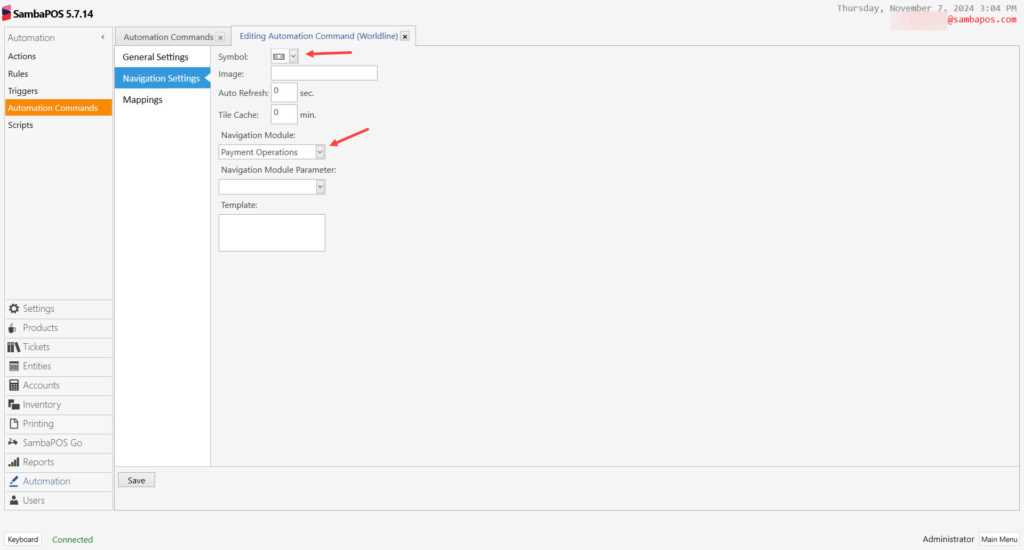
Navigation Settings Section;
Symbol: Select a desired symbol for the button
Navigation Module: Payment Operations
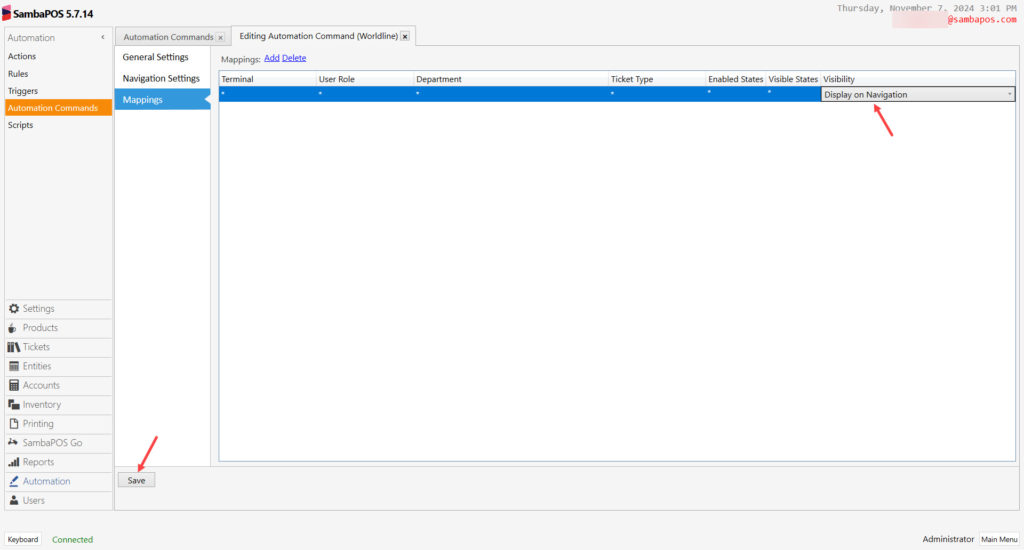
Mappings Section Settings;
In here add a row by clicking on Add button and configure the settings as below image.
After completing necessary editings, click on Save buton.
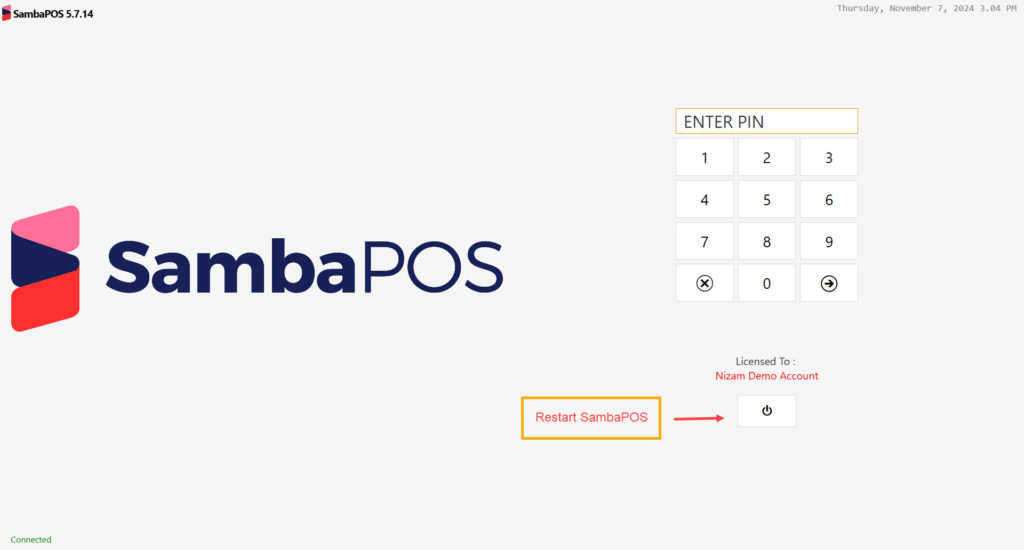
When you finish with the above steps, Restart the SambaPOS 5 Pro.
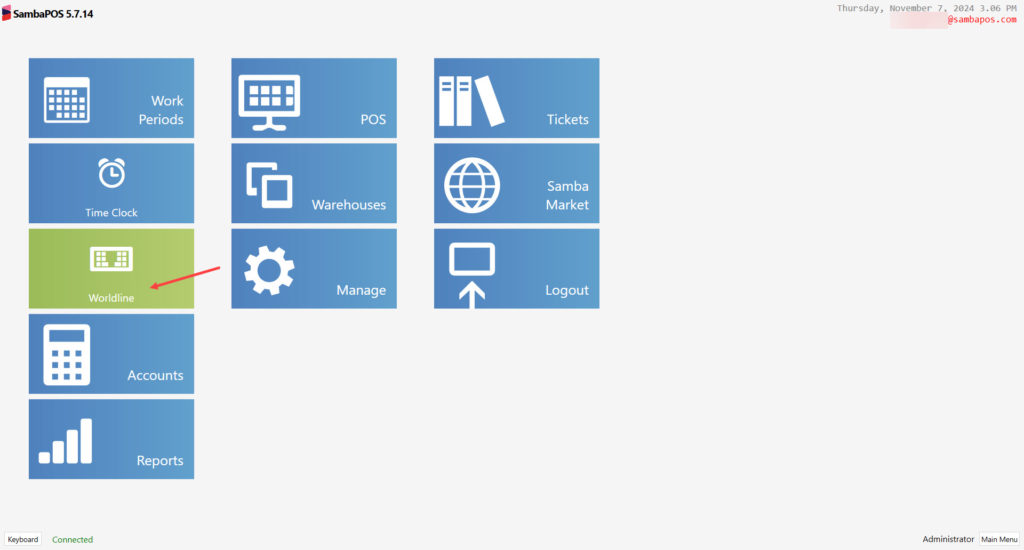
After restarting SambaPOS5 you can start using Worldline Automation Command.
7. Adding Tip Account
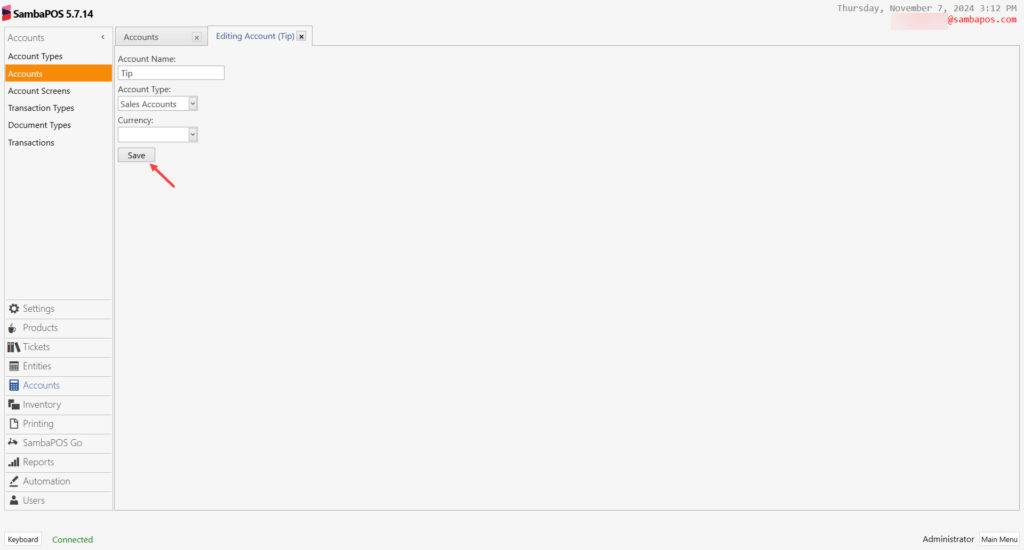
Main Menu > Manage > Accounts > Accounts > here click on Add Account.
Name: Tip
Account Type: Sales Accounts
After completing necessary editings, click on Save buton.
8. Adding Tip Transaction Type
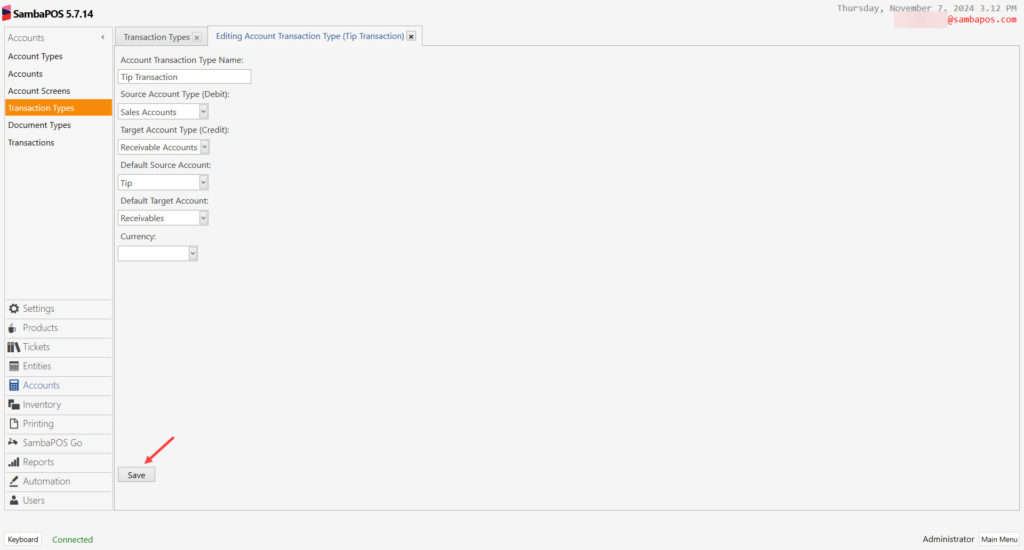
Main Menu > Manage > Accounts > Account Transaction Types > here click on Add Account Transaction Type.
Account Transaction Type Name: Tip Transaction
Source Account Type (Debit): Receivable Accounts
Target Account Type (Credit): Tip Accounts
Default Source: Tip
Default Target Account: Receivables
After completing necessary editings, click on Save buton.
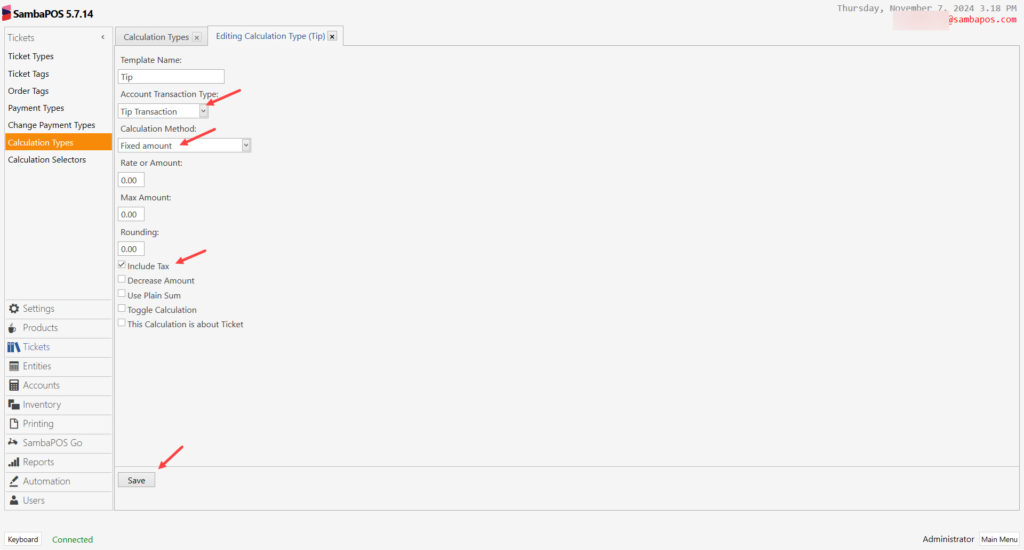
9. Adding Calculation Type
Main Menu > Manage > Tickets > Calculation Types > here click on Add Calculation Type.
Template Name: Tip
Account Transaction Type: Tip Transaction
Calculation Method: Fixed Amount
Include Tax: Must be selected
After completing necessary editings, click on Save buton.
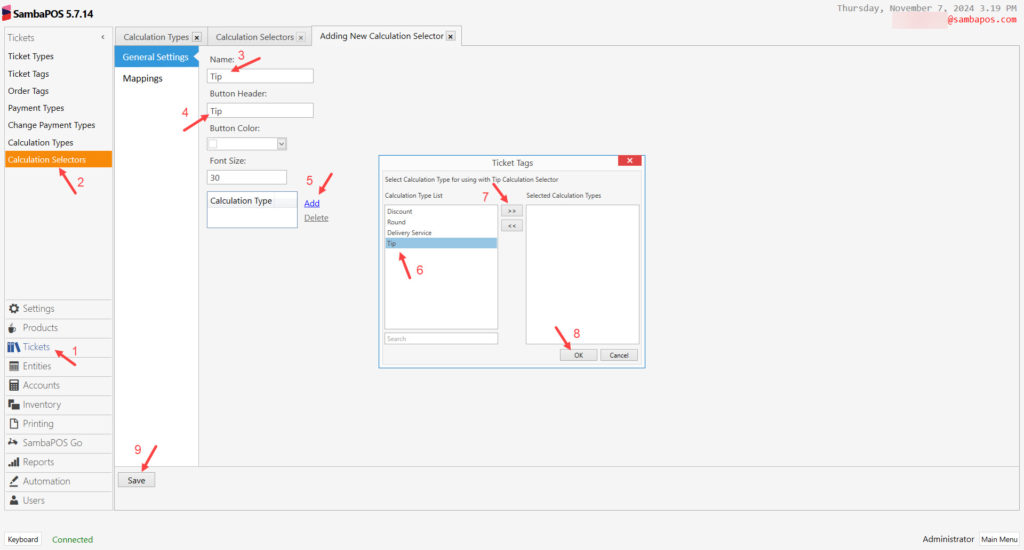
10. Adding Calculation Selector
Main Menu > Manage > Tickets > Calculation Selectors > here click on Add Calculation Selector.
Name: Tip
Button Header: Tip
Calculation Type: Click on Add button and select Tip as calculation type.
After completing necessary editings, click on Save buton.
11. Sample Template for Worldline TIM Integration
Main Menu > Manage > Printing > Printer Templates > Ticket Template > You can copy the below sample template and paste it Template field.

