5.1.12.a. How to Use SambaPOS Android Client
1. Entry Screen
1.1. Entry Password
1.2. Update
1.3. Settings
2. Entity Screens
2.1. Entity (Table) Selection Screens
2.2. Table Selection
2.3. Ticket Tags Selection (Before Opening Document)
3. Ticket Screen
3.1. Ticket Order Screen
3.1.1. Order Status on Ticket Screen
3.1.2. Canceling Order on Ticket Screen
3.1.3. Changing Order Count on Ticket Screen
3.2. Print Ticket
3.2.1. Printing Ticket, Selecting more than one printer
3.3. Select Client
3.3.1. Select Client
3.3.2. Change / Cancel Client
3.4. Add Order / Order Screen
3.4.1. Category
3.4.2. Product Selection
3.4.3. Portion Selection
3.4.4. Order Cancel / Changing Product Quantity Amount
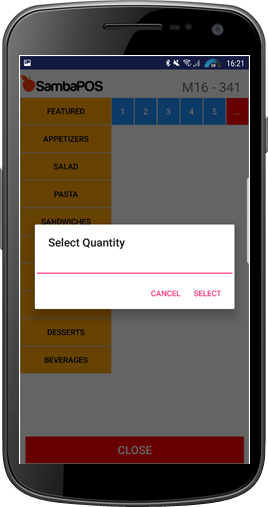
3.4.5. Usage of Numberpad
3.4.6. Add Product / Order Tags Usage
3.4.6.1. Free Tagging
3.4.6.2. Order Tag Groups
3.4.6.3. Order Tag Quantity Limit
3.4.6.4. Order Tag Group Quantity Selection Limit
3.4.6.5. Order Tag Discount Rate Determination
3.4.6.6. Order Tag Price Tag Selection
3.4.6.7. Order Tag Forced Tag Selection
4. Change Table
4.1. Changing Table
4.2. Merging Tables
5. Ticket Note
6. Ticket Tags
6.1. Number of Persons
6.2. Kitchen Note
6.3. Order Channel
6.4. Special Ticket Notes
1. Entry Screen
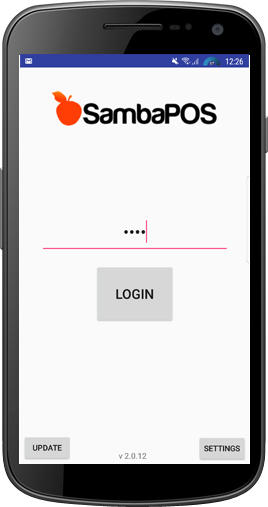
1.1. Password Entry
SambaPOS Management > Users enter from here by typing directed password.
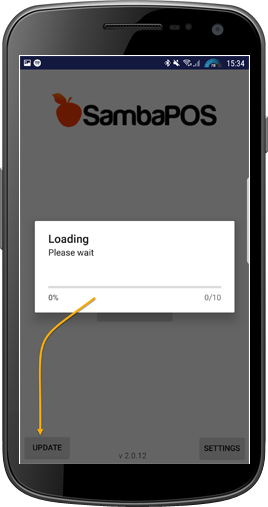
1.2. Update
It’s necessary to perform the updating process in order to activate the changes that has been made on SambaPOS program settings. This feature is used only for activating the changes that has been made on SambaPOS settings.
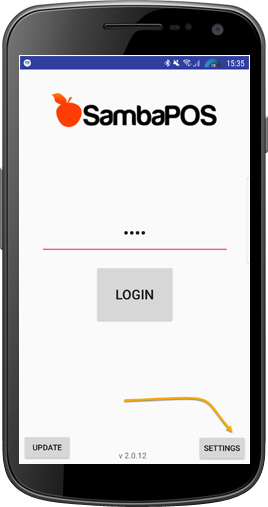
1.3. Settings
It’s the field that is used by service or administrator while process of Android Client Handy Terminal’s setup and usage changings process. Entry is by Service password. Server, Ticket, Entity Types, Printing Settings and Language Settings are configured here.
2. Entity Screens
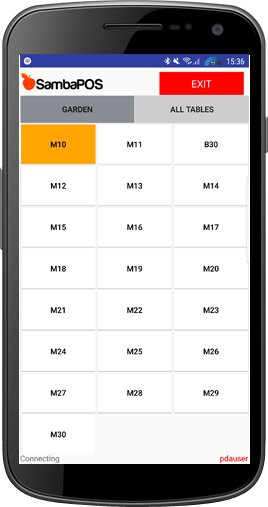
2.1. Entity (Table) Screens Selection
After the entry with user password Table Entity Screens are displayed. SambaPOS Administration > Entities > On the Entity Screens Relations section Entity Screens displayed.
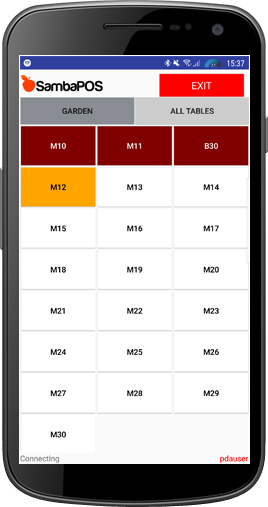
2.2. Table Selection
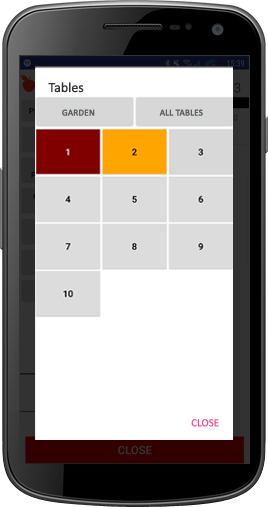
When it’s clicked on the table number that listed on Entity Screens it becomes ready to receive order. If it’s a table that already orders were taken then it displays the bill. If a new order comes, it shows the order screen.
2.3. Ticket Tags Selection (Before Opening Document Type)
Before opening document type if the ticket tag selection is already set, when clicked on the table, firstly ticket tag is displayed. ticket is opened after selecting Tag Value.
3. Ticket Screen
3.1. Ticket Order Screen
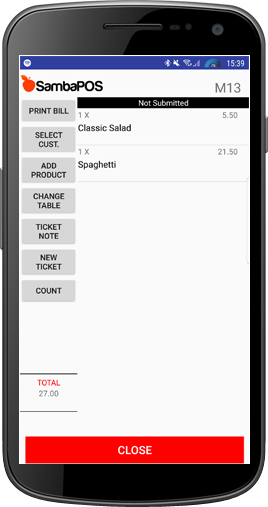
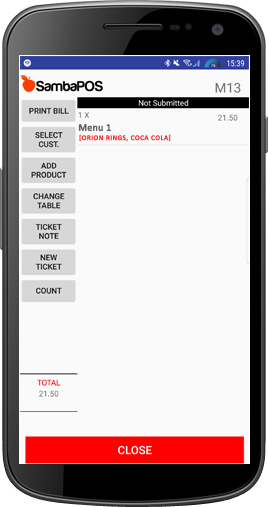
3.1.1. Orders on Ticket Screen: It is field that in the Table Entity; status tracking, order name, order quantity and row price amounts are listed as row. Taken orders are grouped as ” Sent”.
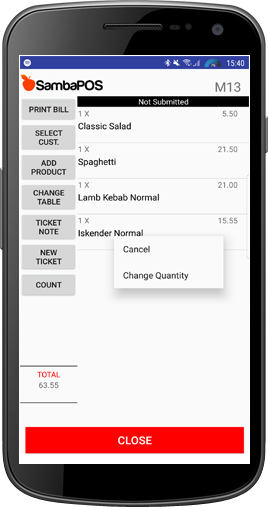
3.1.2. Canceling Order on Ticket Screen: User can cancel new taken and unsaved / undispatched orders. To do this keep pressed on product row and click on cancel button.
3.1.3. Changing Order Amount on Ticket Screen: Keep pressed on product row, use Change Amount button and select the amount.
3.2. Print Bill
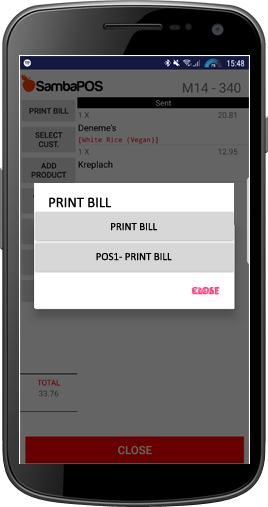
Printing Bill, selecting more than one printer, to print bill on ticket screen click on Print Bill button on the left column. If there are more than one printer, from the window select the printer which to be used.
3.3. Select Customer
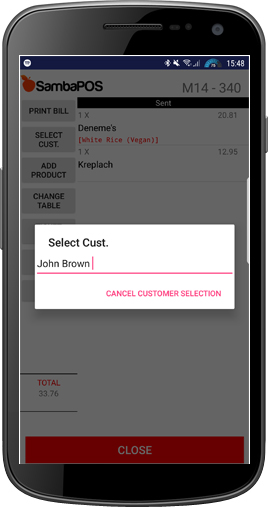
3.3.1. Customer Selection: When you click on Select Customer button from left column, a field is opened to search customer. At this field type customer name, find and select it.
3.3.2. Changing / Cancelling Customer: On a ticket that customer is selected to change customer name click on select customer button from left column. Search for the customer and select it. So that customer information will be changed. If customer will not be selected then click on Cancel Customer Selecting button which is at the down part of window.
3.4. Adding Order / Order Screen
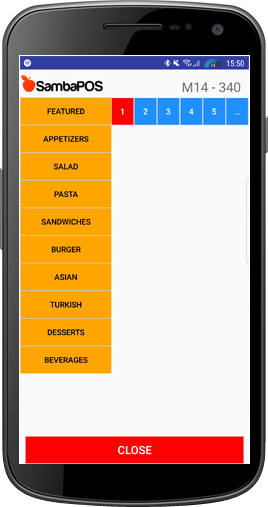
3.4.1. Category: Menu categories are listed on left column when you open adding order section. If you click on category, it shows list of related products.
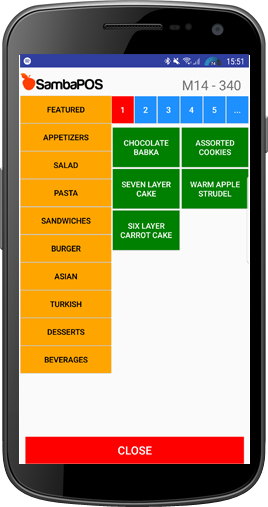
3.4.2. Product Selection: When you select category, add orders related to that category by pressing on listed products. Select order quantity by pressing as much as order amount or before addition select from numbering tool. After adding order, you can change order amount by keep pressing on order row.
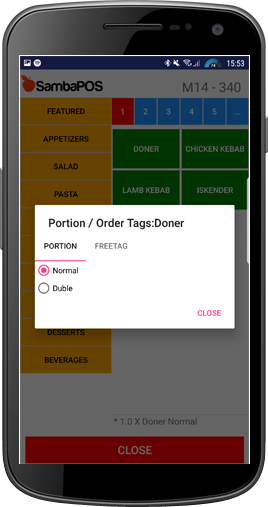
3.4.3. Portion Selection: After adding order if you click on order row one time Portion and Order Tags window will be opened. In this window perform the previously configured settings.
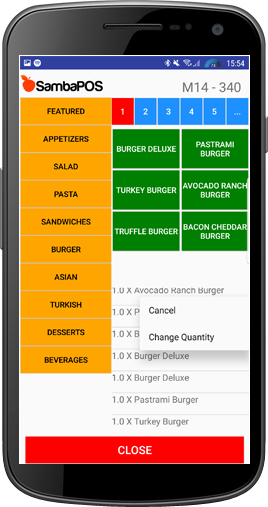
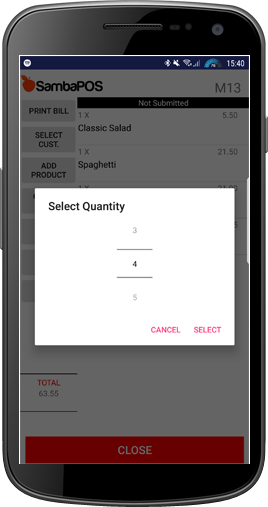
3.4.4. Order Cancel / Change Product Quantity Amount: User can cancel a newly added order. To cancel product keep pressed on the order row and in the window click on cancel button. In order to change order quantity, keep pressed on order and in the window, click on Change Quantity. Complete the process by typing product quantity.
3.4.5. Usage of Numberpad: Digits which located on the upper band of order screen are called order number generator. You can determine amount or quantities for newly added orders from number generator. (On the ticket, you can’t change quantity or amount for the products which already started processing by saving)
3.4.6. Add Product / Usage of Order Tags

3.4.6.1. Free Tag: That section is located on order portion and order tag window. It can be opened by clicking on order row. It’s used for writing instant notes related to orders.

3.4.6.2. Order Tag Groups: It’s displayed when you keep pressed on order. Titles of order tags are sequentially side by side and used by swiping to left. If you click on Order Tag Name you can display and select order tags of that group.

3.4.6.3. Quantity Limit of Order Tag: Order tags can be selected as much as predifened on SambaPOS settings. It’s impossible to select more than this amount.
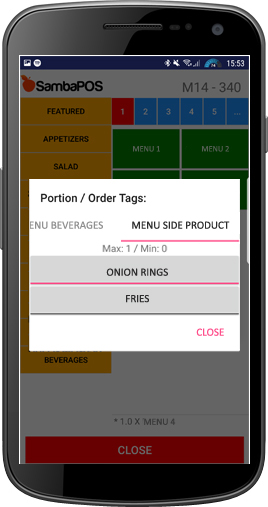
3.4.6.4. Order Tag Group Quantity Select Limit: On SambaPOS, you can select certain amount of tags on Order Tag Group. It’s impossible to select more than determined amount.
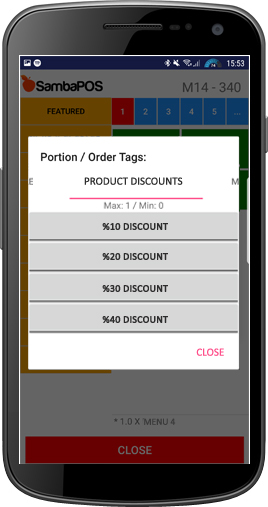
3.4.6.5. Determining Order Tag Discount Rate: For the order tags its possible to use percentage discount about related product.

3.4.6.6. Order Tag Price Tag Selection: Price can be used on order tags.
4. Changing Table
4.1. Move Table
Click and open the table which you want to move. Click on Change Table button on the left column. Complete the process by selecting required table number.

4.2. Merge Table
Click and open the table which you want to move. Click on Change Table button on the left column.Complete the process by selecting tables that you want to merge.
5. Ticket Note
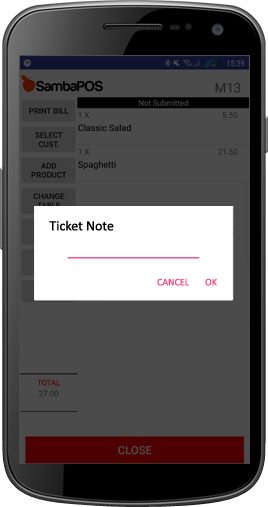
Open the ticket and from left column click on ticket note. Write a generally or partially note about that ticket and click on ok. You can change ticket notes later on.
6. Ticket Tags
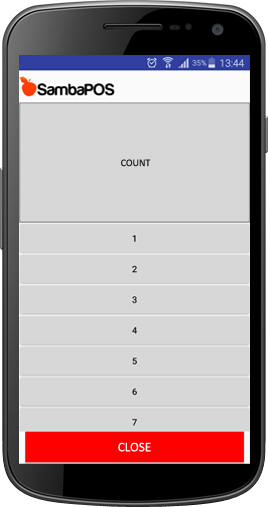
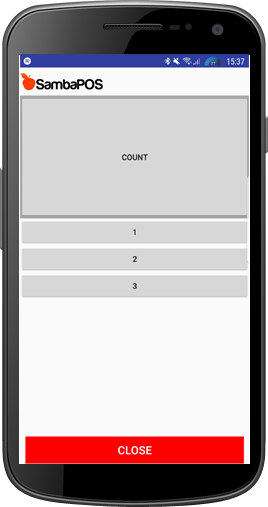
6.1. Person Count
Here you can select the count of person for the table. Open the ticket and from left column click on Count button and select the person count. Person count can be changed later on. From SambaPOS settings it’s possible to configure the way that, person count will be selected when as soon as ticket opened.
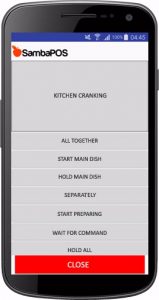
6.2. Kitchen Note
After taking order kitchen preparation processes can be sent to the kitchen. On SambaPOS it’s possible to create this module previously and it can be used on Android Client Handy Terminal as ticket tag.
6.3. Order Channel
You can consider it as the groups that orders are taken from. It can be evaluated like discount or special groupings such as Students, Company A, Company B etc.
6.4. Special Ticket Notes
It’s possible to create variety of ticket tags with special usage purposes and they can be used on Android Handy Terminal.