4.82. How to Limit Customer Account?
In this document it will be explained how to limit customer account.
How It Works;
1. Adding Limit Custom Field
Main Menu > Manage > Entities > Entity Types > Customers > Custom Fields > Here, click on Add Custom Field button and name it as Limit.

After editing necessary parts click on Save button.
2. Editing Customer’s Limit Field
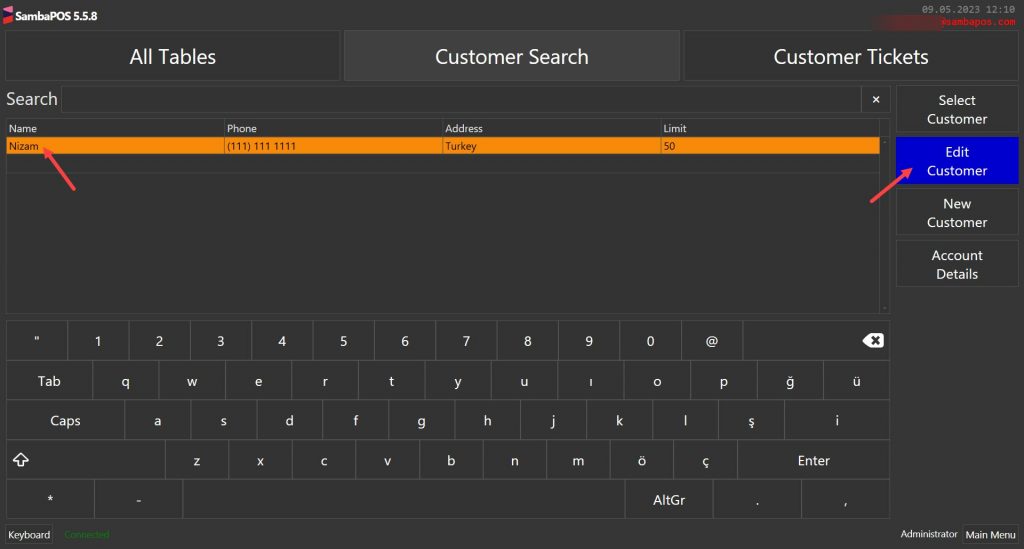
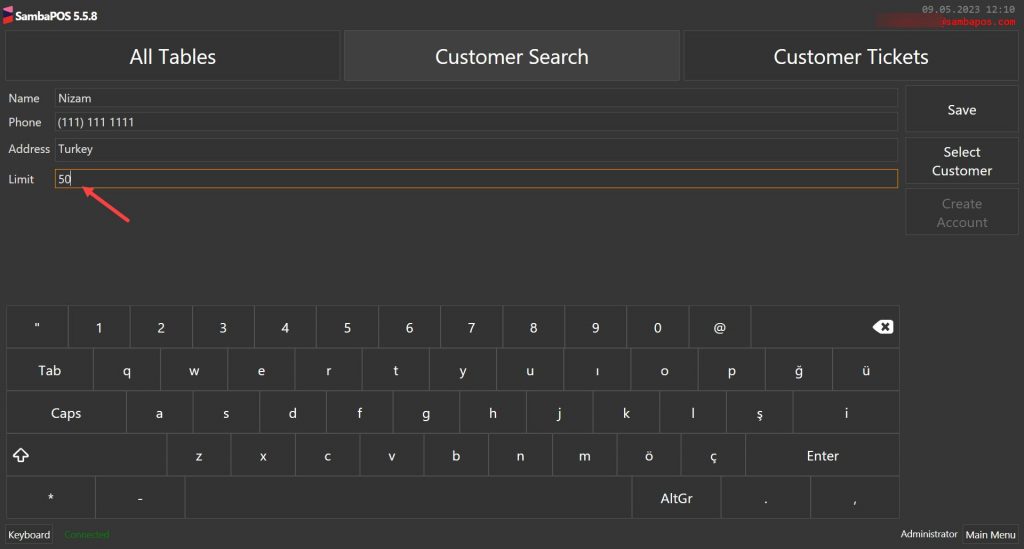
Main Menu > POS > Customer Search > Select Related Customer > Click on Edit Customer > Into the Limit field type desired limit amount and click on Save button.
3. Adding Actions
3.1. Adding LCA-Ask Question Action
Main Menu > Manage > Automation > Actions > Here, click on Add Action.

Action Name: LCA-Ask Question
Action Type: Ask Question
Parameters:
Question: [:Question]
Buttons: [:Buttons]
Description: [:Description]
After completing necessary editing, click on Save button.
3.2. Adding LCA-Cancel Action
Main Menu > Manage > Automation > Actions > Here, click on Add Action.
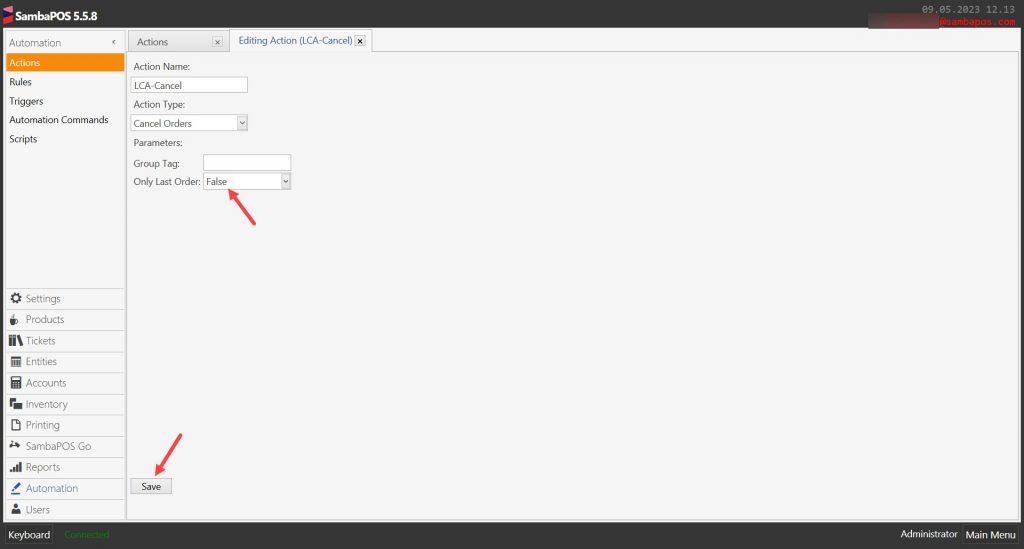
Action Name: LCA-Cancel
Action Type: Cancel Orders
Parameters:
Only Last Order: False
After completing necessary editing, click on Save button.
3.3. Adding LCA-Cancel Orders Action
Main Menu > Manage > Automation > Actions > Here, click on Add Action.
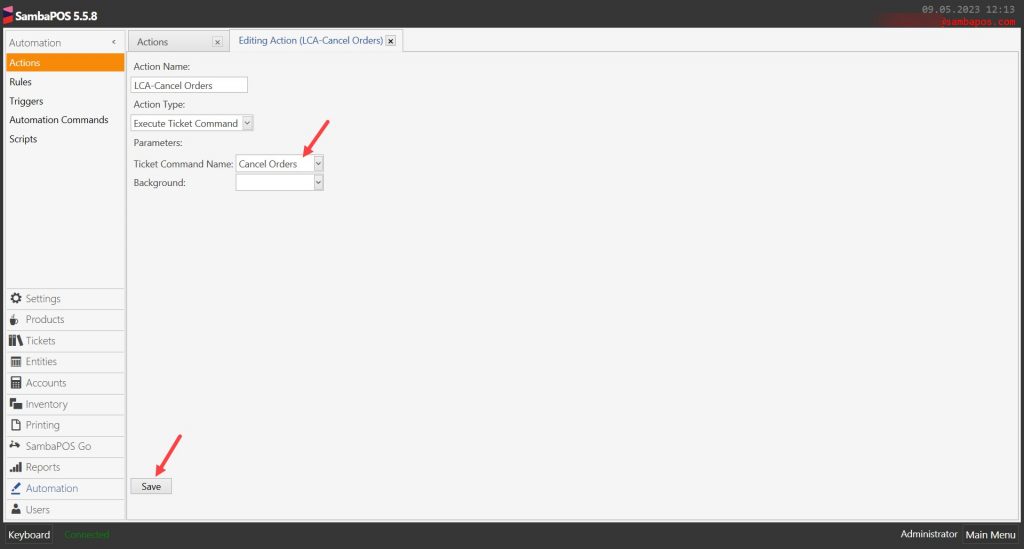
Action Name: LCA-Cancel Orders
Action Type: Execute Ticket Command
Parameters:
Ticket Command Name: Cancel Orders
After completing necessary editing, click on Save button.
3.4. Adding LCA-Update Entity Data Action
Main Menu > Manage > Automation > Actions > Here, click on Add Action.
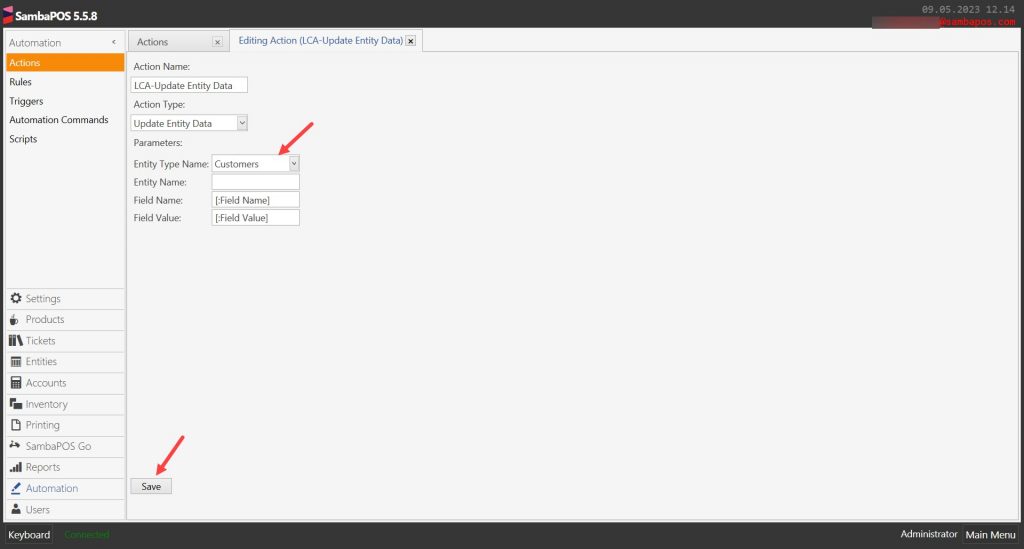
Action Name: LCA-Update Entity Data
Action Type: Update Entity Data
Parameters:
Entity Type Name: Customers
Field Name: [:Field Name]
Field Value: [:Field Value]
After completing necessary editing, click on Save button.
4. Adding Rules
4.1. Adding LCA-Increase Limit Rule
Main Menu > Manage > Automation > Rules > Here, click on Add Rule.

Rule Name: LCA-Increase Limit
Event Name: Automation Command Executed
Execute Rule if: Matches
Add Custom Constraint:
Automation Command Name|Equals|Increase Limit
Select Actions:
Action: LCA-Update Entity Data
Field Name: Limit
Field Value: [?New Limit]
After completing necessary editing, click on Save button.
4.2. Adding LCA-Limit Cancel Order Rule
Main Menu > Manage > Automation > Rules > Here, click on Add Rule.
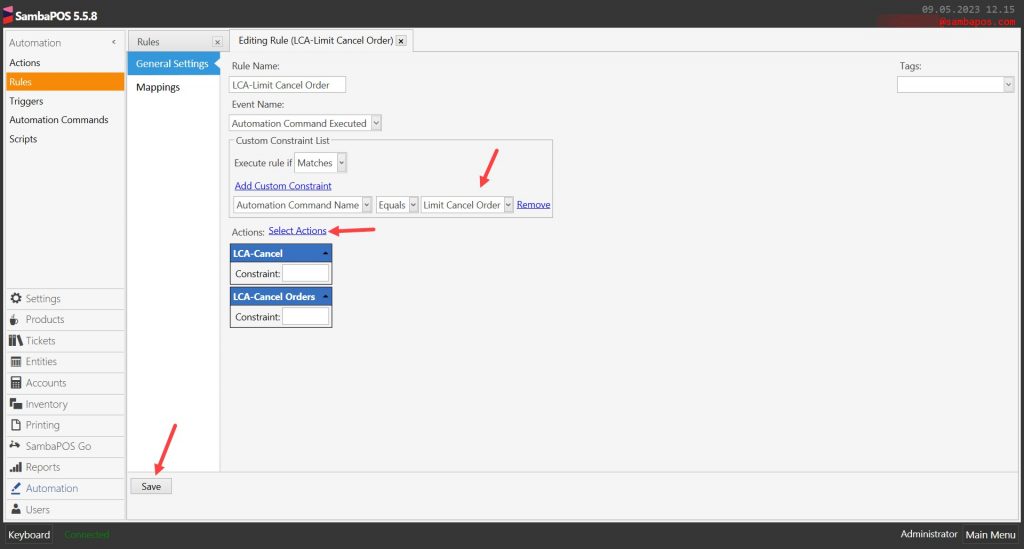
Rule Name: LCA-Limit Cancel Order
Event Name: Automation Command Executed
Execute Rule if: Matches
Add Custom Constraint:
Automation Command Name|Equals|Limit Cancel Order
Select Actions:
Action-1: LCA-Cancel
Action-2: LCA-Cancel Orders
After completing necessary editing, click on Save button.
4.3. Adding LCA-Determine Customer Limit Rule
Main Menu > Manage > Automation > Rules > Here, click on Add Rule.
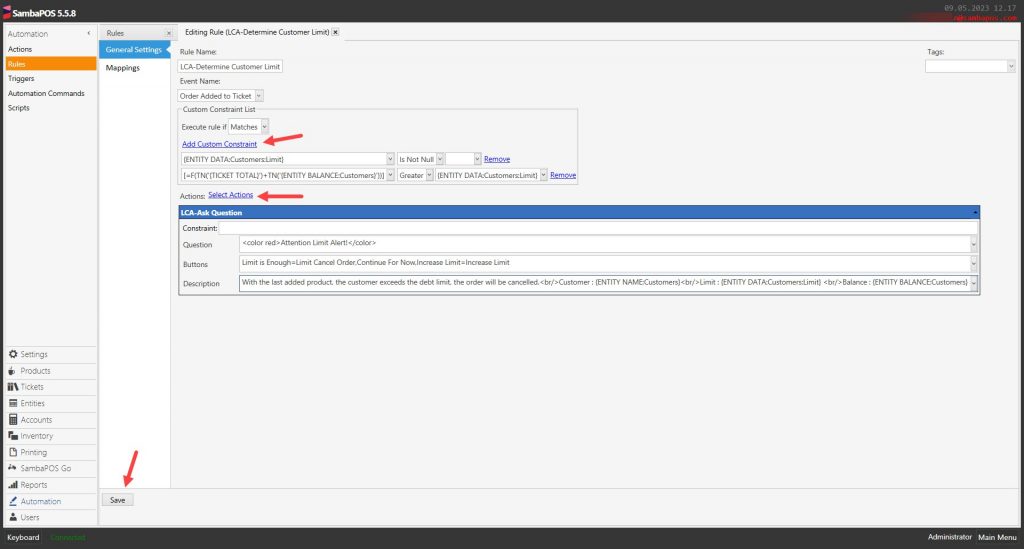
Rule Name: LCA-Determine Customer Limit
Event Name: Order Added to Ticket
Execute Rule if: Matches
Add Custom Constraint:
{ENTITY DATA:Customers:Limit}|Is Not Null|
[=F(TN('{TICKET TOTAL}')+TN('{ENTITY BALANCE:Customers}'))]|Greater|{ENTITY DATA:Customers:Limit}
Select Actions:
Action: LCA-Ask Question
Question: <color red>Attention Limit Alert!</color>
Buttons: Limit is Enough=Limit Cancel Order,Continue For Now,Increase Limit=Increase Limit
Description: With the last added product, the customer exceeds the debt limit, the order will be cancelled.<br/>Customer : {ENTITY NAME:Customers}<br/>Limit : {ENTITY DATA:Customers:Limit} <br/>Balance : {ENTITY BALANCE:Customers}
After completing necessary editing, click on Save button.