4.22. How to Implement Wastage Stock?
In this document, it will be shown how to deduct wastage/damaged stock at the end of the day. It will reduce it from your inventory and log the total cost in a wastage account that you can use in reporting.
1. Adding Automation Commands
1.1. Adding Wastage Automation Command
Go to Main Menu > Manage > Automation > Automation Commands > here click on Add Automation Command.
General Settings Section;
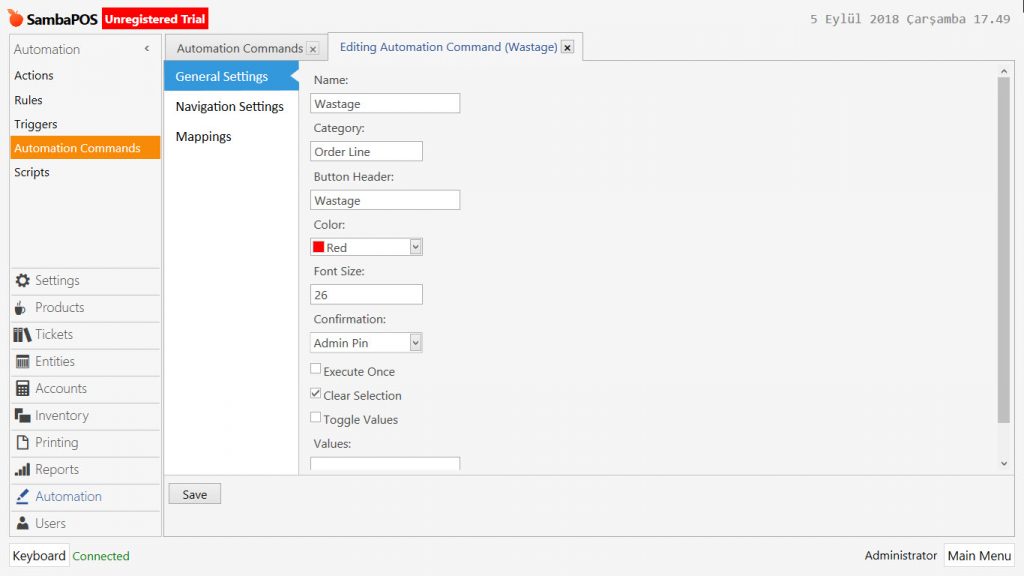
Name: Wastage
Category: Order Line
Button Header: Wastage
Color: Red
Confirmation: Admin Pin
Clear Selection: This box should be selected.
Mappings Section;
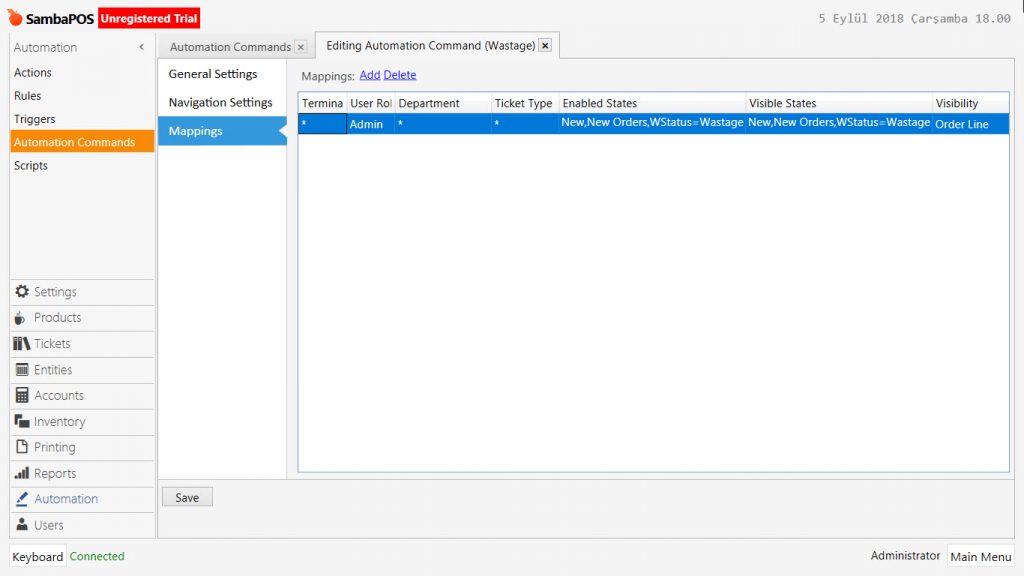
Add a row by clicking on Add button and configure settings as in the image.
User Role: Admin
Enabled States: New,New Orders,WStatus=Wastage
Visible States: New,New Orders,WStatus=Wastage
Visiblity: Order Line
After completing necessary editings, click on Save button.
1.2. Adding Process Wastage Automation Command
Go to Main Menu > Manage > Automation > Automation Commands > here click on Add Automation Command.
General Settings Section;

Name: Process Wastage
Category: Payment Buttons
Button Header: <font calibri>Process\rWastage</font>
Color: Red
Confirmation: Admin Pin
Clear Selection: This box should be selected.
Mappings Section;
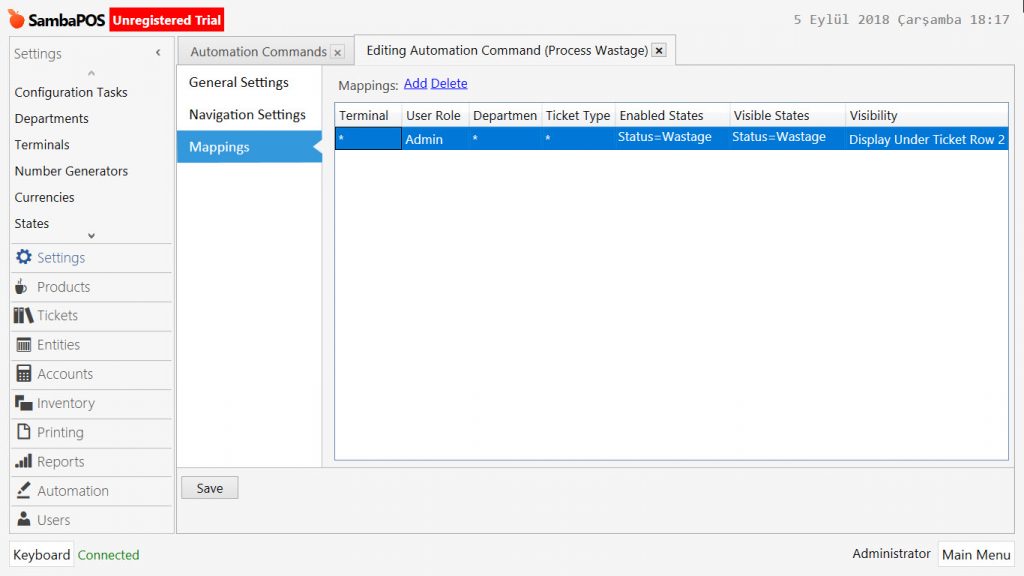
Add a row by clicking on Add button and configure settings as in the image.
User Role: Admin
Enabled States: Status=Wastage
Visible States: Status=Wastage
Visiblity: Display Under Ticket Row 2
After completing necessary editings, click on Save button.
2. Adding Ticket Type
Go to Main Menu > Manage > Tickets > Ticket Types > here click on Add Ticket Type.
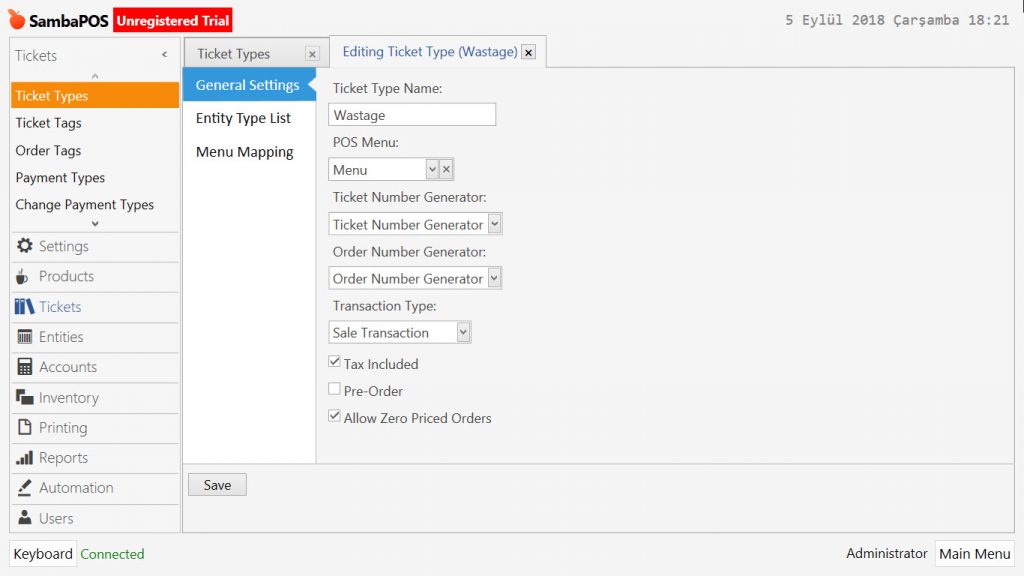
Ticket Type Name: Wastage
POS Menu: Menu (You can select this field according to your own configuration)
Ticket Number Generator: Ticket Number Generator
Order Number Generator: Order Number Generator
Transaction Type: Sale Transaction
Tax Included: Select this box.
Allow Zero Priced Orders: Select this box.
After completing necessary editings, click on Save button.
3. Adding States
3.1. State Type Order State
Go to Main Menu > Manage > Settings > States > here click on Add State.
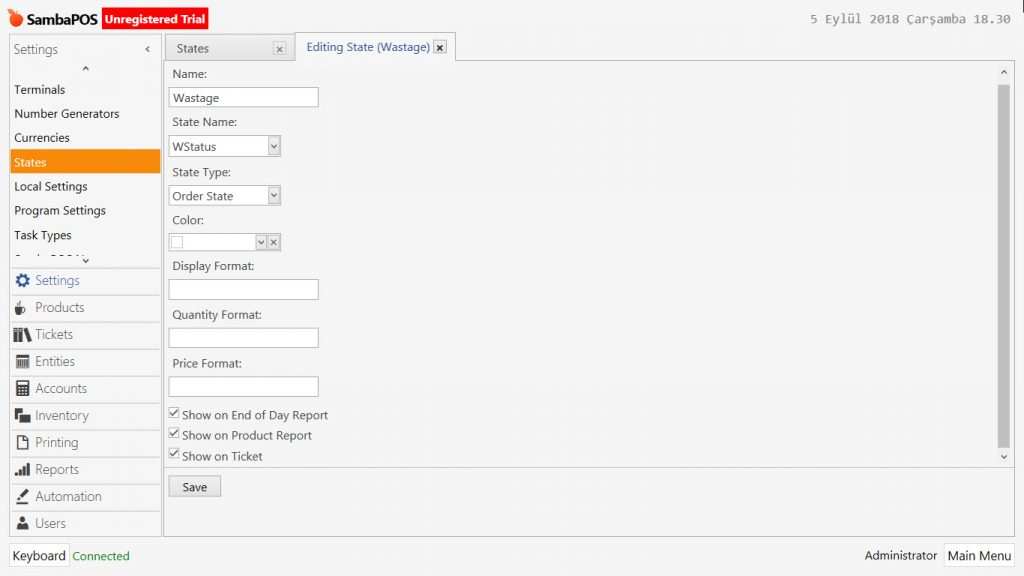
Name: Wastage
State Name: WStatus
State Type: Order State
Show on End of Day Report: Select this box.
Show on Product Report: Select this box.
Show on Ticket: Select this box.
After completing necessary editings, click on Save button.
3.2. State Type Ticket State
Go to Main Menu > Manage > Settings > States > here click on Add State.

Name: Wastage
State Name: WStatus
State Type: Ticket State
Show on End of Day Report: Select this box.
Show on Product Report: Select this box.
Show on Ticket: Select this box.
After completing necessary editings, click on Save button.
4. Adding Account Type, Account and Account Transaction Type for Wastage
4.1. Adding Wastage Account Type
Go to Main Menu > Manage > Accounts > Account Types > here click on Add Account Type.
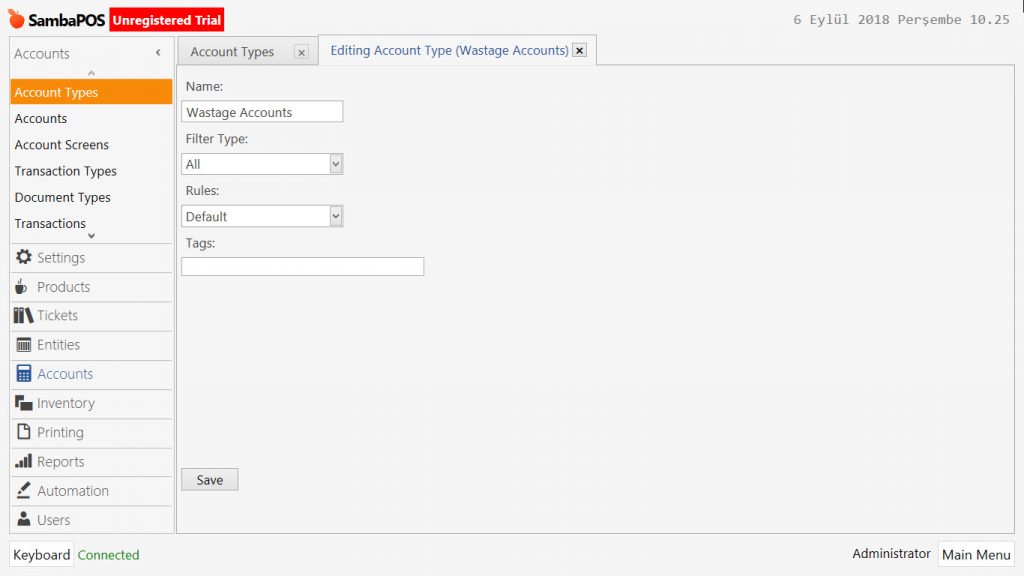
Name: Wastage Accounts
Filter Type: All
Rules: Default
After completing necessary editings, click on Save button.
4.2. Adding Wastage Account
Go to Main Menu > Manage > Accounts > Accounts > here click on Add Account.
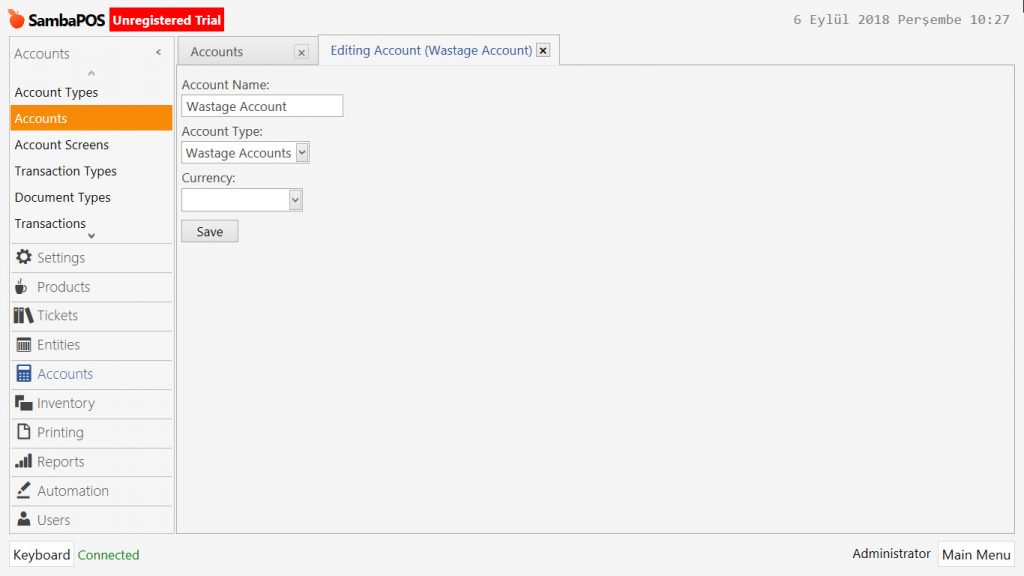
Account Name: Wastage Account
Account Type: Wastage Accounts
After completing necessary editings, click on Save button.
4.3. Adding Wastage Account Transaction Type
Go to Main Menu > Manage > Accounts > Transaction Types > here click on Add Transaction Type.
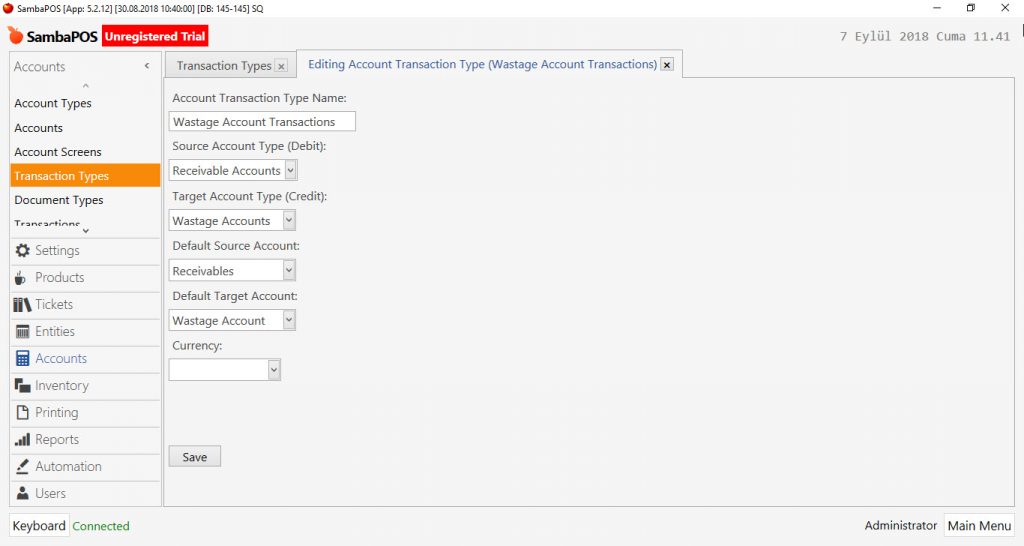
Account Transaction Type Name: Wastage Account Transactions
Source Account Type (Debit): Receivable Accounts
Target Account Type (Credit): Wastage Accounts
Default Source Account: Receivables
Default Target Account: Wastage Account
After completing necessary editings, click on Save button.
5. Adding Account Screen
Go to Main Menu > Manage > Accounts > Account Screens > here click on Add Account Screen.
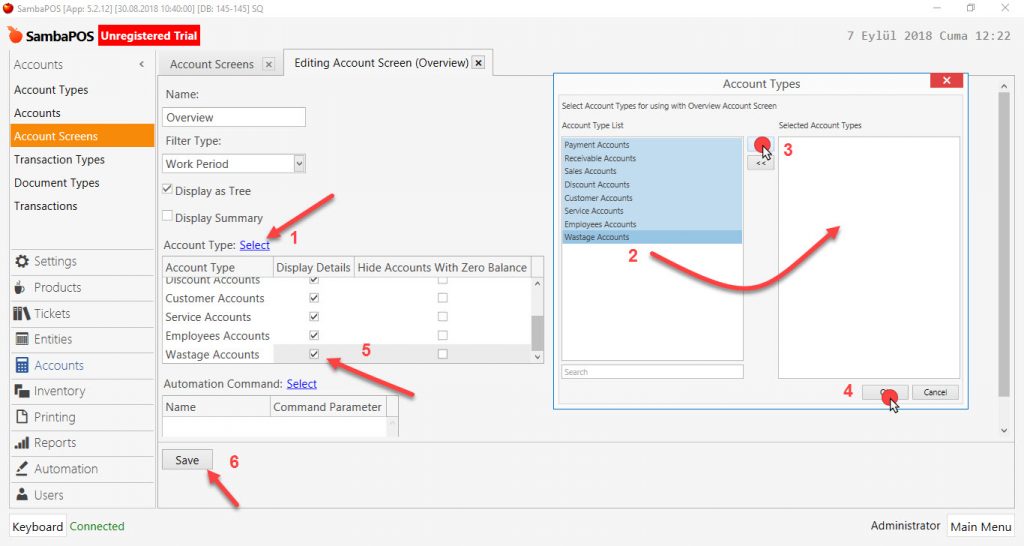
Name: Overview (Give a proper name for account screen, in the example it is selected as Overview)
Filter Type: Work Period
Display As Tree: Select this box.
Account Type: Click on Select button, select accounts from Account Type List, click on Save button and then check the boxes under the Display Details Column for all the accounts.
After completing necessary editings, click on Save button.
6. Adding Payment Type
Go to Main Menu > Manage > Tickets > Payment Types > here click on Add Payment Type.
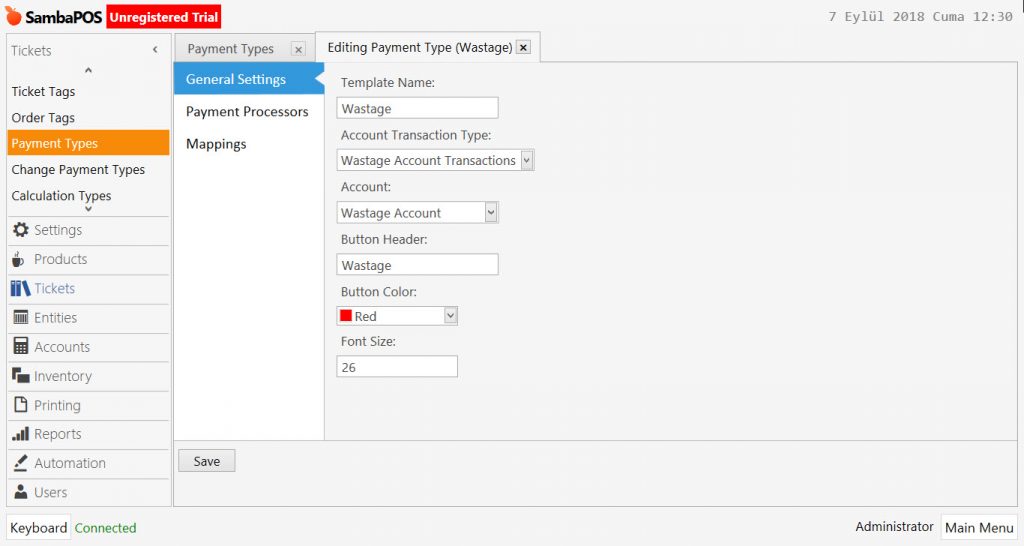
Template Name: Wastage
Account Transaction Type: Wastage Account Transactions
Account: Wastage Account
Button Header: Wastage
Button Color: Red
After completing necessary editings, click on Save button.
7. Adding Actions
7.1. Change Ticket Properties-Wastage Action
Go to Main Menu > Manage > Automations > Actions > here click on Add Action.
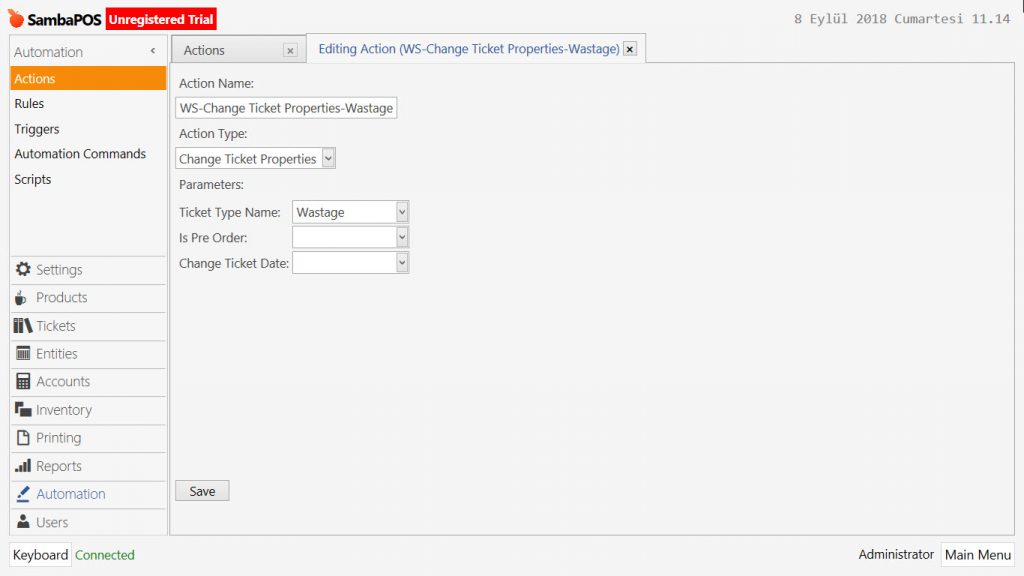
Action Name: WS-Change Ticket Properties-Wastage
Action Type: Change Ticket Properties
Parameters:
Ticket Type Name: Wastage
After completing necessary editings, click on Save button.
7.2. Pay Ticket As Wastage Action
Go to Main Menu > Manage > Automations > Actions > here click on Add Action.
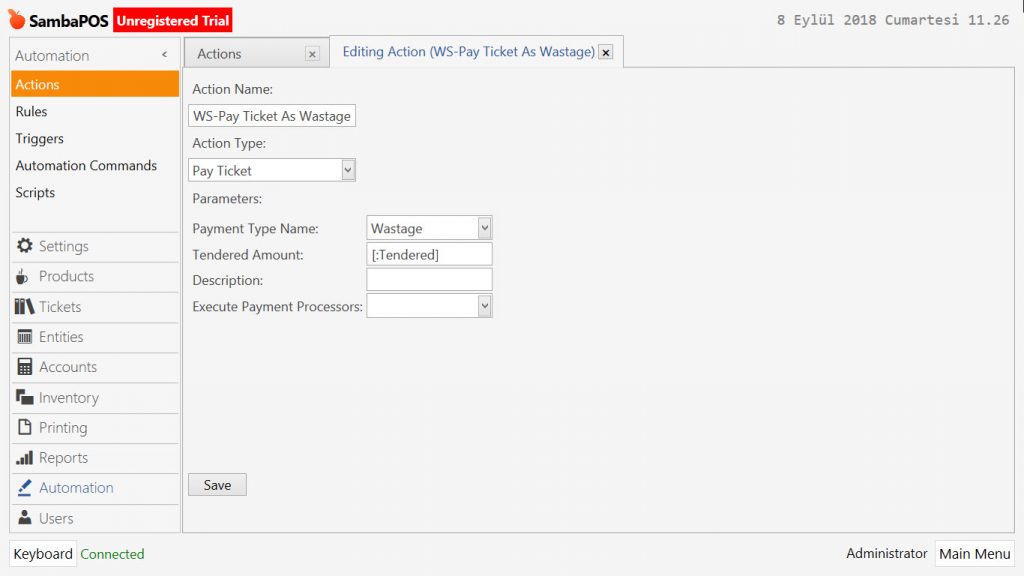
Action Name: WS-Pay Ticket As Wastage
Action Type: Pay Ticket
Parameters:
Payment Type Name: Wastage
Tendered Amount: [:Tendered]
After completing necessary editings, click on Save button.
7.3. Update Order State-Wastage Action
Go to Main Menu > Manage > Automations > Actions > here click on Add Action.
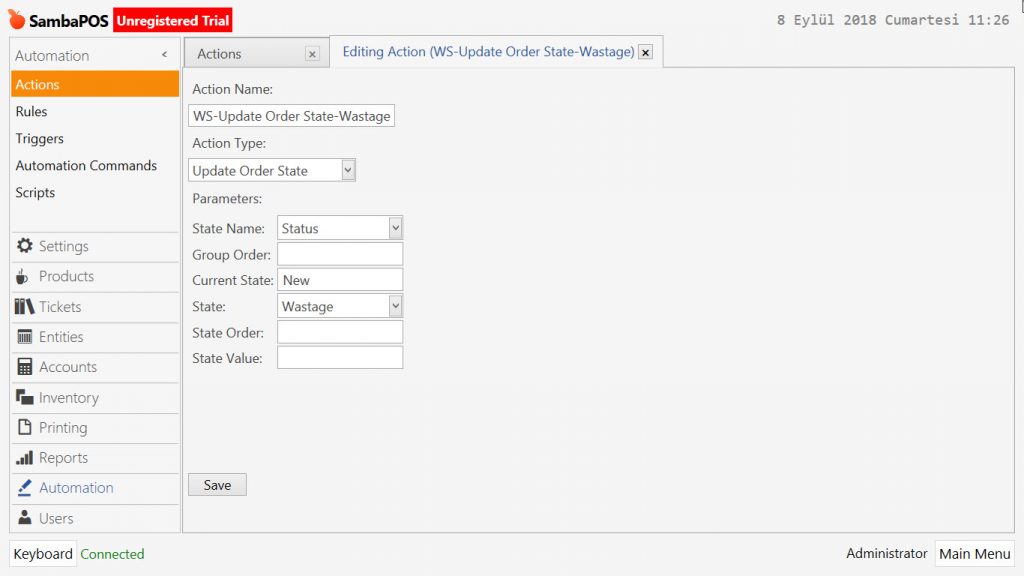
Action Name: WS-Update Order State-Wastage
Action Type: Update Order State
Parameters:
State Name: Status
Current State: New
State: Wastage
After completing necessary editings, click on Save button.
7.4. Update Ticket State-Wastage Action
Go to Main Menu > Manage > Automations > Actions > here click on Add Action.
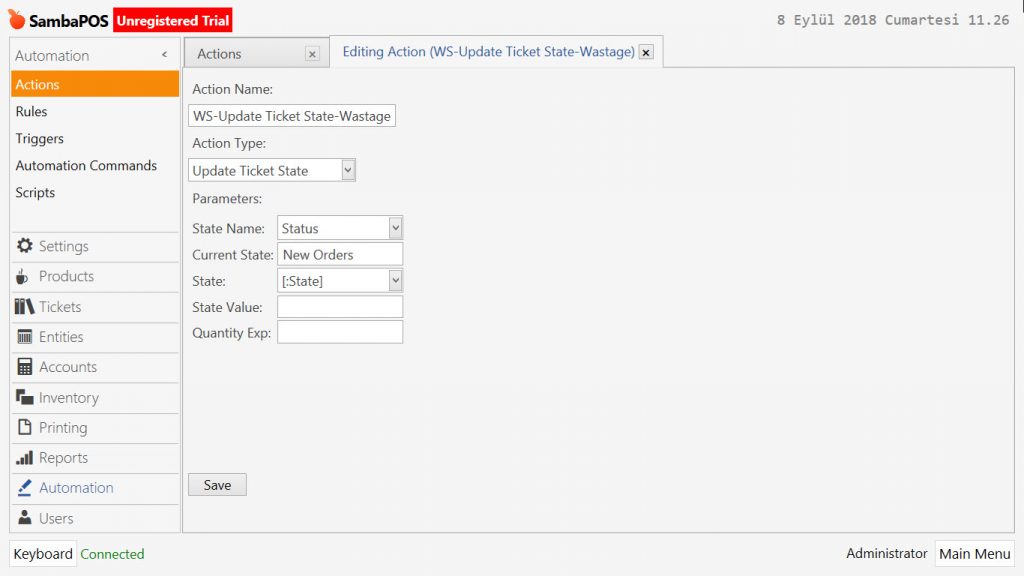
Action Name: WS-Update Ticket State-Wastage
Action Type: Update Ticket State
Parameters:
State Name: Status
Current State: New Orders
State: [:State]
After completing necessary editings, click on Save button.
8. Adding Rules
8.1. Wastage Rule
Go to Main Menu > Manage > Automations > Rules > here click on Add Rule.
General Settins Section:
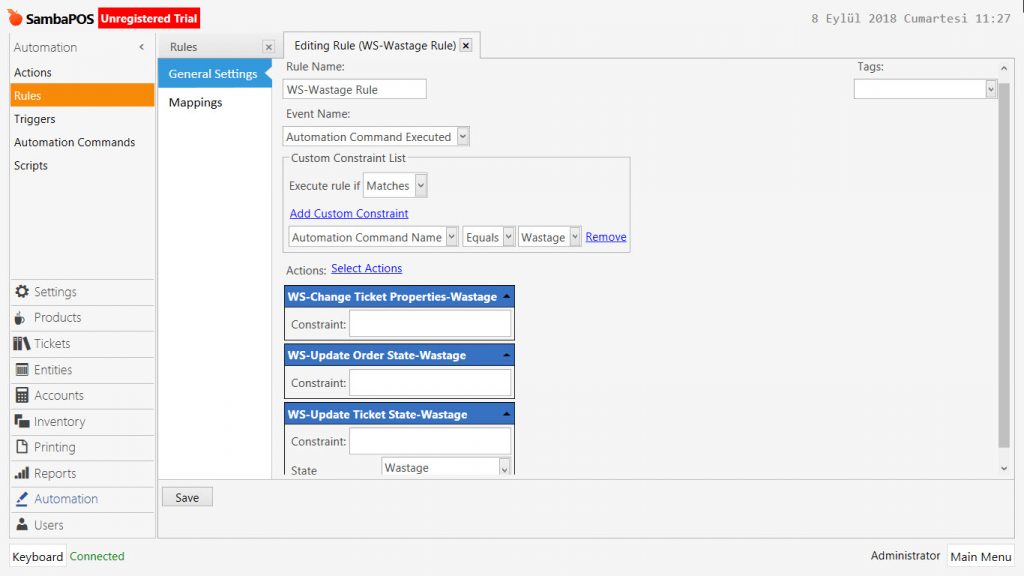
Rule Name: WS-Wastage Rule
Event Name: Automation Command Executed
Execute Rule If: Matches
Add Custom Constraint:
Automation Command Name|Equals|Wastage
Select Actions:
Action-1: WS-Change Ticket Properties-Wastage
Action-2: WS-Update Order State-Wastage
Action-3: WS-Update Ticket State-Wastage
State: Wastage
Mappings Section:
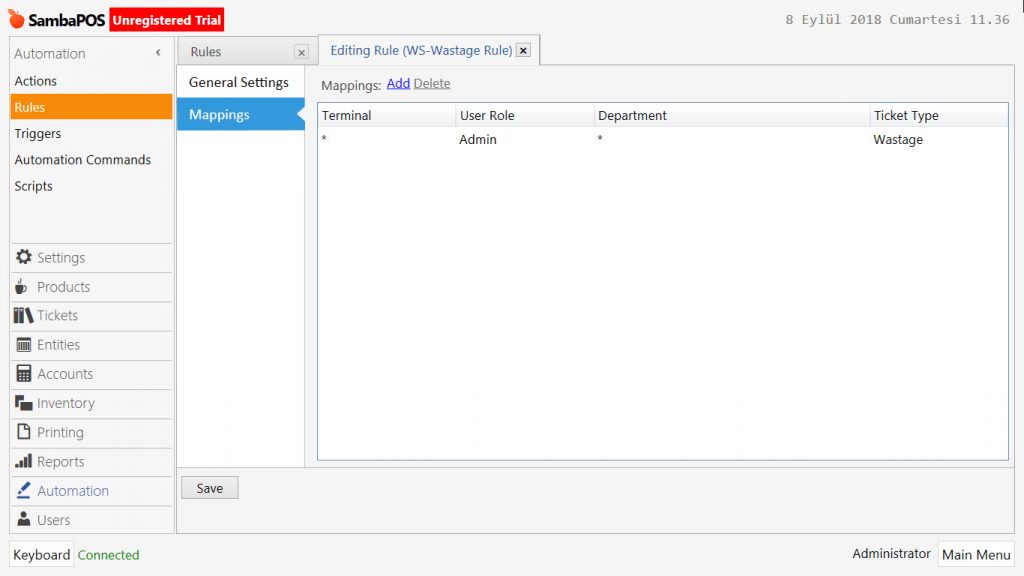
Add a row by clicking on Add button and configure settings as below;
Terminal: *
User Role: Admin
Department: *
Ticket Type: Wastage
After completing necessary editings, click on Save button.
8.2. Pay Ticket As Wastage Rule
Go to Main Menu > Manage > Automations > Rules > here click on Add Rule.
General Settins Section:
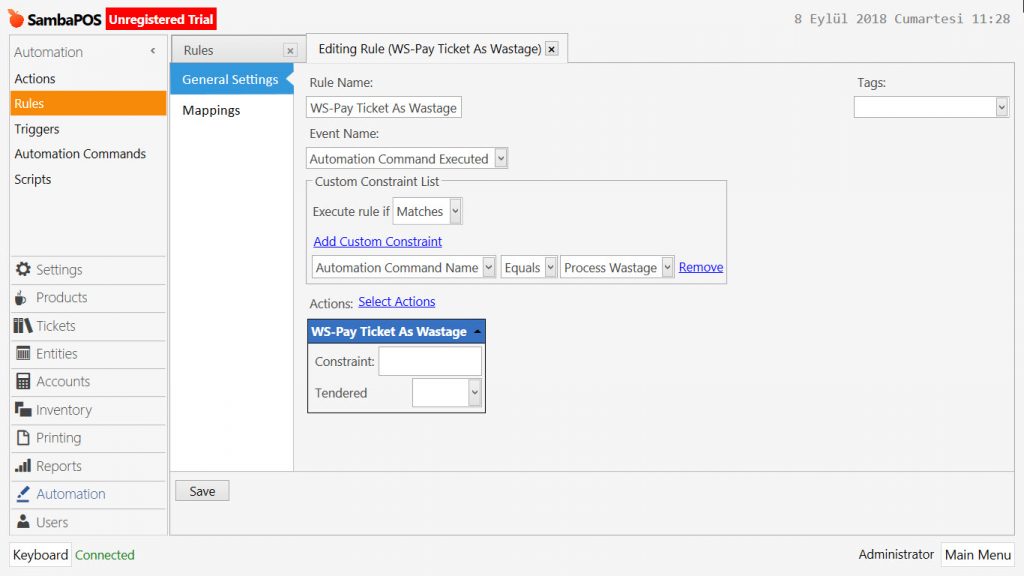
Rule Name: WS-Pay Ticket As Wastage
Event Name: Automation Command Executed
Execute Rule If: Matches
Add Custom Constraint:
Automation Command Name|Equals|Process Wastage
Select Actions:
Action: WS-Pay Ticket As Wastage
Mappings Section:
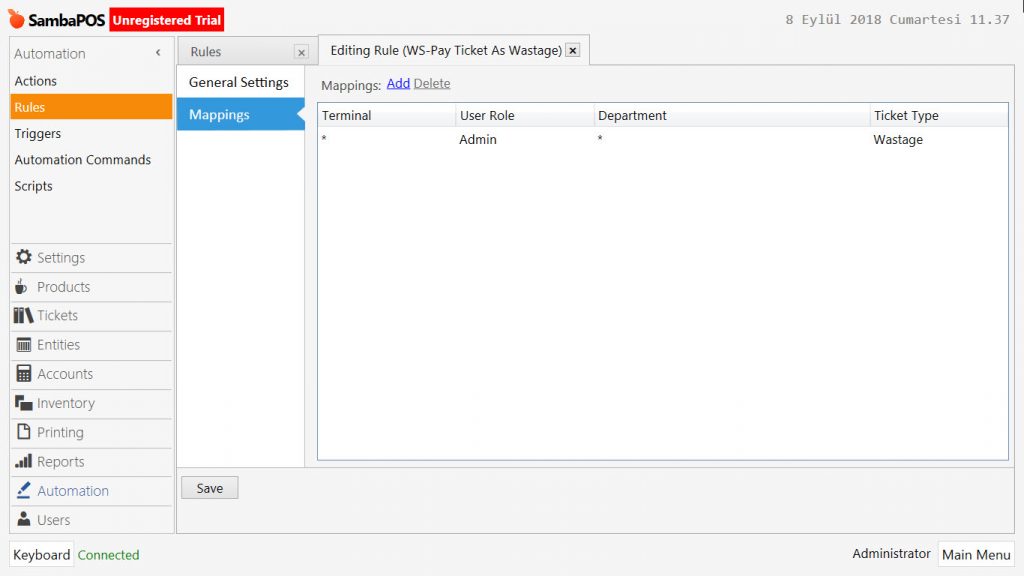
Add a row by clicking on Add button and configure settings as below;
Terminal: *
User Role: Admin
Department: *
Ticket Type: Wastage
After completing necessary editings, click on Save button.
9. Adding Wastage Entity and Entity Screen
9.1. Adding Wastage Entity
Go to Main Menu > Manage > Entities > Entities > here click on Add Entity.
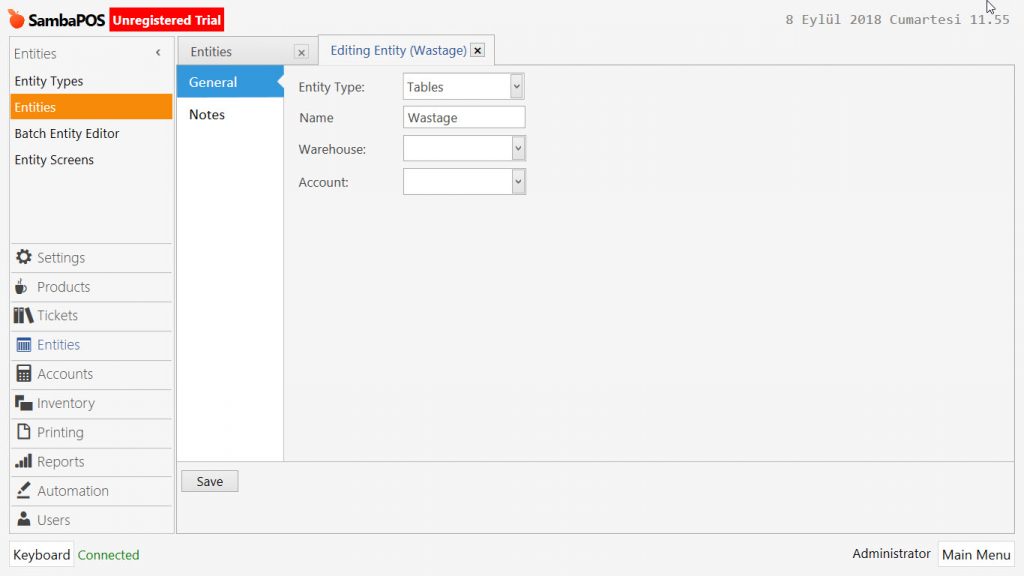
Entity Type: Tables
Name: Wastage
After completing necessary editings, click on Save button.
9.2. Adding Wastage Entity Screen
Go to Main Menu > Manage > Entities > Entity Screens > here click on Add Entity Screen.
General Settings Section;
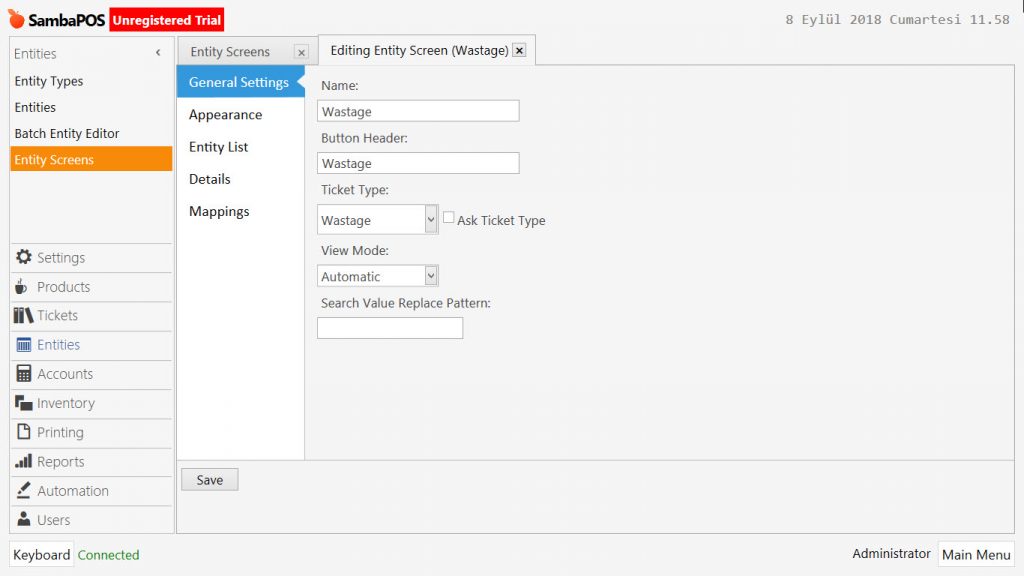
Name: Wastage
Button Header: Wastage
Ticket Type: Wastage
View: Automatic
Entity List Section;
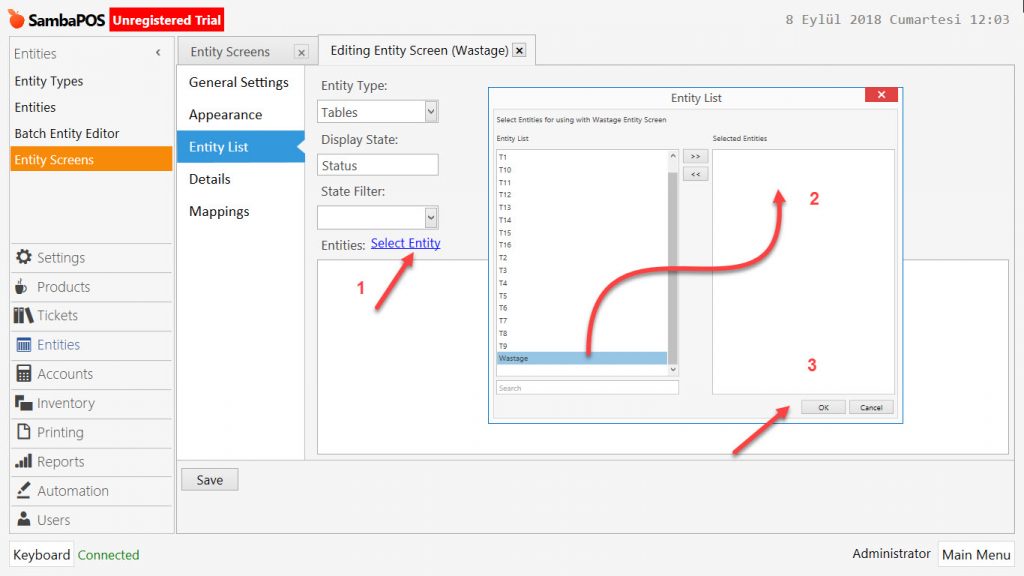
Entity Type: Tables
Display State: Status
Click on Select Entity and find Wastage from Entity List and move it to Selected Entities.
Mappings Section;
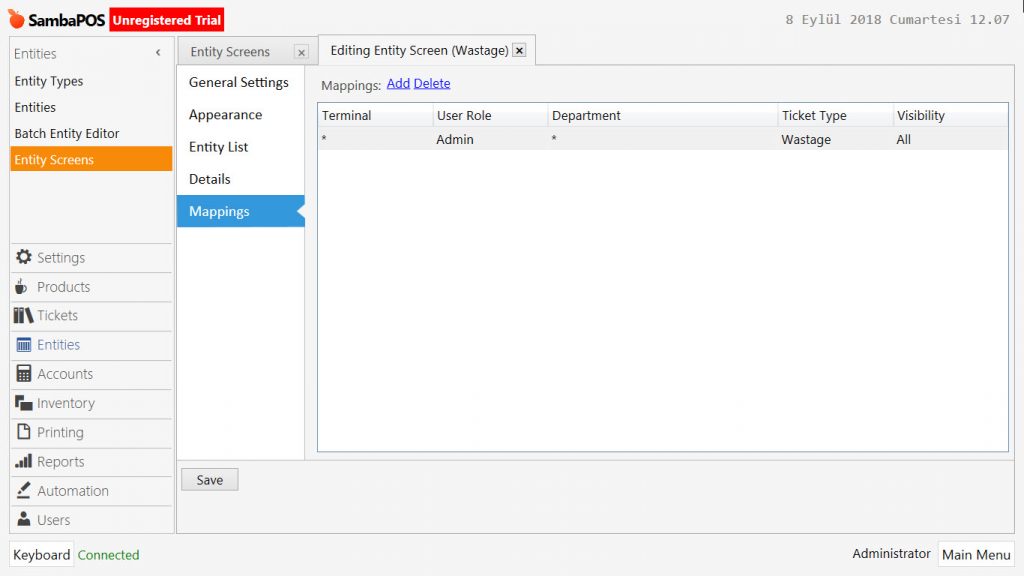
Add a row by clicking on Add button and configure settings as below;
Terminal: *
User Role: Admin
Department: *
Ticket Type: Wastage
Visibility: All
After completing necessary editings, click on Save button.