2.4.5.a. How to Add Price List for Different Ticket Types?
In a restaurant, it is possible to use different price lists, for example delivery service prices could be different than restaurant price list.
In the example it will be shown how to use two different price lists and how to update them according to ticket type.
Adding Price Definitions
Go to Manage > Products > Price Definitions from here click on Add Price Definition link.
- Price Definition Name: Ticket type that price list will be used. (For example: Delivery Service)
- Price Tag: Shortcut for price list to be used on the screen. (For example; DLR)
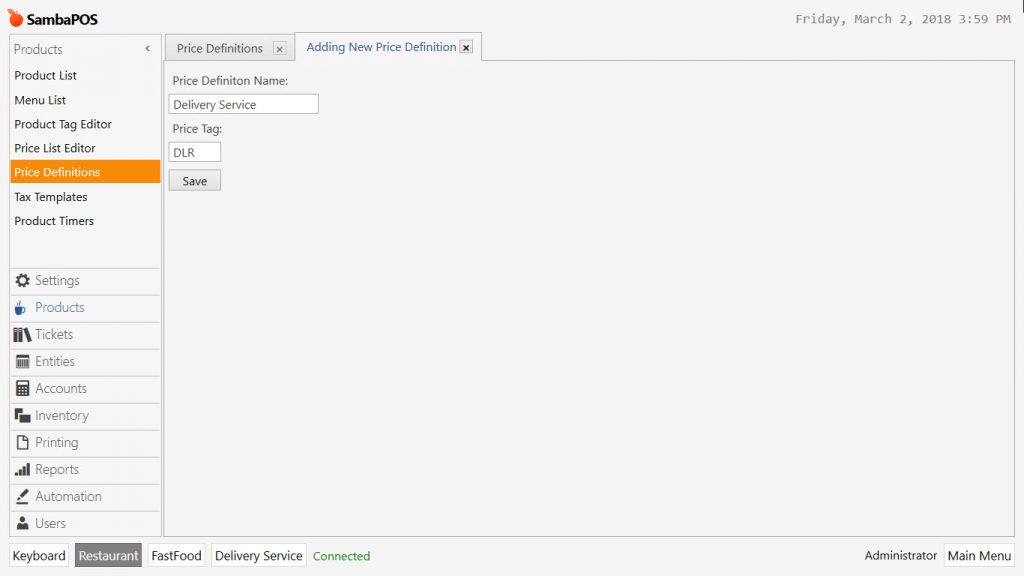
After completing necessary fields, click on Save button. Repeat the same process for other ticket types too.
Updating Prices
Go to Manage > Products > Price List Editor from here set the prices for both restaurant and delivery service.
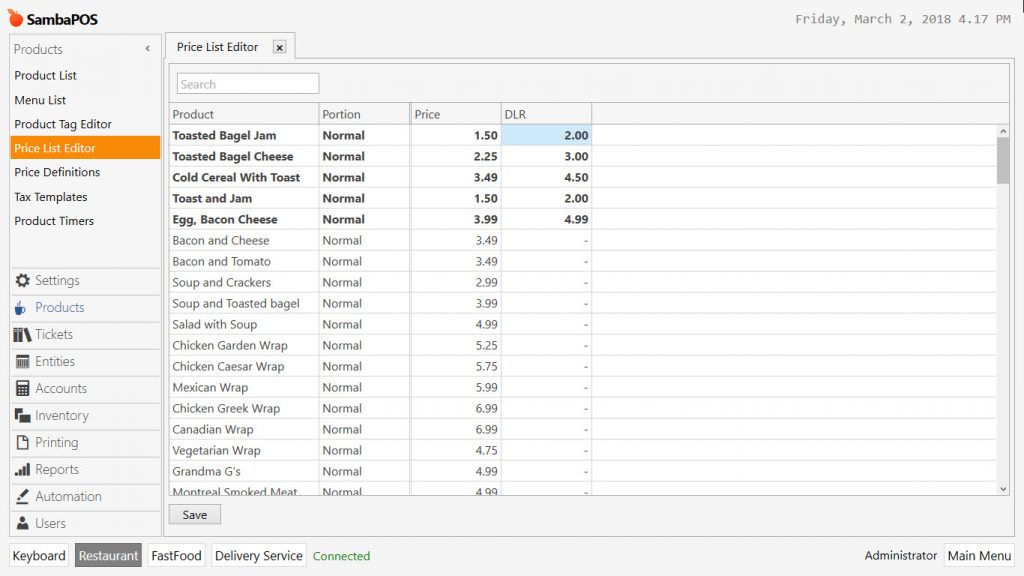
After completing necessary fields, click on Save button.
Adding Update Order Action
Go to Manage > Automation > Actions from here click on Add Action link.
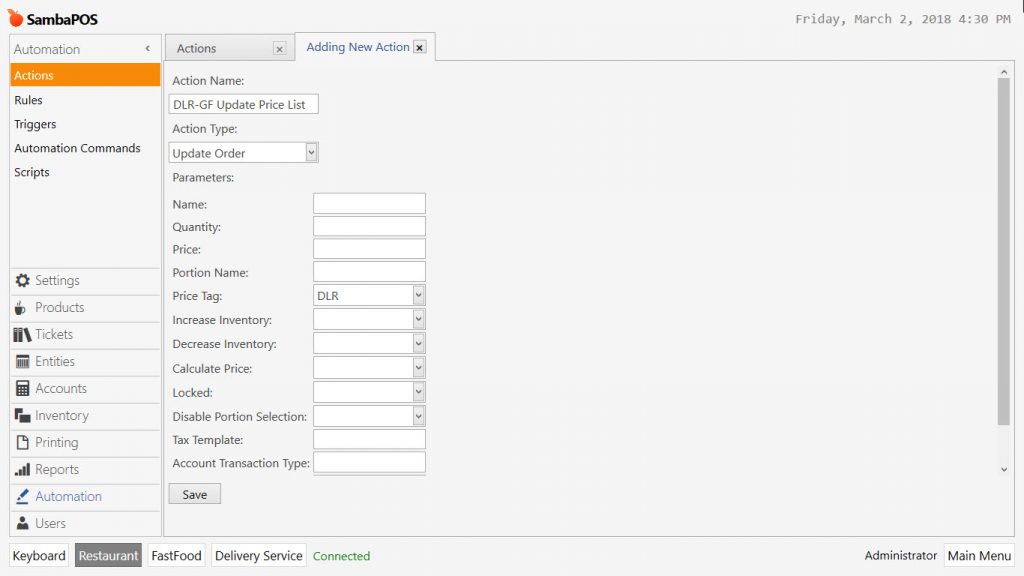
- Action Name: Write the name of action. (For example; DLR-GF Update Price List. GF: G Food)
- Action Type: Select Update Order template.
- Price Tag: Write [:Price List] formula in this field.
After completing necessary fields, click on Save button.
Adding Rule to Edit Prices
Go to Manage > Automation > Rules from here click on Add Rule link.
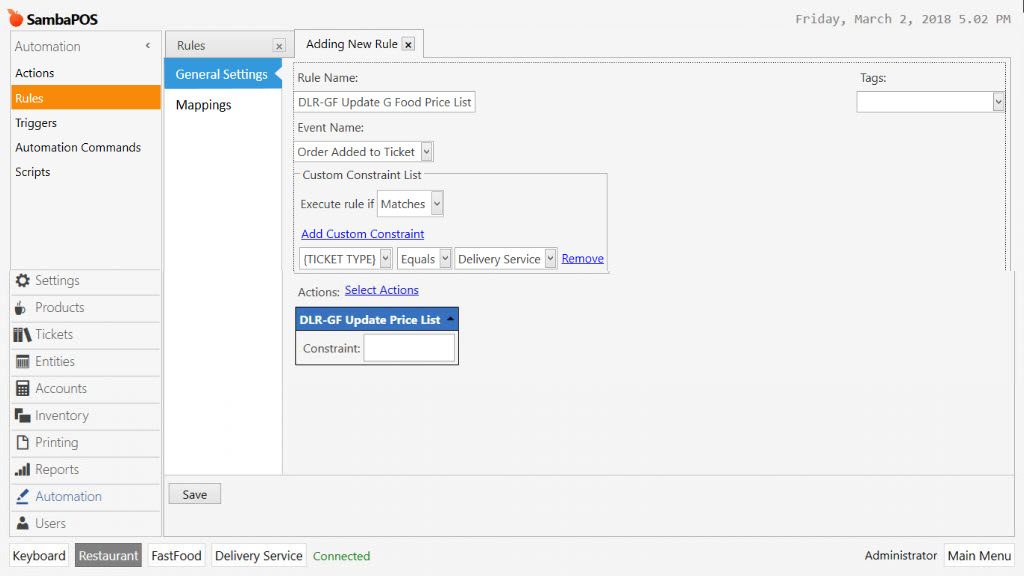
- Rule Name: Write a proper name for the rule. (For example; DLR-GF Update G Food Price List)
- Event Name: Select Order Added to Ticket template here.
- Add Custom Constraint: Add one line in here.
- {TICKET TYPE} = Delivery Service
- Select Action: Select the action which was created on previous step. (DLR-GF Update Price List)
After completing necessary fields, click on Save button. Create the same rule for other ticket types too.
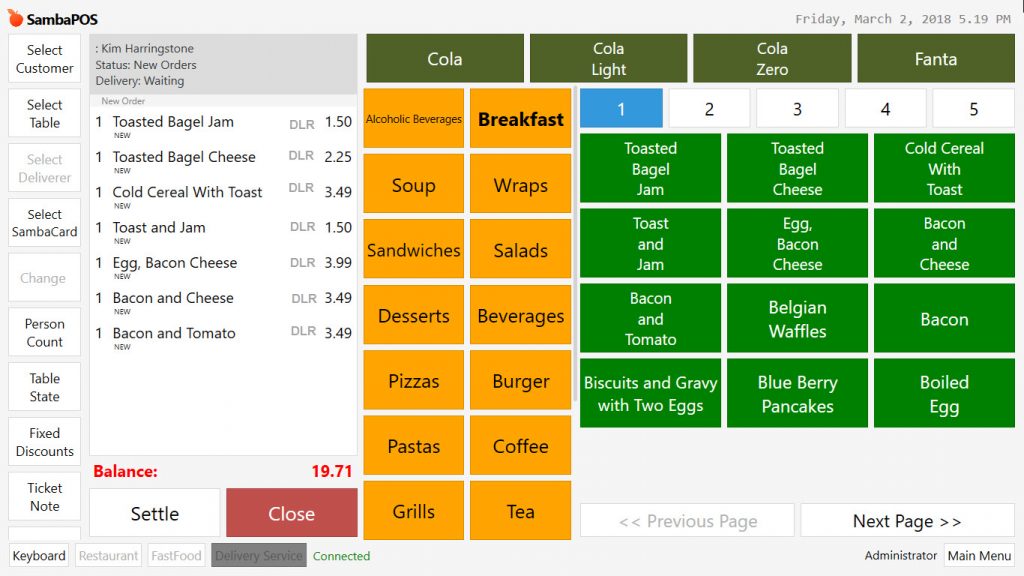
When Ticket Type selected sale will be through created price list.