2.3.14.c. How to Print Invoice and Dispatch Note?
In order to print invoice folllow the steps below.
- Adding Product Tags
- Adding Invoice Printer
- Creating Invoice Printer Template
- Adding Invoice Printing Job
- Print Invoice Automation Command
- Printing Job Action
- Printing Invoice Rule
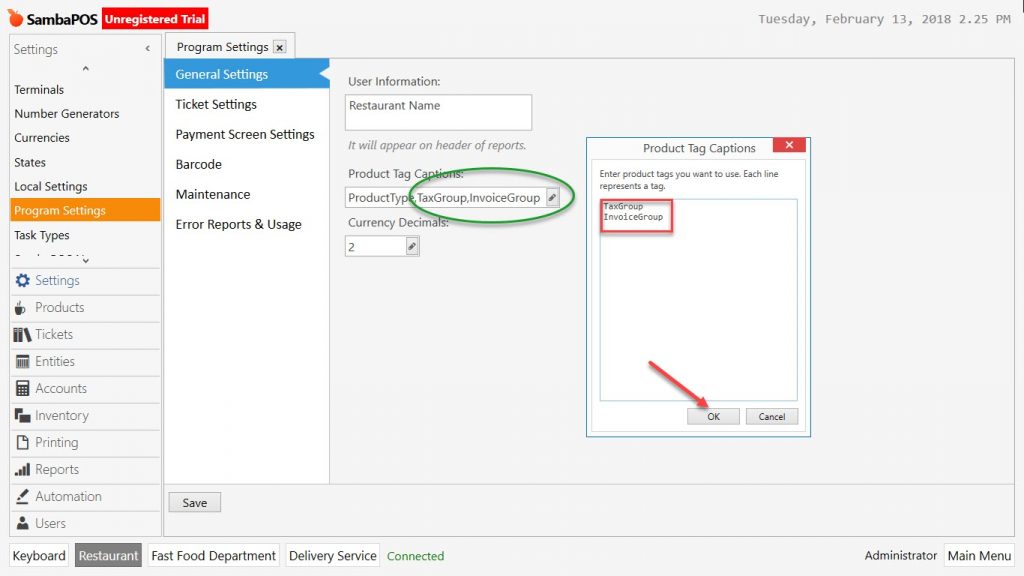
1-Adding Product Tags
When printing invoice it is necessary to split the products as Food Group, Drink Group, Alcoholic Drinks Group etc.
Go to Manage > Settings > Program Settings from here clik on Product Tag Captions in the window write headers of Invoice Groups.
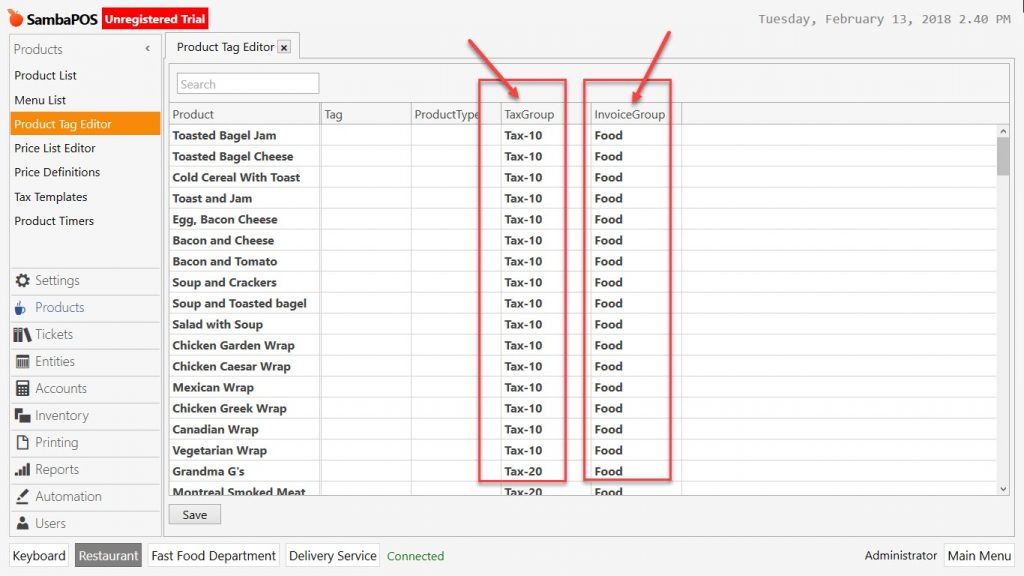
Go to Manage > Products > Product Tag Editor from here write the tags that will be printed on the invoice for all products, complete the process by selecting desired group and click on Save button.
2-Adding Invoice Printer
Manage > Printing > Printers from here click Add Printer link
3-Creating Invoice Printer Template
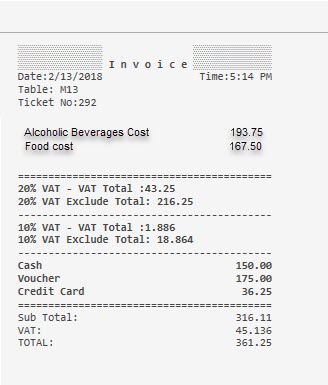
Manage > Printing > Printer Templates from here click on Add Printer Template link. Give a proper name to template and copy below rows into the template;
[LAYOUT]
-- General layout
<T>Invoice
<J00>Date:{TICKET DATE} | Time:{TIME}
{ENTITIES}
<L00>Ticket No:{TICKET NO}
<F>-
{ORDERS}
<F>=
<EB>
{DISCOUNTS}
{TAXES}
[<J10>Total Gift:|{ORDER STATE TOTAL:Gift}]
<J10>Sub Total:|[=F(TN('{TICKET TOTAL}')-TN('{TAX TOTAL}'))]
<J10>VAT:|{TAX TOTAL}
<J10>General Total:|{TICKET TOTAL}
{PAYMENTS}
<DB>
<F>=
[DISCOUNTS]
<J00>{CALCULATION NAME} %{CALCULATION AMOUNT}|{CALCULATION TOTAL}
[PAYMENTS]
<J00>{PAYMENT NAME}|{PAYMENT AMOUNT}
[ORDERS GROUP|PRODUCT TAG:InvoiceGroup]
<J10>{GROUP KEY} Cost | {GROUP SUM}
[ORDERS]
//(Blank leave - 1 character blank - Delete here in the template -)
[ENTITIES:Table]
<L00>Table: {ENTITY NAME}
[ENTITIES:Customer]
<J00>Customer: {ENTITY NAME} | {ENTITY DATA:Phone}
[TAXES]
<L00>{TAX NAME} - VAT Total :{TAX AMOUNT}
<L00>{TAX NAME} Exclude Total: {TAXABLE AMOUNT}
<F>-
4-Adding Invoice Printing Job
Manage > Printing > Printing Jobs from here add Print Job link. Give a proper name, select All Lines for Printing Content field and add a print mapping row. In this row select Invoice Printer, Invoice Template and then click on Save button.

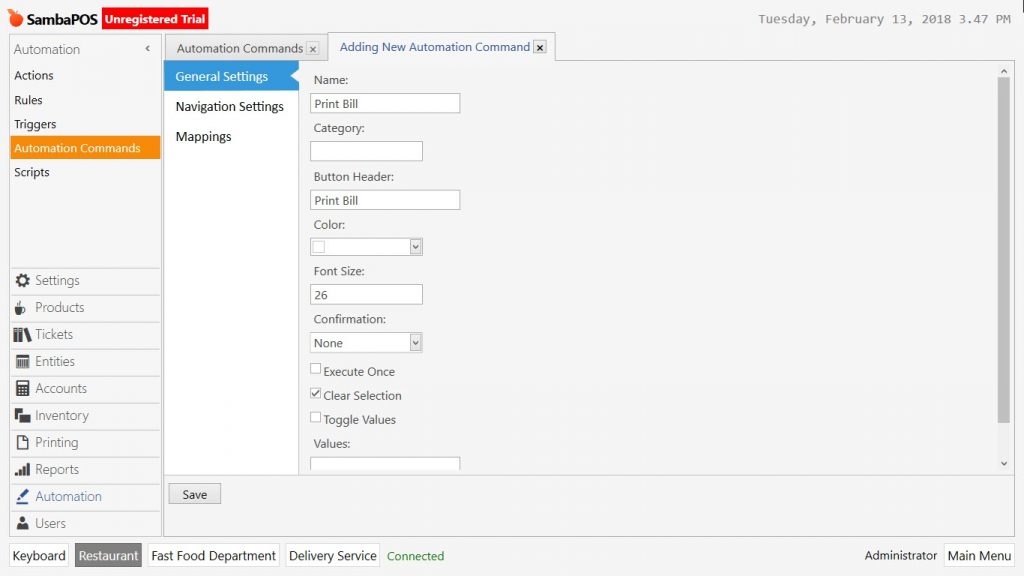
5- Print Bill Automation Command
Go to Manage > Automation > Automation Commands from here add an Automation Command.

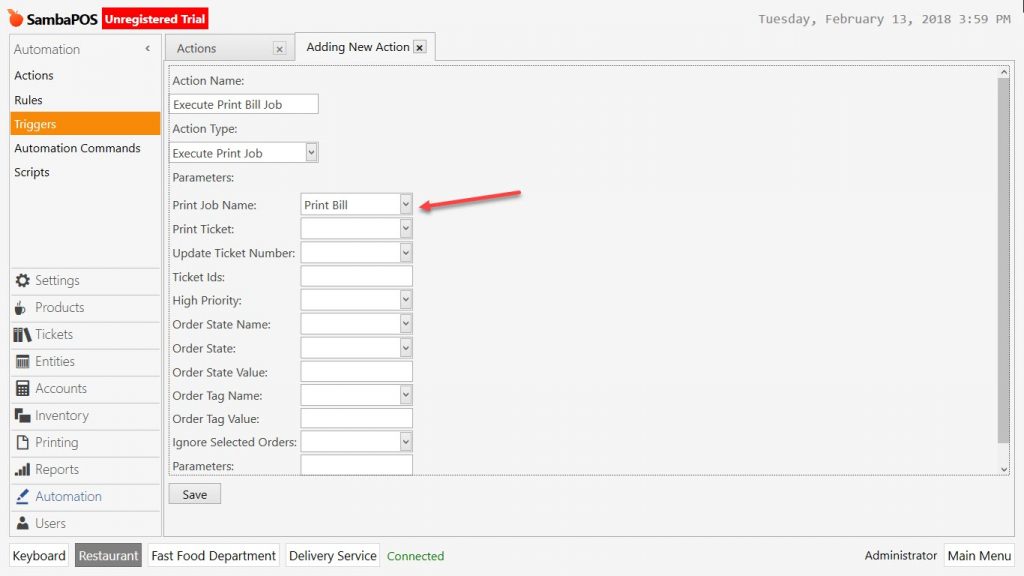
6-Print Bill Job Action
Manage > Automation > Actions from here click on Add Action link.
Action Name: Execute Print Bill Job
Action Type: Execute Printing Job
Parameters:
Print Job Name: Print Bill
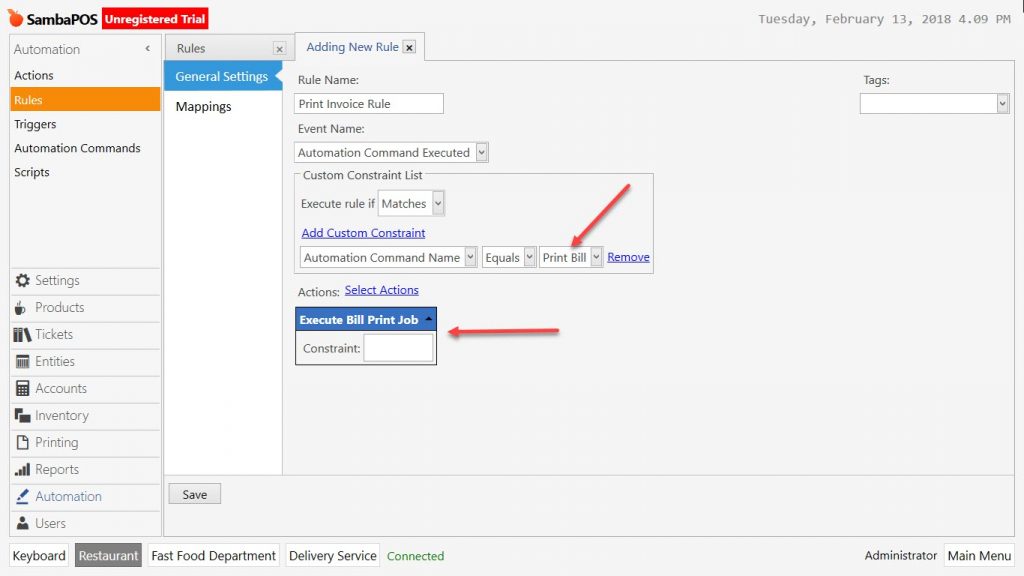
7- Invoice Printing Rule
Manage > Automation > Rules from here Add New Rule link.
Rule Name: Print Invoice Rule
Action Name: Automation Command Executed
Add Custom Constraint
Automation Command | Equals | Print Bill
Select Action:
Execute Bill Print Job