2.2.1. SambaPOS V5 Quick Setup
1. Removing Sample Data
1.1. Removing Database Logs
1.2. Clearing Menu Categories
1.3. Clearing Product List
1.4. Deleting Entities
2. Adding Entity (Table)
3. Adding Product
3.1. Adding Product
3.2. Adding Portion
4. Menu List (Creating a Menu)
4.1. Creating Menu Categories
4.2. Editing Menu Categories
5. Order Tags
5.1. Adding an Order Tag Group (Adding Order Features)
5.2. Adding Order Tag Attachment
6. Printers
6.1. Adding Printer
6.2. Print Jobs
6.3. Printer Templates
7. Users
7.1. Add/Edit Roles
7.2. Adding Users
8. Automation Commands
8.1. Binding Automation Commands (Authorizing Buttons)
8.2. Adding Gift Cancelation Reason
9. Customers
9.1. Adding Customer Custom Fields
9.2. Adding Customer
10. Inventory
10.1. Adding an Inventory Item
10.2. Adding a Recipe
10.3. Create Automatic Bulk Recipe
10.4. Purchasing Inventories
1. Removing Sample Data
1.1. Removing Database Logs
In order to delete the sample data and logs, go to Manage > Settings > Database Tools > Database Tasks tab. In the following page, click on the Clear Database Transactions line to select it and click on Execute Task button below.
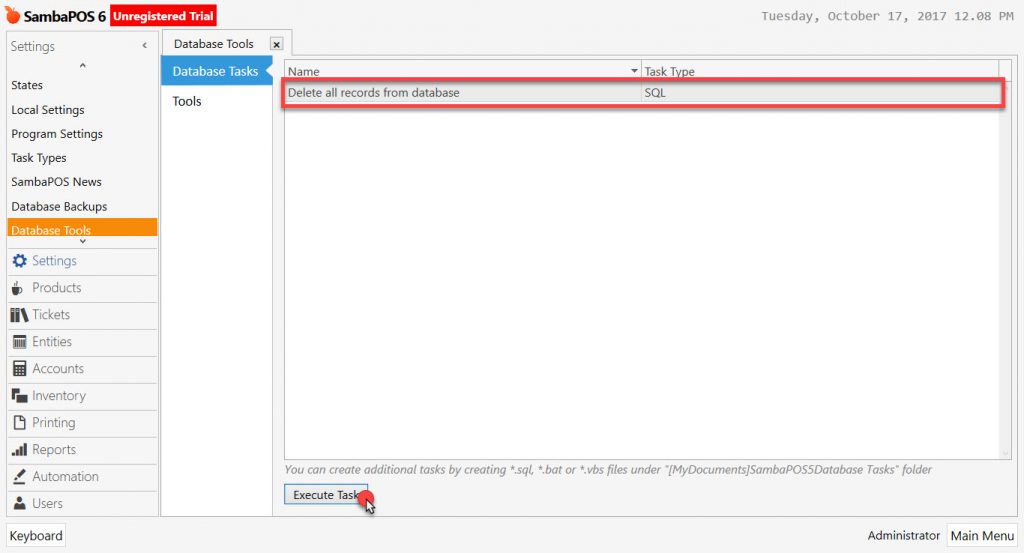
In the confirmation window, click on Yes button.

This process removes every transaction in the previous database and creates an empty database.
1.2. Clearing Menu Categories
In order to delete products, the products have to be removed from the menu first. To do that, go to Manage > Products > Menu List from here double click on Menu and open Editing Menu screen. Select all categories by holding on the Ctrl key and then, click on Delete Category link.
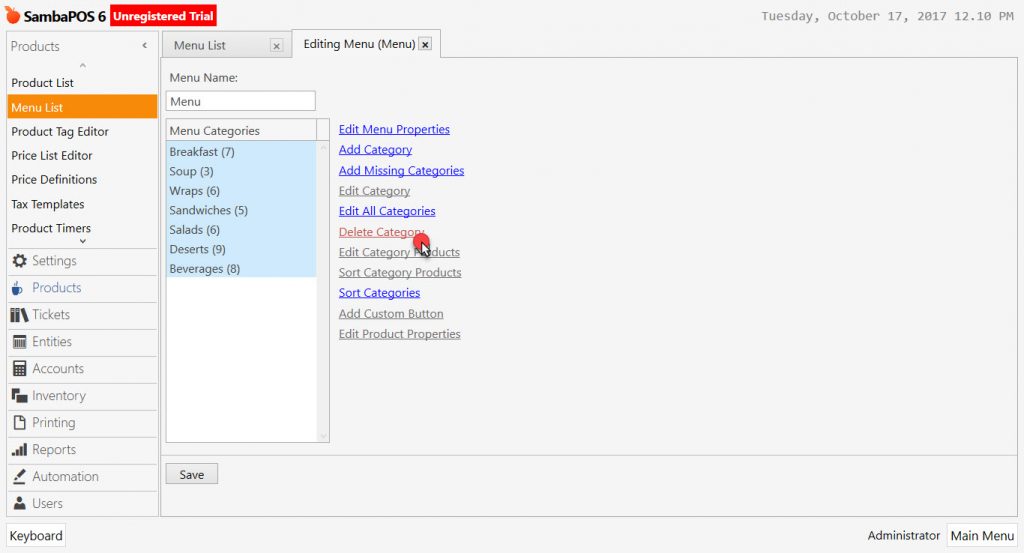
Click on Save button to complete the process. By this process, every selected category and the products inside them wşll be deleted.
1.3. Clearing Product List
In order to delete the products saved into SambaPOS, click the menu, Products > Product List. Select the products which desired to be deleted, right click of your mouse and then click on Delete Selected Items link.
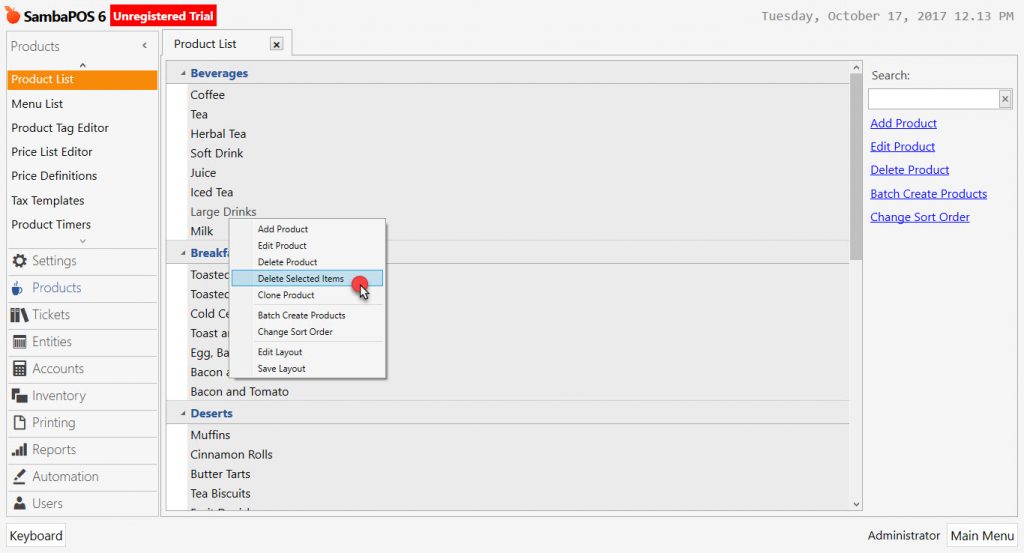
In the confirmation window, click Yes to delete selected products.
1.4. Deleting Entities
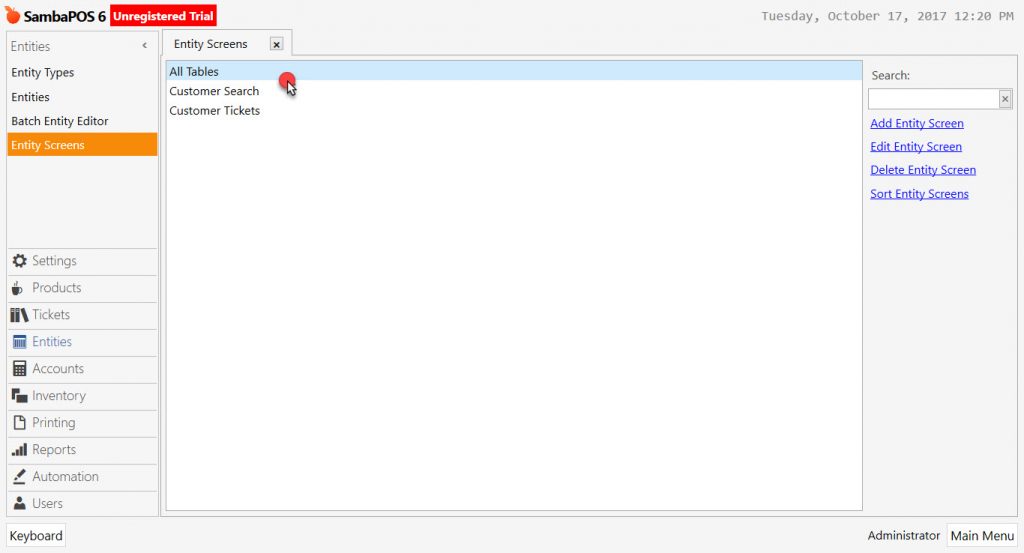
The term table is within entities in the SambaPOS. In order to delete any Tables (Entities), those table(s) must be removed from the Entity Screen that it has been assigned to. Go to Manage > Entities > Entity Screens in here double click on the related Entity Screen.

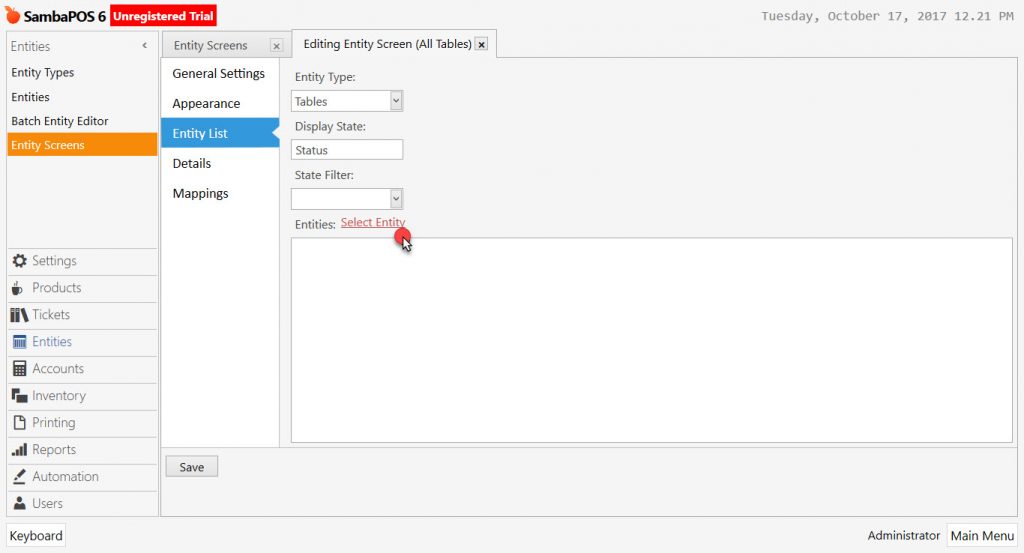
From the Editing Entity Screen, go to Entity List tab and click on the Select Entity link.
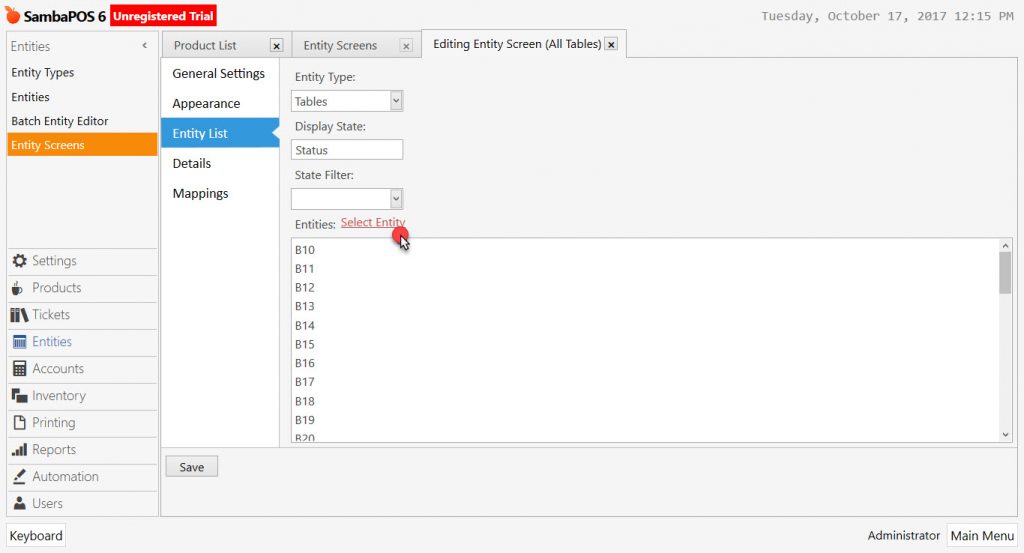
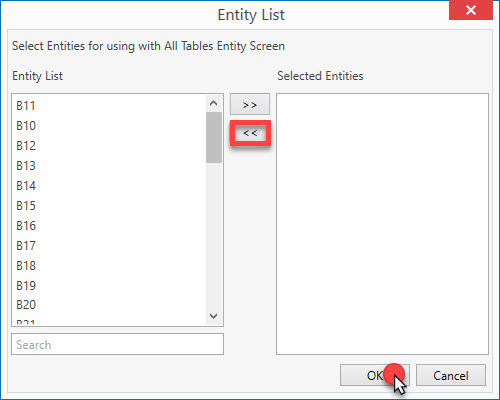
In the following window, select tables from the Selected Entities list and transfer them into Entity List by clicking << button. After that first click on OK button fand then the Save button.
By this process, the tables are removed from the entity screen. In order to delete the tables, click on the Entities menu. Select the respective tables and right click with your mouse and select the option, Delete Selected Items.
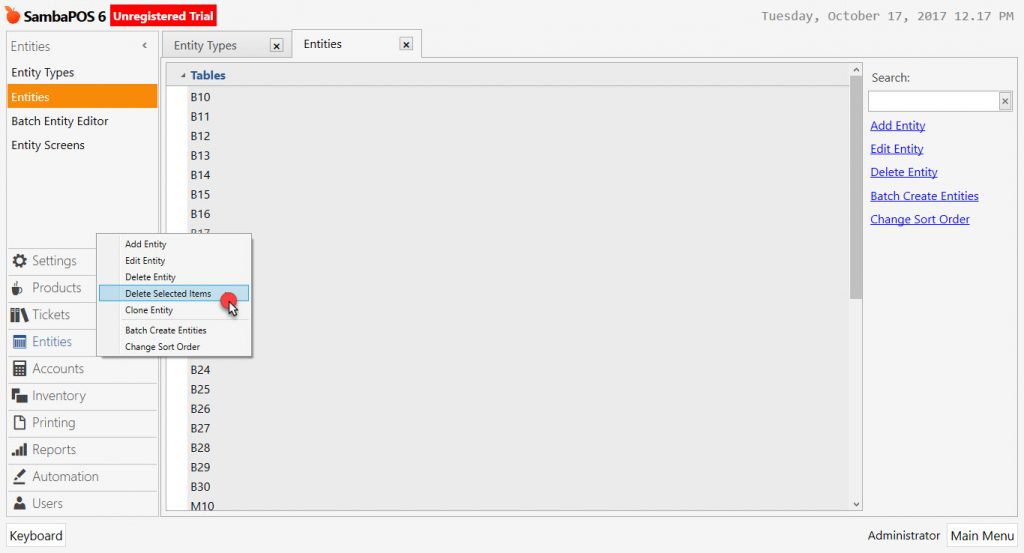
In the confirmation window, click on Yes to delete the tables. (entities)
2. Adding Entity (Table)
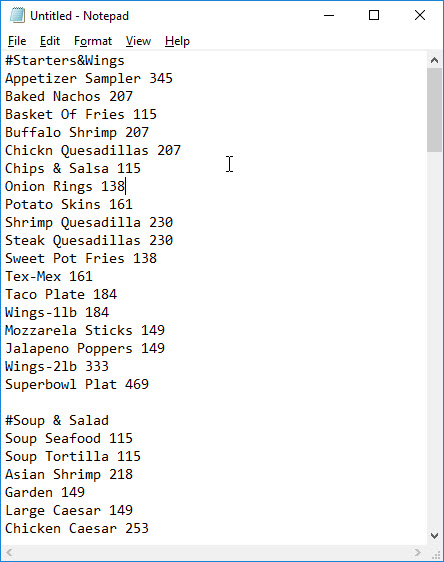
The easiest way to define a table in SambaPOS is to create the table list in a notepad previously. When creating the list, put a # symbol at the top of the list, type the table name, and list the table names line by line.
To create a table, click on the Batch Create Entities link in Manage > Entities > Entities menu.
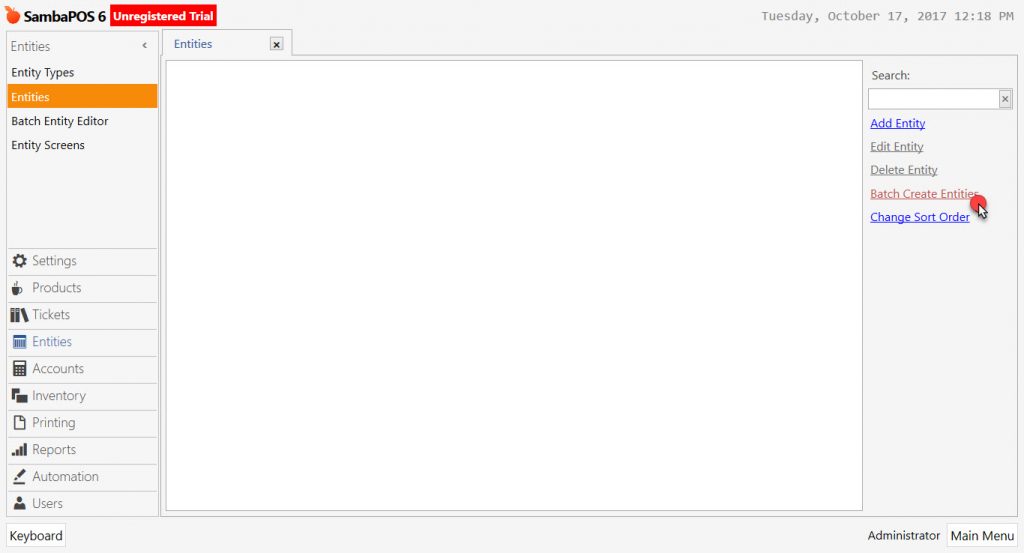
Add the prepared content from notepad into the Batch Create Entities screen by copying and pasting.
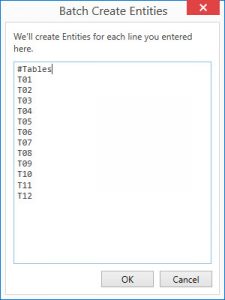
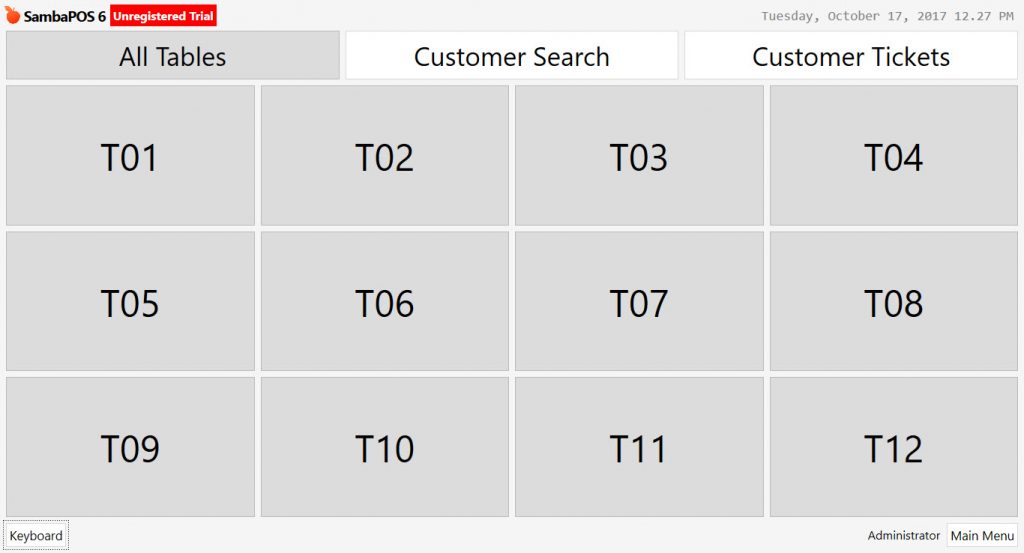
When you click on the OK button, the process of adding tables is completed. To view these tables in a screen view, double-click on the corresponding entity screen where the tables will be inserted from the Entities > Entities Screens menu.
In the Entity List section of the Edit Entity Screen, click on Select Entity link.
In the window, select the relevant tables on the Entity List screen and transfer to the Selected Entities list. The order of the tables can be edited using the drag and drop method.
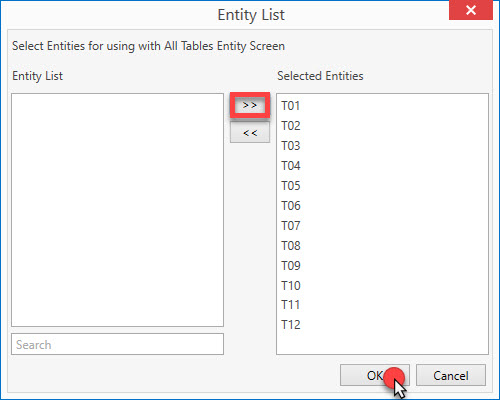
When the OK button is pressed, the process of defining the tables in the entity screen is completed. From the Appearance tab, you can set options such as the number of columns and the number of rows in the entity screen.
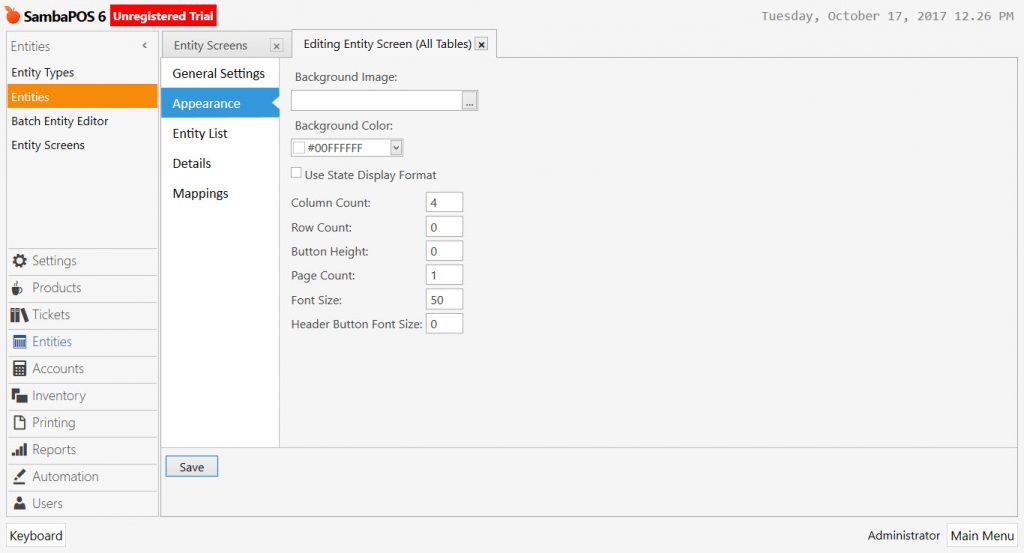
The table definition process is completed when the Save button is clicked after the editing process is completed.
3. Adding Product
3.1. Adding Product
The easiest way to identify a product in SambaPOS is to create a list of products in a notepad, put # symbol to the beginning of the group code name, followed by each line item. Here, the number written with space after the product is the normal serving price of the product.
To create a batch product, click on the Batch Create Products link located under Manage > Products > Product List menu. The product list, previously prepared for notepad, is inserted into the pop-up window with copy and paste.
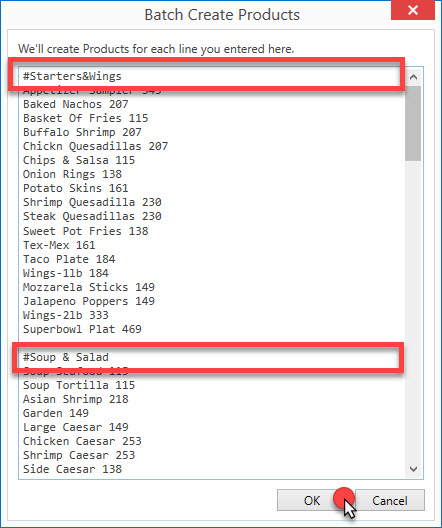
The important thing here is that each row starting with # specifies product groups.
When the list preparation process is completed, the products are added to SambaPOS under the groups to be written by clicking on the OK button. To customize a single product, double-click on it and the product edit screen opens.
3.2. Adding Portion
In the sample practice, it will be shown how to add portion to the related product.
To add a portion to a product, click on the Add Portion link in the Portion Prices section.
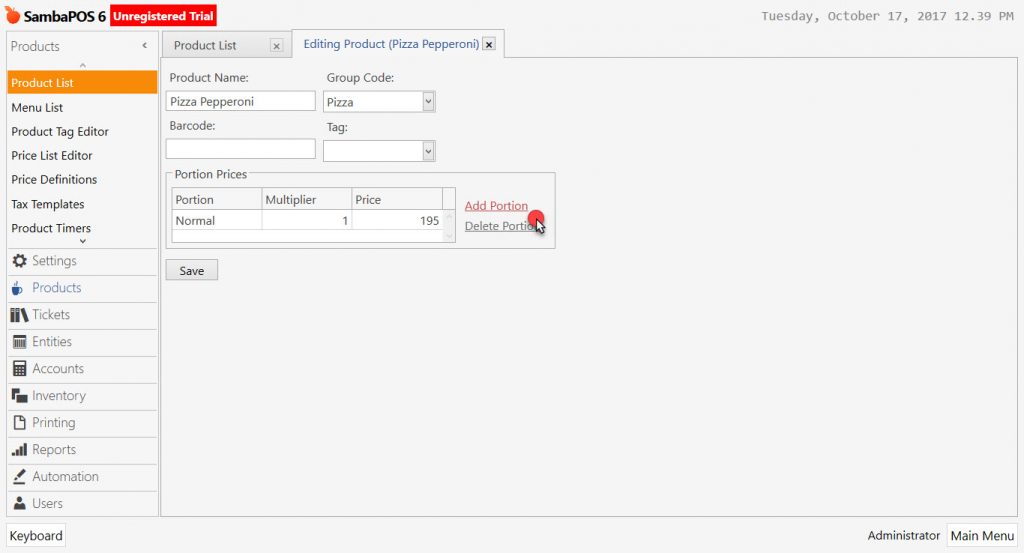
As many rows as the number of portions to be added. After the serving portion name is written, the price is written in the price column.
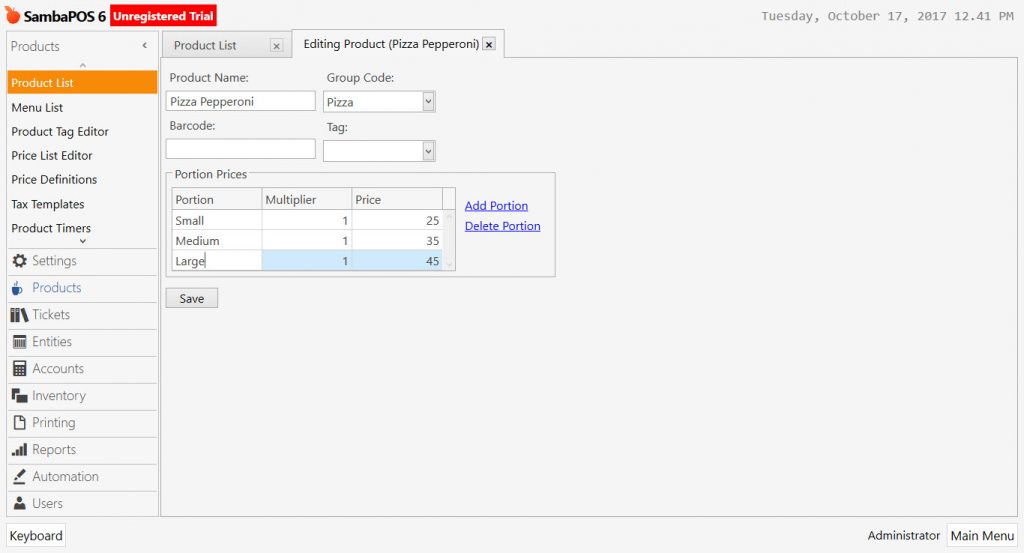
When the Save button is clicked, the product editing operation is completed. The added items must be defined in the relevant menu in order to appear on the SambaPOS sales screen and be added to the ticket.
4. Menu List (Creating a Menu)
In order to add products to the menu, go to Manage > Products > Menu List and double click on the respective menu, to open up Editing Menu screen.
4.1. Creating Menu Categories
In order to add a category to the menu, click on the Add Category link.
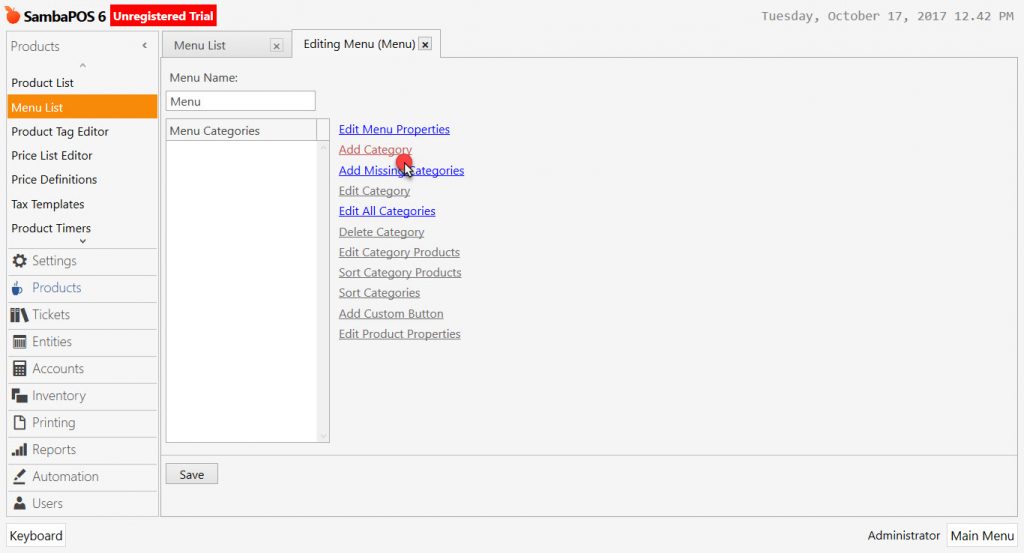
In the following Categories window enter category names, making sure to enter one category name in each line.
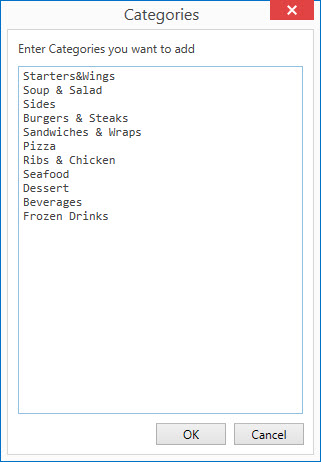
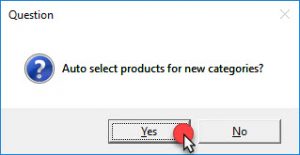
When the OK button is clicked, SambaPOS asks you whether or not to Auto select products for new categories? If you press the Yes button, SambaPOS automatically adds products whose group code/name is the same as the category name, to the respective categories.
If the group name and category name are not the same or some products must be added afterward, double-click on a category.
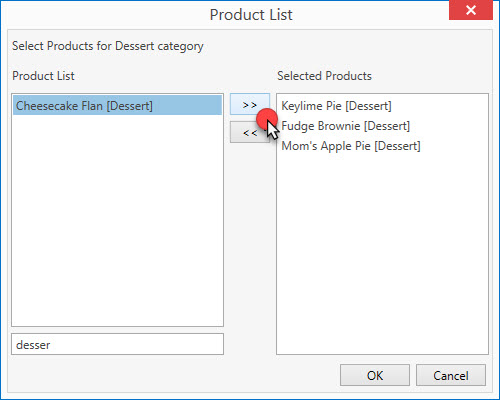
In the following window, double-click on products in the Product List to transfer them to Selected Products list. Then, press on OK button.
4.2. Editing Menu Categories
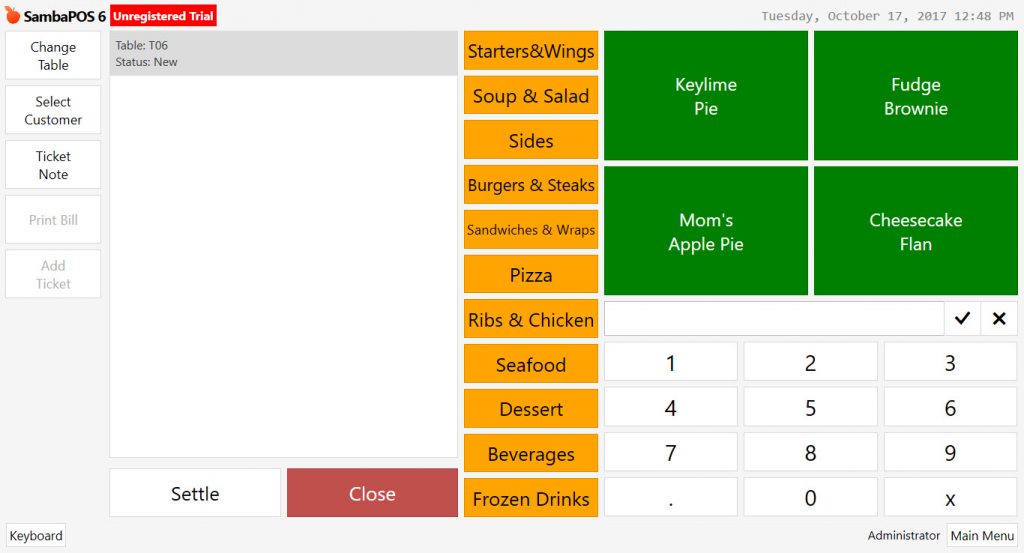
Important: After completing the processes of creating a category and adding products into the category, while the category is selected click on the Edit Category link. In the following Property Editor, check the Wrap Text checkbox.
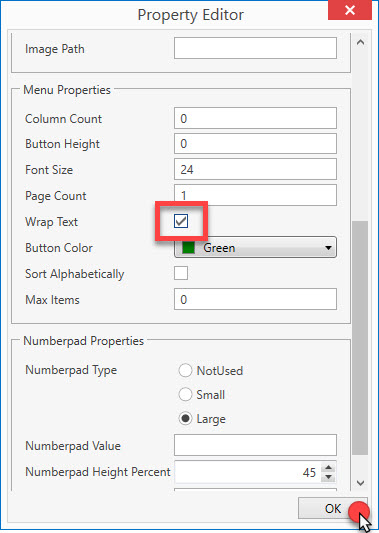
By doing so, long product names are broken down into spaces to lines, so that they become easier to read. After completing related changes, press on Save button, and the process adding products to the menu will be finished.
5. Order Tags
5.1. Adding an Order Tag Group (Adding Order Specifications)
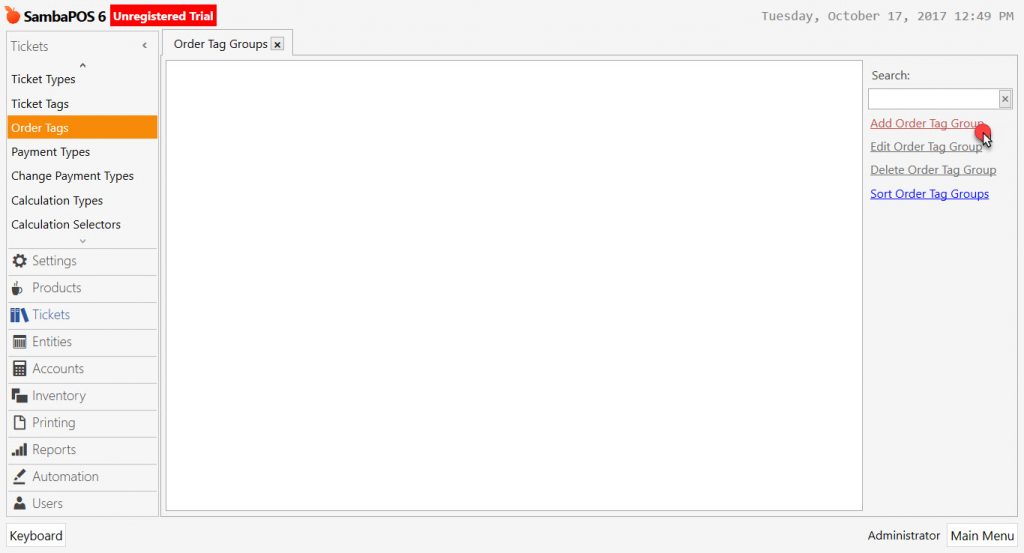
To define attributes for products in SambaPOS, click the Add Order Tag Group link from the Manage > Tickets > Order Tags menu.
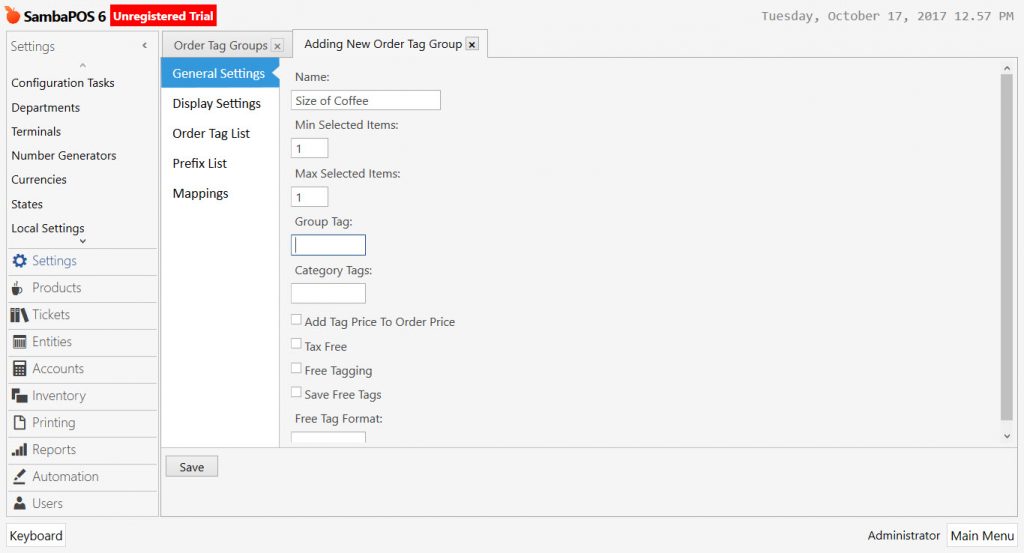
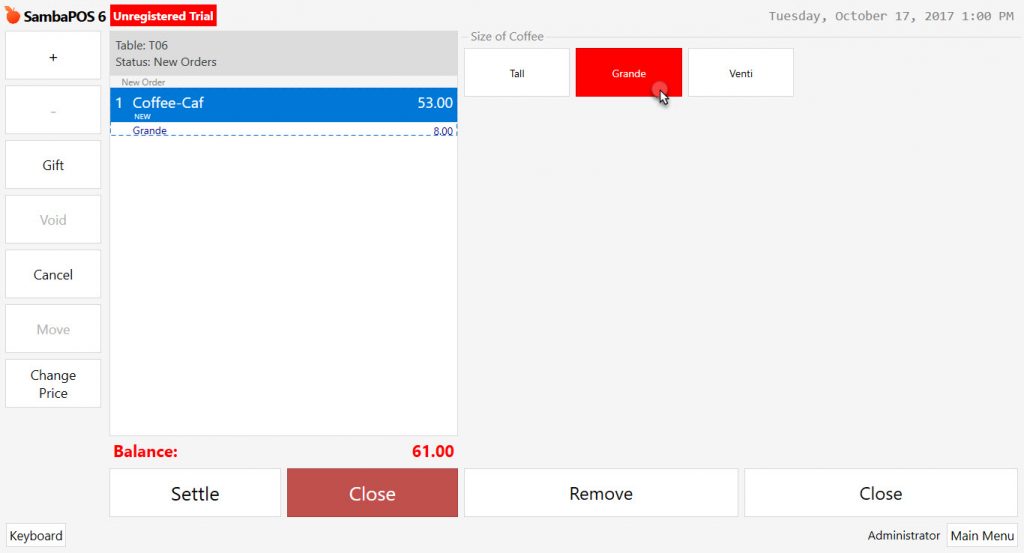
Example-1 Product-Based Order Tag
In practice, there will be added three different sizes called “Tall – Grande – Venti” in Americano Coffee and different prices will be applied.
On the screen that appears, enter the appropriate name for the order tag in the Name field on the General Settings tab. The Minimum Selection and Maximum Selection values are set. These values are given as “1” because it is necessary to make at least one selection for this example.
5.2. Adding Order Tag Attachment
In the Order Tag List section, click on the Add Order Tag link. Add as many order tag list as needed.
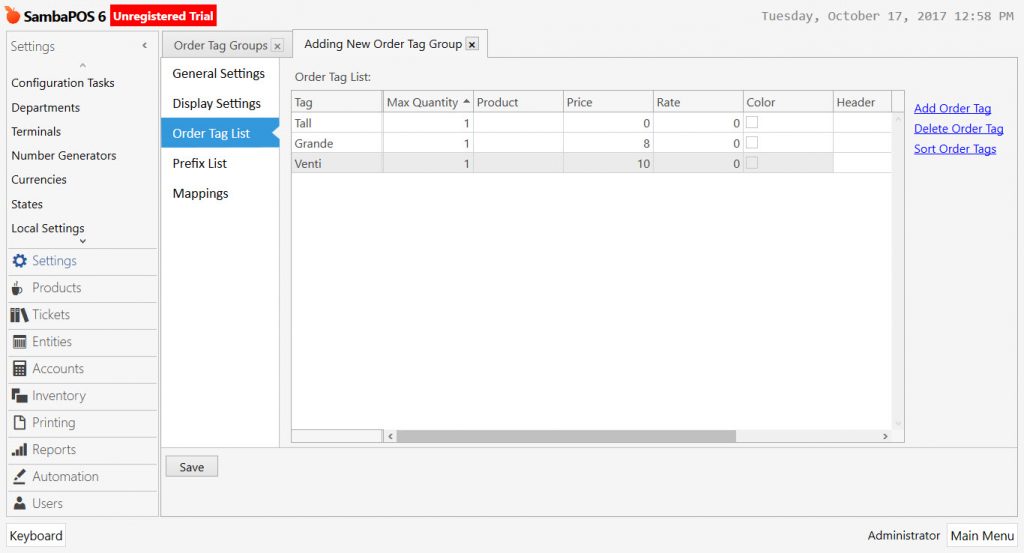
After the label name is written in the tag column, the price column is filled with the price difference value to be added in addition to the product price for the selected property.
To transfer this process to the related product, go to the Mappings tab and click the Add link and add a new line.
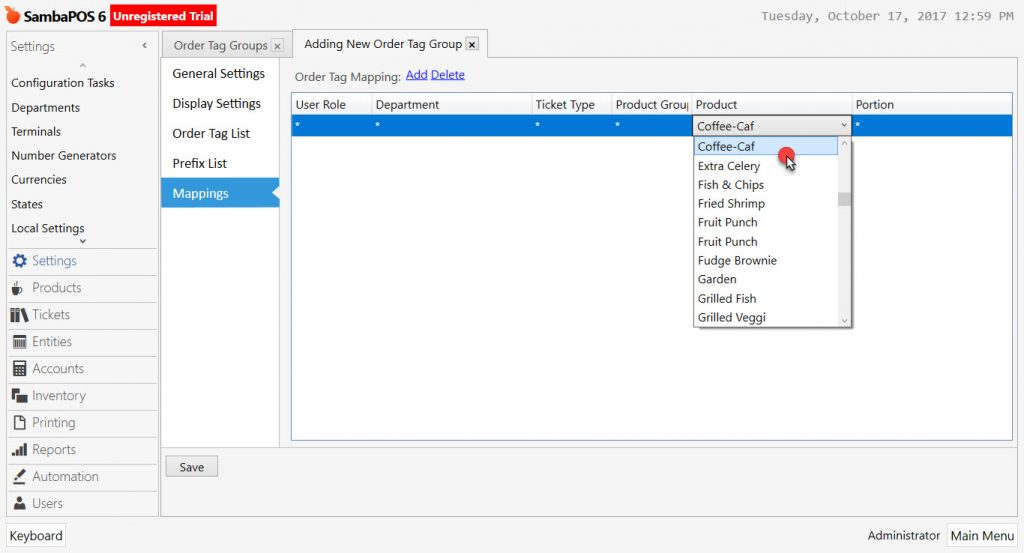
When a related product is selected in the product column, this feature only works for the selected product. The process is completed when the Save button is clicked after completing the related customizations.
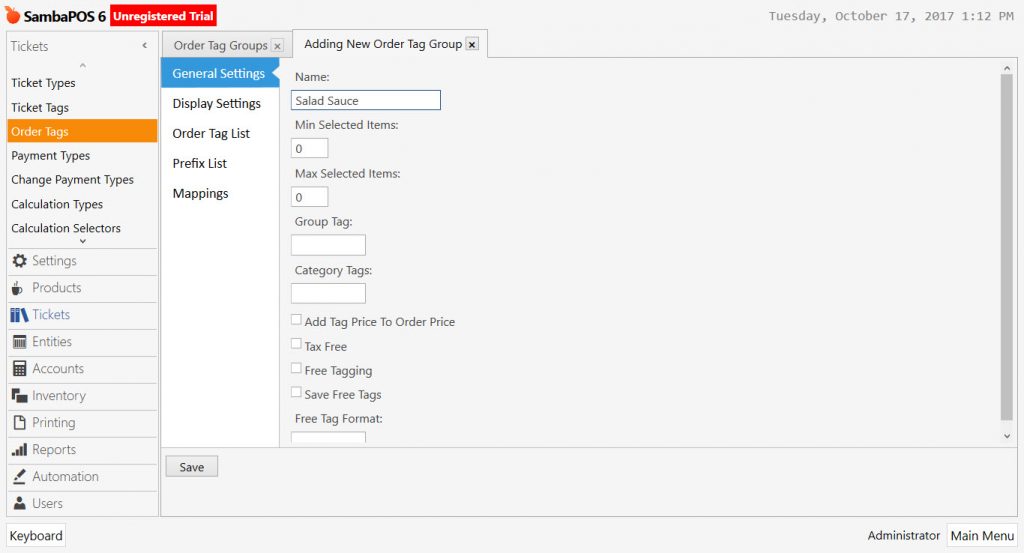
Example-2 Group-Based Order Tag
In this practice, all products within the Grid group will be given an order tag.
Click on Add Order Tag Group link. On the screen that appears, enter the appropriate name for the order tag in the Name field on the General Settings tab. The Minimum Selection and Maximum Selection values are set. These values are given as “0” because it is not necessary to make a selection in the sample practice.
On the Order Tag List tab, click on the Add Order Tag link. Up to the number of properties to be opened are added.
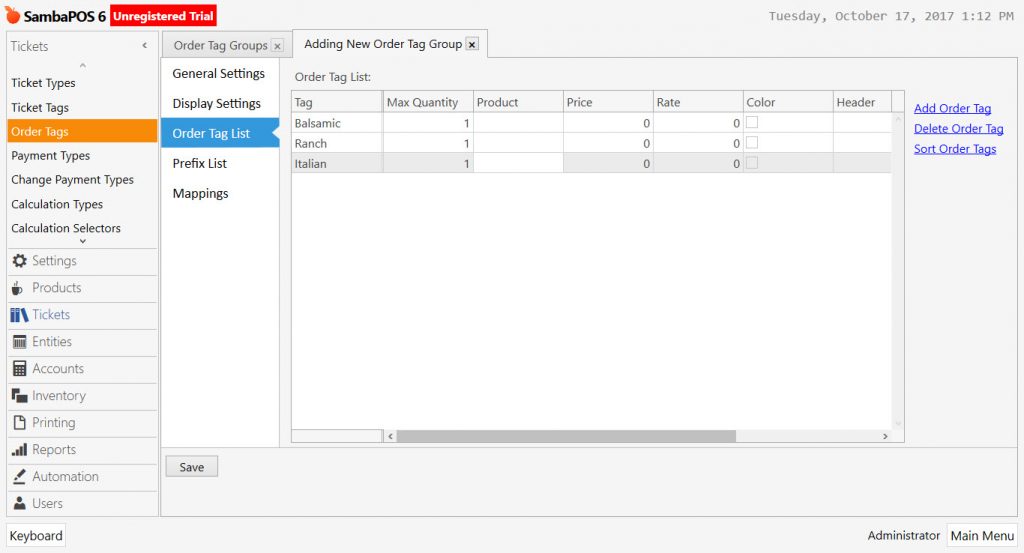
The tag name is written in the Tag column.
For the features added in the sample application, the price column is left blank because the product will not reflect the price difference.
To transfer this process to the related product group, click the Add link and add a new line on the Mappings tab.
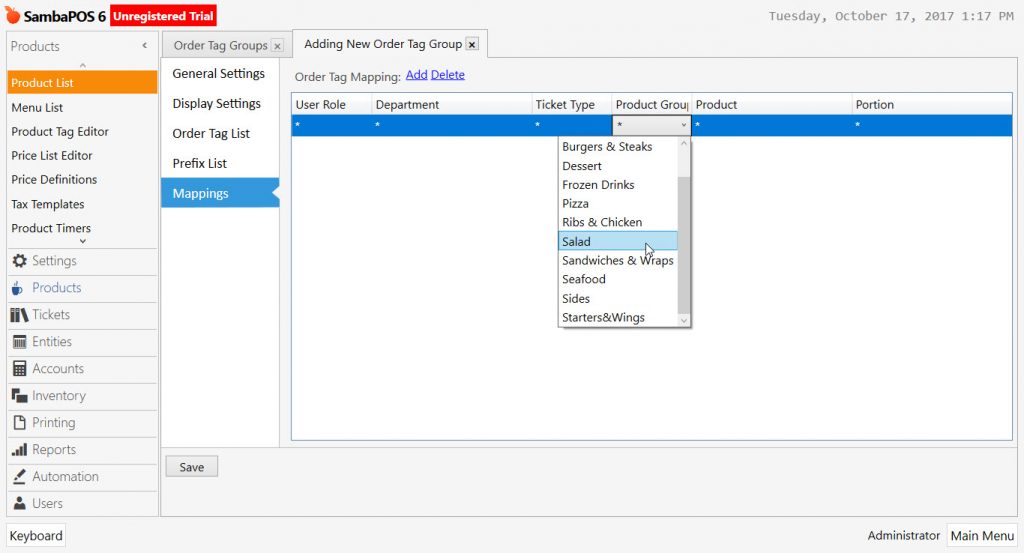
This feature is only available for the selected product group when the corresponding product group is selected in the Product Group column. The process is completed when the Save button is clicked after the related operations are completed.
6. Printers
6.1. Adding Printer
In order to add a thermal receipt printer to SambaPOS, the printer’s Windows Driver must have been installed in Windows.
In the sample below, three different printers are set.
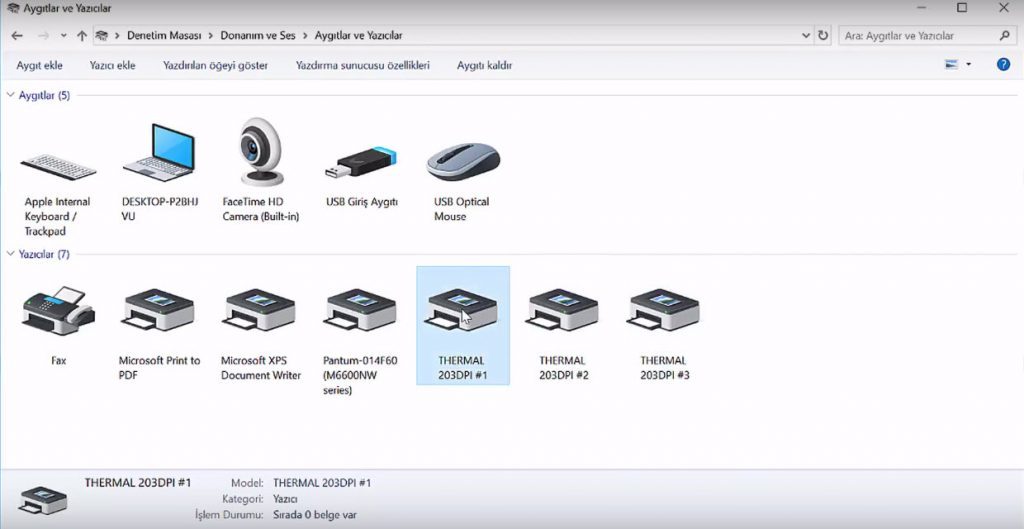
To easily distinguish printer names in SambaPOS, edit the printer names. To change a printer’s name, select the printer and right click on your mouse and select the option Printer Properties. From the following window, change the printer name and press OK button.
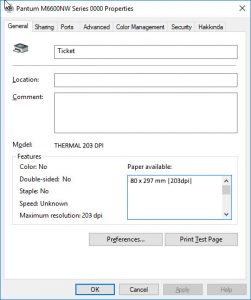
In the sample, printer names are changed to Kitchen, Bar, and Ticket.
In order to add the printers to SambaPOS, go to Manage > Printing > Printers menu, and double-click on Ticket Printer to open up Editing Printer screen.
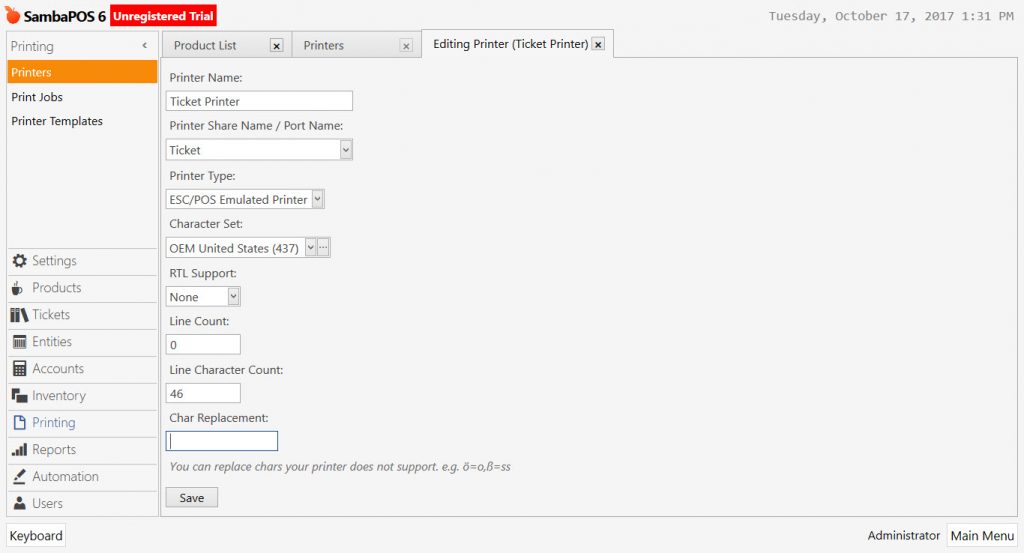
In the following screen, click on Printer Share Name / Port Name field, and choose the respective printer. (Ticket) After the Line Character Count is edited according to the printer’s sizes, press on Save button. By doing so; the process, Assigning Ticket Printer, is completed.
In order to add a new printer, go to Printer menu and either click on Add Printer link or right click on a printer with the same properties and select the option Clone Printer.

In the following Adding New Printer screen, edit Printer Name field, and select the respective printer from the Printer Share Name / Port Name field.
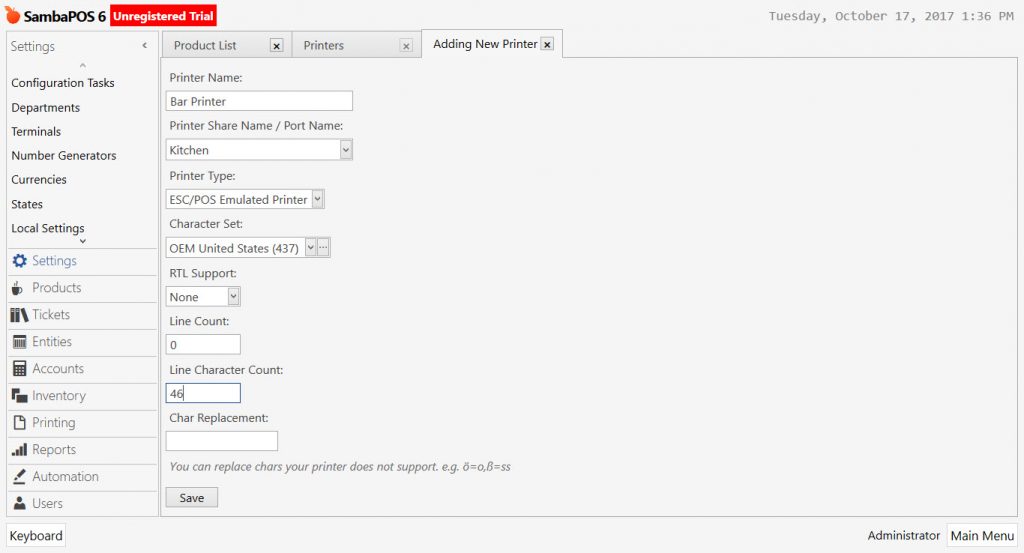
After those operations are completed, press on Save button. By doing so; the process, Adding a receipt printer to SambaPOS, is completed.
In the sample below, receipts of Beverages and Hot Drinks are set to be sent to the Bar Printer.
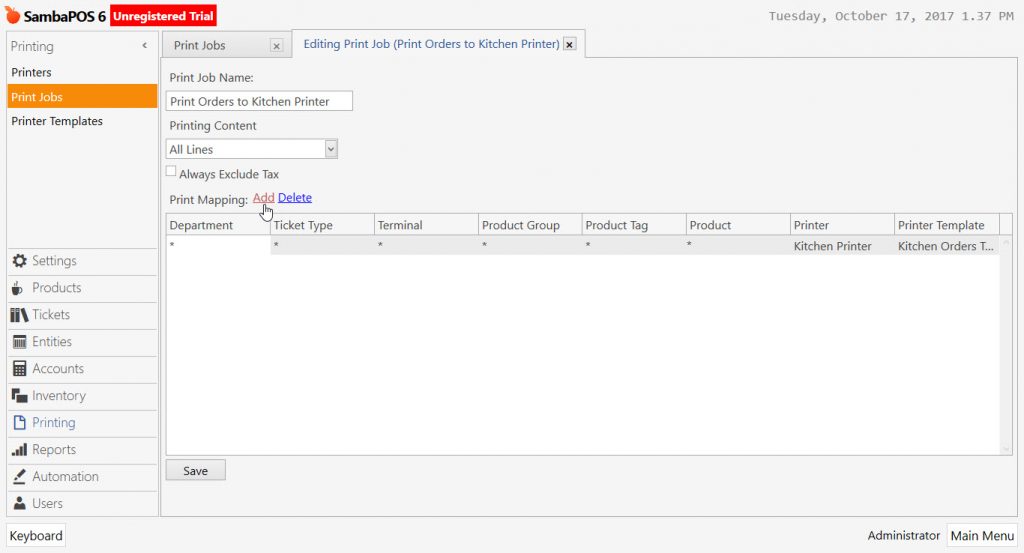
For this process, double-click on Print Orders To Kitchen Printer.
6.2. Print Jobs
In the following Editing Print Job screen, click on Add link to add a line.
In the Product Group column, select the beverages of related Category. From the Printer column, select the Bar Printer (added in previous steps), and select Kitchen Orders Template.
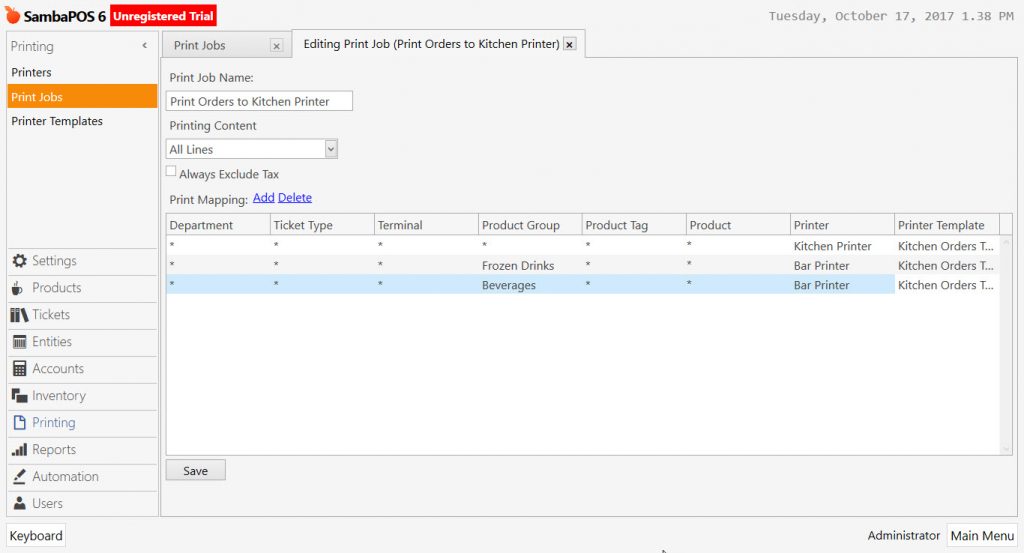
After doing so, press Save button, to complete the process of Adding Printers.
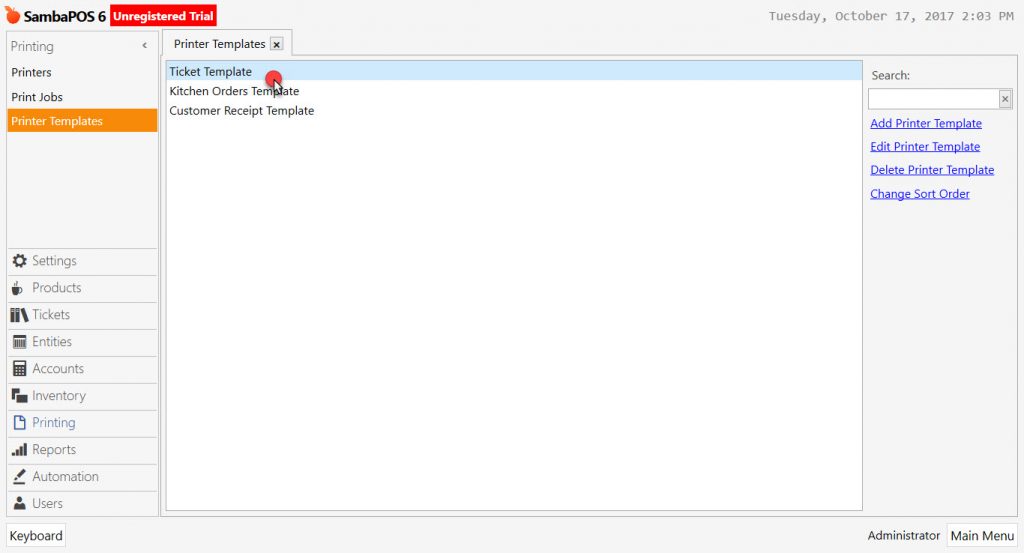
6.3. Printer Templates
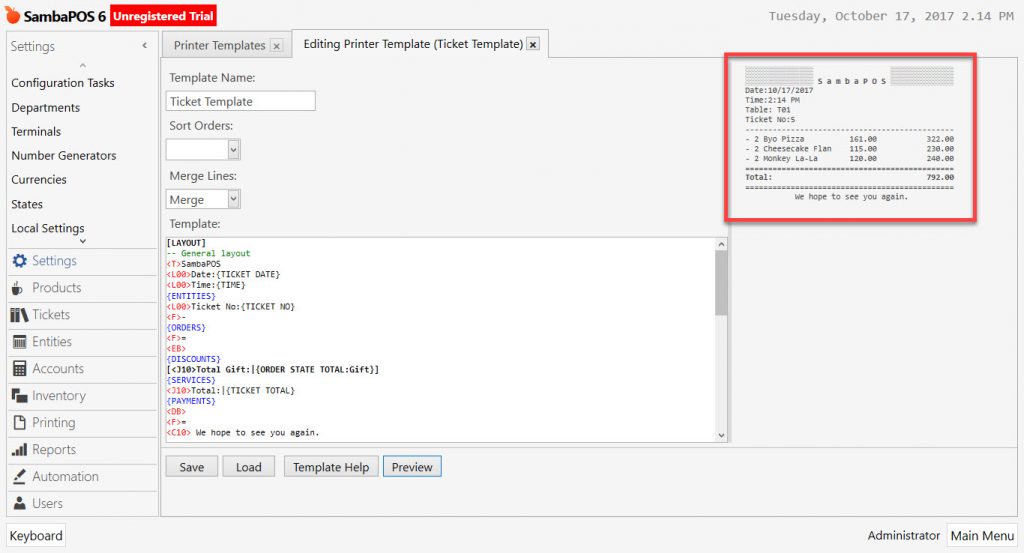
Printer Templates is where the printouts’ design on paper is done in SambaPOS. In order to edit Printer Templates, go to Manage > Printing > Printer Templates menu and double click on the ticket template to be edited.
In the following screen, within the Template field, tags of the template are found. In the right pane (Template Help field), tags used to prepare the template are listed.
When printing, the related value for a tag is used in the respective part for that tag in the template.
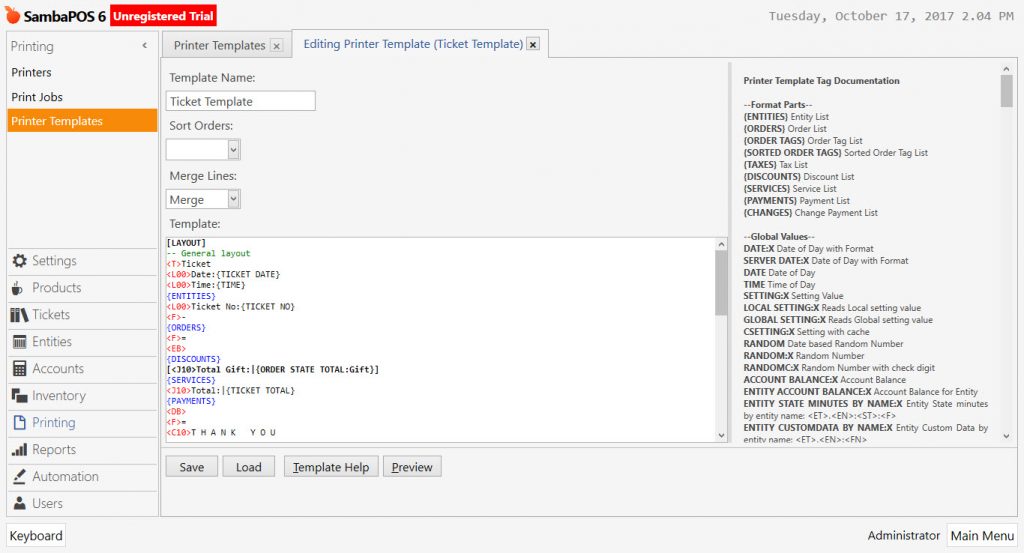
By using the Preview button, how the prepared template would look like on a printed receipt can be seen.
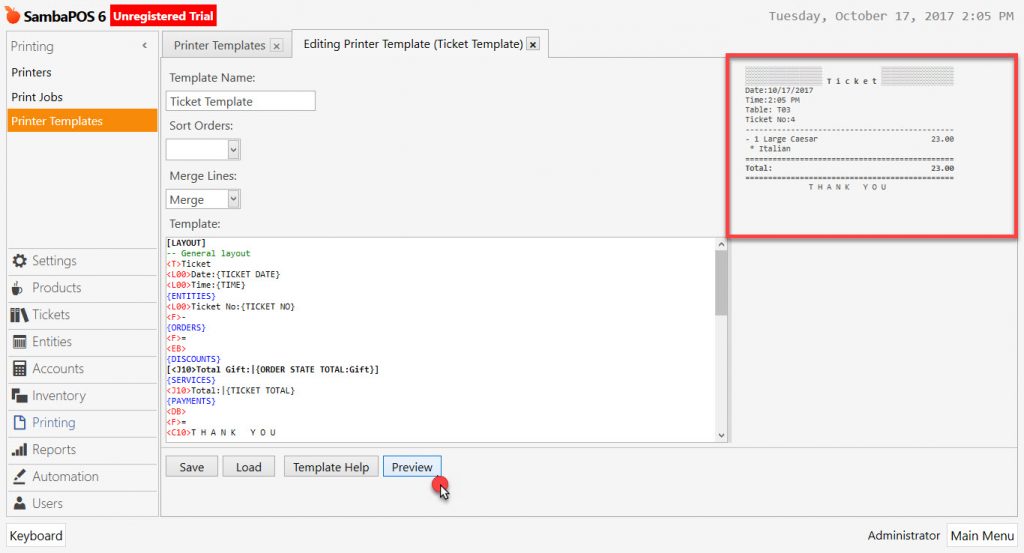
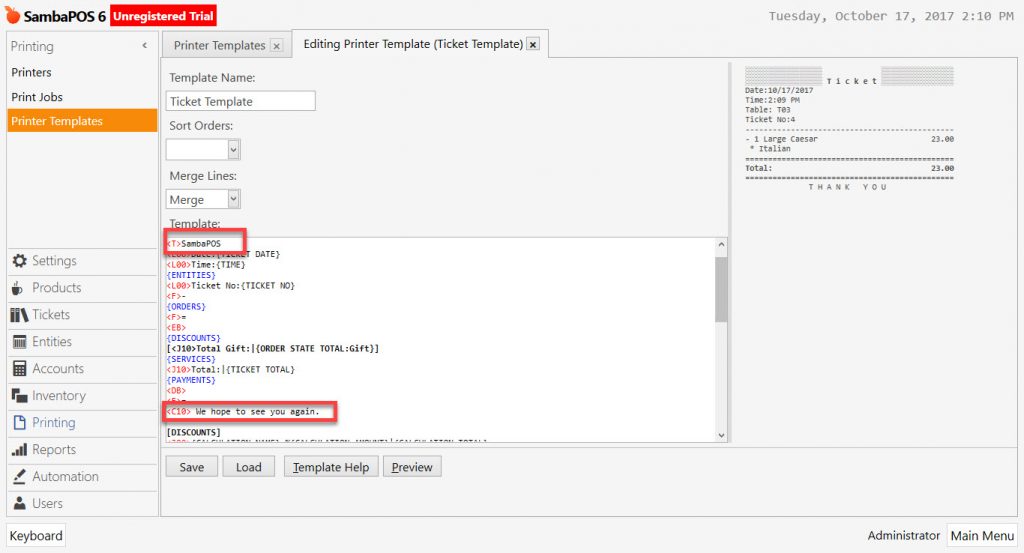
In the sample below, the texts “Ticket” on top and “Thank You” on the bottom will be edited on their lines in the template.
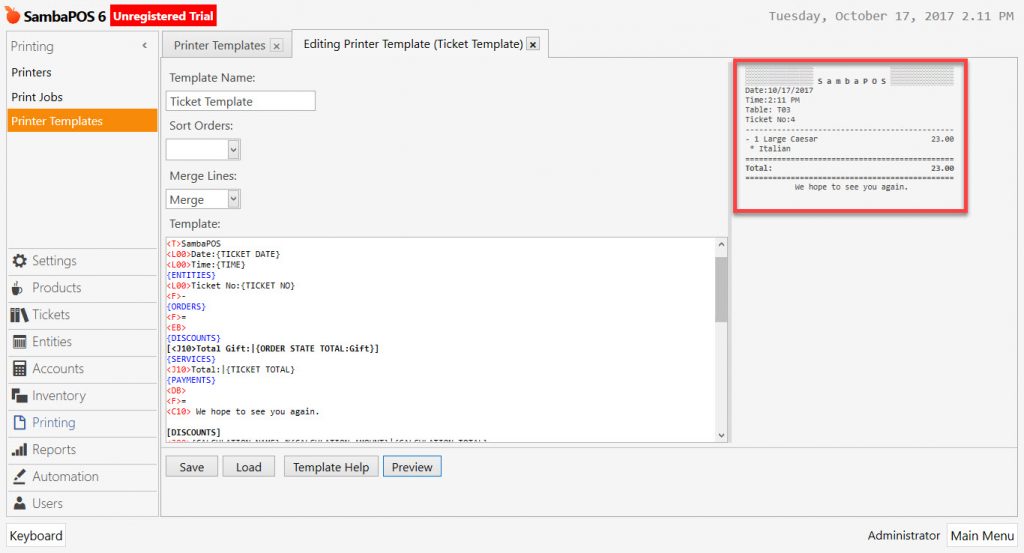
The text, “Ticket”, is the part starting with <T>, title tag, in the template. After changing the text, “Ticket” to “SambaPOS”, we changed the text, “Thank You” into “Come Again”.
When the Preview button is pressed, the related changes can be seen in the preview field.
In the sample template, the total price of each product is written. One of the most used features is to print the unit price of each product in the ticket. To do so, press on Template Help button and add the PRICE #Line: Item Price tag ( can be found under the Order Values heading in the right pane) to the related field in the template.

After adding the tag, press on Preview button. As it can be seen in the Preview field, via the added tag, the unit price of each product is added to the ticket.
Any desired information can be added to be printed on tickets by using related tags on templates.
7. Users
7.1. Add/Edit Roles
SambaPOS comes with a user and a role when it is first installed. The role is the domain in which users are authorized to perform transactions in SambaPOS.
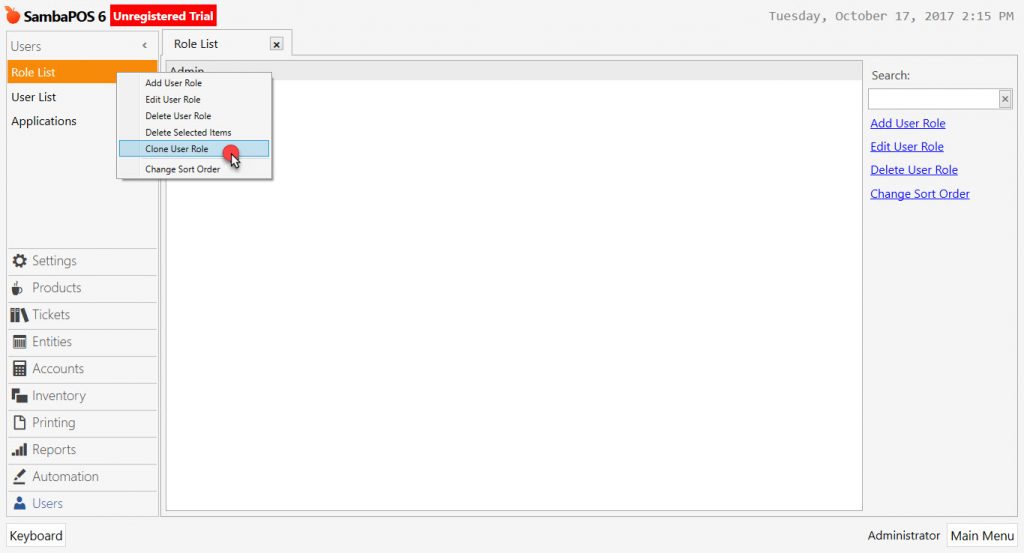
To add a new role, click on the Add Role link in the Management > Users > Role List menu or right click on the Admin user from the default and select the Clone User Role heading.
Example-1 Create Waiter Role
In practice, we define a Waiter Role. The admin authority should not be given when defining the waiter role.
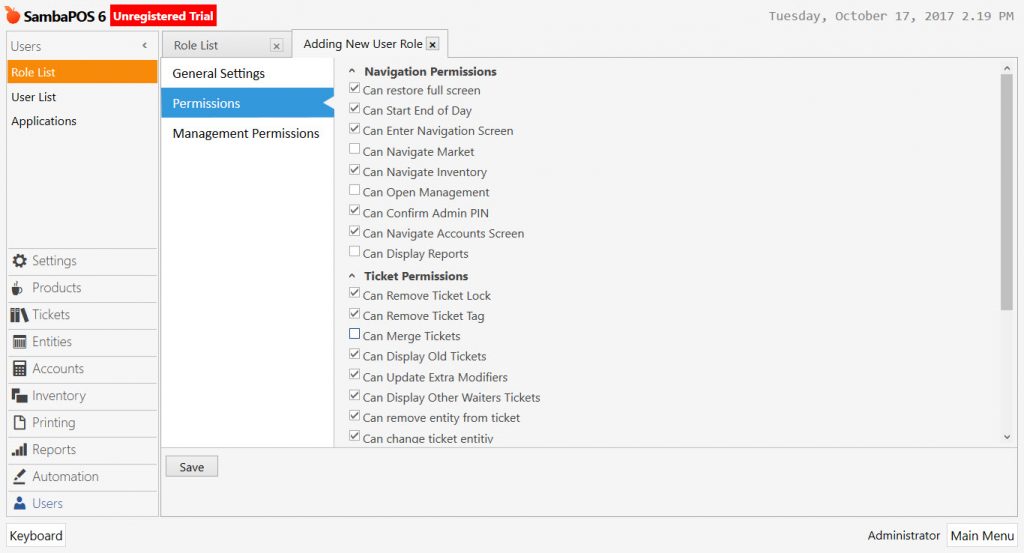
The Role Name is listed in the General Settings tab of the Adding New User Role window.
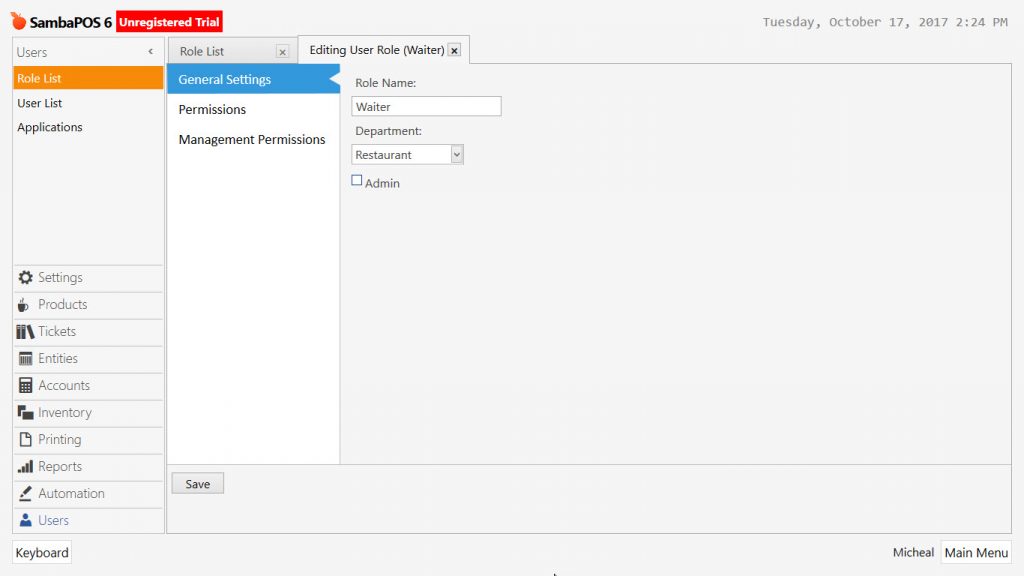
Unauthorized titles that are not allowed to perform this role are removed from the selected state in the competencies section.
All the powers of the waiter user are passive.

After the authorizing process is completed, the Save button is clicked.
Example-2 Cashier Role Definition
We define Cashier Role in the practice. We do not give Admin authorization when defining cashier role.
The Role Name appears in the General Settings tab of the Adding New User Role window.
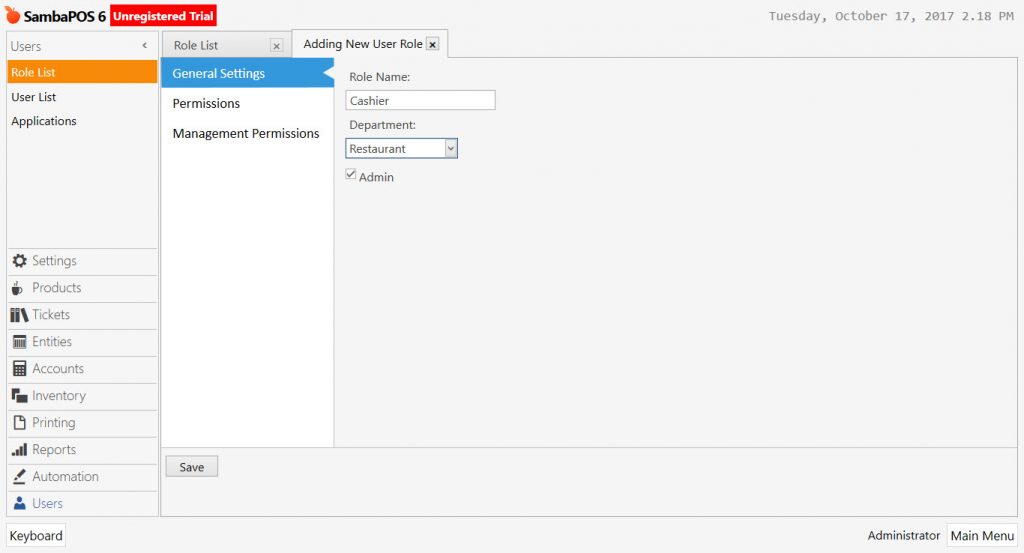
Unauthorized titles are removed from the selected state in order to perform this role in the Authorities section.
In this practice, unlike the waiter role, the cashier role is defined.
After the authorizing process is completed, the Save button is clicked.
In the sample practice, we created two different roles for SambaPOS.
7.2. Adding Users
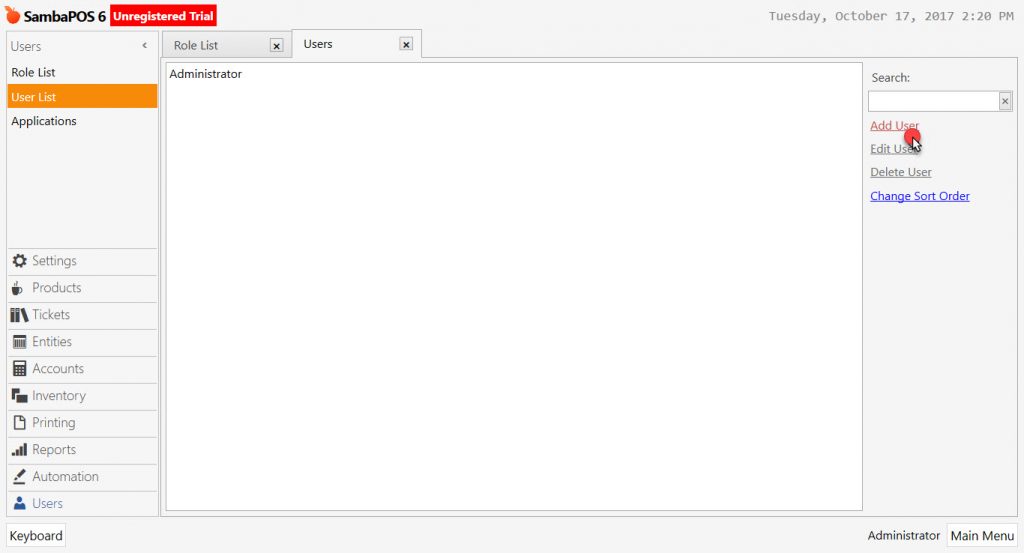
To create a user in the opened roles, click the Add User link from the Management > Users> User List menu.
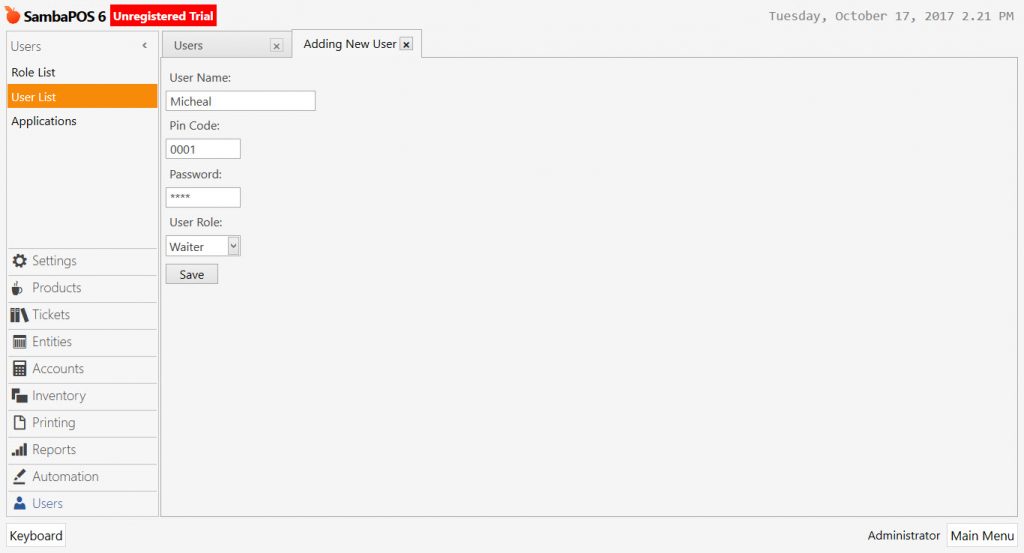
After the username is typed in the Add User tab, the password is entered in the Pin Code field to log in to SambaPOS. The Password field here is the password field that is required for the operation of the Android Client, especially in the API connected with Graphql. The role of the user added to the role field is selected and the Save button is clicked.
In the sample practice, when we log in with waiter’s password, the entity screen came instead of the management menu.
8. Automation Commands
8.1. Binding Automation Commands (Authorizing Buttons)
After different roles and different users bound to different roles are added in SambaPOS, different authorizations can be made. These are the buttons that make SambaPOS very flexible. Each button is an automation command.
In order to authorize automation commands, go to Menu > Automation > Automation Commands menu, and every button created in SambaPOS will be listed.

In the sample below, the authorization process disallows the waiter to give a gift.
Double click on Gift to open up Editing Automation Command screen. From the Confirmation field, select the option Admin PIN. By doing so, the waiter can still give a gift but to do so, Admin PIN of an authorized user must be entered.
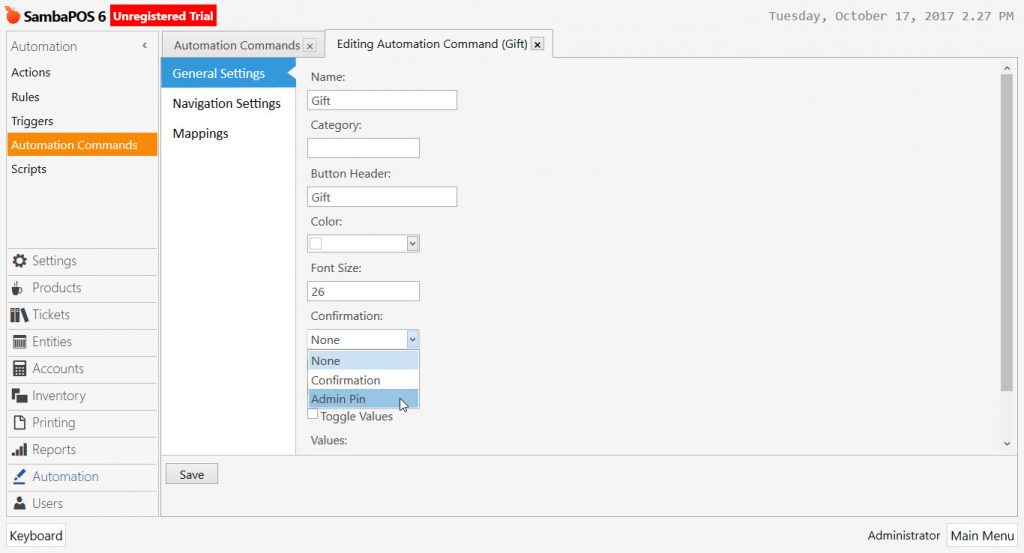
After the related changes are done, press on Save button.
As it can be seen in the sample below, when giving a gift with the waiter authorization, Admin PIN must be entered at the following prompt. When the Admin PIN is entered, the process, giving a gift is completed.
8.2. Adding Gift Cancellation Reason
In SambaPOS, it is possible to keep track of the reason why and by whom during the reporting by writing the reason for the catering and the corrections.
Follow the menu of Management > Automation > Automation Commands to write a reason for gifts cancellation and voids. Double-click on the gift to write the gift reasons and the editing screen opens.
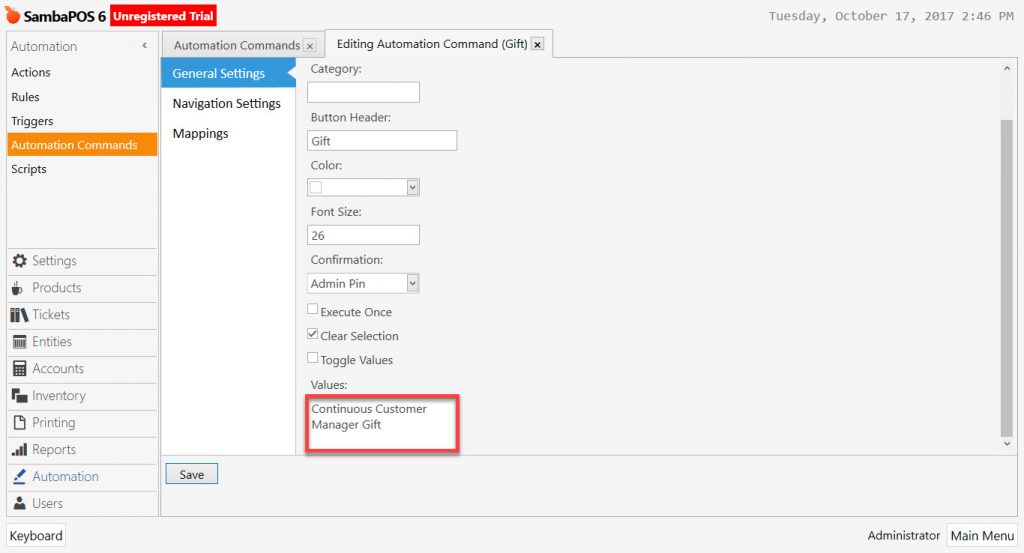
Write the values in this box in rows and click Save button.
When you click on the gift button for a product as shown in the practice, the reasons for the gift are opened on the right side. After selecting the relevant reason, in the section of admission, write the reason for the selected gift under the product.
9. Customers
9.1. Adding Customer Custom Fields
When SambaPOS is first installed, the customer card comes as default. Customer cards in SambaPOS are entities. From the Management > Entities > Entity Types menu, double-click on the Customer and the edit screen opens. On the Custom Fields tab, there are phone and address lines that are added by default to customer information.
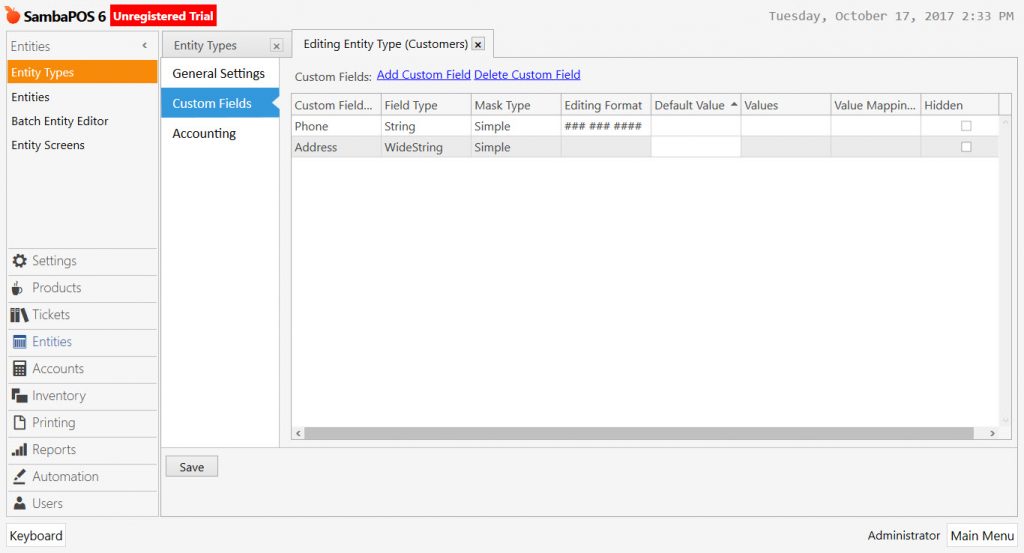
According to the need for each customer here can open as many data fields as desired.
In the sample practice, a new private area will be opened for the GSM number for the customer.
To open a new custom field, click the Add Custom Field link on the screen.
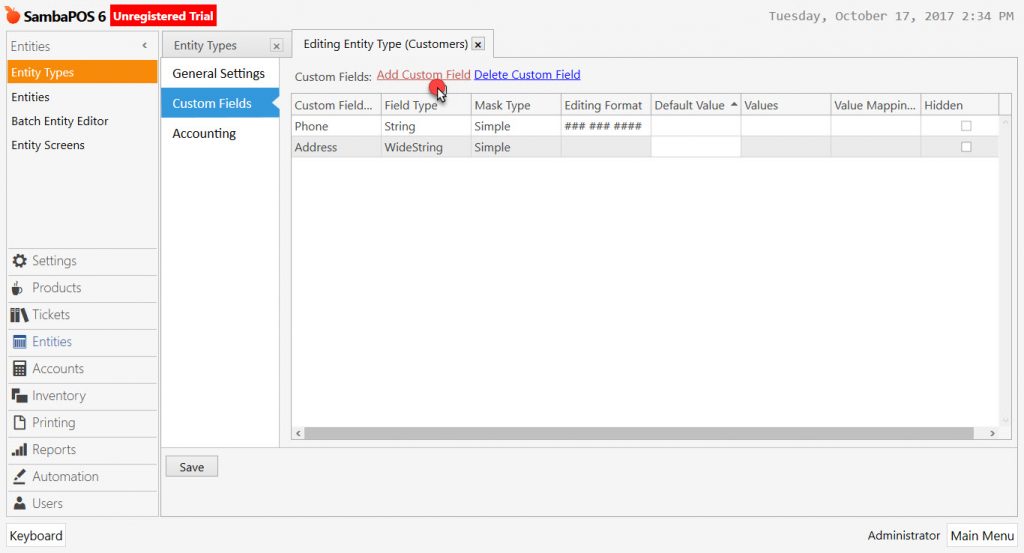
The Field Type String is selected after the Custom Field Name is written on the new line to be added. In the Editing Format column, the form in the edit field of the phone line is added.

A special area can be opened for all the requested information about the customer (e.g. date of birth, place of business, etc.). After all the operations are completed, the Save button is clicked.
At the end of this process, new information created when new customer identification is made can be recorded.
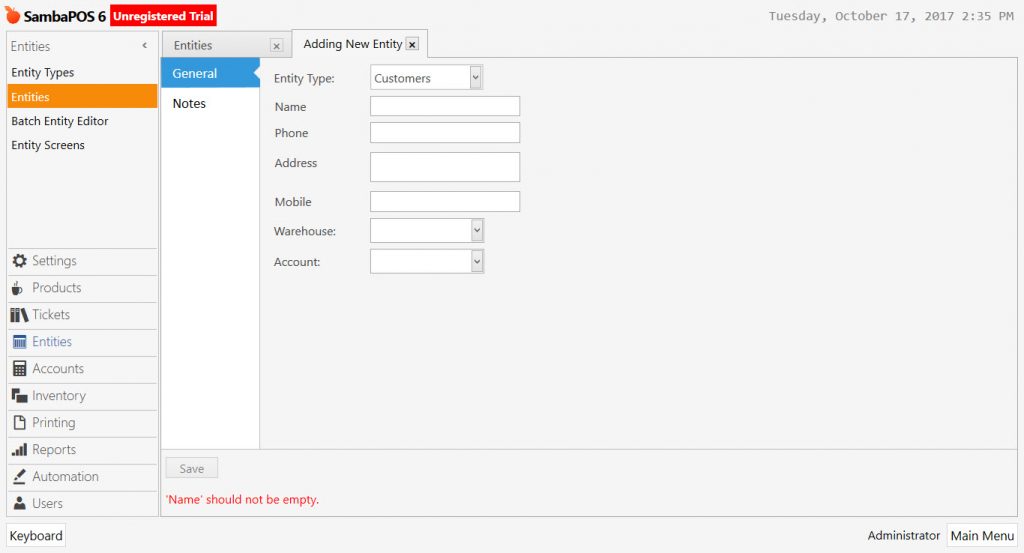
9.2. Adding Customer
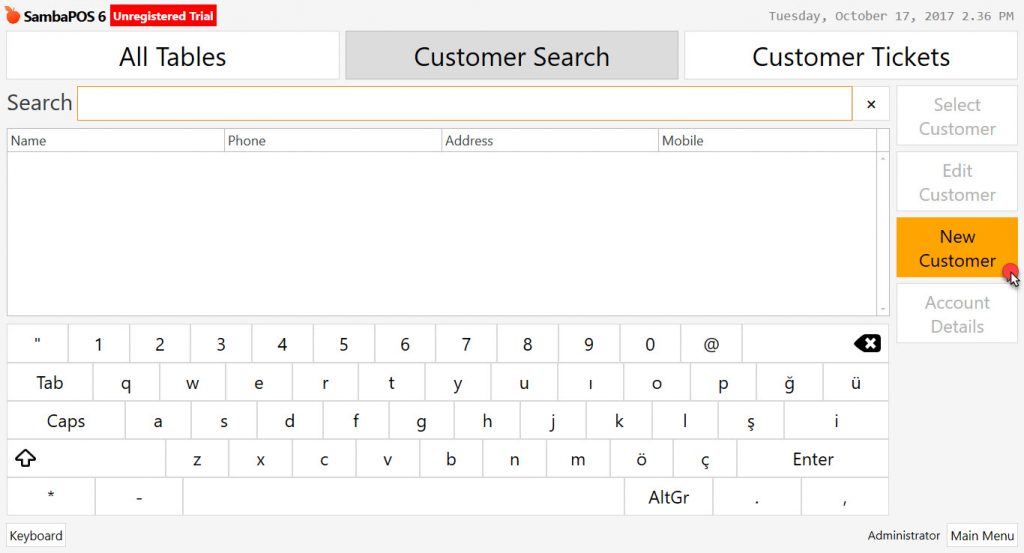
In SambaPOS, click on the New Customer button in the Customer Search section of the POS Menu to define the Customer in daily use.
When the customer clicks the Save button after populating the information on the opened screen, a new customer is created in SambaPOS. However, if you open an account with this added customer, click on Create Account button. This customer who is added to this account can conduct the open account Debt / Receivables relationship.

To select the added customer inside the table, click the Select Customer button on the order screen.

The name or phone number of the customer is written in the Search field on the screen that opens and the Customer is selected and the Select Customer button is clicked.
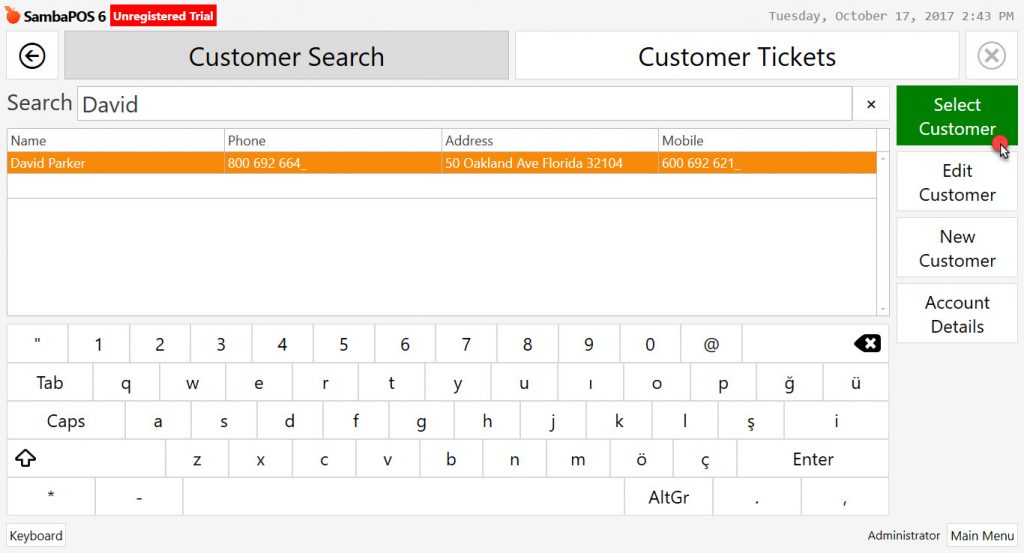
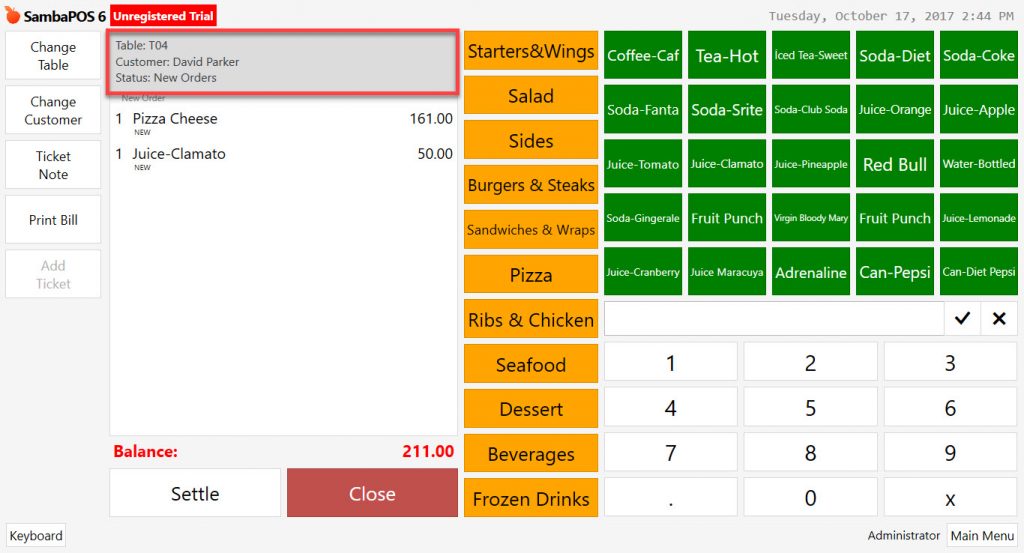
At the end of this process, customer information is placed at the top of the ticket.
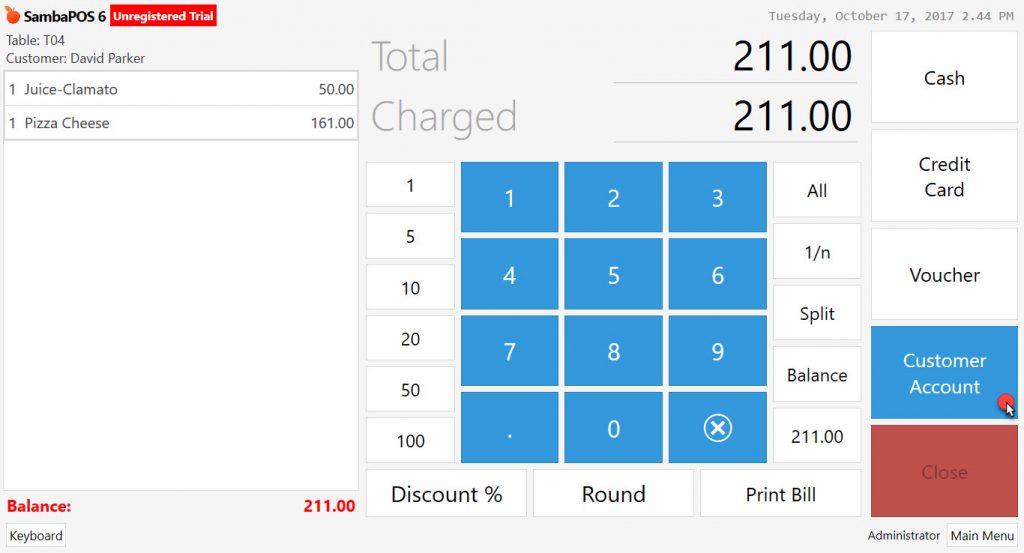
When the customer is registered, the account is created, and when all the payments are selected and clicked on the Customer Account button, the account is recorded as the customer debts.
10. Inventory
The products added to SambaPOS are supposed to be prepared from the inventory and served to the customers. In order to report the inventories of items and costs of those products, inventory items, and products’ recipes must be added.
10.1. Adding an Inventory Item
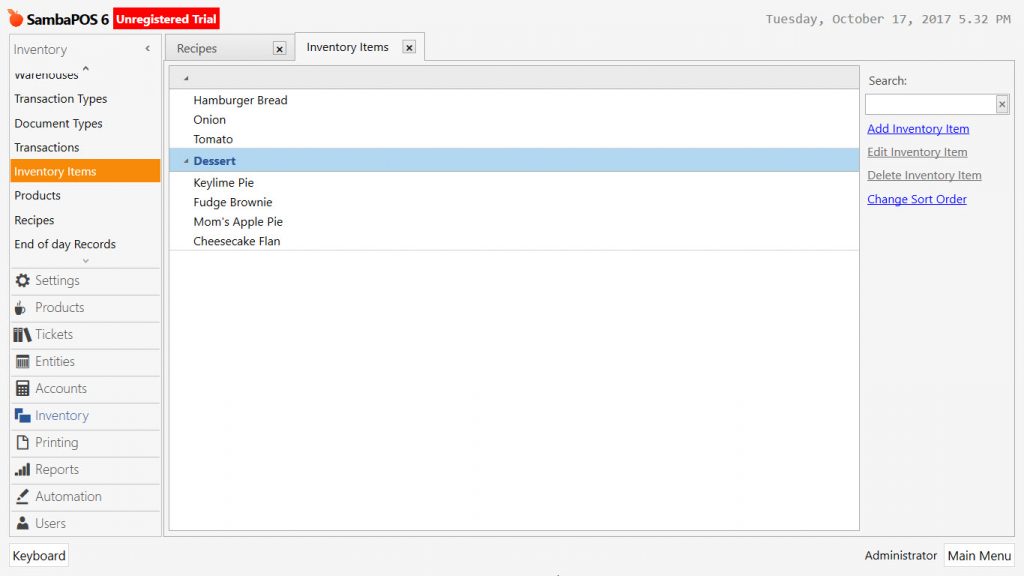
In order to add an inventory item, go to Manage > Inventory > Inventory Items menu and click on Add Inventory Item link.
In the following Adding New Inventory Item screen, enter the item’s name in the inventory Item Name Field. The term Base Unit is the unit used when creating recipes and products. Transaction Unit, a different unit than the base unit, is the unit used when buying from the wholesaler.
In the sample below, the base unit of the Hamburger Bun is written as “Piece” and the transaction unit of it is written as “Package.” The value of “Multiplier,” near Transaction Unit is the number of pieces in each package.
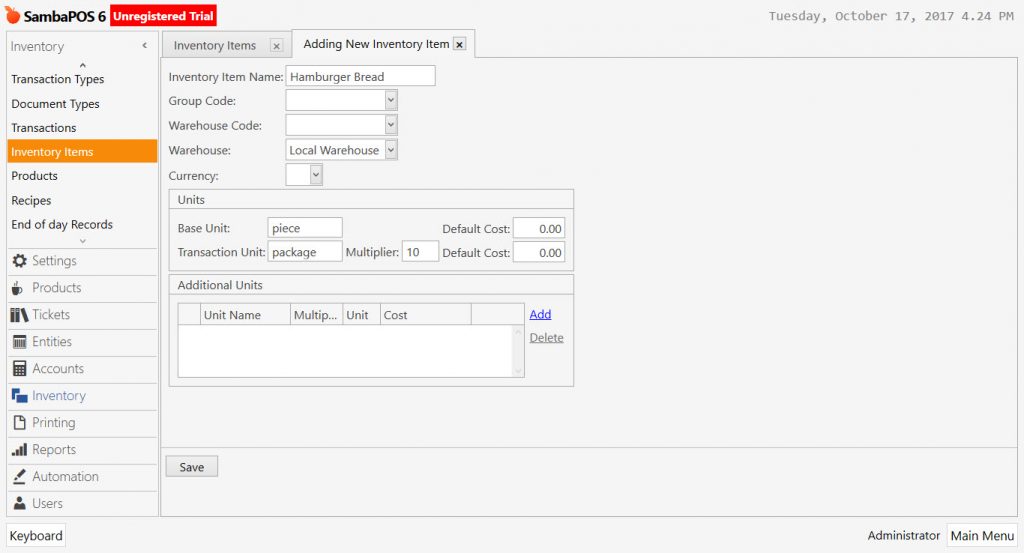
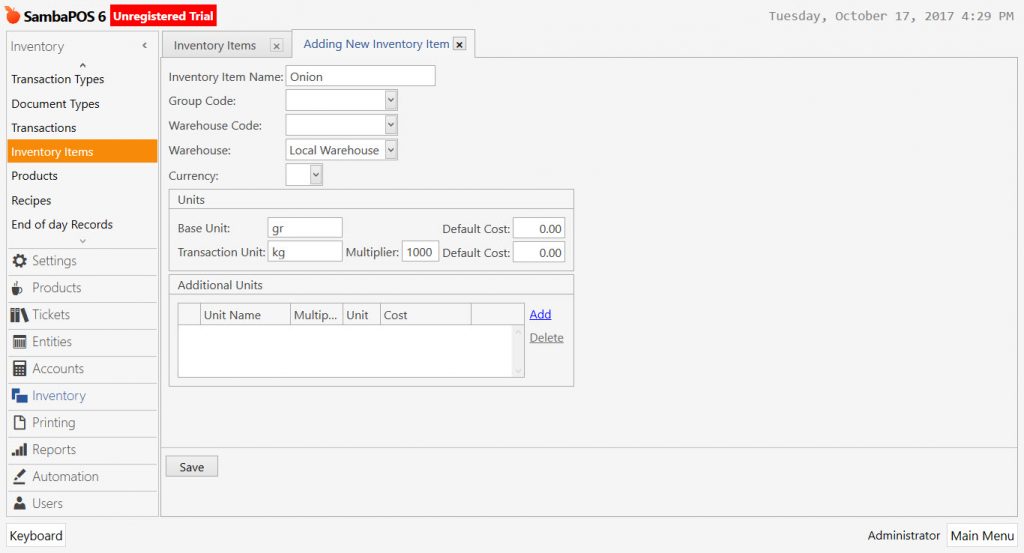
After the related information is filled, press the Save button. By doing this process, inventory items of all ingredients of a product can be created.
10.2. Adding A Recipe
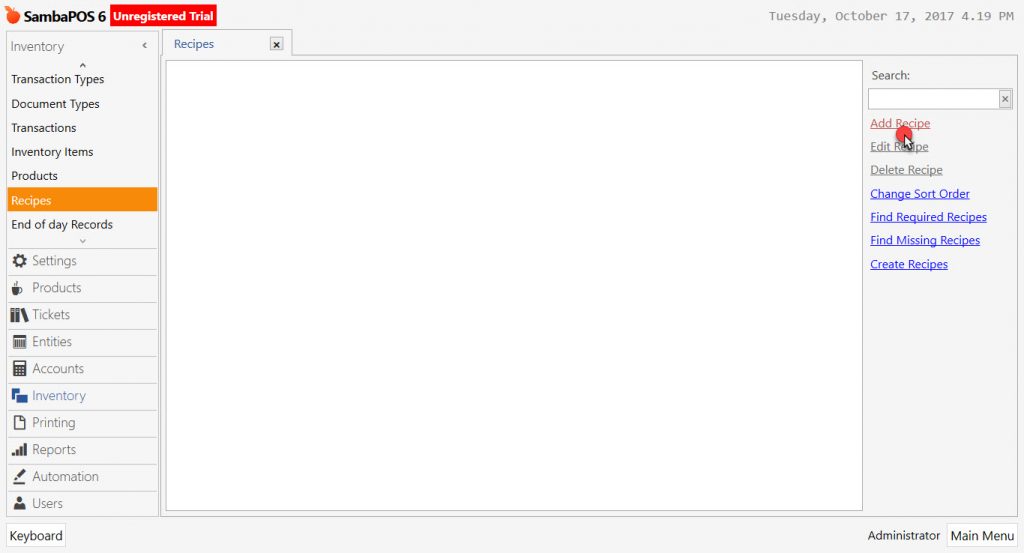
After creating inventory items for a product, the related recipe for that product should be created. In order to create a new recipe, go to Manage > Inventory > Recipes menu, and click on Add New Recipe link.
In the sample below, a recipe for the product, hamburger (whose inventory items are already created) is being prepared.

In the following Adding New Recipe window, write a suitable Recipe Name and Group Code. From the Product field, choose the related product and from the Portion field, choose the related portion. In the Fix Cost field enter the cost that’s wished to be added other than the costs of the used inventory items.
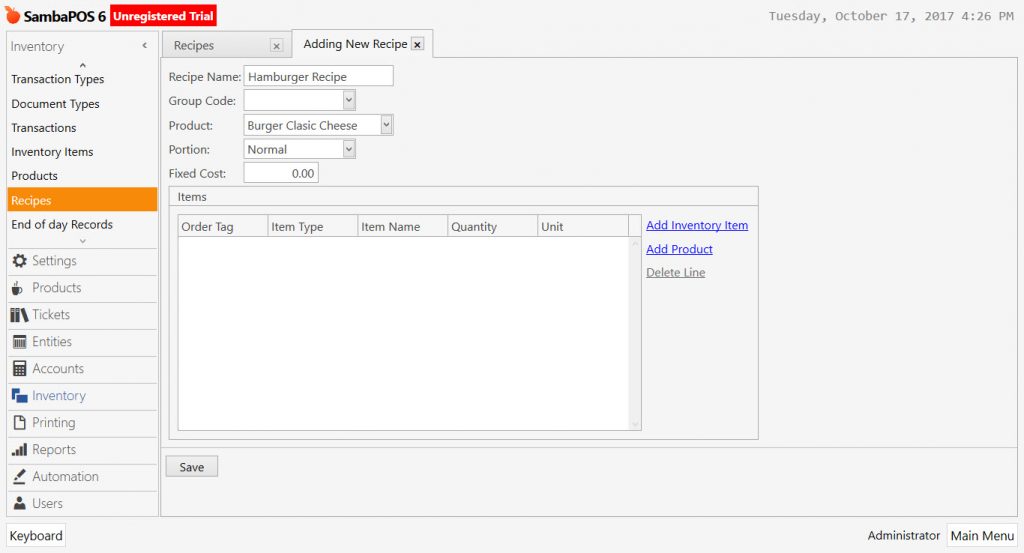
In the Items field click on Add Inventory Item link for each inventory item to be added. On each line added, from the “Item Name” section, choose the inventory item added before for that product. In the “Quantity” section, choose the quantity of that item used for this product.
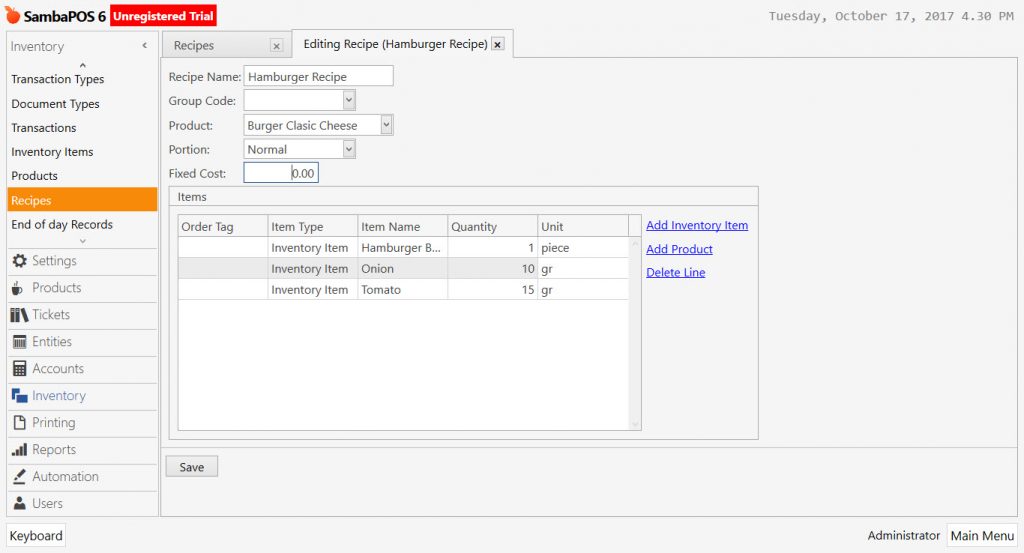
After doing all those, by pressing Save button, the process, creating recipe for a product, is completed. From now on, whenever a product is sold, quantities of items in the recipe are decreased from the number of those items in the inventory.
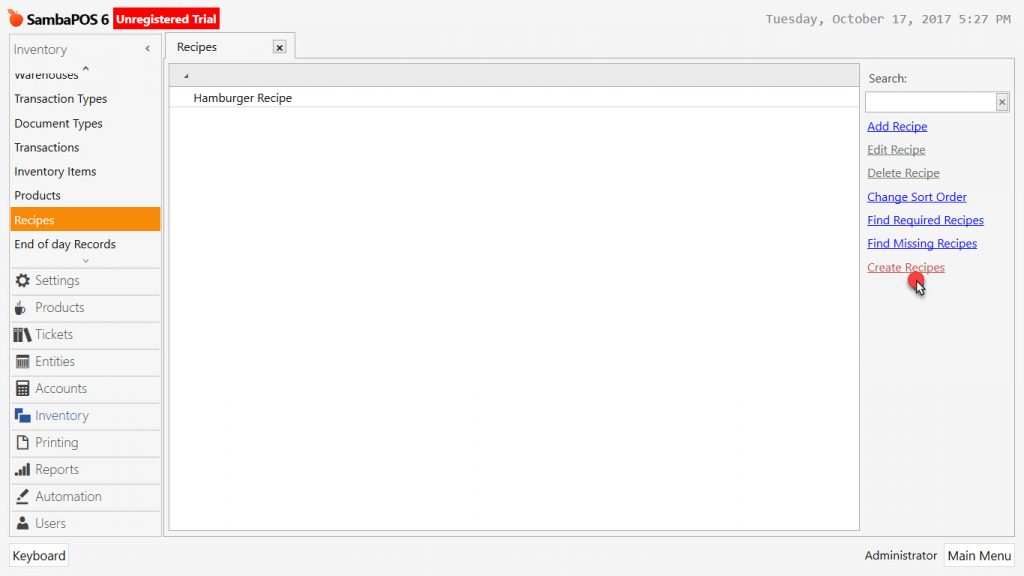
10.3. Create Automatic Bulk Recipe
One feature of SambaPOS is automatic recipe creation. Automatic recipe creation should be used for products that are bought and sold individually (eg beverages).
To create an automatic recipe, click on the Add Recipe link on the Recipes menu.
In the sample application, the automatic recipe feature is used for soft drinks.
The opened window comes with a category list where recipes can be created.
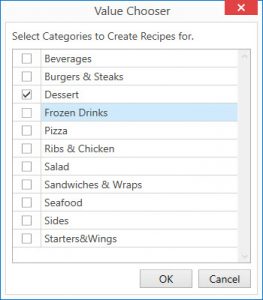
Here the relevant categories are selected and when you click on the OK button, the product list in the relevant categories comes up. After making the relevant selections, click OK button.
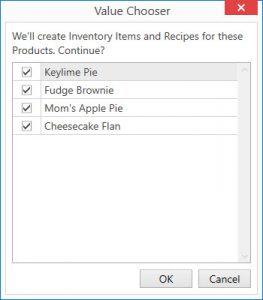
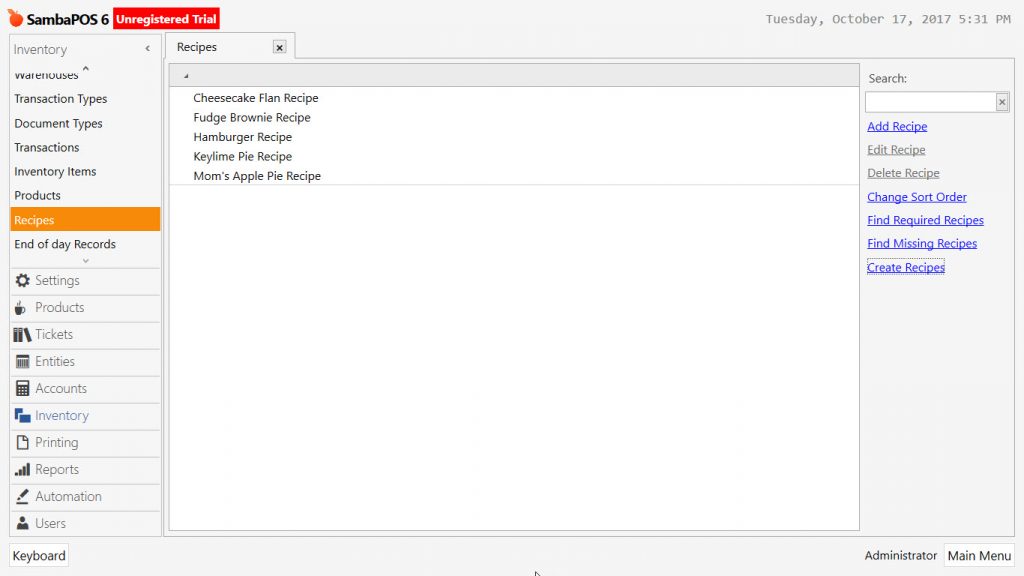
At the end of this process, the recipes and stocks of the related products are automatically opened.
10.4. Buying Stocks
In order for the stock and cost department to be able to work, the receipts, invoices, and invoices of the products purchased regularly must be entered into SambaPOS.
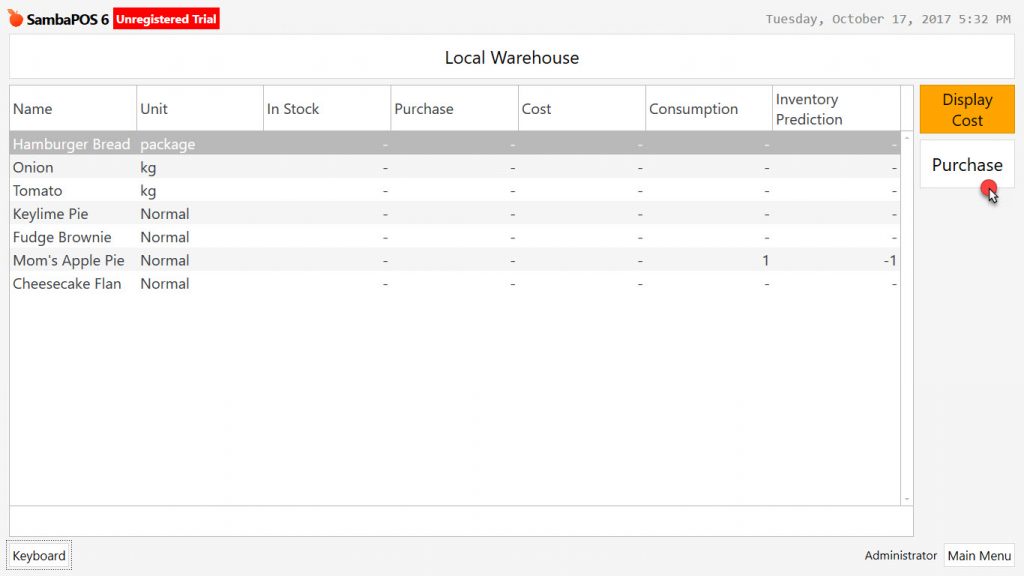
On the navigation screen, click on the Purchase button on the Warehouses menu.
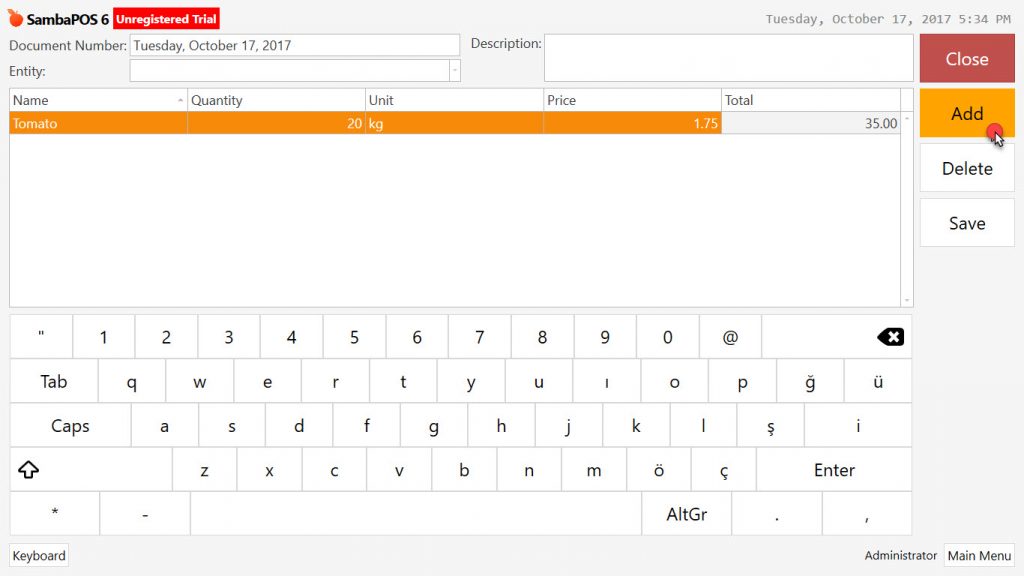
The document number in the opened window, after the description information is written, the pre-registered stock is selected in the Name column below. After the amount is filled, the unit price is written and the Add button is clicked.
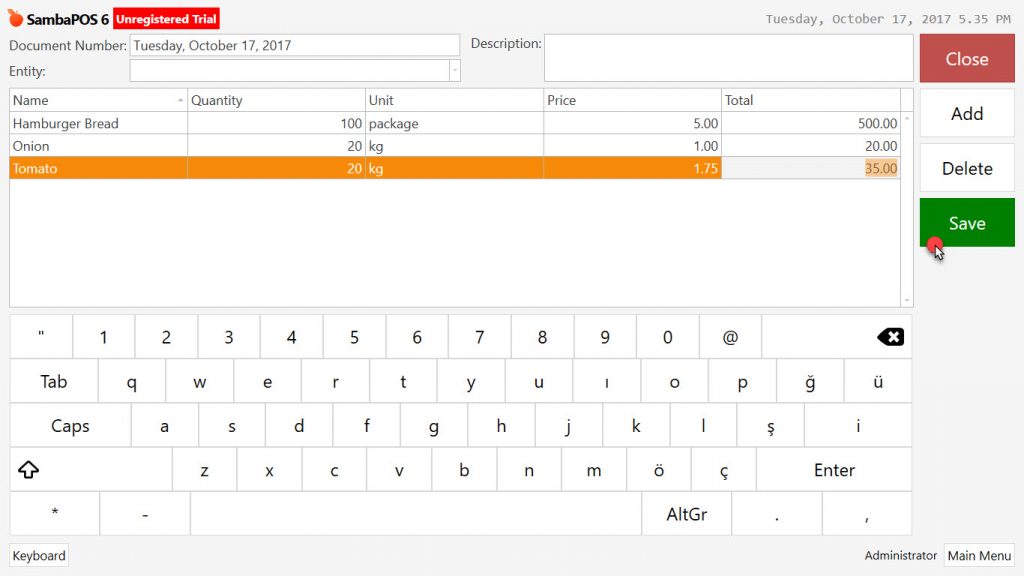
Once this is done for all products purchased, click on the Save button.
As seen in the sample practice, after the sales made from the mineral water product which is purchased, the movement of the related product is realized on the warehouse screen.